


Likes
Comments
Share

@JNSGenetics
Follow
Day 8 into flower and day 43 from germination.
I dont know the night temperatures inside the tent.
I suspect it might be cold and it is very humid in there even with 2 fans blowing. 25 degrees celcius at the canopy with around 65 - 70% humidity during the day. At night i think 13 - 16 degrees celcius.
I need to lower the humidity now.
I tied all main branches down to the sides.


Processing
Likes
2
Share


@pendeja420
Follow
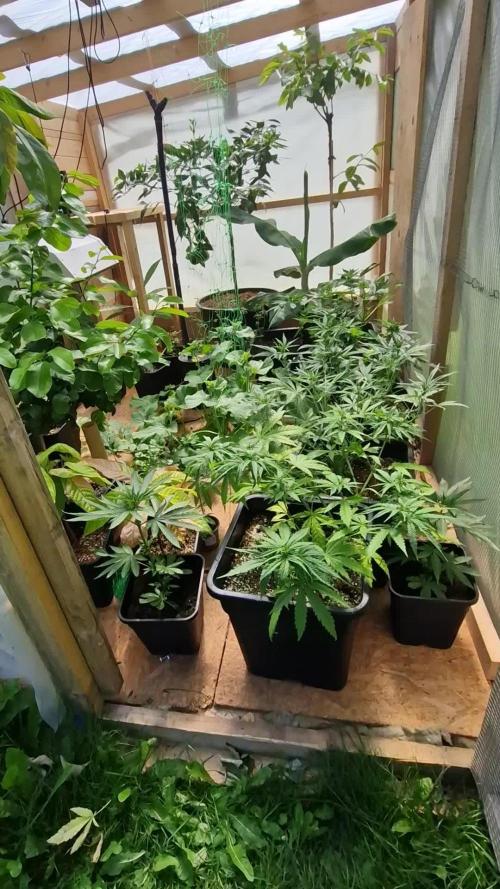
Wow!! It was sunny and hot all week! You can see that they almost doubled their size and are looking pretty much more healthy. That is also because I followed @MadeInGermany 's advice and decided to wait more until I had to water. They seem to have liked that, beacuse there is no more sign of Ca blocking in the leaves. And they grew very nicely, no need of everything. Also following his advice I will use Cal/Mag in the next watering. But, you know, I'm making it cheap... so I will use another home-made recipe: wood ash fertilizer, which include those nutrients and some that are needed in flowering stage -which seems to be starting, so next week will have the flowering label-. It also degrades the N in the soil that could be still causing a little overfeeding (leaves' tips are a bit burnt). However, I admit that my mistake was overwatering from the beggining. Lesson learned! No watering for the whole week and the plnat didn't seem to worry about it.
Man! If only it had been this sunny all the time! Plants look very healthier and are way bigger, with huge new leaves. A little amount of pistils showed up in the last days, so I guess it is the moment for stretching. Knowing that, I decided to do a little training on Sweet, as it is the one a bit behind. You can see in the last picture how I took a couple leaves that were blocking light from side branches-future bud sites- and taped them, so they didn't. If results are good I might do the same with Rebel, but I have a feeling that she'll do good without it.
Sadly, next week will be all rainy and cloudy... Nothing to do tho. Any commentary will be thanked, even if it is about how cheesy the videos are! 😂
Likes
78
Share


@Nebula420
Follow
I love how Blackberry grow, so vigorously and beautiful plant.
Very easy strain, suitable for beginners, you just need to water and give fertilizer, its all u need.
Plants look happy and healthy, all is well.
Blackberry loves fertilizer so much xD=) always asks more)))
Blackberry already flowering,now I can see amazing colors.
The smell is weak. It’s hard to describe this amazing smell of berries, so sweet!😍
Thanks Fast Buds, nice genetics, and thank to everyone who follow my grow report, Peace!😘

Likes
101
Share

@Schnabeldino
Follow
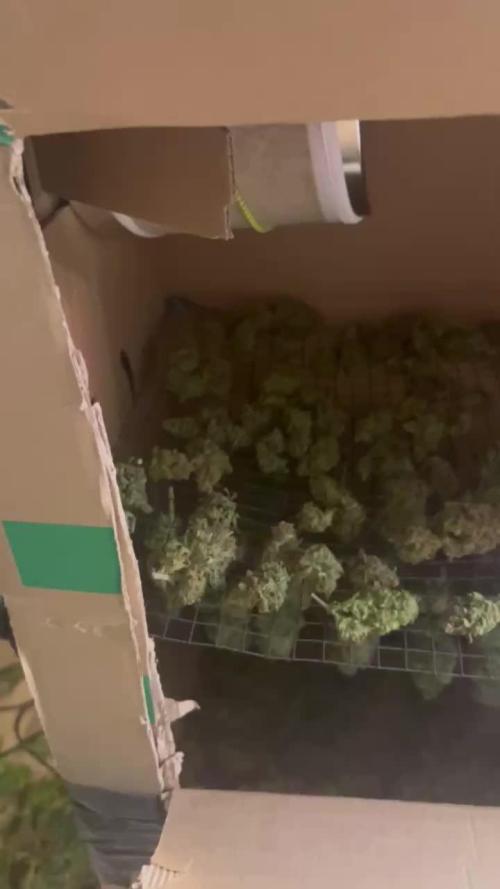
For my first trial run with Grand Cru Genetics, I’m definitely impressed. This strain shows great potential for flavor lovers and will be interesting to run again in the future.
With a little more care and training, she could have achieved more, but she stood in the far corner of the tent and was difficult to reach.
Drying takes place in our Dryomat; delivery of the Dryrocket has been delayed. According to my information, it will not arrive until October...perfect for winter growing.
Photos are wet buds. Once they are dry, the smoke report will follow!!!
See you again in 2-3 weeks 😇😇
Likes
176
Share


@DevilsBud
Follow
Week 8 off flowering Cookies Gelato
On to a next week it's getting closer to the end Growmies 😱😱😱 . But i am ready for it 💪🏻
Tomorrow First day update cheers
🤘🏻🇳🇱🤘🏻
Day 49
Dence and tall that's what the cookies gelato is getting it's definitely a resin producer and i love the smell coming of here 😋😋😋
Day 50
Going on steady pase letting them dry out a bit for day more had feeling over water them to much last couple waterings there's still a lot growing tho that need some bulking up but i have say it before it's my first ever grow and already amazed what i can grow by my self i am extremely curious about the end result 🤞🏻
Day 51
Nothing to tell but good vibes for the cookies gelato i probably gone take these up to day 75 ish i want this strain developing for here full potential
Also gave them 1.5L nutrition pH 6.6
Day 52
Nothing to say about today there going fine gave them more water 1L
And keeping the humidity in check
That's all folks
Day 53
Good day Growmies what a wonderful day it has bin for the plants and for my self very happy with the results i get under my lovely marshydro TS-1000
Is too notch 👌🏻 have great weekend folks
Day 54
Leaving them alone today easy Sunday
Also want to thank everybody for the comments likes etc you know who you all are 👍🏻😍👍🏻
visit www.marshydro.eu
for your best gear and use the PROMO CODE: DEVILSBUD
Mars Hydro tent handy info
Lock All Light Inside: MARS HYDRO Grow Tent Interior is made of diamond mylar. Non-toxic to the environment, no harm to plants. High-quality 1680D canvas being double stitched, (ALL OTHERS BRAND grow tent is 601D canvas) which is tear-proof for perfect light locking, No light leaks or rips at all.
Durability Grow Tent :Stable Metal corner adapters and poles are the trustful supporters of the tent. No rusting nor paint-falling. Quick easy tool-free installation. Carries strong heavy-duty SBS zippers, double layer lining to create a light-proof seal.
Easy Observation of your Plants: Special peek👀 window made by double layers of cloths. Observe the growing conditions of your plants without opening the tent and avoid disturbing plants. The peek window also serves to dissipate heat and ventilate air.
Removable Tray Keep Clean: The package includes a removable waterproof floor tray to hold soil and fallen leaves. The tray can be taken out easily to wash. Removable and water-proof cleaning easy.
Good Ventilation&Fast Assembly: Circular double-sleeved vent holes with adjustable nylon strap for air circulation by exhaust fan, ducting, carbon filter, or reflector. Better allows proper light, heat, and airflow. Quick tool-free installation. Reinforced by a sturdy metal frame to ensure security and stability, supports up to 140lb. Perfectly safeguard your plants to thrive even in winter.

Likes
4
Share


@bobtheblob
Follow
Not everything went well this week - I've used some stress stimulator and burnt leaves a bit, changed aero rocks in hydro since old ones got cluttered. Solutions PH goes up for some reasons, better learn some chemistry to figure out why ahah. It's still about ~ 1300, so I'm not adding any nutrients this week nor I plan to change the solution completely. I guess I'll add a bit big bud and monitor ph and ppm


Likes
68
Share


@Roberts
Follow
Plant grew well outside if a little rot issue. Was operator error. She grew well under the Mars Hydro FC4800, with the Athena blended line nutrition. A berry sour smell with lots of frost. She should be a good 4 to 5 ounces once done. I did use mire then Athena recommend in flowering. I will be back with smoke report in a few months. Thank you Mars Hydro, Athena, and Weed Seed Express. 🤜🤛🌱❄️🌱
Thank you grow diaries community for the 👇likes👇, follows, comments, and subscriptions on my YouTube channel👇. ❄️🌱🍻
Happy Growing 🌱🌱🌱
https://youtube.com/channel/UCAhN7yRzWLpcaRHhMIQ7X4g


Likes
12
Share


@2Stones1Bird
Follow
Checkout my Instagram @smallbudz to see the Small budget grow setup for indoor use, low watt, low heat, low noise, step by step.
08/11/2019 - Showing early flower development?
09/11/2019 - Gave her 0.500 ml plain water PH 6.5, she's starting to need more water and also due to 30c temps. She's also showing light green around the leafs maybe slight magnesium deficiency.
10/11/2019 - Yellow leafs showing up really fast so I 'flushed' the medium with 1l of 6.4 PH plain water, watered until some run off start to showing, change the watering plan again, now I only water when the pot feels light and dry at the bottom.
13/11/2019 - Pot was really light and dry at the bottom so I gave her 1.5l of water with 0,75ml of Grow, 1,5ml of Bloom and 0.75ml of Max BioBizz PH 6.5 until some runoff started to appear I think was too much again : also added a work-supplement led strip light.
14/11/2019 - Leaves looking pale raise the light to 45cm instead of the recommended by manufacture 25-40cm.


Likes
3
Share


@SubliminalSociety
Follow
Did she stretch 2cm? I'm saying: yes!
Otherwise same old. Oh, just realising I didn't measure bud width. Man, it's depressing. So many leaves in the bud, it's going to be hell trimming these two sad colas. But she's doing her best, so I should do, too.
Chopping time is close.


Likes
3
Share


@Deepgrower
Follow
Esquejes fuets del propagador. De momento 15/15 enraizados . Esperamos ver evolución!

Likes
93
Share


@TeflonDonFarms
Follow
Halfway through week 7. Couple pictures from Tuesday. Gonna upload more when I get back home to her. Can’t raise the lights anymore. Hoping she is done stretching. She takes up every bit of that 4x5 box. Couldn’t be happier with this grow so far. I think next time I’ll go down to 5 gal smart pots this way I can pump out two of them. Still in disbelief she has grown this fast and started budding that fast as well!! I’m feeding her 2 gallons every 2 or so days. She is a
very thirsty girl and let’s me know when she is hungry too (leaves curl down). I’ve been slowly defoliating the bottom of her. I cut a couple under grown budds from underneath as well. Not sure how she’d respond if I went scissor happy. I also can’t say enough about Advanced Nutrients. Since I made the switch I can tell her leaves are always praying up and overall health seems through the roof! She really is a monster. 31 inches wide by 36 inches tall. She is stacking nicely. Did my best with pictures. Can’t tell if the flash on the phone helps or hurts the pictures.
End of the week- She is doing awesome. Blowing up pretty fast and there is a serious citrus pine smell coming off her when you bump into a budd or it wipes on your finger. For the most part it seems as if she is loving life!!
Likes
17
Share


@Dunk_Junk
Follow
She is just about done for a haze!!!
All her pistils are now brown and her trichomes are going milky, but no amber yet.
She will be harvested in the next 24h.

Likes
16
Share


@eldruida_lamota
Follow
Vamos familia, aquí os traigo la sexta semana y primera de floración de estas Royal Gorilla de RoyalQueenSeeds.
Vaya color, y van con buen ritmo.
La temperatura maxima es de 26.5 y la
Mínima se queda en 23.5. En cuanto a la humedad está estable en 50%
Agrobeta:
https://www.agrobeta.com/agrobetatiendaonline/36-abonos-canamo
Mars hydro:
Code discount: EL420
https://www.mars-hydro.com/
Hasta aquí es todo , espero que lo disfrutéis, buenos humos 💨💨
Likes
30
Share


@WeWantItToGrow
Follow
This week was amazing! Looking at how complex the bud structure is I am blown away low stress training has really opened up the canopy to allow for good light penetration so even the lower buds are truly filling all the way out the thc crystals on these things are soo beautiful I literally have been found by my wife just staring at them!

Likes
13
Share


@Huntress007
Follow
She looking great getting taller moving into flower! Very healthy looking! 🌸😇


