


Likes
Comments
Share

@Canna-Lytiker
Follow
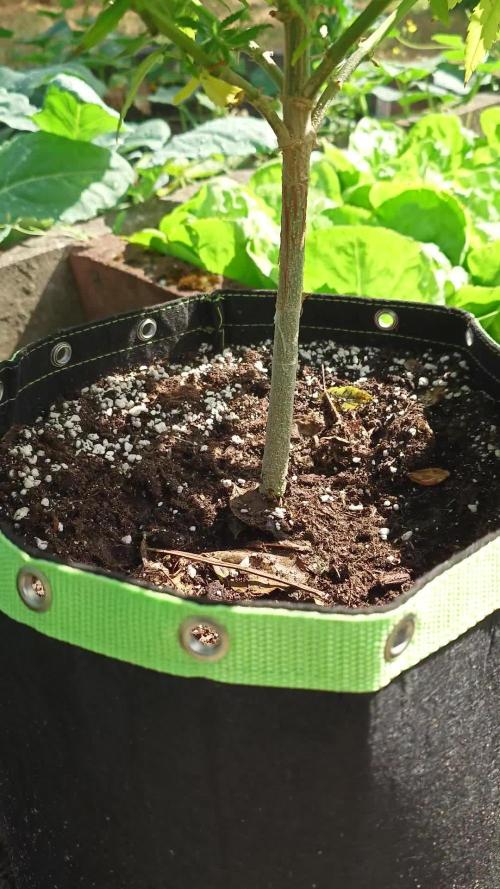
Was ist hier groß zu sagen außer sie entwickelt sich super und steckt die kleinen Blessuren super weg. Oma hat auf jeden Fall den Auftrag bekommen demnächst ein wenig aus zu dünnen. Aber das machen wir wenn ich wieder dabei bin. Spätestens nächsten Sonntag.
Von daher weitergehen, hier gibt es nicht viel zu sehen....
... Falls ihr doch mehr sehen wollt, demnächst kommt auch dieses kleine Schätzchen auf YouTube bzw. Sobald die Blüte beginnt 🏻
Und, schaut bei meinem Growmie mit rein - Bei dem ist immer Eskalation angesagt:
https://growdiaries.com/grower/stimpson


Likes
32
Share


@Schnabeldino
Follow
_____📅 Week 4 | 📅 Day 22 - 28 | 03.03 - 09.03 ______
🌞💧 05.03.25 | Day 23
🔸 Gloria 🍊🦏🌱 is doing very well...I topped her last week and she took it very well. I have now 8 main branches, I think at the end of next week I'll change to 12/12
🔸2 ml Master Grow A+B | Master Root on 1 liter solution.
🔸feed with 2 liter
_____________________________________________________________________
🌡️🔆= 24-26°
🌡️🌜= 18-19°
💨 Hum. = 60-70%
🔦 PPFD = 600 umol 18/6
🔦⌚DLI = ~38
___________________________________________________________________
Equipment: Veggie
💡2 x 200 Watt Cosmos LED
💡4 x 40 Watt Spider-Farmer
⛺120 x 120 x 200 Tent (4 x 4 x 8)
🍯 15 liter pot
Likes
74
Share


@Hou_Stone
Follow
🌱🌿🌱🌿🌱🌿🌱🌿🌱🌿🌱🌿🌱🌿🌱🌿🌱🌿🌱🌿
C'est partis pour la culture de la Kong's Krush. Disponible sur :
https://shop.greenhouseseeds.nl/feminised-cannabis-seeds/usa-genetics/kongs-krush/
Pour la première fois j'essayer de faire germer dans des cubes de laines de roches.
J'ai préparé une eau avec 0.5g de bio enhancer/L puis j'ai abaissé le PH à 5.5. Je laisses trempé mes cubes dans cette eau 24h avant d'y placer les graines pour la germination.
Erreurs de la semaine :
Trou dans cubes : Certaines graines n'étaient pas à l'abris de la lumière. J'aurais mieux fait de pousser les graines dans les cubes sans les trouer.
🌟👨🚀🌟👨🚀🌟👨🚀🌟👨🚀🌟👨🚀🌟👨🚀🌟👨🚀🌟👨🚀🌟👨🚀🌟👨🚀
Venez me voir sur Instagram ❤️️
https://www.instagram.com/hou_stone420/


Likes
8
Share


@artems
Follow
Scrooge is showing signs of improvement, displaying a healthier appetite and increased nutrient uptake. The recent adjustment in feeding regimen appears to be positively impacting its growth, promising a more robust development in the days ahead. 😊🌿

Likes
11
Share


@Emperor
Follow
My first week went very well. 3 Runtz Muffin in the back (1 week)
On the right DNA DJs Gold. (1,5 week)
On the left should be Kings Kush CBD cutting from cutting, hope it will be back to life 😇


Likes
13
Share


@Mastr
Follow
Week 2 flowering and tropicana cookies very easy to grow and she loves feeding o feed her with high dose and seem she love it all time I feed her every 2days and I wanna feed less water and do it every day when light goes on

Likes
111
Share


@Herbalize
Follow
Hello folks 😎
9th week of flowering, we are near the end !
1 more flush and it will be time to harvest 👌, I love to see the leaves fade like that 😍
This week the outside temperatures have dropped a lot, very cool for the end and especially for better drying so im happy !
All trichome are milky and some amber, I could leave it another week longer but I want to be able to smoke it the day, and not stay glued to the sofa 😁
So the harvest will be done after about 60/62 days
Anyway, I really liked this run ! and I would try other strains of this bank really soon
stay tuned and see you next week for the final upload guys 😘
I also have another diary with one Pineapple kush from RQS if you want to see
Peace Love & Weed GD Fam😍👊

Likes
3
Share


@Krack
Follow
Didn't realize that it's been 4 weeks since I was on here last. Not sure if I over watered, nute burn or a deficiency but I am having a problem with my leaves going yellow and crunchy. I just gave straight RO water for a flush.

Likes
12
Share


Likes
19
Share


@buddhi_coop
Follow
This week I just watched them grow. I watered a couple times using the nutrients mentioned & today I watered with just 6.3 ph water that I filtered. These girls are bushing up & I’m not mad about it. I haven’t done much defoliation just the topping I did a couple weeks ago. I’ll Start doing that probably after I flip to flower & add my trellis net.
Likes
24
Share


@DeepRootsGrowTrees
Follow
SWISS DREAM ROSE CBD 🌹 AUTO ORGANIC GROW
WEEK #12 Overall
Week #9 Flower
This CBD plant is 👏 amazing first she's just a beautiful plant with her dense purple buds that just pop with the orange hairs and trichomes she even has a nice aroma about her. She's got a few weeks left. Stay Growing!!
Kannabia.com
SWISS DREAM ROSE CBD AUTO

Likes
7
Share


@Northstar_cannabis
Follow
Strawberry Gorilla has grown great given its limited space. I moved her and added supplemental lights.


Likes
37
Share


@Organic_G
Follow
Es ist offiziell, die Ladys werden mein Zelt sprengen 😂💀
Hätte nicht mit so einem explosiven Sprung schon in der ersten Woche gerechnet 😭
Hab ein zweites Netz eingesetzt um die Stämme später in der Blüte stabilisieren zu können, vor zwei Tagen 😳 werde mir ein drittes besorgen und wenn die zu weit oben sind muss ich die wohl einfädeln ins Netz.
Hab mir ansonsten noch eine Migro Aray Intra 160W für das under Cannopy besorgt, bin gespannt was draus wird 🤩
Die trinken aber auch wie verrückt, habe vor zwei Tagen den 47 L Tank voll gemacht & jetzt seieht der Tank so aus😭 [ Bild ]
Es ist einfach nur verrückt


Likes
25
Share


@kizdog
Follow
So this week I saw some decent bud development! There are a couple of colas with tips a little too close to the light, but they aren't getting super high PAR measurements so I think they're good. I added PK 13/14 this week, so I wanted to see some interesting changes. Not as much as I thought, but some flowers are noticeably much fatter than a few days ago. Had an issue with the top layer of my coco getting dry which I realised to be from the 15L dehumidifier I had in there, right next to my pot 😳 So that's now on full power in the room outside of the tent. The heat can be a bit of an issue, reaching 27-28c briefly some days. There's been a couple of fluctuations in the humidity, from 55% RH to 70%, so I've straightened the ducting and tried to perfect my ventilation and environment as much as possible. I'm debating buying a co2 bag to help my plant deal with the heat and intense light. The trichomes are really starting to show, with the 60x magnifier I can see so many cool heads. It just seems that my buds aren't really filling out beneath the pistils, causing me to worry. This week there were so many photos that even after picking out my favourites I ended up with 111 of them! Also, it's worth noting that the nutrient amounts I have listed are in *ml/1.5l. Happy growing!
KIZDOG
Likes
85
Share


@Tropicannibis_Todd
Follow
Start of day 35 ...... Nov 13 Start of week 2 of Flowering
Check out the full grow video on latest weekly update
Super Exceptional Growth Daily
Still adjusting LST when needed and leaf tucking.......
Water Only when needed but its drinking more every otherday and adjusting lights when needed......
Rain Water Only .......
( DAY 39 AND IT SHOWS ZERO DEFICIENCIES ) IM ALSO DOING VERY LITTLE, SLIGHT DEFOLIATION
This is more of a personal note
So this is my first Autoflower grow , now the one advantage of an auto is the speed to which its life span will go , so in doing my homework on the Auto's life span the pros and cons , I choose to keep her short at the start and not add any stress and maximize her cycles and in doing this I was surprised at how fast she went into Flowering, NL 2 day 21 and NL 1 on day 26 , I will say this, i really am liking the speed and vigorous growth of this northernlights autoflower in general and becoming a huge fan....
I hope you enjoy my growlog...
Sidenote : I don't have anyone or a community to bounce ideas or share growing tips with so if there's any growers out there wanna , hit me up.......

Likes
3
Share

@PapaTerps
Follow
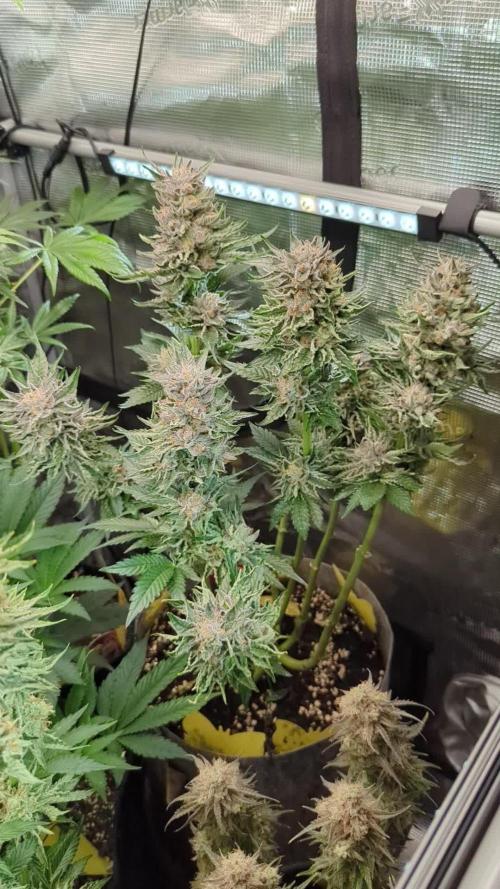
British Delight - Wizard Trees
Day 98
🚿 She has been watered with 3L of RO tap water with nutrients mixed individually, in order and then pH'd to 6.3! She's just about a week or so away from harvest, so Ive reduced her nutrients over the last two waterings, so she is just getting the ActiVera and BioHeaven at the moment 💪🏻
✂️ She has been given another round of defoliation this week, mainly focusing on removing fan leaves and larger sugar leaves from around her flower, so that any shaded areas are now exposed to light - this is to ensure her flower matures as much as possible before harvest 👌🏻
🌸 Her flower is looking so beautiful, with the late bloom colour change around the cola and the maturing of her pistils and calyx, she looks very dark and stormy! Her aroma is filling the tent now too, with smells that transport you to a French patisserie; creamy sweet pastries 😋. Around 90% of her trichomes have turned milky with around 5% amber and clear each, basically all of her pistils have turned amber, so I will complete this week of flush and then she will be harvested 🙌🏻

Likes
5
Share


@TerpyOG
Follow
Lilac Diesel RBX2
Both plants smell diesely but the pheno
with sativa like bud structure smells way
stronger and has sweet pineapple notes
along with a strong musky scent, I dried
a small amount of it and i gotta say that
this is the strongest tasting flower I've ever
smoked in my life! Sweet pineapple inhale with a sharp diesely exhale.
ALL ORGANIC NUTRIENTS USED!! GAIA GREEN 4-4-4 AND 2-8-4 WITH SOME ORGANIC SEAWEED EXTRACT WATER AND MOLASESS!
ENDED UP BEING BETTER THAN ALL THE STUFF I GET FROM THE DISPO HERE IN MA! STRONGEST TASTING BUD IVE EVER SMOKED/VAPED AND IVE BEEN SMOKING SINCE I WAS 14!
