


Likes
Comments
Share

@Northern_Ent
Follow
June 28: rainiest June on record but average temperatures. Godfather OG is behind schedule because of the weather but is doing fine.
July 1: Happy Canada Day 🇨🇦
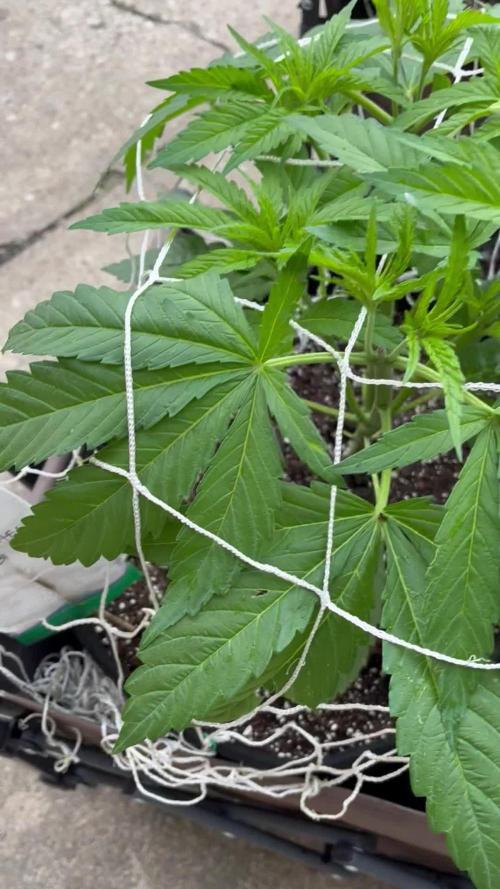
Adjusted scrog net. Using a net with paper clips onto the edge of the grow bag is the easiest way to get the shape I want for the manifold. Looking good.
Starting another compost tea for use tomorrow. There has been so much rain that I haven’t been watering and the only added nutrients are by foliar spray. That is working, but she will like the tea tomorrow.
July 2: compost tea in morning and sunny all day adds up to a big vegetative growth day. Only 2-3 weeks until I have to start force flowering.

Processing
Likes
19
Share


@UKLEEDSGROWER
Follow
4th day in flower here, plants have doubled in size since a week or so ago. Once again very nice healthy colour to the girls really impressed so far, not a hint of stress shown from the plants at all, very hungry the soil is becoming dry everyday they just take everything I give them.


Likes
6
Share


@Lordviper28
Follow
These lady's have been weird but have been growing great I got two them with Topps showing orange furs and are frosty as hell and smelling lovely this thebstart of the 5th week of flower

Likes
3
Share


@CaptonianMoneymaker
Follow
Looks like buds r going slow super cheese is on track nice rop colas
Processing
Likes
25
Share


@Kikiwindsurf
Follow
30/04/2020 enjoy ! day 56 and 57of the gorillas. day49 Lemon Haze.
03/05/2020 I cant keep my HPS light working because of the heat... They will finish outdoors and, at my terrace, the maximum temperature registred was 39 fucking Celsius degrees so let´s see how she evolves ! I take a look at the crystals every single day because I know that because of the heat they can change of color very fast but its not the case, all the plants are very resistent. Top Candy and Bloom increasing, and i gave 3 doses of PK (52-34) and probably 1 or 2 more once a week.
Stay tunned !!
Likes
32
Share


@Vega0284
Follow
Hey Guys!
Super excited this week! I've really been wanting to try growing outdoors, so I built a cheap hoop house! Got most of this stuff for the frame from Lowes under 300$. All the soil products I got from GrowGreenMI. Some really cool people out there.
One thing I'm super worried about is drainage. Right now those holes are about 4 feet deep and they've got about 4 inches of water in them already. What's been cautioned is that, eventually, about 2 months in these plants roots will grow and reach the bottom and cause root rot to form. One of the biggest things I was trying to be wary of was causing root rot. This was also the biggest precautionary measure I took when mixing the soil. Adding the extra perlite, coco, and clay pebbles. Best advice right now is to build the soil up on the holes another 16 to 18 inches and possible stick a PVC pipe down to the lowest drainage point of the hole to allow some of that natural occurring water to evaporate.
Any advice anyone has on it is welcomed!
Making a compost tea for the soil outdoors, will probably put 2 cups in each RDWC bucket as well and let that do it's magic for a day or so before nutrient change. Raised the bed about 14 inches as well!
All the seeds sank! Off to a good start! Lol


Likes
66
Share


@BigBadLion
Follow
Hey everyone! 😁
Another week, another update and I've learnt a lot this week!
It seems my theory that I was underfeeding Puff was right (I mean, it's not rocket science and I confused charts haha) and I had to do something to fix this issue!
Some people I talked with recommended me to buy a product called "Revive" from Advanced Nutrients since it would help with a faster recovery than just adapting the nutrients... and it seems it works! I applied it twice (this week's post) and the next and the improvements are really noticeable! (specially now!)
My concern now tho is when I should start flushing! Puff should be ready soon and supposedly I should start doing it two weeks before harvest... and I should harvest when trichomes are 50 cloudy and 50 amber... but how can I tell when I those two weeks are close? The trichomes should be 20% amber? 10% amber? It's confusing! 😱
I know as well that the two weeks flush is just a number, I could also flush for one week but I still don't know WHEN it'll be the right time to start doing it but I think that by the middle of the next week or by the end of it I'll start doing it.
Anyway, thanks everyone for reading this update! 😃
Next week I'll have more news! 😜
Likes
57
Share


@nonick123
Follow
Día 13 (06/05) Nos acercamos al final de la fase plántula. A ver si ahora empiezan a crecer de forma explosiva!
He sido muy estricto con los riegos, dejando que el top hasta el nudillo se seque completamente!
Día 14 (07/05) Hago una mejora en la tienda. Hasta ahora tenia intracción pasiva, pero ahora he instalado una turbina para que impulse aire fresco dentro de la tienda
Día 15 (08/05) Con el calor que hace me sorprende que las macetas sigan aguantando la humedad, pero al hundir el nudillo sigue húmeda. Mañana haré un riego de nuevo
Día 16 (09/05) Relleno el top con sustrato para compensar la compactación y dar mas soporte a las plantas
Riego con 300 ml solo H20 - pH 6,2
Día 17 (10/05) Baño de sol de dos horas.
Día 18 (11/05) Baño de sol de dos horas
Día 19 (12/05) Riego 750 ml H2O + Regulator 0,15 ml/l + CaMg-Boost 0,25 ml/l + Startbooster 0,25 ml/l - pH 6.2
💦Nutrients by Aptus Holland - www.aptus-holland.com
🌱Substrate PRO-MIX HP BACILLUS + MYCORRHIZAE - www.pthorticulture.com/en/products/pro-mix-hp-biostimulant-plus-mycorrhizae

Likes
36
Share


@MadeInGermany
Follow
Info:
Unfortunately, I had to find out that my account is used for fake pages in social media.
I am only active here on growdiaries.
I am not on facebook instagram twitter etc All accounts except this one are fake.
Have fun with the update.
Hey everyone 😊.
The lady was repotted 4 days ago and has developed very well since then :-).
I let them take root for a few more days before I start training (topping) and add their GHSC Powder Feeding bio Grow 👍.
Otherwise, as always, the tent was cleaned and the humidifier refilled :-).
I wish you all the best ☺️ stay healthy 🙏🏻
You can buy this Strain at
https://www.barneysfarm.com/blue-cheese-34
Type:
Blue Cheese
☝️🏼
Genetics:
Blueberry
X
Original Cheese
👍
Vega lamp:
2 x Todogrow Led
Quantum Board 100 W
💡
Bloom Lamp :
2 x Todogrow Led
Cxb 3590 COB 3500 K 205W
💡💡☝️🏼
Soil :
Bio Bizz Coco
☝️🏼
Fertilizer:
Green House Powder Feeding
☝️🏼🌱
Water:
Osmosis water mixed with normal water (24 hours stale that the chlorine evaporates) to 0.2 EC. Add Cal / Mag to 0.4 Ec Ph with Organic Ph - to 5.5 - 5.8

Likes
Comments
Share


@OnePrettyFlyGuy
Follow
Something tried to nibble on Plant B, however there are no signs of pests and no further damage anywhere else (I have 6 other plants in the garden too). Plant A has already begun to develop stipules on its first set of true leaves too!
Had their first feed on day 14 (2ml Fish Mix + 0.1ml Mono-silicic Acid), and were fed again on day 16 (2ml Fish Mix, 2ml Bio-Grow, 2ml Bio-Bloom, 0.1ml Mono-Silicic Acid).

Likes
12
Share

@farah4weed
Follow
Hello guys 😍👽
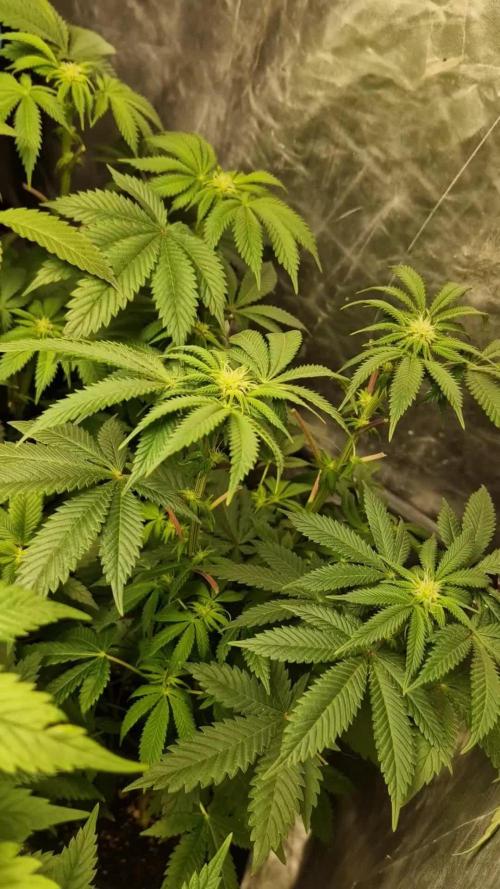
This week is the most exciting time of my cultivation.
After we grew 10 og creams, today in the third week of flowering, all the seeds showed that they are feminized😍😍
My project has given the right result
But more important than this is the final product, which we compare with the father (og kush) and the mother (cake n cream) and the traits it inherited😍😍
Thanks for your comment🙏😍👽
"farah4weed"
Likes
10
Share


@CURATI_DA_SOLO
Follow
Questa varietà e la nuova di anesia! Con 29 % di THC! E rimasta più piccola del resto della coltivazione ma forse è proprio per questione di grandezza di genetica anche perché lei sta benissimo....e bello forte e robusta ed ha resistito benissimo ai 3 topping...adesso ha 8 apicali e non è ancora entrata in fioritura...le radici hanno già oltrepassato il vaso in tessuto geotessile...una bomba! Ringrazio indoorline per i fertilizzanti biomabno del quale sono molto orgoglioso! Prodotti italiani di primissima qualità e te ne accorgi anche da.alcune bottiglie che si restringono...simbolo di un fertilizzante pregiatissimo! (Ricco di batteri ecc) li ringrazio anche per quanto riguarda l'aspirazione della growbox in quanto mi ha fatto testare coon piacere il secret Jardin df16...il loro catalogo e infinito e i prezzi molto accessibili! Passate a dare un occhiata trovarete di tutto e lavorando in team ti assicurano un assistenta clienti perfetta!Ringrazio anesia per questa genetica.... e tutto il pubblico di growdiaries per supportarmi nei miei lavoretti! All prossimo aggiornamento 💪🏼💪🏼💪🏼


Processing
Likes
18
Share


@Cannibalgardens
Follow
Boy she has been through a lot but it doesnt slow her down she pushes on . The tent set up was so off that she just took a huge hit and is just getting better now and starting upwards growth again .. The genetics are good but I'm stressing this baby out the last two weeks and looking forward to her future growth and success ..cheers family

Likes
26
Share


@GrowGuy97
Follow
Day 42 - Ladies are growing great, some are growing a little faster than others but all in all very happy with this run so far! Thanks for following & happy growing friends!✌️🏼🌱
Day 43 - All of these ladies expect for 1 white widow & 1 orange sherbet keep having problems, yellowing leaves, rust spots, not sure if it’s me or what the issue is considering 2 of them are doing great😬😬
Day 44 - Watered the ladies today, going to give them some calmag next watering when my new PH meter gets here!
Day 47 - Buds are starting to get much bigger on a few of the ladies & a lot more frosty!😍


Likes
28
Share


@Adkguerrilla44
Follow
I cannot talk up wicked genetics enough man,they are strong and stable plants and honestly since the temps have been continuing to drop these suckers have been LOVING IT!!! I am going to start some boston kreme pie S1s very shortly for my indoor grow. I have so many amazing strains from wicked I can't wait for this winter it's going to be insanity 🤯😵😵💫😎
Likes
14
Share


@Wenz004
Follow
My F-MILF (NL untopped) is going to eat my tent
She is not soaking 5 l (nutrified)per day...she drinks it with open mouth. Not a single drop drain
Getting this:
Aptus Topbooster 4 drops/l
Aptus P-boost 10 drops/l
Aptus regulator 3 drops/l
Aptus All in one 0.6 ml/l
Aptus CaMg 0.6 ml/l
Trying to keep ph not lower than 6.4...
Not easy because P-boost puch it down a lot
All TA nutrients above are only for NL untoppes in smaller tent


Likes
38
Share


@Cariboo_OG
Follow
Utopia Haze is a rare heavily sativa dominant hybrid (90% sativa/10% indica) strain created through back crossing Brazilian Sativa strains. This tasty little bud took home 1st Place for Best Sativa in the 2008 High Times’ Cannabis Cup and for good reason – with its potent 18-22% average THC level and long lasting cerebral effects, Utopia Haze is one powerhouse smoke. The Utopia Haze high comes on soon after you finish your first toke, hitting you with a strong cerebral lift that infuses you with a sense of hazy relaxation.
Type: Feminised/Photoperiod
Cultivation: Indoor/Outdoor
Flowering Time (days): 70-75
Indoor Yield (g): Up to 650
Feminised Outdoor Harvest Month: October
Feminised Outdoor Harvest Month Week: 3rd-4th week
Aroma: Citrus, Woody, Pungent, Mint
Effect: Cerebral Lift, Hazy Relaxation, Sleepy
Welcome Everyone to the Final Entry of my Utopia Haze Grow !
There is so much to discuss ! I have been extremely busy as of late trying to get this Harvest together, but i am happy to have it here for you now !
I Seriously under estimated the amount of time, help from others, and my own necessary skills to pull this off.. and i still kind of screwed it up lol !
But its worth noting i have never actually done this before and trying to document it during....was extremely hard.
It is next to impossible to work an iPhone with rubber gloves on !
First I want to discuss everything step by step so before you jump straight into the comments on how the end product is so small in "quantity"
Rest assured i am happy with its"quality"...and thats all that matters to me because Life is a journey not a destination! and i have learned so much from this grow that I couldn't be any happy even if i messed some things up :)
But at the very least I hope you read through this entry in its entirety with an open mind and focus more on the process, rather than just the outcome!
I ran out of Ice & i was only able to wash three times..(normally I've heard you should go sometimes 5-6 washes)
Preparation is Key & things will be much better next round :)
Photos 1-22
These are pretty self explanatory but for those of you just tuning in now.. this is what happens to a very happy plant when you don't have the necessary tools to monitor key components of growing cannabis.. Ph, as well as EC levels play a very key role in the outcome of your grow lol that being said I was just able to save this plant by purchasing both tools but that doesn't mean the plant didn't suffer because of the prior events.. This was a Huge reason behind me choosing to turn this harvest into what i would consider
"Solventless Hash Rosin" from "Ice water extracted Bubble hash".
Pictures 23
The idea here is the process of using "fresh Frozen Cannabis" this has been discussed many a time online on such sites as instagram and here on grow diaries as well.. I personally have Never tried the process so i decided to try it out and make a judgement for myself..
Video 24
The Cannabis has now been in the freezer for 72 hours making it very well frozen.. as you can tell i struggled getting it all into the 25u Screen Wash Bag. One thing of note i would do differently is i will de-stem my next batch as i also believe this played a part in the amount of plant matter that escaped through the sieves.
Photo/Video's 25-28
The idea here is "ice water Seiving" & especially with the bags that I am using here that are only have screen material on the bottom portion of the bag it is very important to have spaces in-between the screens to allow the water to pass directly through the screens into the bottom bucket with the least amount of resistance.. because the hash is so extremely temperature dependant if it gets warm on the side of the bag.. it will stick there and not make it to the bottom to become use able product..
29
You do not need to use as much Ice as i used here lol... the idea is to keep everything very cold..i certainly achieved that but at the sacrifice of using so much that i ended up grinding product and producing "contaminants" but in the end they are just plant matter that i would be smoking when i rolled up my joint either way so.. I'm not super disappointed..
But it should be noted that what you want to achieve here is a Layering effect where you have the wash bag between two small layers of ice while the "water current" washes the Trichomes away allowing them to be separated by the screens setup below :)
Before Starting the machine you should allow some time (i.e.;10-12minutes pre soak to allow the product to become saturated) before the first cycle.
By video 32 I have just ran out of ice lol..
Video 33-34
Here I have a tip for you.. to separate the screens that you sieve through.. cut 5 gallon buckets to stretch them across nice and tight.. it'll make scooping your Bubble that much easier ! i learned this from the many "Frenchy" videos I have watched :)
Picture 35
Here in lays the problem for most people.. drying your hash without loosing vast amounts of "Terpenes" whilst also stay ever vigilant against mold !
Thanks to all those videos I've watched on youtube.. id like to think this was one of my most successful parts of this process..
Things to Note; Terpenes start to seriously evaporate at temperatures 68F or 20C
you need to stay as cold as possible whilst bringing the Relative Humidity in the space down into the 40-30% to stay away from that nasty mold !
I used my cold storage room in the basement.. with a dehumidifier running to keep the space at 45% RH & staying at a constant 15c.
All while spreading the hash as thin as possible across parchment paper, on top of the white screens with a fan moving air across both sides of the paper.
Pictures 36-38
These are some macros i took in the middle of my drying session I fell in love with the colour.
Yes i know the black spots are plant material but they will get caught when i bag the hash & squish the oil out.
Thing to Note; at this stage it is important to ensure you 'micro plane" the hash down as fine as you can whilst staying weary of the temperature... any "chunks" will hold pockets of moisture.. that lead to potential problems..ie; mold ...
Picture/Video 39-41
Successfully planed bubble hash ready to be bagged and Squished !
Picture 42
Ive decided to follow Pedro.. from Pedros Grow Room and double bag to be on the safe side so i don't have any blow outs.
So thats One 25u bag inside one 160u bag ! :)
Pictures 43
This is almost 3 grams of the bubble hash from above, already melting in the bag.. this is where i ran into trouble again lol things started getting to warm in the house and i was only able to get one of the three squish's i did on video :( things started getting sticky.
Picture 44
This is basically just a photo of the equipment I'm using; 3x5 LowTemp Cage in the frame I built myself, with a 20Ton bottle jack.
Something to note here is this is an older Lowtemp model with only a single heating zone which is which i have it closed here heating Both sides of the press :)
As well as the importance of having adequate pressure on your plates.. my rig is very overkill for the size of hash bags..lol
Video 45
Here is the lovely press video.. its didn't quite work the way i wanted either lol my directional folding wasn't quite tight enough for a big "drip" :)
&the Press was set to 65°c
Photo's 46-50 are pretty self explanatory :) I had a blow out.. but still managed to pull an 80% return from the hash once squished...& yes it tasted amazing :)
Was it worth it in the end... that could be debated.. for some..i understand..its not your thing, but for those of us that are interested in making our own concentrates.. free from Solvents...
I wouldn't make it any other way :)
If even ONE of you reading this diary finds it helpful to reference for ANYTHING.....even if its "what not to do" ill consider it a success !
Thanks again for tagging along on this garden adventure.. its been one heck of a journey !
Much Love from B.C. Canada,
Until Next time,
Cariboo