


Likes
Comments
Share

@CanOli95
Follow
Auch hier gab es eine anstrengende Woche.
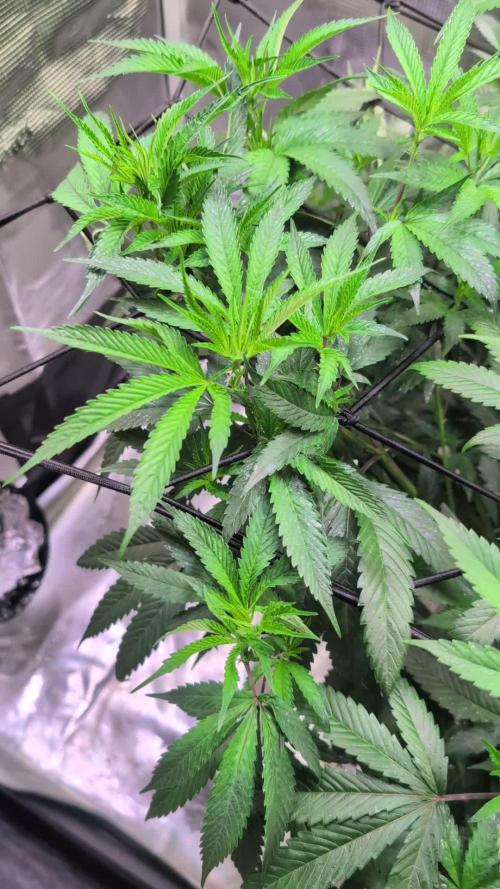
Ich will ehrlich sein. Ich habe nicht so oft den pH kontrolliert, wie ich es tun sollte. Es gab einen Drift, den ich nun wirklich engmaschiger kontrollieren muss. Thripse haben sich leider auch eingeschlichen, wahrscheinlich durch das Lüften und die Hitze. Hitze wirkt leider auch auf Insekten wie ein Boost. Ich habe die Pflanze etwas mehr durchlüftet und stärker befallene Blätter entfernt. Daraufhin habe ich Spruzid von Neudorff verabreicht. Es ist eher ein biologisches Mittel auf der Basis von Chrysanthemen, welches biologisch abbaubar ist. Weil die Pflanze sich noch in der vegetativen Phase befindet, ist die Anwendung auch noch bedenkenlos. Ich wollte es nur Mal erwähnt haben, falls sich jemand über den Schleier auf den Blättern wundert.
Gestern gab es eine eine NL mit EC 1,4. Heute habe ich nachgeschaut , da war sie bei 0,9. Hat mich etwas gewundert, Morgen wird nochmal kontrolliert , wie rapide der Abstieg tatsächlich ist .
Durch das entlauben ist mir erstmal aufgefallen, wie Dick der Stamm geworden ist. Das ist wirklich eine solide Basis für die Blüte. Wenn erstmal Raubmilben da sind und die Nähestoffe stabil sind, wird das denke ich ein sehr schönes Projekt.

Likes
14
Share

@StonedSteve
Follow
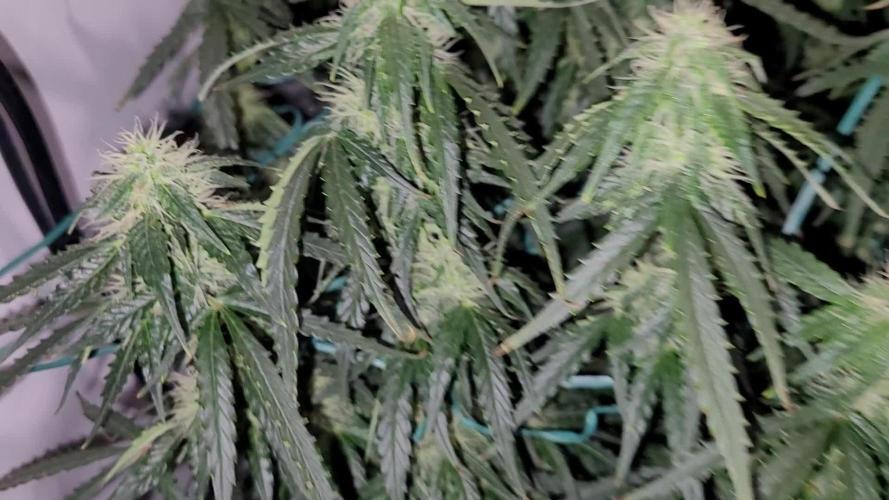
Start week 6 of bloomingToday 11.3. I had to pour 6 liters of clean water over it. 1500ml (leaked out)
76. day of grow
36. day of bloom but not sure I think I started counting the blooming before they actually started blooming.
All of pohotos is acutal from today

Processing
Likes
10
Share


@Trying4Trees
Follow
Week 1 - Day 1
20L Super Air Pots with a bottom layer of clay pebbles, (an inch deep at the centre point) and topped off with Growdog’s 70/30 coco perlite mix.
The tops of the pots are covered by green plastic water distributers to evenly spread the water from the 12” watering rings.
2 lights; each 300W actual draw, currently inside the tent. 2 more coming next week to make a total of 4, across the 6 plants achieving a true watt draw of 1200W.
Aiming for 1g/watt
Germinated seeds from FAST BUDS, were planted and hand watered using tap water pH’d to high 5.8 to low 5.9 with H&G Roots Excl. giving a nice PPM of 362 to start.
The BudBox tent is a 2x2x2m, using a Medusa Boosted XL run off trays to a waste brain were the run off can be tested. This will then be recirculated into the feeding tank again. The feed tank will a standard 100L water butt, retro fitting pumps inside for Feeding and Pump to waste - for cleaning the tank out each week. Another 100L water butt will contain a store of filtered RO water which will fill the feeding tank.
A 10L PureMate humidifier is set at 65%, along with 2x RAM 16” oscillating wall fans which are mounted to the top of the tent for maximum coverage - set to lvl1 on swing giving the 25°C. No extraction yet. This is ready and waiting. 8” HyperFresh fan with a RHINO 8”x600 pro filter. We are using 8” acoustic ducting.✌️🏻
Week 1 - Day 2
No change. Keeping the new environment stable is difficult. The humidifier is not large enough for the space.
Week 1 - Day 3
Fed PH RO water this morning. Trying to keep the humidity up inside the tent.
They have popped up! It begins :D
Did a feed of 5.8PH RO with CocaA&B 0.4ml/l, Roots excl 0.3ml/l, Calmag 0.2ml/l for a 150PPM. 300ml was used to moisten the coco per pot.
Extraction fully connected. Environment stable at 23-24°C, trying to stay at 23.3°C. Humidity fluctuating 47-60%, humidifier struggling, but hopefully be okay.
Week 1 - Day 4
All 6 are up and reaching. Husks hopefully will pop off soon. Will be doing another small feed this evening to keep the coco moist.
Little leaves have appeared!! Fed another 300ml, 5.8PH @ 151PPM/ plant.
Week 1 - Day 5
All shooting up now, tallest at 5cm down to 3.5cm 🌱
I gently helped the last 2 husks off the smallest ones to hopefully even them up. Gave the coco 1L of RO water around the edges.
Week 1 - Day 6
Nothing to report this morning. Another PPM feed to be done shortly.
Soaked the coco until run off with around 3-4L per pot using 5.8PH nuit water; 0.4 Canna A&B, 0.2 Calmag, 0.3 Roots Excl. 152PPM.
First time we tested the Medusa brain - works well and pumps away to the feed tank, need to change one of the low trays to be a boosted tray for better drainage. Giving 5 boosted trays and one normal. Hand feeding up until this point, but will connect up the automation in the next week.
Week 1 - Day 7
Strongest are growing around 1cm a day now. Tallest 6cm, smallest at 4cm. Looking forward to next weeks progress :)
Bought a wet&dry vac - best thing ever!! Haha. Cleans everything in sight plus all the water from the dirty run off.
Lifted all the pots, still a good weight to them so no feed or RO water today I think. Bring on week 2! 💪🏻

Likes
4
Share


@GREENPHOENIX6262
Follow
* Week 1 early veg - 11/05 - 14.5 Inches - Flowering has begun - Last week of beg nutes - Flower nutes will begin this week with increased water feeds*
Processing
Likes
12
Share


@HylianGrass
Follow
Starting 3rd week , we should know soon if im lucky and my strong looking plants are females!
Fingers crosed! 2 out of 4 are looking good one is a slow grower and the other one is all mesed up , i guess the rooting process did not go well for this one ☝️
Likes
5
Share


@Highclass
Follow
TM2 showing some amber tricomes, ill do 1 more feeding an then check again. Might start flushing about day 70. I will hold my TM3 at least 1 week more.
Day 65: 1L + 4ml biogrow + 4ml biobloom +1,3 ml/l bibloombastic
Day 67: 1L + 1ml calmag + 1ml bibloombastic
Day 69. 1L + 2ml/ atazyme + 2 ml/topcandy
Likes
15
Share


@NoviceGrower313
Follow
The plant had some issues earlier in the week, but thanks to a fellow grower who helped me to sort it out! The pant is doing fine just that the leaves that turned pale never turned back green… but I still see new pistil formations very often in new sites!! Hope everything goes well.
Likes
5
Share


@Bak2Blk
Follow
They're getting so big. I'm hoping this week I'll start to see some flowers starting to form. Gave them a ph'ed watering only today. I'll be giving them water with calmag on Wednesday.
7/27 - They're finally budding up. YIPEE! This is my best grow batch yet! GDP1 and BK are about 11 weeks old and GDP2 is about 9 weeks old.


Likes
37
Share


@AkFarmZ
Follow
14/7/21
Tercer día con muestra de pistilos 😬😍
Hoy le apliqué riego de nutrientes sin variar a la dosis anterior. Desprende un leve aroma muy dulzón.
15/07/21
Riego a base de nutrientes 1ml Base Jungle Juice Bloom junto con 1,5ml Big Bud más 1,5ml Sensizym
17/07/21
Riego a base de h2o 1,5L
18/07/21
Riego a base de nutrientes con las mismas dosis del último, una cantidad de 0,5l.
19/07/21
Riego a base de nutrientes con las misma dosis al anterior, cantidad de 1,5L.


Likes
2
Share


@TEAM_Piff_Paff
Follow
The first white pistils can clearly be seen now. I guess that's why she's getting more yellow leaves at the base but this also means that she is in the preflowering phase :)
Due to this and the fact that the weather is great, she needs more water now.
Aside from that she is starting to smell a bit more in the morning and her branches are turning red.

Likes
37
Share


@Capo420
Follow
Another Great Week Down!
The ladies are looking great, these Orange Sherbets are a little ahead of the Six Shooters
The stretch is REAL. Hahaha
Everything going fairly smooth besides not being able to get this pH down a little.
I have burned their tips a few time trying to flush with a high ppm low pH solution.
Everything else seems to be in order though.
Happy Growing!
🤙💚💪🌱😎🌱💪💚🤙
Likes
67
Share


@Dunk_Junk
Follow
Day 20 - Transplant into her 38L airpot with GrowCaps!! I used 3x packets (I wish I'd asked for more) and mixed it with the coco. I also made a FIM cut.
Day 21 - After a few hours in her new pot.

Likes
35
Share


@DudeGrowsWeed
Follow
Happy New Year!!!
Over the past week I did some HST bending. The branches are starting to recover and straighten out after the HST now. I still have some issues with pale leaves and a few spots here and there. I’m going to try adding some Dolomite Lime with the next watering and think that should help with the paleness. I’m also going to up the amount of CalMag and Mammoth P to see if that helps with the spotting. I’m not sure if I should see the spotted leaves recover or if the spots will remain. I suspect the spots will remain on the existing leaves regardless of what I do at this point, but hopefully no new spotting will develop.
The lights went off before I was done taking pics, so some pics will look a little different. The pics with the lights on I had to color correct, they still look a little more on the yellow side than in reality, but much closer to reality than the pre-color corrected versions. Once the lights went off I turned the flash on for my camera, those pics did not need any color correction. You can see the differences in the pics of all plants, the first 2 are color corrected with the lights on, the last 2 are taken with a flash and no color correction.
I read several books on cannabis over the past few days, some good, some not so much. One that I liked was “Marijuana Cultivation Reconsidered: The Science and Techniques For Huge Indoor Yields” by Read Spear. This book is available on Amzon’s Kindle Unlimited service, which costs $9.99/month, but they offer a free 30 day trial (which is what I’m using at the moment). Reed’s book is broken down into 3 sections, the first and third go fairly deep into the science behind growing, he does a pretty good job at breaking it down in easy to understand terms, but I had to read several sections 2 or 3 times to really get it (or just move on with as much understanding as I could digest). The second section is the nuts and bolts of growing. Most was a review but there were several topics he touched on I hadn’t thought of in a while. And again its well written. He also offers the section only in a separate book called “Small Spaces, Big Yields”. If you are not interested in going deeper into the science behind growing, “Small Spaces, Big Yields” is what I would recommend (if interested in reading books on cannabis).
I took some notes while reading and I’m going to add some of these notes in my dairy updates over the next few weeks. This week I’m going to include a note on electrical, this should be a fairly basic concept, but it is super important IMO…
“Electrical Items In a sealed grow room or in a tent, you will have water pooling on the floor from time to time. There is no avoiding this. Mop it up when you see it, and never put your electrical gear directly on the floor. Never. Not even for a moment. In fact, let me stress this point in bold capital letters. ALL ELECTRICAL GEAR MUST BE MOUNTED SECURELY ON A WALL OR TENT POLE.”
-Read Spear
I’ll add more did bits like this in my diaries over the upcoming weeks.
If anyone has any good book recommendations please let me know in the comments. I’m looking for books that might not be as popular as the ones by Jorge Cervantes or Ed Rosenthal (I’ve read those). I did just order “True Living Organics” by The Rev which I’m looking forward to reading. But I’m looking for more. I really want to step it up and learn as much as possible. Your comments, feedback and recommendations are very much appreciated!
Until next time, Happy Growing! Stay Positive! And have an amazing 2019!!!

Likes
Comments
Share


@Pablo_420
Follow
Última semana de todas al final quite la cheese auto floreciente ya que estaba en su punto óptimo y bastante contento con los resultados


Likes
4
Share


@ratatas
Follow
Essa genética é uma cruza que fiz em algumas flores da Franco Lemon Cheese da Green House Seed.
Utilizei o pólen da minha primeira planta que era um macho. Foi um processo a longo prazo. Coletei e armazenei o pólen por um ano e só depois de uns 4 ou 5 ciclos, polinizei a Franco Lemon Cheese.
Todo esse processo levou em média 2 anos, e não foi nada planejado. Por aqui trabalhamos com o que temos e quando temos.
A germinação foi feita no copo com água e água oxigenada volume 10.
Após a radícula aparecer (3 dias) foi direto para o substrato, posicionei bem a radícula no solo e esperei a casca da semente se quebrar. Essa parte não é um processo fácil para uma pessoa ansiosa que já não estava conseguindo germinar as últimas sementes disponíveis.
Mas quem diria, depois de tantos anos, uma cruza feita em casa de forma artesanal, viria a germinar…
Vamos acompanhar o crescimento dessa guerreira!
Likes
17
Share


@Crumbles
Follow
Topped all the ladies at day 22
Starting to really stretch so should slow them down and grow out the bottoms
Day 24 thinking I might retop these in a few days
Day 25 looks like I’ll have to top the mandarin punch again
Going to be tall girls
Day 26 starting to go for it going to get two mothers one og kush and other mandarin punch
Day 27 two of above pheno s are way ahead of there girlfriends 😊
New rhino filter coming tomorrow, ready for the sweet smell of ……
Day 28 well end of week 4 could put into flower but will grow on and get decent strong branches and maybe re top them 😊

Likes
73
Share


@PEAKYPLANTERS
Follow
Hello everyone ,
masters and beginners .....
my Dutch daughter has been able to satisfy me great!
autoflowering with maximum yields and rock-solid buds!
the smoke of her? sweet, tropical and beautiful powerful!
From true Dutch thoroughbred can give a lot of highs

Likes
36
Share


@TaterheadJohnson
Follow
7/7: Transplanted plant to final pot! Roots showed out of tray. Accidentally pulled a root off during transplant 😢.
After transplant I top feed/watered medium with a half gallon of treated water. I mixed 2ml of Rapid Start in 1 gallon water hub. Poured half in half gallon jug then poured half gallon over medium. Added 2 gallons of water into reservoir (1st white line) to promote root growth to bottom and to begin capillary reaction.
7/8: Bumped light intensity dimmer to 30%.
7/9: Left for Vacation.... Praying for my baby!🙏🏿 Going to be gone for 4 days. 😅
***** For this Grow******
“Day Air Temperature” will be the max temp of tent for the week.
“Substrate Temperature” will be the average temp of tent for the week.
“Night Air Temperature” will be the lowest temp of the tent for the week.