



Likes
22
Share


@UnorthadoxDude
Follow
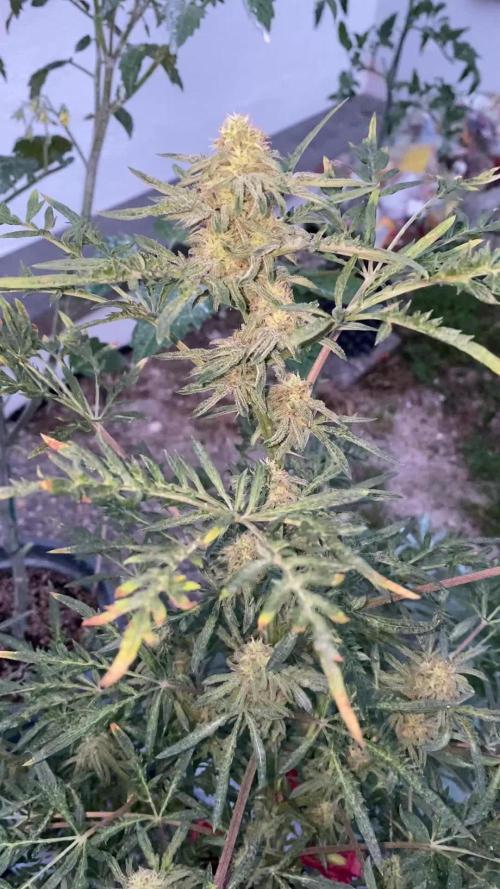
Hello everyone and welcome to week 9 and day 57 for these two Fast Buds Strawberry Bananana Autos.
These two have gone mad!
Beyonce is 81cm tall and well into flower as you can see.
Solange on the other hand was 118cm tall and had passed the light so I super cropped her two tallest colas a few days ago. She is now 98cm
Fertigated 10l 4 days ago and 7.5l today.
Day 60: Fertigated 10l
Day 62: The plants are now too big and/or heavy with bud to move out of the tent to photograph, and so with thanks to @growbigorgohome who suggested it, I have got a selfie stick to do in-tent photography. It's not great but it's better than nothing! Hopefully the videos will show plenty of details. Anyway I am starting to routine again now, the plants haven't gone more than 3 days without feeding, and I should be back to every other day again now. These two girls are really amazing. Beyonce is way ahead in terms of bud development, but Solange vegged longer and stretched more she was so massive I had to super-crop two colas! Anyway they are really motoring along now, I think Beyonce will be ready 2 weeks before Solange. Despite it is only day 62 we are rapidly approaching the end game here.

Likes
15
Share

@GoodTimesOrganics
Follow
Hi liebe Community and Welcome Back! 🌿💚
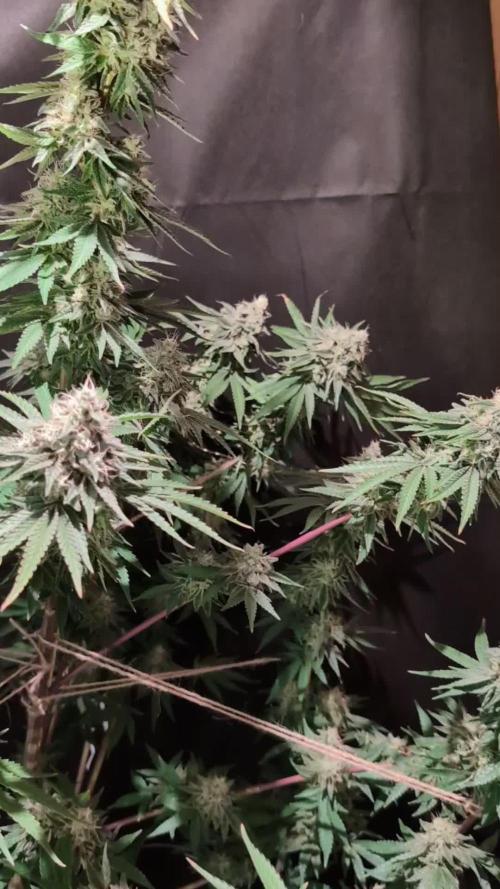
Willkommen zur siebten vergangenen Blütewoche! Blütetag 57
Insgesamt zeigt sich hier in diesem Grow eine stärkere Blütenausbildung, als bei der anderen Pflanze.
Auf jeden Fall zeigen sich Phenotypische unterschiede in der Gesamtstruktur.
Allmählich kommen wir auf die Zielgeraden. Sie zeigt eine richtig schöne Struktur und wir landen beim Ertrag sicherlich im XL Bereich.
Das Aroma hat bei dieser Pflanze einen stärkeren süsslichen Zitrustouch mit nun ausreifend fruchtigen Noten.
Die Umgebungsgegebenheiten sind aktuell gut:
—————
🌞 Temp: 26
🌚 Temp: 18°C bis 19°C
💨 RH: 56%
VPD: 1,10kPa
💡ppfd: 830 mpm
—————
Viele Grüße 👋
Likes
23
Share

@Prilyfe13
Follow
07/09/2026
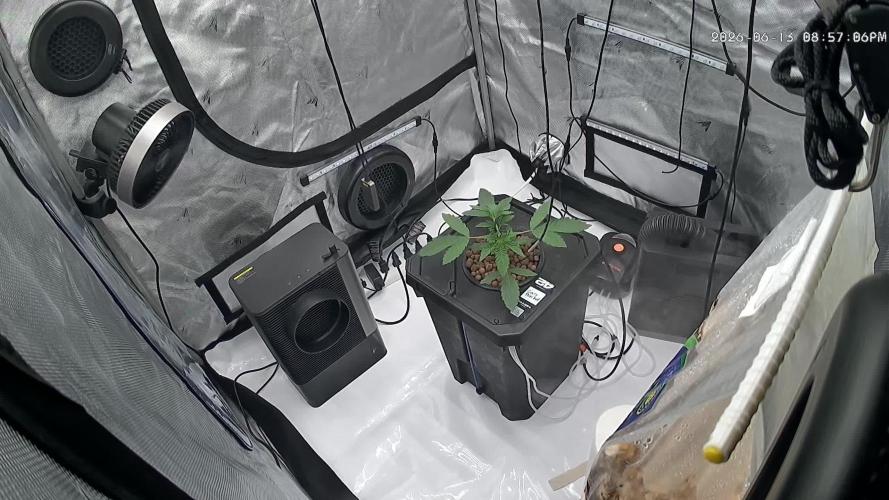
New week folks! This week is kinda busy. I have to either lift the light or drop the intensity. I personally would turn the light up to level 6. For the time being that is. I think I get to use a much higher intensity with the thingy I have. We'll see. It's a 500 watt light, so I have plenty light to work with.
She is growing quite rapidly at least the leVes are all getting bigger.
Readings:
pH: 6.31
EC: 2.21
TDS: 1.57
Evening Readings:
Temp: 68°
I think I'm gonna change the water out instead of mixing a new gallon. I really don't want to though. It's wasting my poor nutrients.
DLI: 42 mol
PPFD: 631 PPFD
09/10/2026
The goal this week is clearing out the big leaves and cover leaves.
Readings:
pH: 6.3 (very steady) but it needs to be closer to 5.8 just don't know how.
EC: 2.18 cU? The thing changed on me.
TDS: 1.55 ppm?
Temp: 70.1° ice bottle added. I'd like to keep it below 70°, like 65° would be good.
Update: I have decided to defoliate my plant today. I've already removed a few branches that just won't reach through the canopy. I'm also taking all the big leaves off. The ones with purple stems seem to be a sign of readiness to me. That was quick. Lol there's a whole bunch. So I've got my work cut out for me.
07/11/2026
Readings:
pH: 6.26
EC: 2.27 ?
TDS: 2.28 ?
Temp: 68.2°
07/12/2026
Readings:
pH: 6.3
EC: 2.19 mS
TDS: 1.6 ppt?
Temp: 69.1° will drop a bit more. With the ice bottle, it'll cool down much faster. Granted it was 70° when I first opened the bucket.
I took some more foliage and a few lower sites and branches that weren't going to make it.
07/13/2026
Readings:
pH: 6.33
EC: 2.44
TDS: 1.74
Temp: 67.5°
Honestly I'm not sure how it changes, but I have people trying to explain. Lol. My meter reads in both ppm and cm. I'm still not seeing how the TDS is higher than the EC. I'm confused.
I've been topping her off with a half mix of nutes for now. Also I also increased the Hydroguard to 5 ml per gallon. I will get this brown stuff somehow.
Hopefully it will clear up before I flip to flower.
But there is so much root mass. I don't think it's getting all the bubbles. I have 3 air stones in there. It can't be oxygen related. Environmental is also out of the question. My system is pretty on point now. The water temp is fine as well. Just around 67°.
I feel like I'm missing something. I'll update if I remember.
07/14/2026
Readings:
pH:
EC:
TDS:
Temp:
She's about a half inch away from the net. She'll definitely be touching the net at some point today or grown over the net. That would be cool. I have a few promising tops. They are a little low, but I'm hoping for the next week and a half to really get some growth. And the trellis is gonna be used hardcore. I'm gonna weave this fucker like a bad sweater maybe. LMAO.
She also looks great! The leaves are still kinda canoeing. Is the light actually that bright?! I need a person here to look at it and say yep or nope. Lol anyway, it looks more like they are opening up them old wrinkles. That has to be it. There's no way a photoperiod takes less than a DLI of 31.2 mol at this age. Nope.
A+ environment. AI is coming through! 76° and 60% humidity.
Readings: After a 1 gallon top off.
pH: 6.26
EC: 2.69
TDS: 1.92
Temp: 67.8°
I think I'm gonna do a plain water bucket with hydroguard for a couple days for the flowering period.
07/15/2026
Readings:
pH: 5.88
EC: 2.41 mS
TDS: 1.84
Temp: 67.5°
Light changes:
I added the light from the net distance.
DLI: 41.2 mol.
PAR: 621 ppfd
Distance:: 24"
07/16/2026
We have touchdown! More like kissed.. Not completely, but there's a few leaves that grew over the net along with a top or two. Still touchdown.
Ice bottle was replaced this morning. I also topped her off about 3/4 gallon. It brought the roots down a bit so they're fully under water. Just below the net pot. I know it should be 1" to 2" inches between the water and the net cup, but the roots are also important. Not to mention how fast she's taking the water down. She'll need another half gallon tomorrow morning. Maybe more.
When I changed the ice bottles out, the roots blocked the bottom of the bucket, so I had to put my ice bottle in the one spot. With roots under it. I might be able to move them. With a paint stick.
Lucky I have 3 air stones in the bucket. The only place it's not bubbling is by the access panel. The rest is a bubbly haven for dirty roots. The only thing is, the roots are officially too big for the bucket. Again. Sweeet. Now I just need a bigger bucket. Lol.
A quick look at the leaves. They look fantastic. Beautiful rich green. Spreading out the wrinkles to make her big and strong.
I had to pull some off as I went looking around at the plant. So far, I don't have any dead or dying leaves. So that's good.
Oh and she SMELLS.iem wow. She smells. Good aroma. Powerful too. And we haven't even hit flower yet. Oh no. Not sure how I'm gonna keep the smell locked in while I'm working on the plant. Lol. No bueno indeed.
Readings:
pH: 6.3
EC: 2.93
TDS: 2.08
Temp: 65.1°
Update:
So I took a decent amount of lowers off today. All the bud sites that will be larf. Still needs to be cleared out. I also took a few leaves off. Everything that was pointing inward. I still have more to go, but I'm gonna wait for next week to pull the rest off.
08/19/2926
I added a time lapse video today. It's a month long instead of the weekly I was considering. You know, for more "meat" as it were.
Likes
28
Share


@Master_weeda
Follow
Bonjour à tous les padawans et maîtres jedis
Pour la germination j'utilise la technique du sopalin
Pour faire germer vos graines dans du sopalin, vous aurez besoin :
Un Tupperware avec couvercle
Du Sopalin, ou autre quel papier de cuisine qui soit épais et qui retienne l’eau
Un verre d’eau
Si c’est l’hiver, vous placerez le Tupperware près d’une Box ou d’un Modem pour donner un peu de chaleur
Étapes de la germination:
faire germer vos graines de cannabis dans du sopalin
La première chose à faire est de tapisser le fond du Tupperware avec du sopalin, 2-3 feuilles suffiront. Si vous ne mettez qu’une feuille, elle captera peu d’eau et pourra sécher, vous mettrez donc plus de feuilles que pas assez.
Une fois les feuilles placées, versez l’eau du verre dessus, mais pas trop, juste de quoi imbiber toute la surface couverte par les feuilles. Vous aurez ainsi l’eau suffisante pour faire germer les graines sans avoir besoin d’essorer la feuille de papier.
Une fois les feuilles humidifiées, mettez vos graines par-dessus, et recouvrez le tout avec une autre couche de quelques serviettes. Une fois en place, humidifiez cette nouvelle couche.
faire germer vos graines de cannabis dans du sopalin
Lorsque vous graines seront placées entre les 2 couvertures de feuilles, fermez le Tupperware hermétiquement pour que l’eau reste bien dedans et que l’ensemble ne sèche pas malgré la chaleur.
Si vous êtes en hiver lorsque vous mettrez vos graines à germer, ou que les températures sont inférieures à 20°C, vous placerez le Tupperware sur votre Box ou modem jusqu’à germination, mais toujours en évitant le contact avec la lumière. Si vous êtes dans une zone au climat tempéré ou chaud, vous n’aurez qu’à placer le récipient avec les graines à l’ombre dans une armoire ou une caisse de rangement. Toutes les 24h, vous devrez vérifier l’état d’avancement de la germination. Si quelques-unes sont sorties mais pas d’autres, prenez celles qui ont germé pour les planter, laissez les autres dans le Tupperware et vérifier de nouveau le lendemain.

Likes
54
Share


@MadeInGermany
Follow
Hey guys :-)
She is growing great and will be ready for the flowering tent in the coming days :-)
A few cuttings are taken beforehand.
Was poured 2 times with 1 l each.
I'm looking forward to the start of flowering :-)
have fun and stay healthy 🙏🏻
👇🏼👇🏼👇🏼👇🏼👇🏼👇🏼👇🏼👇🏼👇🏼👇🏼👇🏼👇🏼
‘Powered by GreenHouse Feeding’
Copy the link for 10% off all Nutrients 👇🏼
https://shop.greenhousefeeding.com/affiliate/MadeInGermany_PassionGrower
👇🏼👇🏼👇🏼👇🏼👇🏼👇🏼👇🏼👇🏼👇🏼👇🏼👇🏼👇🏼
You can buy this strain at :
https://www.amsterdamgenetics.com/product/choco-cheesecake/
👇🏼👇🏼👇🏼
Use the coupon code: madeingermany
for 10% on all Amsterdam Genetics seeds
Water 💧 💧💧
Osmosis water mixed with Cal/Mag (24 hours stale that the chlorine evaporates) to 290 ppm and Ph with Ph- to 5.8 - 6.4
MadeInGermany

Likes
9
Share


@Car1bGrow
Follow
This week is going really good, started seeing white hairs appear for it’s safe to say that it is beginning to flower, no scent as yet but will update as time goes on. Was eyeballing the height before but now I actually did it and it’s close or even passed 3ft now....this plant is growing amazingly.


Likes
5
Share


Likes
25
Share


@Herbz_Unkraut
Follow
i accidently bought some unbuffered coco and mixed it with my ussual earth, had major calmag problems in mid-flower but i´m still pleased with the results...also had a little trouble with mold at the end due to bad weather and high humidity in the final weeks of the grow, had to remove a few buds and harvest early @ day 55 of flower....but there's still alot of great looking buds left for me to enjoy and all look mostly done...
Just harvested and hung them upside down, currently drying them at constant 19.5-20.5°C and 50-60% RH..will update as soon as they are dry

Likes
9
Share


@Tobecobe
Follow
15/10 - Bit of defoliation to open her up and remove some stacked leaves. Didnt take a whole lot but its made a decent difference. I think that'll be the last cut before harvest bar a few which have been hit by the cal lock. Next grow I need to figure out how to access the back of the tent, because at the moment its impossible without fucking my back up and craning my neck. Got would I could back there but could def be better. Topped up with plain water as shes drank 10l over the last 2 days. Not seeing any more rust spots forming so hopefully the cal lockout is fixed. Shes starting to smell quite strong with notes of citrus and shes sticky as hell.
17/10 - EC plummeting again, 10l drank over 2 days. Topped up with water and 3ml CalMag, 5ml Grow, 10ml Bloom added.
18/10 - PH has remained stable overnight after the top up. I ended up doing quite a bit of defoliation today, again opening her up and removing problematic or shaded leaves. Always amazes me how much plant matter can be removed and yet she still ends up looking super dense.
20/10 - Full res change. 5ml CalMag 10ml Micro 5Ml Grow 45Ml Bloom. 1.15EC 6.1PH.
21/10 - PH dropping much more slowly now, so in a good spot. Continuing to take the odd leaf here and there to help light penetrate and get them off bud sites.
Likes
3
Share
@Sr_mezo
Follow
Video y fotos del día 47, se nota que los cogollos están engordando.
Me preocupa un poco el calor que ronda los 30°C todo el día y la humedad algo alta, el problema es que el deshumidificador me sube mucho la temperatura, veremos como avanza y si puedo controlarlo.
De todas formas las plantas están bien aunque algunas hojas bajas de la cheese se van secando y amarilleando, las voy quitando a medida que se debilitan.

Likes
22
Share

@CannaArchive
Follow
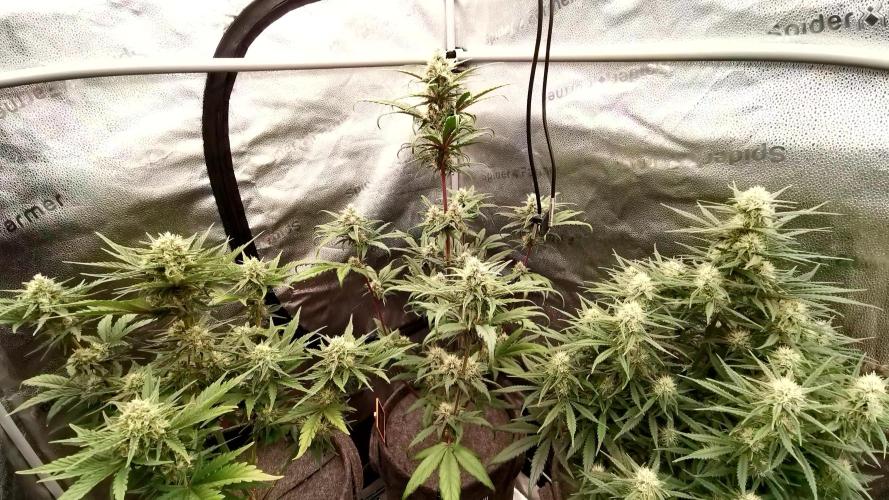
Week 9 showed clear progression into the final ripening stage.
Bud size didn’t change much visually, but trichome development advanced noticeably. 🌸
Most trichomes turned milky, giving the plants a slightly white, frosty appearance.
Light intensity remained stable at ~1100 PPFD.
Environment stayed consistent at ~26°C and ~50–52% RH.
Both plants were watered every 2–3 days with RO water + CalMag, based on pot weight. 💧
During this week, Apricot #2 developed rust-colored / yellow spots on smaller leaves near the buds, which led to a precautionary flush. Both plants were flushed once thoroughly with water + CalMag at around pH 6.5 to reset the medium. After flushing, the issue did not worsen.
Phenotype observations:
Apricot #1 continues to look healthy and stable, with a compact structure and consistent bud development.
Apricot #2 shows the earlier leaf spotting but remains stable overall. Buds continue to swell and maintain good density.
Aroma intensified further this week.
The Apricots are now producing a strong sweet, fruity, tropical smell, becoming very noticeable in the tent. 🙂
The Amnesia Skittlez in the same environment appears slightly behind in development, with smaller buds and less pronounced trichome production at this stage.😊


Likes
23
Share


@peterfly98
Follow
Day24: wedding cheesecake and Tropicana cookies are flowering while the gorilla cookies is a little behind. I turned the exhaust system on to lower the humidity and manage the smell
Day26: I added bloom nutes and increased the light power to 75%. I also tied some branches down. Let’s see how they respond. So far they are going very well
Day27: good response to lst, a little healthier now as well


Likes
28
Share

@MadeInGermany
Follow
Info:
Unfortunately, I had to find out that my account is used for fake pages in social media.
I am only active here on growdiaries.
I am not on facebook instagram twitter etc All accounts except this one are fake.
Have fun with the update.
Flowering day 54
since time change
to 12/12.
Hey everyone ☺️.
We are slowly getting closer to the harvest 😍.
You can see that the lady sucks all her energy out of the leaves and passes it on to the flowers.
The buds smell very tasty 😍.
It should be ready to harvest in the next 17 - 25 days.
But of course we will be observing this closely with the microscope from next week.
Otherwise the tent was cleaned as usual and the humidifier refilled.
I wish you a lot of fun with the update. Stay healthy and let it grow 🙏🏻
You can buy this Strain at :
https://www.royalqueenseeds.de/feminisierte-hanfsamen/220-pineapple-kush.html
Type:
Pineapple Kush
☝️🏼
Genetics:
Pineapple x O.G. Kush
👍
Vega lamp:
2 x Todogrow Led
Quantum Board 100 W
💡
Bloom Lamp :
2 x Todogrow Led
Cxb 3590 COB 3500 K 205W
💡💡☝️🏼
Soil :
Canna Coco Professional +
☝️🏼
Fertilizer:
GHSC Powder Feeding Bio
☝️🏼🌱
Water:
Osmosis water mixed with normal water (24 hours stale that the chlorine evaporates) to 0.2 EC. Add Cal / Mag to 0.4 Ec Ph with Organic Ph - to 5.5 - 5.8 .
Likes
34
Share


@FreshCoastOrganics
Follow
Will update later on when I get the time. I have some valuable info on the powdered malted barley and other amendments.
Likes
2
Share


@Greenbean420
Follow
Decent smoke, one of the plants tasted and smoked better than the other.