


Likes
Comments
Share

@Alvareas
Follow
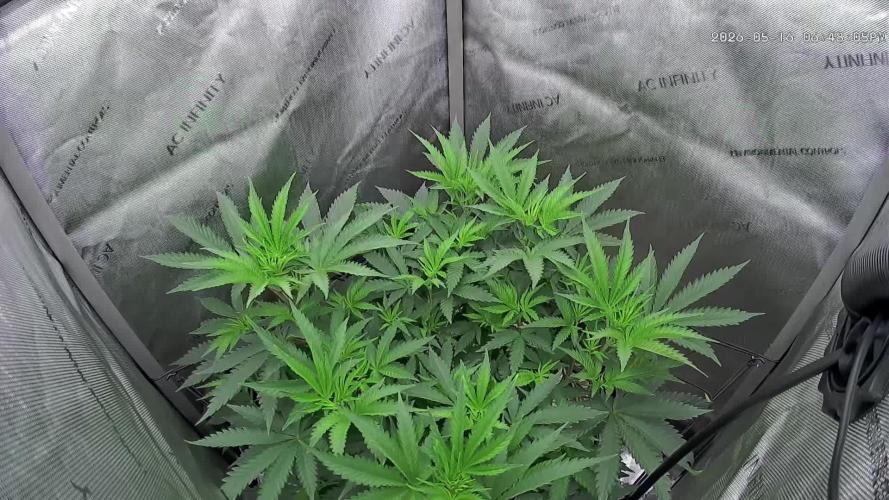
Zu Beginn der Woche wurde auf Blüte umgestellt.
Mit dem bisherigen Wuchs bin ich sehr zufrieden.
Die Pflanze zeigt ein gleichmäßiges Blätterdach, wächst buschig und hat viele Nebentriebe gebildet, die nun Licht bekommen.
Bisher habe ich nur wenige Blätter entfernt.
Gelegentlich habe ich oben einzelne nach innen wachsende Blätter entfernt, wenn sie darunterliegende Triebe verdeckten.
Da die Luftfeuchtigkeit bisher unproblematisch ist und sich keine Staunässe zwischen den Blättern bildet, sehe ich derzeit keinen Grund, mehr Blattmasse zu entfernen.
Eine stärkere Entlaubung plane ich für den 21. Blütetag, wenn ich auch Lolli Poppen werde.
Der Stretch hält sich bislang in Grenzen.
Das hatte ich allerdings auch erwartet.
Bis zum Ende der Woche hat sich die Pflanze um 10 cm gestreckt und die Zeltfläche gut ausgefüllt.
Zur Umstellung auf die Blüte habe ich die LED auf 40 % erhöht, um die entfallenen sechs Lichtstunden auszugleichen.
Der Luftbefeuchter ist ausgeschaltet, und den Controller habe ich auf Temperatur- und Luftfeuchtigkeitsregelung umgestellt.
In der Lichtphase wird nur die Temperatur berücksichtigt, in der Dunkelphase dagegen nur die Luftfeuchtigkeit.
Die Zieltemperatur liegt bei 25 °C, die Zielluftfeuchtigkeit bei 50 %.
Die Abluft ist dabei auf mindestens 10 % und höchstens 30 % eingestellt.
Da beide Werte stark von den Bedingungen im Grow Room abhängen, läuft die Abluft meist auf 30 %.
Aktiv von außen gegensteuern würde ich nur, wenn die Luftfeuchtigkeit im Grow Room so hoch steigt, dass sie sich im Zelt nicht mehr unter 60 % halten lässt.
In diesem Fall würde im Grow Room ein Luftentfeuchter zum Einsatz kommen, vor dem eine aktive Zuluft zum Zelt positioniert wäre.
Die Parameter in Woche 7:
Controller Einstellung Tag: Temperatur und Luftfeuchtigkeit 24C°-26C°, 45% - 55%
Controller Einstellung Nacht: Temperatur und Luftfeuchtigkeit 24C°-26C°, 45% - 55%
Durchschnittliche Tagestemperatur: 26,9C°
Durchschnittliche Nachttemperatur: 23C°
Durchschnittliche Luftfeuchtigkeit Tag: 51%
Durchschnittliche Luftfeuchtigkeit Nacht: 54,3%
Durchschnittlicher VPD Tag: 1,3
Durchschnittlicher VPD Nacht: 1
Durchschnittliche Bodenfeuchtigkeit in Mbar: 94
LED Leistung: 40% = 120 Watt
Beleuchtungsdauer: 12 Stunden
Umluft: Stufe 2 oszillierend

Likes
57
Share


@Roberts
Follow
Pablo Escobar is coming to a end. She has some nice frosty colas on her. She has a fruity smell with a pine undertone. Her feed was pretty strong and it probably effected my final yield. She will still provide several ounces once she is processed. I have not has a good sativa in some time. She smells very good. Thank you Spider Farmer, and Divine Seeds. 🤜🏻🤛🏻🌱❄️
Thank you grow diaries community for the 👇likes👇, follows, comments, and subscriptions on my YouTube channel👇.
Thank you Happy Growing 🌱🌱🌱
https://youtube.com/channel/UCAhN7yRzWLpcaRHhMIQ7X4g.

Processing
Likes
37
Share


Likes
19
Share

@GoodTimesOrganics
Follow
Welcome Back!💚
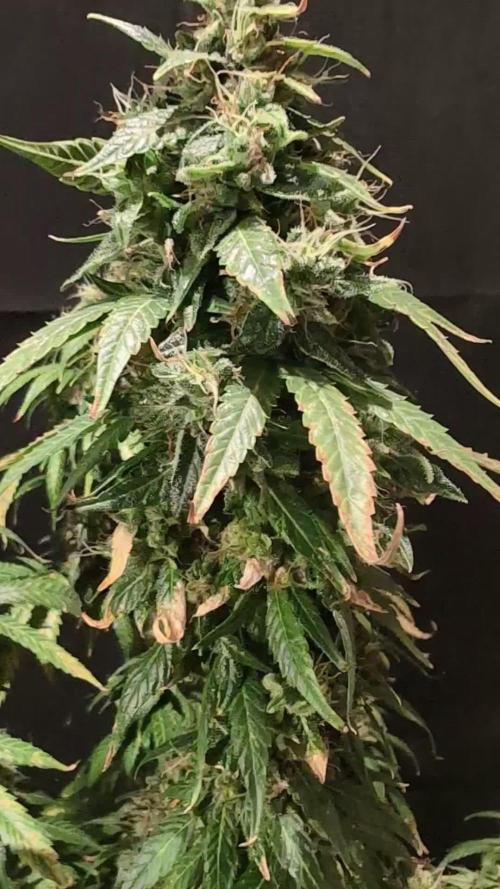
Nach der neunten Blütewoche bildet die Pflanze weiter Blütenkelche aus und auch trichome werden immer mehr ersichtlich.
Daher war es Mal Zeit diese unter die Lupe zu nehmen.
Sie sind fast alle noch Durchsichtig, daher haut das mit der 11 Wöchigen Blütezeit vermutlich gut hin.
Ich werde nächste Woche den nächsten Trichomcheck machen, da die Pflanze einfach noch Zeit benötigt.
Die Pflanze entwickelt einen eher würzigen und von Kräuternoten geprägten Geruch.
Die Pflanze ist von der Beschreibung her nicht darauf getrimmt viele Trichome auszubilden, da dass Hauptaugenmerk ja auf die THCV Produktion gelegt wurde.
Die Umgebungsgegebenheiten sind trocken und warm
—————
🌞 Temp: 27°C
🌚 Temp: 18°C bis 19°C
💨 RH: 56%
VPD: 1,42 kPa
😎 PPFd: 830 mqm
—————
Viele Grüße 👋

Likes
8
Share


@Silverback_Guerilla
Follow
4/1:
Fed today after topdressing with cavern culture and rock phosphate. Preloading stuff they'll need soon.
4/3:
Flipped to 12/12 today and started UVB stressing with 2 x 30-minute sessions a day.
4/4:
Fed today and foliar fed with Axiom harpin proteins and boom boom spray.
4/7:
Fed today..started adding a little Open Sesame and Signal to the mix along with sweet & sticky, One, silica, and calmag.

Likes
30
Share


@Grower_Of_Persia
Follow
at last we are in harvest week. im happy at all it was a good experience.
my dry and cure style is this:
4 days of hanging upside down to get water activity lower to around 0.6 in 50% humidity and 26 C temp (i know its a little high but we are in a hot summer right now and i cant get it lower even with air conditioner) and then after 4 days of drying i remove leaves and stalks, trim buds and move them to jar for the rest of their life :D . and in the first 4 days of curing i open the jar door and let hem get some fresh air in the jar for about 5 minutes and close the jar door again, after 4 days of curing like that buds are smokable but they will get better as they getting cured about 1 month.
buds are dense and frosty but very little in size!
i had some mistakes and problems with this grow so i admit i wasted them .
lesson from this grow :
grow autos far from fems and always give them 20 hours or more light per day to get good weight in little time.

Likes
6
Share


@Naujas
Follow
Hello :) this is my second growth in nature this year, the first one was drowned...... but I hope it won't happen again and I will try to do it with car flowers :) I will leave the little ones on the balcony for another week :) and then they will move to their permanent place :) so far the girls look quite good, knowing that it's only been a week:).
Likes
4
Share


@alexb420
Follow
flipped 11/27
got the feeding down, got the color back. buds starting to come in. smells are getting way stronger. hope this flower run goes good.


Likes
4
Share


@SuperGluedGrow
Follow
Got the guy separated and hopefully the other three are female so I can still flower two of them. Will be doing small pheno hunts with this strain in the future so ill be needing the seeds.
Likes
13
Share

@masterofsmeagol
Follow
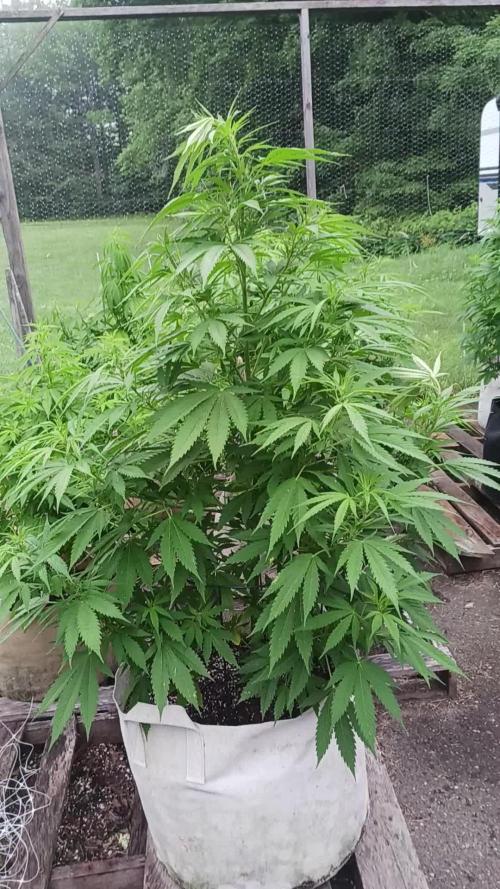
7/13 It's maine-ing out. Overcast and misting. I guess it rained last night but not much. Today is my watering day although I think they could've made it until tomorrow. These drastic temp changes makes it hard to get a STEADY routine in place. I watered everything in the 20's a gallon the 10's 1/2 gallon. The 10th planet in the front was still heavy so I didn't water it. I'll keep an eye on it. Temps are much milder. I noticed a few more septoria leaves on the 10th planet which I promptly defoliated. This pheno is flowering. I could've put this week as flowering as several plants have started. I also saw ONE leaf on my chem dog that had septoria on it. ONE f-ing leaf! I was planning on treating this early anyway so I mixed one gallon of plant doctor 3 tsp gallon/gallon which was the recommendation. I'll monitor this plant and continue treating it the next two weeks. I may do foliar too but the mixture is different. It's a systemic so I don't think that matters as much. Considering getting mulch to protect from spores on the soil. My plants look GORGEOUS. I Hate to use such a nice plant as a guennie pig but I'm not going to sit here and watch it progress. I'm lucky it's really not that bad and that it's on a reveg. There's so many leaves that I would be forced to prune anyway. I'm seeing two MAYBE three leaves a morning but I want to get this under control. Last year u let a plant with septoria go and it finished but went to extracts. I've got a pretty good feeling about this plant doctor. I've used it before with good results. Only time will tell though.🤞
EDIT: WENT OVER AT ABOUT 1PM. ITS 2 NOW AND BLUE SKIES AND SUNNY. IM SUPER GLAD I WATERED AND EVEN MORE SO THAT I APPLIED THE PLANT DOCTOR HOW I DID. THE GIRLS ALL LOOKED AMAZING. THE TENTH PLANET I TREATED WITH PLANT DOCTOR LOOKS THE BEST IVE EVER SEEN IT. I FOUND ON LEAVE DEEP ON THE INTERIOR WITJ A SMALL SPOT BUT ITS SOMETHING IM SURE I MISSED THIS MORNING. IF THIS WORKS THIS GOOD ILL BE APPLYING IT TO EVERYTHING EVEN IF ITS JUST PREVENTATIVE.
7/14 Rained last night andcwas still sprinkling when I went over. Amazingly the 10th planet that I treated with the plant doctorcmix had ZERO visible signs of septoria. I did find one leaf on Mt chem dog and two on my mk ultra with the big leaves. It could've been calcium deficiency but I really doubt it because I think I saw THAT as well. I'm going to wait a day or two and if there are still no negative results and the plant is still looking good I'm going to treat AT LEAST the two others that MAY be infected. It's a systemic and can be used proactively and supposably breaks down into p and k after stimulating immune response. I'll monitor a little longer but as it stands I think I'm going to treat the other two just in case. I also need to start feeding. I've watered a lot more than I normally do so obviously the soil won't last as long. This has been some tricky weather but I'm happy with how things are progressing. I probably should've changed this to the first week of flower as several plants are popping pistols everywhere.


Likes
22
Share


@Chubbs
Follow
What up grow fam. Week 3 up on these girls. At the moment they're a little upset with me. I went away for a few days so I over watered hoping they'd be alive when I return. They're still alive but sure upset and showing it. I did a defoliation taking the bigger fan leafs off to allow some more light to the lower branches. Also I don't usually put them under full power of my light until about week 5 but I did to see how they'd do and though they're stacking super tight, I think I probably did more harm then good. I'll baby them and see if they'll bounce back. All in all Happy Growing
Likes
294
Share


@StarLorr
Follow
Welcome to my Ðivine ØĠ Ķush diary.
In this diary:
Seeds: sponsored by Ðivine Șeeds
Media: Promix HP
Nutrients: Advanced Nutrients, Diablo Nutrients, Gaia Green Power Bloom.
Light and Weather: Şun☀️and Mother Earth.🌎
___________________________
Feeding:
Tue 10Sep: 4L water not pH'd
Wed 11Sep: 4L water not pH'd
Thu 12Sep: 4L nutrients pH'd 6.5
Fri 13Sep: 4L water not pH'd
Sat 14Sep: 9L water not pH'd
Sun 15Sep: 8L water not pH'd
Mon 16Sep: 8L water not pH'd
___________________________
*please note that watering are from the top.....since i smashed the saucers with the weed wacker*🤦🏻♂️
______________________________
Amazing weather throughout the week!☀️Sunny 28°C everyday😎
______________________________
Buds are starting to get solid and still puffing up and pistils are mostly white still.
Not quite there yet but almost😉
______________________________
Thanks for stopping by, likes and comments are appreciated!👊🏻😎
Keep on growin!
Keep on tokin!!!
😙💨💨💨💨💨
Likes
30
Share

@All_our_small_plants
Follow
10000 ml jeden 3 Tag in der zweiundzwanzigsten Woche
pH-Wert: 6,2
EC-Wert: 1,1 mS/cm
Temperatur: 24ºC
Luftfeuchtigkeit: 60%
Schädlingsbekämpfung: /
Düngemittel: Sie bekommen ab jetzt Brenneseljauche und Schachtelhalmjauche da sie im Outdoor Bereich ist.
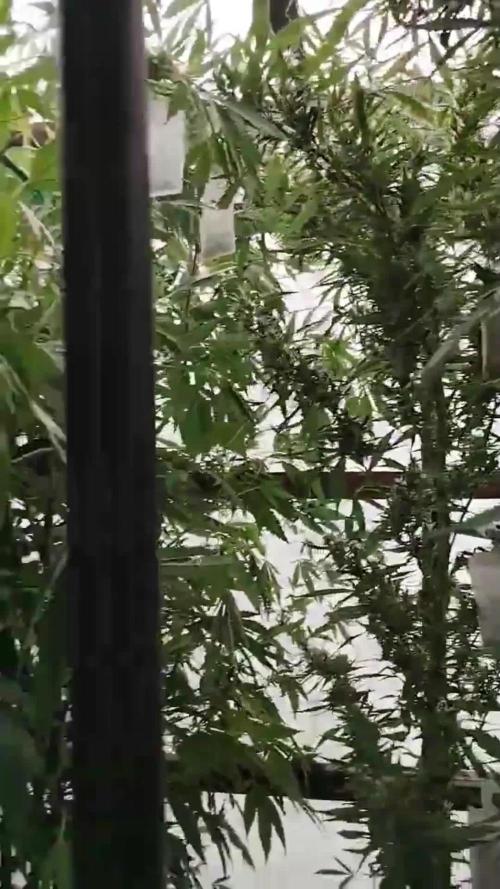
Besonderheiten: Wir mussten sie jetzt toppen da sie zu hoch wurde und das Dach berührte, es besteht die Gefahr von Schimmel oder das die Blätter Schlächter wachsen.
-Tag 152 Heute haben wir gemerkt das sie in die Blüte gewechselt hat, aber es sieht auch nicht gut aus, wenn sie jetzt noch 6 bis 8 Wochen braucht und das Wetter nicht besser wird, denken wir das auch sie Probleme mit dem Schimmel bekommt. Wir haben ihr nochmals die Spitzen geschnitten damit sie nicht oben am Dach anstehen, und somit das Risiko von Feuchte reduzieren.
Likes
29
Share


@Drgreenthumb627
Follow
seems to really want to turn into a bush so i’m just going to let it do its thing!
Likes
39
Share

@Roberts
Follow
Bubba OG Gum is doing the best in the run. She will be ready for her first lst in a few days. Everything is looking really good with this. Thank you Ganja Farmer, Spider Farmer, and Athena. 🤜🏻🤛🏻🌱🌱🌱
Thank you grow diaries community for the likes, follows, comments, and subscriptions on my YouTube channel. I greatly appreciate all the support. 🌱🌱
🌱https://youtube.com/channel/UCAhN7yRzWLpcaRHhMIQ7X4g


Likes
143
Share


@PapaNugs
Follow
These girls are a pleasure to grow. On total auto pilot. Just water daily and pull dying leaves off the bottom of the girls. You get heavy tones of blueberry muffins when you open the tent.
Likes
56
Share


@MrGrow
Follow
10.11.2022
130 giorni dopo la germinazione
70 giorni di fioritura (10 settimane intere)
è stato un piacere poter coltivare questa genetica! I geni della Green House Seeds hanno creato un capolavoro! Genetica all'altezza della sua fama, produttività elevata, profumo di limone e agrumi favoloso e unico! mai sentito un aroma del genere in nessuna genetica che ho potuto coltivare in questi anni.
Ragazzi provatela e non ve pentirete!!
Rapporto sul fumo e sul peso con foto dettagliate tra un paio di settimane


Likes
10
Share


@xXBorn2BreedXx
Follow
This week I will be introducing Fish Sh!t into my watering throughout the rest of the cycle along with Grow With Grease.
02/28 received a cup of nutes to hopefully help them bounce back from the couple of days of being under watered and any type of stress from the change of light setup on 02/25