


Likes
Comments
Share

@in_a_few_weeks
Follow
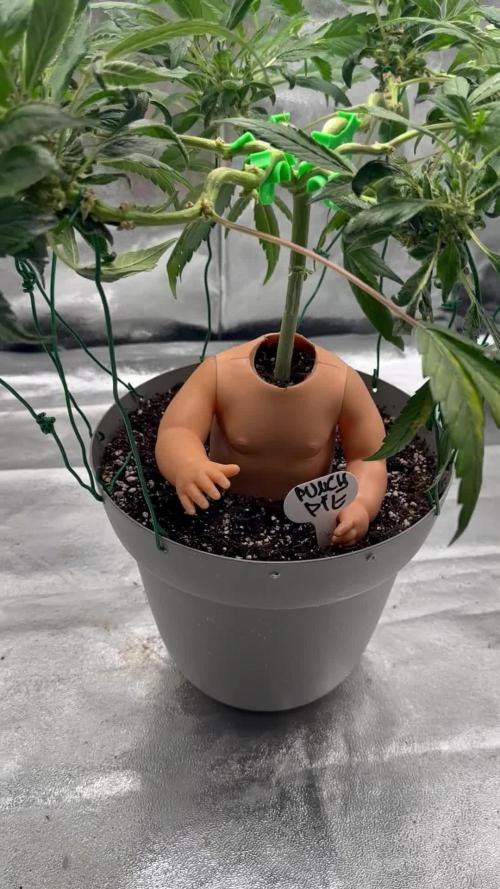
This will be hopefully an endless Grow Diarie. Clones and revegge from Punch Pie 🥊👶🏻👌🏼

Likes
8
Share

@Skynets_Growing
Follow
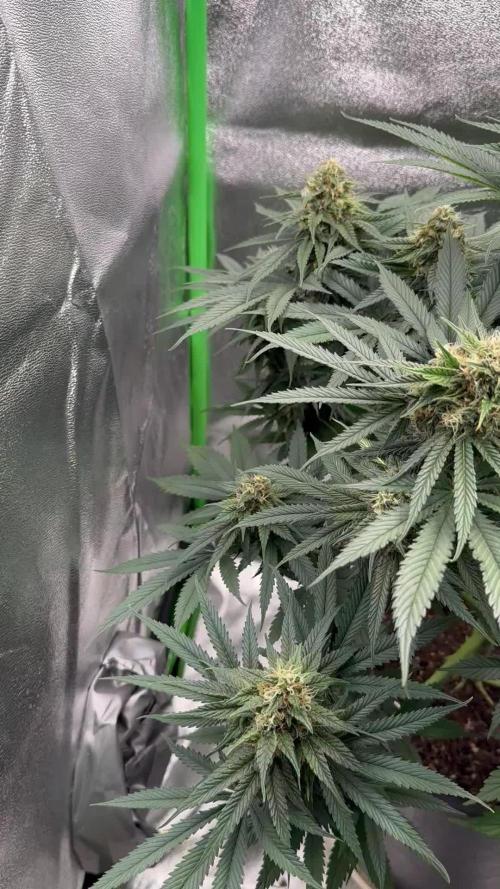
In der Woche vor Weihnachten und in Tessa Ihrer 11 Woche zeigt Sie mir wie perfekt Sie als Triploid unter meiner Pflege ist. Sie besticht durch solch eine„mathematischen“ Schönheit das man Ihr, Ihr eines leicht angeschlagenes Blatt welches das Einzige ist, schon fast eine Perfektion Bescheinigen möchte. Morgen ist Weihnachten 🎅🏻 und ich wünsche mir, das Sie so bleibt 😅🤗👀.
Likes
18
Share


@djghost
Follow
So alles schön getrocknet ergebniss auf der wage ist ok aber nicht das beste aber die qualität ist 1a 2 von 3 phenos waren rot 1 ganz normal grün und schmeckt eher nach Skunk die anderen 2 sehr fruchtig halt wie beschrieben.
1g pro 1 watt trocken gewicht ......

Likes
9
Share


@Mighty_Monaco
Follow
---------------------------------
📅 WEEK 3
---------------------------------
💧 22.04.2024 - new pots (6L)
💧 30.04.2024 - watering* (300 ml/pot)
💧 04.05.2024 - watering* (500 ml/pot)
*(plain tab water)
---------------------------------
💡 light is 40cm+ away, dimmed to 50%
---------------------------------
📰 NOTES
All three went to new pots (6 Liter) at monday 22.04.24.
This week later are doing way better!
The soil (All-Mix) was prepared and watered well - so the plants we're not watered for a week - but looking much better now and start growing compared to the weeks before.
Number three looks strange, first leaves almost died. Maybe mutating? But i"ll giver here a chance, since there ist still space in the box
---------------------------------
from munich with 💚
---------------------------------
Likes
2
Share


@KannaGrowing
Follow
Ya estamos en plena floración y con las luminarias a max potencia... Evidentemente el aire acondicionado también está trabajando durante la fase de encendido.
Flowa-Bloom es la estrella de los nutrientes a incorporar, pero todos son importantes... Así que sigo la tabla de fertilización de JUJU Royal al pie de la letra.
Eso si, primero humedezco bien el sustrato con agua, para aprovechar bien la solución con los nutrientes y que no filtre por las macetas textiles.
Riego cada cuatro días.

Likes
12
Share


@Piablo
Follow
Day 7-9:
Had a good environment overall, although the light was probably much too high. I didn't realise until quite late that it should have been 60cm above the seedling, and I had it around 120cm at first, and then 80cm. As a result the stem is a bit stringy.
Day 9:
I lowered the light to 60cm above the plant, and it won't go any lower. the recommended for this light is 30cm above the canopy, according to this very useful article: https://www.growweedeasy.com/how-far-grow-lights, but it's still in seedling stage and I'm guessing the plant will grow up a bit more, and I can always lower a little bit more. Also it's pretty damn hot, so I don't want to overdo it on the lights.
I've been keeping the water consistent and just topped up a little on recommended nutrients (more grow, a little micro, adding a little bloom as it comes closer to flowering). The reason for this is because I want to maintain the consistency of environment and monitor the plant for any signs of unwellness. Because Sativas are sensitive to nutrient burn, I'm being conservative in this respect.
The temperature with the light lowered is a steady 26 C, and I'm maintaining the humidity at around 70%. This is pretty good for this strain, as a sativa it likes higher temps and humidity. The water pH is around 5.9, also desirable.
I've also been wondering if the plant is getting enough CO2. Is it necessary to buy a measurement device and some CO2 bags?
Overall the plant seems very happy and is looking healthy.
Day 10:
cleaned the inside, added more grow, added more clay pellets since she looks a bit thin and stalky and needs extra support, and there were not many pellets present. Light distance is currently around 60cm. Though it won't go any lower with the straps, I will look at lowering it more with some extra rope as the ideal height will eventually be 30cm for this 250W HPS light. Added more Ph buffer yesterday evening and we're currently sitting around 5.7 ph. I was aiming for 5.8 but this is still acceptable. Temperature is around 25 - 26 C, humidity is around 70%, though I will begin lowering this as she grows. I will probably replace the water sometime this week. Upon further investigation I realised that my water levels were too high, and were possibly suffocating the stem. I reduced water levels by a few cm since I had previously been topping up without realising possible damage.
I feel like today is the day that this seedling is finally becoming a plant. She has grown some long roots already.
Day 11:
I further lowered the light to around 40cm using some extra string. It's not super ideal, but for now it's ok. The plant was falling over it's own weight so I added some extra pellets around it for support and it seems to work. I'm hoping she won't stretch as much now that the light is lowered. The inside fan is still on and on full power to build up extra stem strength and keep temperature down. I'm attempting to keep humidity around 60%, a little lower than before. The temperature is significantly higher with the light lowered, easily maintained by periodically opening the door and leaving in cool air from outside which runs just past the intake fan. I'm slightly concerned about the Monstera Deliciosa plant which is sitting just opposite and above the intake fan. Would this have any effects, positive or negative, on the grow? Google is coming back blank on this.

Likes
64
Share


@Huggomadd
Follow
🍨🌿🍦🍨🌿🍦🍨🌿🍦🍨🌿🍦🍨🌿🍦🍨
This girl put out some real amazing hues towards the end. Has a very pleasant aroma as well. She's on her last week in under light. I'll be harvesting this Beasty beauty next week.
Gave Gelato a few good flushes over the last 10-12 days of plain RO, PH 6.5
With her initial flush done with a Flawless Finish soak.
🍨🍨🍦🍨🍨🍦🍨🍨🍦🍨🍨🍦🍨🍨🍦🍨🍨
** Had some issues uploading her Trichome video. Eventually got it to post. Yay!
Because we do 💚 them milky trichome forests. All is done for your appreciation of course. My fellow growmies make it all worthwhile.
Eagerly waiting to indulge in this girl's fruity goodness. Good things come to those who wait patiently.
🍼💎🥛🍼💎🥛🍼💎🥛🍼💎🥛🍼💎🥛🍼
Until Gelato's harvest. Stay frosty 🥂

Processing
Likes
6
Share


@BestbudsPT
Follow
As you can see differenfe between mediums is huge..have to improve my solo grow bcs i think i might be doing something wrong..any tips??

Likes
17
Share


@soloczek
Follow
They look and smell amazing, think the RS11 will also become more purple like the cherry.
Cherry MAC muffin gets pure water (ph6,1) since week 7 of flower

Likes
11
Share


@BrigadeDesTerps
Follow
28/09/24 mise en pot des graines germés, elles ont toutes pris un beau 100% de réussite en pleine terre!
Elles sont tranquillement dans la box à semis que j’ai construit, il me reste quelques travaux mais faut que j’attende ma perceuse pour faire les trou d’aération pour l’air extérieur et pour la ventilation que je vais relier à l’autre tente, j’aurais une ventilation pour les deux box! Faut je fasse la fixation de la lampe plus le passe de câble, terminer l’isolation lumineuse et elle sera complètement terminé! Le semis vont rester environ 3/5semaine le temps que la récolte soit termine


Likes
32
Share


@donnob
Follow
These girls are still bulking up but the trichs are still not fully cloudy, I'll give them another week or so. They are becoming heavy now and the branches are starting to lean so I might have to add some support soon
Likes
57
Share


@TheBudWhisperer
Follow
Week 8 of flower is in the books and this show is quickly coming to an end. I said last week we had about 7-10 days and I was spot on at the 10 day mark. I was only wrong about the order. The cheese is ready to chop before the rest and the gorilla cookies, cherry Bomb and lemon haze will follow in due course. The cheese is a beast and it’ll take a little time to get it all run through the bowl trimmer. At least the big one goes first. Her tallest colas have foxtailed like mar, despite the late supercrop. You can tell where the sweet spot for the light is at about 10” distance from the canopy. Any closer than that and the tails begin to show prominently. It’s a good example of just how close you can get to these fixtures with a little bit of prior experience. It’s been noted for the next run😎👍😎. The res. is on an h2o2 only flush for the remainder until the rest are ready to come down. Not a moment too soon either - the pollen chucking project has stalled out waiting for these girls to finish and now that we’ll have a little extra room, we can start running our cuts in the aerocloner🤟. Not long at all now folks. Thanks for tagging along through all this. Learned a bunch about this system and we’re back to hardware mode to make some serious improvements for the next run🤙😎. I love hardware mode😉.
Background/Repetitive Nonsense
The strain line up on this grow is look’n quite saucy 😈. We’ve got 2 FB strains this time around - Gorilla Cookies (seems we always have some GSC cross in the works). Mainly because the colours look stellar and remind me of a sugar breathe we did last year that was 🔥. The other FB is their original Cheese strain... because we already smoked all our cheese... and we really like our cheese...😉. Emerald triangle was kind enough to include a freebie of Lemon Haze. Wasn’t really big on the list but we haven’t done a haze strain to write home about yet so worth a go👍. The last is a Cherry auto from Bomb seeds that we’ve been trying to get to for months. Let’s just hope that she’s not a dud like the last bean.
The new digs for this run are courtesy MarsHydro👊. Their 2x4 single grow tent, paired with a shiny new 240w QB courtesy ViparSpectra.
These folks were kind enough to discuss a collaboration and as a result, here we are to test out the gear with an inaugural run of autos. Each week, we’ll try to expand on some of the benefits of each, as well as any limiting factors or considerations that need attention when pondering purchase.
Already I can say that both are high quality products in terms of overall craftsmanship.
MarsHydro 2x4 Grow Tent:
Excellent construction in terms of durability. Reinforced stitching on the zippers and corners ensures zero tearing. Conveniently placed screen vents and intake/exhaust ports. The ceiling exhaust port only exists on the right side. Perfect for me but not great if you’re running exhaust from the top on the left side (left side wall port makes up for this however). The aluminum frame is rigid enough to support the weight of the lights and accessories. Once you have some weight in the tent, she’s go’n nowhere and you can assemble and break it down in record time if moving or stashing the grow op.
Only limiting factors I’ve noticed is that temp. Control will be an issue for a tent. It just doesn’t have the same insulating ability as a wood cabinet or other permanent enclosed space. No worries, this is offset by a small desktop heater and keeps the environment exactly where desired. The other issue was a production problem - the ceiling vent was accidentally stitched into the corner seams on the assembly line. Again, no real issue - just pulled it out with no damage or fraying to the tent or port👍.
Website link here:
https://www.mars-hydro.com/grow-tent/buy-mars-hydro-grow-tent-24x48x70-2-x-4-cabinet-closet-grow-box-upgraded-diamond-1680d-mylar-for-sale
ViparSpectra 240w Quantum Board:
This thing is sleek and slick in terms of design. Closest comparable to it that I’ve seen would be spiderfarmers line of qbs. They feature the same top-o-the-line components and roughly similar spectrums. Where VS takes the advantage is in the convenience of the dimmer nob which is easily accessible and works great at 50% with no strobing👍. The heat sink is also larger which contributes to lower temps. That’s not a good thing in my case but beneficial for most folks.
I can already say that this will be a great fixture through all stages of growth. Where I know this light will excel will be in the veg. Stage for sure. Dimming function gives seedlings a much better chance of success with the ability to use lower lighting levels early on and the coverage area on a 240w is great. The average grower will find this panel suitable and fitting to their needs in a 2x4 grow space although I’d suggest 2 units if going any larger than that. The total output in this space equates to about 30w/sq.ft. Which is a decent amount of coverage based on power vs. Growprint. Ideal for veg. Certainly but, in flower - I tend to run closer to 50-60w/sq.ft to achieve higher yields. Again, similar fixtures have performed admirably in the past and while this wouldn’t be considered an “entry-level” fixture, I’d recommend that any grower new to the game not skimp on lighting and start with one of these. The price points are a great value for quality LED tech. These days, so there’s little reason to even consider a lesser fixture👍.
I have no detail on limiting factors for this light as yet but have heard that stock branded fixtures don’t necessarily incorporate enough red diodes. I’ve seen no issue myself but confess - I’m no lighting guru.
Website link:
https://www.viparspectra.com/collections/xs-series/products/xs-series-xs2000
***8% discount when using code: “ItBudWhisper”***
Happy to have you along for the ride if you made it this far through my opening rant!!😎🤟😎🤟😎


Likes
17
Share


@RakonGrow
Follow
**** HAARVEST ZOE ****
Nice Strain ,
My little Zoe really made all the mistakes you could possibly make. No matter when I give light or want water or fertilizer. It grows and grows and grows, the main thing is that there is light. It was one of my free seeds from Zamnesia. So far all seeds have germinated. I store my seeds in a dark, airtight container at 6°C. Tastes kind of sweet after curing.
Greenhouse Feeding is a really easy fertilizer to use. I used the BioEnhancer again and again. My little Zoe thanked me. The BioGrow was used as topdressing and is doing its job. The BioBloom also does its job at the right time.
And that's really great and easy if you don't have an autoflower. Of course there is a corresponding product. But I was happy to get anything here at all. Legalization has wiped out the market. But for next time I have an appropriate soluble fertilizer for fast-flowering plants. It doesn't work for 8 weeks :))
I use a Sanlight Evo 3-60 1.5 with Bluetooth dimmer. There's nothing to complain about there. Set daily cycle via app. Helpful if the weather or environment is so bad that you have to regulate the light intensity.
33g after 5 days dry . 24.5 °C to 22°C with 50%-60% .
curing in a vaccum box at 18°C .
It looks like I'm drying too long. // It tastes a bit crunchy.
Day 79:
trim , slow vacuum box to cure 22°C and 61%rH .
Day 76:
videostuff: been drying for 4 days (res 640x480) ( optical zoom x200 - x250 )
Day 72:
DLI usage total this Plant : 2236.6 DLI in 70 Days .
wet trimmed, cut off, hung upside down. see you after 14 days
Day 71:
preparing for harvest . 24h long night session .
DLI : 0
Day 70:
- Sanlight DaylightCycle
- + ON 200PPFD (00:00) - 800PPFD (03:30) - 800PPFD (16:30) - 200PPFD (18:00) OFF
video and photo tryouts with the digimicro mobil x300 optical zoom , mostly freehand
Day 69:
- Sanlight DaylightCycle
- + ON 200PPFD (00:00) - 1000PPFD (03:30) - 1000PPFD (14:30) - 200PPFD (18:00) OFF
incredibly hot and rain. lost some terpene :)) Well, summer is coming,
Day 68:
- Sanlight DaylightCycle
- + ON 200PPFD (00:00) - 600PPFD (00:30) - 800PPFD (03:30) - 800PPFD (14:30) - 600PPFD (17:30) - 200PPFD (18:00) OFF
- Added 1L bottle of water
It's hot, hot, hot, Zoe would like more water.
changed daylight cycle so it match the weather problems. tent is open until my real night comes.
103 flowers (including popcorn) counted, due to an accident about 15 flowers are missing.
Day 67:
- Sanlight DaylightCycle
- + ON 200PPFD (00:00) - 600PPFD (00:30) - 900PPFD (03:30) - 900PPFD (14:30) - 600PPFD (17:30) - 200PPFD (18:00) OFF
- watering bottle water 1.75L
weather to hot , changed daylight start time and daylight cycle so it match the weather problems.
I'm lucky, buds are still growing :)))
Day 66 (we are on the road with maximum sanlight )
- analyse some trichome .
- make some Zoom Pics and Video stuff .
- Sanlight DaylightCycle :
- + ON 200PPFD (00:00) - 1000PPFD (00:30) - 1000PPFD (13:30) - 800PPFD (17:30) - 200PPFD (18:00) OFF
- DLI will stress alot ...
Anyway, it's too hot in my room... I open the tent and now everything is fine with the temperatures and I increase the Sanlight to 100% for the first time. May Zoe love it or leave it :)) We'll see what happens
Day 65 :
Sanlight DaylightCycle : ON 200PPFD (00:00) - 800PPFD (00:30) - 850PPFD (13:30) - 800PPFD (17:30) - 200PPFD (18:00) OFF
It will soon be ready for harvest.

Likes
4
Share


@zanie
Follow
Its been about 5 days I believe? These started to peak this morning, just barely. Finally emerged! So excited to run beleaf's genx. Wish me lux


Likes
60
Share


@m0use
Follow
This week was good, Did the transplant from 7.5L/2Gal to 28L/7Gal, Stared to do some LST but the main stem broke on two "blue and Red" of the three plants. Kinda sucks but a bit to aggressive, on the third plant "yellow" I also used LST just not as strong and got the shape and placement I was looking for. Will have to wait for the others to heal and then I can try again. IDK how long it will take, but I'll give it a full week. Sucks as the tips will be getting more light then the others.
I also ran out of soil so had to make up a half batch as well to top off the pots, got about 8L leftover for transplanting the peppers and what not, tents so full I had to remove the clones and one smaller plant. They are growing in a window now. The extras where Gaia Green All Purpose 4-4-4, Gaia Green Power Bloom 2-8-4, Gaia Green Insect Frass 3-2-4, Gaia Green Seaweed Extract 0-0-17, Bokashi Grains, Epsom Salts, Yeast Powder, Fluvic Acids, Enzymes, Silicon and Multiple Microbes.
PH adjusted really low as the amendments have a lot of rock dusts and such, wanted them to be broken down by the time the roots reach em. Watered in with 4L on each container, Should be ok for the first few days, will need to judge how they are doing in a bit and see if their roots are colonizing the new area. no idea how the clones will do outside the tent, Still have them in a plastic bag till I can see roots in the containers they are in. Checking about once a week.
My goal is to veg this out for another 3-4 weeks and top it one last time they switch to bloom with a SROG net, should have good coverage and lots of cola sites per plant.
Big shoutout to Medic Grow for sponsoring the lighting in my tent, They have provided me with 2x Mini Sun 2's in the 240w configuration, They use the v1 growing spectrum that is a all purpose seed to harvest spectrum so their is no hassle of switching it mid grow. If you interested in learning more about Medic Grow products please visit the web link below.
https://medicgrow.com/
https://growdiaries.com/grower/MedicGrowLED

Likes
44
Share


@GmansGarden
Follow
They are at 4 nodes but i noticed the plants are almost dwarf I just added nutes hopefully they will get robust they are really healthy though. I lifted my light a bit so they can get a little height. We will Seeeee 🤔🤔🤔🤔🤔. Topped and conducted LST added worm castings as well.
Likes
6
Share


Likes
18
Share


@Hashy
Follow
Week 13
Light cycle=12/12
Light Power=100w
Extractor controller settings
High temp= 25c
Low temp= c
Temp step=0c
High Rh= 40%
Low Rh= %
Rh step=0%
Speed max=10
Speed min=1
Smart controller settings (during lights on).
Lights on=10.01-21.59
Radiator on= below 22.0c
Radiator off= above 23.0c
Dehumidifier on= not in use
Dehumidifier off= not in use
Smart controller settings (during lights off).
Lights off=22.00-10.00
Radiator on= below 18c
Radiator off= above 19c
Dehumidifier on= not in use
Dehumidifier off= not in use
Seperate feeding program.
#1 and #2 go onto flawless
#3 and #4 stay on schedule.
Fri 15/3/24
#3 (Day 85)(Day 47 flower)
📋
Sat 16/3/24
Smart controller settings (during lights on).
Lights on=10.01-21.59
Radiator on= below 22.0c
Radiator off= above 23.0c
Dehumidifier on= above 55% RH
Dehumidifier off= below 50% RH or above 24c
Smart controller settings (during lights off).
Lights off=22.00-10.00
Radiator on= below 18c
Radiator off= above 19c
Dehumidifier on= not in use
Dehumidifier off= not in use
#3 (Day 86)(Day 48 flower)
📋
Sun 17/3/24
💧💧💧💧💧💧💧💧💧💧💧💧💧💧💧💧
Method= automatic
Feed=water plants 3&4
Neutralise=0.1ml/L
Easy Ph down=0.008ml/L ( 1 drop total)
Ec=0.18 PH=6.4/6.5
Time start=12.00pm
Finish time=13.45pm
(11×5 minute runs with 5 minute gaps)
Total flow rate=190ml/min
Flow rate per plant=47ml/min.
Total volume made=8L
Total volume left=2.75L
Total volume used=5.25L
Volume per plant=2.6L (Est)
Runoff.
Total runoff=1.75L
Ec=1.8 PH=6.3/
💧💧💧💧💧💧💧💧💧💧💧💧💧💧💧💧
#3 (Day 87)(Day 49 flower)
📋
Mon 18/3/24
#3 (Day 88)(Day 50 flower)
📋
Tue 19/3/24
#3 (Day 89)(Day 51 flower)
📋
Wed 20/3/24
💧💧💧💧💧💧💧💧💧💧💧💧💧💧💧💧
Method= automatic
Feed=ripen nutes.
Dragon Force=4.0ml/L
Sumo Boost=1.0ml/L
Easy Ph up=0.117ml/L
Ec=1.45 PH=6.0/6.2
Time start=12.00pm
Finish time=13.45pm
(11×5 minute runs with 5 minute gaps)
Total flow rate=190ml/min
Flow rate per plant=47ml/min.
Total volume made=8.5L
Total volume left=2.5L
Total volume used=6L
Volume per plant=3L (Est)
Runoff.
Total runoff for 2 plants=2L
Ec=1.7 PH=6.3/
💧💧💧💧💧💧💧💧💧💧💧💧💧💧💧💧
#3 (Day 90)(Day 52 flower)
📋 Ripen
Thur 21/3/24
#3 (Day 91)(Day 53 flower)
📋 H=82cm D=20cm DLI=37.0
I'm hoping to make a bit more space for this girl over the next few days. She is probably going to go on for another 2 weeks and hope the extra light will help.
Back soon
Take it easy.
Likes
16
Share


@ButterfliesLittleFarm
Follow
Hello Diary,
Epsilon F1 is the fifth hybrid F1 strain from the Royal Queen Seeds lab that grows on my small farm.
This time, all three plants on the farm are Epsilon F1, but the soil mix in which they grow is different.
But before I describe the preparation, a few words about the strain itself.
EPSILON F1:
Epsilon F1 is the fastest of all of our F1 cannabis seeds, and combines genetic traits from some of the most notable cannabis varieties of the last decades, including Blue Dream, Blueberry, Amnesia Lemon Haze, and Black Domina.
She boasts delicious aromas, plenty of cannabinoids, and, like all RQS F1 seeds, unrivaled stability, resulting in a uniform crop that consistently produces buds of unwavering quality.
Plus, her autoflowering trait and extra-fast flowering time make Epsilon F1 an ideal choice for growers focused on getting to harvest as quickly as possible.
Epsilon F1 features a rich aroma that combines hints of fresh herbs and citrus with full-bodied earthy notes and touches of blueberries and lavender.
Epsilon F1 is a mid-strength variety, consistently producing solid levels of THC and a terpene profile dominated by myrcene, farnesene, ocimene, and limonene.
Not only do these terpenes impact Epsilon F1's delicious aroma, but also its effects,
endowing it with a long-lasting, physically relaxing stone that soothes the entire body (predominantly courtesy of myrcene, linalool, and farnesene), mixed with an uplifting, motivational kick (from limonene).
SET-UP ON MY LITTLE FARM:
Box - Secret Jardin DS120W 120x60x178
Lights - MIGRO 200+
Ventilation - TT Silent-M 100
Filter - Primaklima filter PK 100/125
Fan - Oscillating Koala Fan X 2
Humidifier - Beurer LB 45
Soil - BioBizz Light - Mix
Pot - 11L Air pots
Seed - Royal Queen Seeds
Nutrition - RQS Organic nutrition
Let's officially start the diary:
02/08/2023
Planting. I prepared a total of three pots, as usual.
And this time I used AirPots, which proved to be the best option. I've been using them since the beginning.
I used the soil from BioBizz Light-Mix.
Pot #1 - I first put Easy Boost Organic nutrition in the form of pellets into the ground, then I added SeaWeed and Mycorrhiz in the recommended doses and mixed everything well.
Pot #2 - I also put in Easy Bosst Organic nutrition, Seaweed and Trichoderma. Also in doses according to instructions.
Pot #3 - Along with Easy Boost Organic nutrition, I put Bat Guano and Trichoderma.
After I prepared the soil, I soaked all the pots well with water and made small holes in which I placed the seeds.
I then placed the pots in the Grow Box where the temperature was around 28 degrees and the humidity was around 55%.
05/08/2023
I sprinkled a little water on the surface of the soil. Not too much.
06/08/2023
All three plants sprouted.
07/08/2023
I watered the plants with a little water. Approximately 0.5 liters per each plant.
10/08/2023
Watering. Each 0.5 liters of water.
That's all for this stage, see you soon and thanks for your support.
Likes
14
Share


@Groweedo
Follow
Hello,
J’ai recoupé les extrémités des 4 branche pour créer 8 nouveau site de buds, plus qu’à attendre pour recouper et faire 16 sites… la végétation se passe bien dans l’ensemble, je vais la voir une fois par jour, elle est heureuse et pas compliquée 😎