Likes
Comments
Share
@chrizzle
Follow
Already went down with the nutrients last watering (day 78) , they‘ll receive plain water for the next week. :)
Likes
Comments
Share
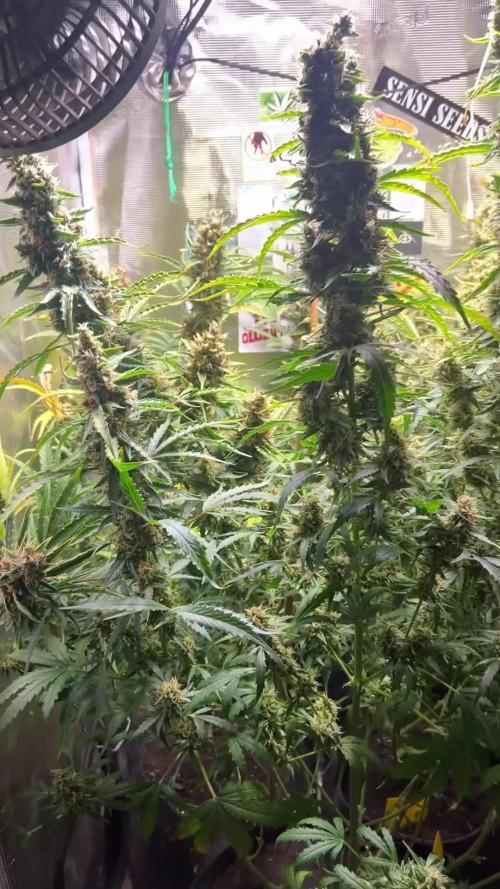
Doing pretty good trimmed some leafs shading lower sites
Likes
32
Share
@Sadhus
Follow
Difficile à tenir les niveaux de pH ( descend en flèche)et ec (grimpe en flèche ) ,plante très saine apart deux ou trois fleurs qui ont l'extrémité des pistil blanc qui sont comme brûler, changement du réservoir dans 2 jours pour essayer de stabiliser les valeurs, en tout cas plante très robuste qui résiste parfaitement a mes erreurs et qui mange tout ce que je lui donne sans discuter ! Peace ✌️🕊️ sådhũs
Likes
12
Share
@BudXs
Follow
What dat mouf do? It eats Lemon Pie All health, all good. Countdown to harvest now baby!!
Likes
2
Share
Primera semana en la que se ve una mejoría en general de las plantas. Me hubiese gustado anotar aquí el día de germinación y transplante a tierra, datos a considerar.
Likes
13
Share
Some of you may have wondered: Why do I use CO2 at average 950 ppfd μmol/m2/s (moral flow)? The answer is quite simple. Because of lack of space in some regions of my cultivation area, I simply cannot keep the ideal distance to my Sanlight high-performance lamp, due to some height growth of various strains. And so some of the main colas have ppfd values of 1250 μmol/m2/s and even more... So this is how I manage to achieve and compensate for such high radiation levels even with a CO 2 balance. And I have to say, my strategy to avoid various light stress symptoms works just fabulously. In combination with CO 2 implementation, my babies are simply unbeatably insensitive to light. Thats it! Beginning of 3rd week flowering: Again feeding my babies by 36 hours fermented potions of Bio Tabs Kompost Tea PK-Booster (15 g pro Liter) and added: 5ml Orgatrex/Liter 1 Spoon of Bactrex 1 Spoon of Mycotrex 1 Spoon of Mycco-Vital 1 Spoon of Dynomyco A little tip for those who are interested in small modifications that have a big difference or influence - on the result - effect - beauty - health - taste! Before adding microorganisms or beneficial bacteria or Mycorrizae and Trichodermas, please use oxygen-saturated water. On the one hand, unwanted chlorine gases evaporate and the small world of the microbiome becomes even faster and more rewarding in compost tea to sprout. Last but not least for this week, I would like to introduce my reasons, why I prefer growing biologically and sustainably. First of all, it’s something which suits very well in these times/days we are living now. Sustainability is a big need and task for our planet. 🌎 Nature means life. Our home, the air we breathe and everything that surrounds us. Not just today. Hopefully tomorrow as well. Maybe I'm starting to protect our environment on a small scale, but maybe I can also make a big difference at all. If you change the way you look at things, the things you look at change... I thought about what’s the difference, between Mineral Feeding and Super Soil Feeding. It’s very easy. Biologically Growing is a similar process than the natural soil activities out there in the lap of nature’s. So plants has to work and interact with the microorganisms and microbiomic communities in the soil. So the plants will never get lazy like the lazy ones of mineral feeding growers. If you grow biologically, you will feed the soil first and the microorganisms will support every parameter next to your plant conditions. And that will generate an unbelievable spectrum of Terpenes and Trichomes you will never forget. It’s the same comparison, when you daily visit McDonalds and you eat only fast food. How does your body and mind react on this shit for money?!?! May I invite you to think about it… See you next week dear Growmies! Have a nice Weekend and take care… Peace out! Addendum for Day 53: At the moment we unfortunately have another winter onset here in Germany. This means that I am forced to take additional heating measures due to structural facts in order to be able to keep the temperatures constant. After all, just tonight the thermometer climbs again to -1 degree Celsius. In addition, my exhaust air system runs out of my bedroom terrace and I therefore grow winter and summer with the patio door open. Well, sometimes I experience real weather-related challenges. But all in all, no problem... "Where there's a will, there's a way." Addendum to pouring out the fermented PK tea: I always administer half a liter of lukewarm aerated water with 3.5 ml of cannazyme per liter to each plant. This means that the "root machine" is not supplied with supplies unprepared and the nutrient solution can thus also be better distributed in the soil. Since I also work with cloth shoes, I spray them evenly moistened everywhere with water that is also warm before pouring them out from the outside. This has the advantage that the moisture stays where it should: in the pot! ... I did the math today ;-) We are still in week 7 until this Friday. And week 8 starts on Friday! OMG... still so much time yeahh! Today my Fast Buds Sour Jealousy and Sweet Seeds Big Devil and Dark Devil Automatics arrived. I'm looking forward to it. This time Fast Buds next Time Sweet Seeds. Love them too. Very beautiful genetics. Today a review video of the beginning of week 3. At the time of the pictures, I had minor signs of nitrogen excess. (Light peaks first at the crown of the roof and then slightly continuing to the middle section.) I then painstakingly racked my brains as to why this could be. I found that very slight dry spots had formed and therefore the root found small accumulations of nitrogen that caused its problems. But then, when I carefully homogeneously checked the moisture content in the substrate, the problem evaporated again. However, they had not shown any loss of growth rate during this time. Nevertheless, they developed as expected. They Strawnanas had no problem with that. In the end, I always have a hard time killing them. But I guess that's the way things go. We live and die. We come and go. But it's not there yet. ;-) Tomorrow is day 56. Tomorrow’s updating day! Can't wait to see their progress. Have a good time and see you tomorrow… 🏽🕊️ 🏽 ☮️🕊️
Likes
14
Share
The plants completely stopped from going up, but the buds are getting bigger and the smell is stronger and stronger. I continued to play classic music for one hour everyday. Did anybody tried this before? Being the first experiment I am very happy with the results so far.
Likes
42
Share
Bonjour à tous les padawans et les maîtres jedis Cette plante est vraiment exceptionnelle! Elle représente la force et j'en suis fier 😍 La semaine 4 est déjà la ! Ma plante est saine le LST ce passe relativement bien je l'ajuste tout les jour je le combine avec la technique du pincage d'Apex cela me permettra d'avoir une canopé plus homogène donc une meilleure pénétration lumineuse et par conséquent un meilleur rendement. Le pinçage est une pratique courante en horticulture. Beaucoup de cultivateurs l'utilisent pour améliorer le rendement de leurs plantations cannabiques ou autres. Il est souvent question de 'taille' des bourgeons apicaux. Cette taille se pratique également mais il n'est plus alors, à proprement parler, question de pinçage. A l'instar d'une taille, le pinçage va permettre de stimuler le développement des ramifications tout en préservant les sommités en vue de la floraison. Il est très utile pour uniformiser une canopée. Pour réaliser le pinçage, il vous suffit de presser 'fermement' la tige [entre le pouce et l'index] aux environs de l'apex jusqu'à sentir un léger 'crAck'. Cela aura pour résultat d'endommager les vaisseaux impliqués dans la circulation de la sève [situés dans le pourtour de la tige], la tige conserve toutefois une certaine rigidité. Pour obtenir le même résultat, il est également possible de vriller légèrement la tige sur elle-même. L'interruption du circuit d'alimentation entre le ou les apex et le reste du plant va provoquer un déséquilibre hormonal qui aura pour conséquence le développement des ramifications antérieures au point de pinçage. Jour 25 j'arrose mon pot normalement avec un quart de son volume en eau toujours avec un PH de 6.3 à cette eau j'ajoute 0.7 gramme de greenhouse feeding enhancer pour favoriser son développement racinaire. Par la suite je n'aurai plus qu'à ajuster mon LST jusqu'au stretch et surveiller mon arrosage, Je pincerai mes apex suivant la pousse de la plante pour uniformiser la canopé. Petit rappel de ce que est le LST et comment le pratiquer le plus efficacement possible: Quand commencer à appliquer la technique LST De nombreux cultivateurs commencent la manipulation dés que les plantes possèdent entre 3 et 6 nœuds ou une paire de feuilles. Durant cette première étape de la croissance, le tronc encore flexible est pliable sans risque qu’il ne se casse, même si au fur et à mesure du développement de la plante il sera de plus en plus difficile de le plier. Nous pouvons continuer à guider la croissance des branches durant toute la culture, même durant la floraison, ce qui pour cette étape représente un grand avantage face à la taille, qui n’est pas du tout recommandé une fois que la formation des têtes commence, cela stressera en effet la plante, ce qui aura pour effet de retarder la récolte. Comment appliquer la technique de guidage LST Si nous sommes prudents, la flexibilité naturelle des fibres du cannabis permet de plier leur tronc et branches avec une relative facilitée, même durant la floraison des plantes. En utilisant une corde fine, nous pouvons accrocher la pointe de la plante à la base du pot par exemple ou à un tuteur que nous aurons planté dans le substrat. Nous plierons le tronc avec précaution et nous le fixerons avec la corde, à partir de là, nous pouvons augmenter progressivement la tension de la corde, chaque jour un peu plus, jusqu’à obtenir la position souhaitée. Soyez attentif à la réaction de la plante, essayez de ne pas appliquer trop de pression sur la corde et rappelez-vous que la flexibilité des branches peut varier d’une plante à l’autre. Pour obtenir de meilleurs résultats, il suffit de suivre quelques règles simples. Pour commencer, nous devons choisir une corde fine mais pas trop pour ne pas blesser les troncs au fur et à mesure qu’ils grandissent et qu’ils deviennent plus gros. Nous pouvons utiliser des crochets en plastique souple ou de n’importe quelle autre matière flexible pour éviter d’endommager les plantes. Spécialement en intérieur, utiliser des cordons en plastique de couleur (voir les diaries de @Silky) est très pratique pour voir facilement les accroches et faciliter le travail au milieu du réseau formés par les cordes, les tuteurs, les mailles ou les supports que nous aurons dans la culture. Bien entendu, en culture extérieure et surtout en guerilla nous ferons juste le contraire et nous utiliserons des matériaux de couleur qui n’attirent pas l’attention pour que notre jardin reste discret. Pour stresser les plantes au minimum, la mieux est de réaliser ces manipulations le soir ou juste après que les lampes en intérieur s’éteignent, ce qui leur permettra de se remettre durant la nuit. Normalement, le jour suivant nous pourrons observer comme les pointes des branches que nous avons pliées se dressent de nouveau vers le haut à la recherche d’une source de lumière. Je combine un pincage d'Apex (explications plus haut) au LST cela me permettra d'avoir une canopé plus homogène donc une meilleure pénétration lumineuse et par conséquent un meilleur rendement. Que la force soit avec vous 💪
Likes
25
Share
the plant was transplanted into a 20 liter pot. I did some minor defoliation and LST again. Starting this week I switch the light mode to flowering 12/12
Likes
9
Share
Overview of my grow: Tent: Secret Jardin DS120 4 x 4 (120 cm by 120 cm) Lights: 2 x 120 Watt CTlite c4 clusterled Climat: Trotec Dehumidifyer 240 watt- 10L/24h Filter: Prima Klima carbon filter PK2600 fan: 2 x Secret Jardin 20watt osc. fan Pots: Gronest 4 x 11 liter airpots Water : automated water system PH: bluelab Nutrients: Plagron cocos A + B Plagron PK 13/14 ATA cal/mag Epsom salt no rights to music in the videos Week 6 She is doing great, She has grown another 21 cm in height. She is still the biggest plant in the room. I did some LST and defoliation again. She is stacking up nicely, i'm very curious about this gorilla no smells maybe next week ! Thanks for checking and stay safe all 😋
Likes
25
Share
Great week. Growing non stop, might be pretty big if all goes well. Buds starting. I also do the tucking of the leaves as much as possible before I start defoliation
Likes
10
Share
Altough the "anonymous" seedling was still a bit behind, I decided to move the plants into the AutoPots. The pots were still disconnected from the tank and the plants were handwatered for the time being. 3 days later it was clear that "anonymous" had died. I was getting a bit frustrated since the fourth pot was now empty and the other 3 plants were growing happily. I started another germination attempt.
Likes
14
Share
Likes
22
Share
8/19/23 - Day 67 - Things are still looking good. We just had a water change. A couple more weeks! 8/21/23 - OK, ok ok, we have a lot of work coming up. Right now is like the calm before the storm. The storm I'm talking about is harvest, trimming, drying, and curing. This is the kind of labor that you LOVE to HATE. Especially with how many buds ill be pulling from this LEAF box. Let's talk about progress real fast. She is getting bulkier every day. Overnight she drank about 300+ ppm of nutes. She likes the nutes a lot. I'm taking this as a reason for all the little snowy crystals and the enlargement of the buds. Flushing: For about a week before harvest I will empty the water+Nutes and refill only with Water. We want the plant to suck up and replace all the nutes in the buds with water. This is called flushing. Trimming plans and Tools: When it's time to trim the plant, I've got a plan in mind. I'm going to trim the buds while they're still wet, and I'll leave them attached to the stems. To simplify the drying process, I will split the LEAF into two parts – the top and the bottom. Since space is a bit tight in the LEAF with this grow, I will keep just the buds on the branches. This will help the air circulate the buds better. I've even found this cool trimming tray on Amazon that I'm planning to use. I've realized that having the right tools for trimming is essential. Just like I'd put on gloves to work on a car, I will use nitrile gloves to keep things clean while trimming. And I'll use proper trimming scissors instead of regular ones. These scissors are designed for this job and should make the process much smoother. Amazon - Trimming Tray - (somewherr brand pictured above) Amazon - Nitrile Gloves Amazon - Trimming Scissors Drying Plans and Tools: Once I'm done trimming, it's time to dry the buds. I'm thinking of using simple tension rods, like those small shower curtain rods, to hang the branches. This way, I can create two levels inside the drying box. The lower part can rest on a SCROG net to ensure good airflow and even drying for all the branches. The LEAF box will handle the drying parameters. The environment inside the LEAF box will focus only on keeping the humidity at 60% and moving the air around getting the buds to a non-mildew amount of humidity. Amazon - Tension rods 16-28” Curing Plans and Tools After the buds are dry (60% humidity), the next step is curing. This means I'll be storing the buds in sealed glass jars. I've got mason jars and hygrometers to monitor humidity levels. Once the jars are filled with buds, I'll seal them and put them in an cool, dark spot. I plan to open the jars briefly every day to let in some fresh air. (15min). I'll know the curing is done when the humidity inside the jars stays around 62% during these "burps." That's when my perfectly cured buds will be ready to enjoy! Amazon - Hygrometer 12 Pack Target - 32oz Ball Mason Jars 12 Pack I use a smell-proof duffle bag. It has double zippers, and smell prof lining. The brand is www.420stock.com, and the model I use is the X-Large Trap Pax Duffle Bag. 8/23/23 - 20% more nutrients were added. She went from about 900 at the beginning of the week to about 330. Now she's back up to 500ppms. We change the water in one more day. 8/24/23 - Day 72 - It's official: I have moved the smell slider up! Holy shit, does it smell potent. I put my arm in there through the Weed forest, and when my arms came out, I was attacked by the Skunk BOSS. I had to shower and change my outfit to eliminate the smell. If you are looking for this experience, check out https://www.getleaf.co/
Likes
41
Share
@squalino
Follow
🌿 Journal de Culture : Mac 1 – "Spirit" (Plante #2) – Pleine Floraison ​Date du jour : 27/05/2026 Âge de la plante : J+53 (Semaine 8) Taille actuelle : 1m15 Évolution : +21 cm par rapport au dernier suivi (Le stretch ne s'arrête plus !) ​C'est un départ improvisé ! Sur un coup de tête, je pars en vacances avec ma petite famille du côté de Rimini. Ce matin, c'était la course avant le grand départ, j'ai fait de mon mieux pour prendre quelques clichés rapides et administrer les derniers soins à la va-vite. ​📊 État de Santé & Évolution de la Structure ​Une poussée incontrôlable : Spirit a officiellement dépassé le mètre pour culminer à 1m15. Sa croissance est tout simplement monstrueuse, voire même un peu trop par rapport à l'espace dont je dispose. Visuellement, elle reste magnifique : une structure vigoureuse qui continue de se couvrir de têtes de haut en bas. ​Développement des fleurs : Les pompons se densifient nettement par rapport à la semaine dernière. La formation des buds s'accélère et la plante montre un excellent potentiel de rendement sur l'ensemble de ses branches secondaires. ​Le repère visuel : Notre figurine "Spirit" est toujours fidèlement installée au pied du tronc pour identifier cette championne. ​⚙️ Paramètres Environnementaux & Culture ​Lumière : Intensité fixée à 75%. La gestion de la distance devient un art millimétré puisque la plante continue de manger l'espace vertical. ​Climat : Les températures restent stables (24°C jour / 21°C nuit). Le déshumidificateur tourne pour essayer de contrer l'humidité ambiante causée par le réservoir et le système de la pièce. ​Arrosage & Ajustement : L'Autopot gère l'autonomie en eau claire pendant mon absence. ​ Nutrition & Entretien (Aujourd'hui) ​Apport anticipé : J'ai donné 4 ml de Bio PK 5-8 de Biotabs dans 75 cl d'eau ph 6,3 ​Ajustement de planning : J'ai dû avancer ce repas de 2 jours à cause de mon départ à Rimini. Le but est de lui donner le carburant nécessaire pour qu'elle puisse continuer à gonfler ses fleurs sereinement pendant que je profite de la plage. ​📝 Résumé de la situation ​Spirit porte définitivement bien son nom : indomptable et sauvage. À 1m15, elle demande énormément d'énergie et l'apport de PK 5-8 tombe à pic pour soutenir l'explosion des bourgeons. La canopée est bien verte, aucun signe de stress majeur, le run suit son cours de manière spectaculaire. Place à quelques jours de repos en Italie, la nature va faire son travail en autonomie ! ​🙏 Remerciements ​Un grand merci à @mia_biotabs et à Mrs_Larimar pour leurs précieux conseils horticoles, ainsi qu'à vous tous qui suivez les aventures de Spirit et sa sœur depuis le début.
Likes
3
Share
She suffered with under watering practices and heat stress no doubt but seems to be stabilising with no further deterioration. Double Kush Cake Feminized is come to the end of her growth spurt reaching 60cm her gaps aren’t filled and won’t likely be filled with due to the stress she was under! From now until the end the lady will be fed sparingly every five days with 1500ml of nutrients and npk
Likes
175
Share
@yan420
Follow
🌸🍊✨🍭🌸🍊✨🍭🌸🍊✨🍭🌸 Back at it with Kannabia — huge thanks for the NEW EXCLUSIVE Upcoming Kannabia's seed Launch 🙏🍨🍊 Grateful for the trust and for everyone following along, I’ll run her clean and showcase what she can do. Dessert-party goals: berry–citrus sherbet terps, creamy finish, tight stacks, easy trim, zero drama. Veg 24/0, clean manifold + LST, flip on a happy, even canopy. Coco’s fresh, seed goes in now. 🚀 Added on 12.10.2025 🌞 Light conditions: Limited direct light for the first 4 weeks — ~4 h/day on weekdays and ~10–11 h on weekends due to tent sharing and work schedule. 🌸🍊✨🍭🌸🍊✨🍭🌸🍊✨🍭🌸 💭❗💭❗💭❗💭❗💭❗💭❗💭 ❗Events & thoughts worth noting❗ 💭❗💭❗💭❗💭❗💭❗💭❗💭 10.08.25 GW1 Sowed seed, soaked starter pot with #1 12.08.25 GW1 Seed popped hip hip hurray 28.08.25 VW2 Stopped using GreenBuzzBloom, took it out of the schedule. 01.09.25 VW3 TriPartMicro 10→30ml, TriPart bloom 10→30ml 12.09.25 VW4 Applied nemadodes against thrips and fungus gnats. 20.09.25 VW6 topped and trained for first time, decided against a full manifold as I lost a few weeks already. 26.09.25 VW7 Topped her one more time for 8 mains 27.09.25 VW7 Topped up the pot with perlite instead of clay pebbles this time, just trying things out, TriPartMicro 30→40ml , TriPartBloom 30→20ml 10.10.25 VW9 have her a haircut, umm be trimming the side shoots tomorrow, rest in the video 📹 12.10.25 VW9 done some extra trimming to clean up a bit and chose two extra side shoots to nurture info mains, so kept the 8 original mains plus 2 rest in the video 📹 17.10.25 VW9 FfJ/fpj fish mix 30 → 60 ml 20.10.25 VW10 Feed tweak: added 3 g Calcium Nitrate/ 30 L (≈ 15 ppm N + 10 ppm Ca) 24.10.25 VW11 did a defoliation and trimming session 📹 27.10.25 VW11 Epsom Salt 0 → 2.5, Calcium Nitrate 3 → 9 g 01.11.25 VW12 CalMag 60 → 30ml, TriPartBloom 20 → 30ml, Magnesium 2.5 → 3.5g 02.11.25 VW12 Did a cleanup in preparation for flowering, rest in the video 📸 12.11.25 VW13 Did another cleanup in the tent 🎥, also switched to the FERMAKOR PK Micro schedule, (10.11.25) added Phosphoric acid as a pH down in preparation for flowering 14.11.25 FW1 FERMAKOR PK Micros 40 → 50 ml 05.12.25 FW3 about 2 weeks ago Calcium Nitrate 35 g → 25 g, FERMAKOR PK Micros 50 ml → 60 ml 🌱💦🌱💦🌱💦🌱💦🌱💦🌱 🌿 Day to day tasks & actions 🌿 🌱💦🌱💦🌱💦🌱💦🌱💦🌱 28.11.25 FW2 – Fed 5l of #1 → 2l runoff 29.11.25 FW3 – Fed 5l of #1 → 2l runoff 30.11.25 FW3 – Fed 5l of #1 → 2l runoff 01.12.25 FW2 – Fed 5l of #1 → 2l runoff 02.12.25 FW2 – Fed 5l of #1 → 2l runoff 03.12.25 FW2 – Fed 5l of #1 → 2l runoff 04.12.25 FW2 – Fed 5l of #1 → 2l runoff 05.12.25 FW2 – Fed 5l of #1 → 2l runoff (*RUNOFF reused for tomato plants) 💧💦💧💦💧💦💧💦 🌱 Nutrients in 30 L #1 Veg – FERMAKOR 💧💦💧💦💧💦💧💦 Calcium Nitrate (Calcinit / Nitcal): 45 → 40 g → 35 g → 25 g = 1.50 g/L → 1.33 g/L → 1.17 g/L → 0.83 g/L = 207 ppm N / 253 ppm Ca → 184 / 225 → 161 / 197 → 115 / 141 PK Concentrate (FERMAKOR Base): 30 → 40 ml → 50 ml → 60 ml = 1.00 → 1.33 ml/L → 1.67 ml/L → 2.00 ml/L → balanced 1:1 P:K + light micros (from extract) Home-made FFJ/FPJ (Fish + Veg): 30 ml = 1.00 ml/L Epsom Salt (MgSO₄·7H₂O): 8 g = 0.27 g/L → ~26 ppm Mg + ~35 ppm S Fetrilon Combi 1 (Micros): 0.5 g = 0.017 g/L → Fe 0.7 ppm · Mn 0.7 ppm · Zn 0.3 ppm · Cu 0.3 ppm · B 0.1 ppm · Mo 0.02 ppm Phosphoric Acid (pH down) + Citric Acid (chelation): as needed → First set pH with phosphoric acid, then add a little citric only if you want extra chelation Target pH: 5.8 – 6.0 (drop test yellow-green) 📦 TOTAL: Liquids: 60 → 70 → 80 → 90 ml per 30 L = 2.00 → 2.33 → 2.67 → 3.00 ml/L Solids (CaNO₃ + Epsom + Fetrilon): 53.5 → 48.5 → 43.5 → 33.5 g per 30 L = 1.78 → 1.62 → 1.45 → 1.12 g/L 💧💦💧💦💧💦💧💦 ⚙️✂️⚙️✂️⚙️✂️⚙️✂️⚙️ ✂️ Tools & equipment ✂️ ⚙️✂️⚙️✂️⚙️✂️⚙️✂️⚙️ ✂️ 2× MarsHydro SP3000 ⚙️ MarsHydro 150mm ACF Ventilator ✂️ Trotec dehumidifier (big unit) ⚙️ Mini no-name dehumidifier ✂️ Kebab skewers (LST – stainless) ⚙️ Wire + roast skewers (LST assist) ✂️ Scissors (HST) ⚙️ Vacuum (for spills & cleanup) ✂️⚙️✂️⚙️✂️⚙️⚙️✂️⚙️✂️⚙️✂️⚙️ --- 🍊🍧🌬️🍬🍊🍧🌬️🍬🍊🍧🌬️🍬 Mystery seed (Kannabia Seeds) — NEW EXCLUSIVE 🍊🍧🌬️🍬🍊🍧🌬️🍬🍊🍧🌬️🍬 Species: Hybrid (GF / swift-flowering line) Genetics: TBA (breeder sheet pending) THC: TBA Effect: Euphoric, relaxed, creative (target profile) Flavor: Berry–citrus sherbet, sweet candy, creamy finish Flowering (indoors): ~6–7 weeks target (GF) Resistance: High (aim: no drama) Indoor yield: TBA Outdoor yield: TBA Structure: TBA Notes: Brand-new exclusive from Kannabia’s GF line — I’ll update specs when the breeder card drops. Goal is rich sherbet terps (berry–citrus + cream), low leaf-to-calyx, easy trim. Stage harvest stays on the table if tops finish early. YouTube Link: https://youtube.com/-m8h?si=A7x4Zlr2kj-_ga31
Likes
2
Share
@Vellaman
Follow
SO this is my second grow of this strain, this plant shared a 120x120 tent with another Magic Melon and 2 Gorilla Cookies from Fast Buds (Amazing Strain) Very happy with large feedings, and now that she is alone in the tent, I can publish some good information about this strain as other diaries for this strain do not seem to do it justice. From previous grow, which was summer here so 40 degree C days, was growing at around 33C and obviously feeding it around 2.5 litres a day - but she did it and the smoke was great, this time around since the temps are in the normal ranges, Im hoping for less terpene loss and a much better smoke, great strain from HUMBOLDT - Im guessing this harvest will be in the 150 g Dry Weight Range, the previous 2 I grew in Summer at those very high temps yielded 220g between them.
Likes
23
Share
So this is how things are looking at the end of Week 8,going into week 9. Definitely one of my best grows yet, no issues whatsoever, great strain to run, if I like how she smokes (which I'm sure I will) I will definitely run her again.