


Likes
Comments
Share

@Solitude
Follow
📓 Cultivation Diary: The 12/12 Flip & Transition Week
📅 June 5, 2026 (Veg Day 17)
Irrigation/Reservoir: Prepared a full 100L reservoir refresh.
Nutrients: Kept the feeding aggressive with a double dose of vegetative nutrition (x2 Nutrient formula) to ensure the root zones and plant tissues are fully stocked with elements before the transition.
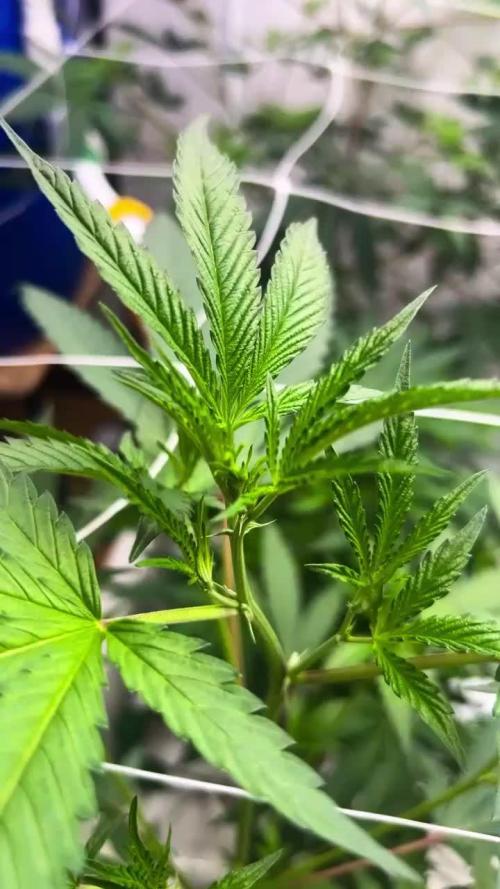
Canopy Observation:the canopy is thick, uniform, and fully occupying the table space. The trellis net is officially filled out, and the lower branches are strong and rigid.
📅 June 6, 2026 (Day 1 of Flower / Bloom Week 1)
The Flip: Officially switched the timers to a 12/12 photoperiod (Lights ON at 6:00 PM / Lights OFF at 6:00 AM).
Schedule: First irrigation shot triggers exactly 1 hour after lights on (7:00 PM), followed by a shot every 1.5 hours.
Volume: Configured the drip stakes to run for 1 minute per shot, delivering 5 shots total per day. This provides roughly 450ml per plant per day, creating excellent target dry-backs overnight to force vigorous root searching.
📅 June 11, 2026 (Day 6 of Flower / Bloom Week 1)
Irrigation/Reservoir: Bumped reservoir capacity up to 110–120L to keep up with increased transpiration as the plants begin their post-flip stretch.
Nutrient Recipe (TargetingpH 6.0 EC 2.5
Water: 110–120L
Athena Cleanse: 120ml
Silica: 220ml (Essential for stem strength during the stretch)
CalMag: 10ml
Athena Bloom: 600ml (Adjusting base to target 1.2–1.3 EC from Bloom component)
Athena Core: 400ml
Irrigation Adjustments: Increased the shot duration slightly to 1 minute and 15 seconds to match the accelerating growth pace.
The early flowering stretch has officially begun. The tops are noticeably pushing past the trellis net layers, and the node spacing remains tight and stacked. Leaf color is an excellent dark green with healthy, bright yellow-green shoots driving upward at the growth tips. No signs of stress or stalling from the schedule shift.

Likes
23
Share


@cmstacker01
Follow
A couple days before chopping.
Spotted budrot at 2 spots in the New 2. So almost time
to cut before it get worse.
The rest is doing fine, New 1 and Strawberry are gonna be the first ones to get chopped together,branches are under load and some are bending down


Likes
33
Share


@NanoGrow
Follow
Day 71. Starting to show some purple, which was unexpected! Removed a few leaves that were overlapping.
Day 74:
Today was a bit heart breaking. We found a spot with botrytis/stem rot starting to set in.
It appears we have discovered it fairly early.
After searching treatments, we ended up doing a mix of them to try and avoid losses.
Obviously cutting the branch off would be the most obvious choice, but we are trying to keep her as is and do some experiments in the name of growing science.
We dusted with cinnamon, which has proven to be efficient in terms of anti-fungal properties, and let it sit for a couple hours.
Then, we decided to remove the spot where the rot is showing up. We sprayed with H2o2, scraped out the affected area as much as possible, sprayed again and wiped dry. We then sealed the wound with candle wax. We also spread some more cinnamon on other susceptible entry points for fungus, mostly where leaves had been cut or where the stem was more fragile.
We really hope this turns out well and we win this fight against the dreaded fungi.
We suspect the raise in humidity this week triggered it. She was in the 30s to 40% last week, but the weather changed and she rose about 60% these last couple days.
Pray for us, grower friends.
Day 75: Had to remove the side branch that was connected to the main stem at the spot where the rot appeared. 😕 Patched her up and am praying this is the last of the consequences of this situation.. Pushing as much as we can to avoid and chop her early..
Day 77:
Gave her the final haircut. 😊
Mold situation appears to be under control. Looking frosty as fuck!

Likes
5
Share


@Brasson
Follow
2 week of flowering! She's still losing leaves. The buds are shooting up nicely


Likes
3
Share


@GelatoTerps
Follow
Deep watering on Sundays (buildaflower compost tea)
Moist watering on Wednesdays ( vitamin c water & jay plantspeaker )
Cut down 3 hermies from light leak
2 charmz
1 Apple fritter


Likes
91
Share


@CAMOGROWN
Follow
I've pretty much gone over everything in the video.
Super not happy I've had to turn this auto grow into a photoperiod grow. I'm not really set up for light leaks hence why I grow auto's.
On the only plus side, I think two are MABEY starting to flower. They would be the smart pot pair.
The big sativa is still stretching even though it did that during week 3-4!
All I can say is thanks for suggesting the 12/12 switch @biggreens420, if this grow turns out fine then we'll be smoking buddy lol
I was gunna kill three off and start a fresh grow with BETTER GENETICS. But I'm willing to see how messed up they can get so I can give a PROPER review.
Thanks for all your time !


Likes
11
Share


@GrowerGaz
Follow
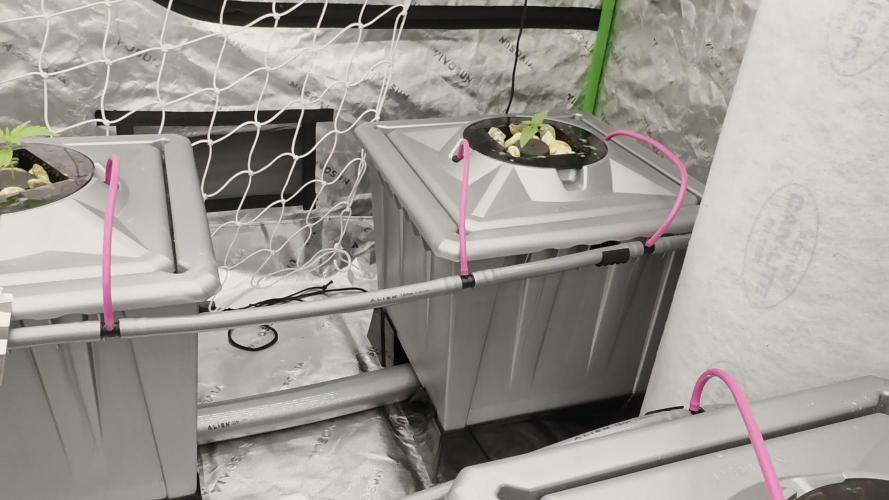
The three small ones are in on day 14 , the bigger one is 5/7 days ahead. I gave them all a top dressing with a couple of grams each if bio grow from Greenhouse feed. Liking the @spiderfarmled , does not get to hot and seems brighter. I moved the light down to 40 cm , above the tallest plant.




Likes
9
Share


@Rckeh
Follow
10/05/2023 - She´s growing well, i left her growing 2 days. Now i´m aplpying more LST and start to question: Should i top her once more? I´ll let her grow a bit more and watch. Also noticed a deficiency, i think it´s copper excess due to Acti-vera or Root Juice. Next feeding i´ll cut on Acti-Vera and give half of Root-Juice.
12/05/2023 (Day 30) - She´s growing well, won´t feed her yet as the soil is still moist. Thinking about HST already, but i´ll let her grow a bit more
This week arrived my Plagron Sugar Royal, so i´ll add it aswell :)
Day 31 - Today i noticed some more healthy new growth so i decided to top her again and LST´d just a bit
Day 32 - Didnt feed her yet, soil looks dry but pot is pretty heavy. Also her leafs are touching the soil so i dont want it to be moist.
Day 35 - Slightly LST
Likes
14
Share


@BoboLacetti
Follow
The plants have stopped stretching. The Ph value keeps falling so I add PH + every time I pour and water with a PH value of 8 xD. I'm thinking about buying a small 100 watt LED panel. The light distribution is very uneven


Processing
Likes
142
Share


@MadeInGermany
Follow
Hi everyone :-)
This week a lot of nice things happened in the flower tent :-)
Everyone looks super nice, and is growing stronger and more beautiful week by week 😍👌.
The blue cheese smells like a dream ;-) As usual from this variety 👍.
The kosher tangie is also very, very tasty 👏🏻.
Both got Pk 13/14 this week for the last time :-)
Everyone else is developing very well 👍, That will be the last diary with several strains together :-)
In future everyone will come individually 👌.
I wish you a lot of fun with the videos, have a nice weekend, stay healthy 🙏🏻 and let it grow 😎👌


Likes
11
Share


@RunWithIt
Follow
This update was made Day 58 from seed. I just now realized I've had my day count offset by about 2-3 days. No biggie, at least it's been rectified.
Anyways, onto the update. Beautiful deep purple tones have begun peeking throughout the plant. Similar to my lemon berry but with more of a magenta hue.
Feedings have been rather frequent. 2-3 nute feedings last week. With XSD. For the rest of the grow, XSD will be omitted. Just molasses and Liquid Seaweed from here on out.
Absolutely love the development of this photo period variety. I'll probably give this strain a rest for the next journal, however. Still need to spread my wings with Ethos' catalogue.

Likes
Comments
Share


@SelfCultivationGrower
Follow
After 14 days vacation my tent Went crazy. The Stretch is absolute shocking and so many new leaves in this short time. I really have to defo. And HST some Main-Colas or they will get burned
Likes
35
Share


@Santica_Garden
Follow
Things are going good, but I have made a few mistakes along the way which have hurt my yield. All is explained in the video (if it plays).
Thanks for Watching & Happy Growing guys 👍🏾😎


Processing
Likes
27
Share


@Silverback_Guerilla
Follow
4/5:
Took 4 cuttings from the shortie
4/12:
All 4 are rooted and growing!
5/1:
Transplanted from 1gallon pots to 5 gallon pots.
5/3:
Decided to grow one of them in my tiny tent and the other 3 will go outdoors.
5/4:
Took 2 of them outdoors under the 270w and sunshine.
5/6:
Trained all of them today and fed some boomerang along with the kelp, molasses, big bloom, and silica. Foliar fed and took the last one outdoors.
The one in the tent is really flourishing!
5/7 - 5/17:
Excellent growth! The supplemental lights are making all the difference.👍
Did some more training on all of them early in the week.
The one in the closet is spreading out nicely and budding up pretty quickly...but what's very cool is that all 4 clones outdoors are flowering?!?!? I sure hope they go ahead and finish rather than starting to revegetate as the days continue to get longer.
Much rain for the past few days, but it let up long enough for me to install another 200w of waterproof 3000k LED lights a couple of feet above them. Very intense lighting, great bang for the buck. So now, I've got 350w of 3000k and 120w of 6500k in the outdoor garden. That's gonna have to do it, as I also am using 1400w in my indoor gardens, plus a/c..bills are getting ridiculous.
5/18 - 5/28:
The clone in the tent is still stacking up really well. I guess the ones outdoors are too, but next to the seedling plants, they seem puny. Many buds though...
Since they decided to flower early, I sprayed them all down with a product that is loaded with hormones and auxins and stuff that's supposed to retard vertical growth and promote branching. It's also supposed to speed arvest time by as much as a week. I hope they can finish before the summer solstice (June 21), otherwise they might try to reveg instead of finishing..
Hopefully it helps keep them from stretching so much that I'll have to supercrop them. Their mamma was a shortie, so they really shouldn't get too tall anyway.
I also foliar fed them several times this week with something called MicroLife Maximum Blooms, Pow! They love the stuff!
5/28 - 5/31:
I did some training on a two of the outdoor clones early in the week between rain showers, and foliar fed with Microlife maximum bloom formula. She was looking a little N deficient, so I assume the dry amendments have petered out. They were dry enough, so I top-fed her with another couple tablespoons of cavern culture and on the 31st. I gave them big bloom, tiger bloom, grow big, beastie bloomz, silica, endoboost, signal, humic acid, liquid kelp/fish emulsion, and liquid molasses. The indoor clone is looking awesome. I fed her heavily on the 30th.
It just feels so strange that I'll be harvesting outdoor photos in June!?!
That's it for week 8-
6/1 - 6/8:
Early in the week I gave them about a half gallon of water with liquid molasses, cal-mag, silica, and beastie bloomz only.
I foliar fed them a couple of times during the week, right at daybreak.
I fed them on Saturday, the 6th..about a gallon each..beastie bloomz, microlife maximum blooms, cal-mag, humic acid, grow big, big bloom, sweet & sticky, and signal.
They are looking very good..buds galore. The indoor clone got the same nutes, but on different days. She's also covered in buds, and they are beginning to fatten up.👍
6/9-7/4:
Busy with other gardens, so not many updates...
Indoor clone got to spend the last 2 weeks of her life in my closet under the quantum boards and UVB. I harvested and washed her buds on 6/28, let her hang dry and weighed and jarred her up on the 4th of July. She came in a 111g of cola and 45g of lower bud with only about 5g of larf. Nice!👍
She smells just like her mommy and has the same uber-dense buds. She was topped, so the buds aren't as mighty as the mamma's, but much more plentiful.👌
Outdoor clones:
I had a massive spider mite attack, and during the same week, I had a grasshopper invasion...I lost a few plants, one of which as a FFT1 clone.
I had just harvested my autos and my indoor clones from the closet, so I moved the remaining two clones in under the quantum boards. I treated them for spider mites several ways for several days and have given them much TLC. Hopefully their buds fatten up some more. They stanky, but they kinda slim...
7/11:
I harvested the last two clones tonight. So sticky!!! I washed them and hung them to dry.


Likes
Comments
Share

@RBG
Follow
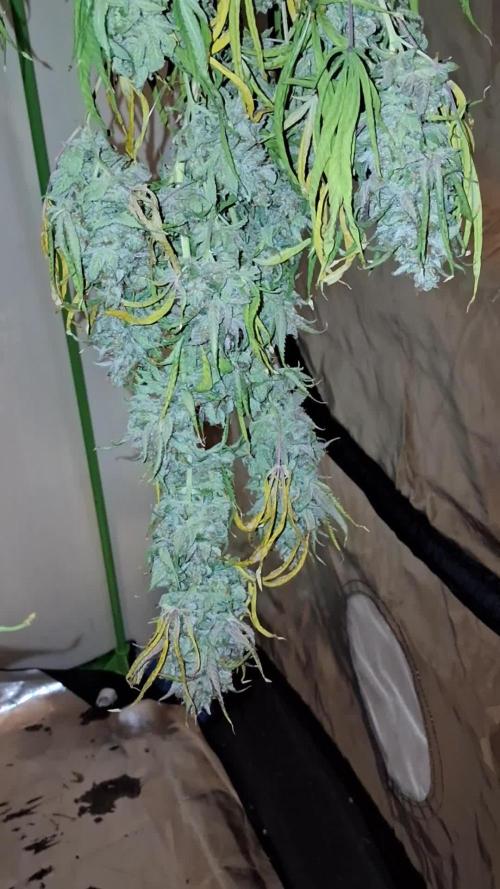
All done and up for drying, will come back in a bit and write me a paragraph on the ladies that have been taken down!
Overalll very happy with the outcome, they went over there suggested flowering times by a few weeks. Ceremony was the only one on her top side that had just started to finish up but she flowers for about 12 weeks so understandable but weve only got that 1 room to dry n grow in currently until more equipment arrives for the next coco ladies
Drying on 55% RH with a 21-23 room temperature.