Likes
17
Share


@m0use
Follow
This was a fun project that was a few years in the making and a year later to see if they would last a season for this upload to happen. Before any of this I would bike aorund town grabbing up all the old Ikea solid pine bed slats that I could find and storing them in the basement. I have a lot of wood down there, any size worked as long as I have enough of them. The hot days to find them were the first and last of the months because that's when people where moving in/out. I also kept an eye on the free section on local online classifieds as well. The entire purpose of this was to recycle as much off the streets as I could before buying anything to finalize the project. In the end I only bought sealer, screws and some takeaway/beers. All the wood was 100% free and salvaged off the streets of Toronto saving it from the dumpster bin.
After collecting all the slats for about 2 years I was playing aorund with them on how I wanted to make this work. I had previously done a little project like this before but I messed it up and the boxes where crap. did not last longer then 2 seasons, they where thin and shallow as well could not grow much of anything in them. I Was talking to my friend who is renovating their house and we brainstormed some ideas on the boxes, I found some designs I liked online and said lets make something like this out of what I have here. We tossed out a few of the design features when looking at them as it would have been wasted wood and extra work not needed. If I had more wood them maybe it could have been an option but simple was the name of the game. They taught me what I needed to know like how the miter saw and sander worked, plus all the other tools I was using. They did help out with a table saw and creating the triangle support joints in the corners, They used some pine left overs they had while making a staircase indoors. I did not feel up to the task of using a table saw given all the relatives I know who have lost a finger to them.
In the end we decided the design would be three boards high and take an alternating pattern on corners. layer one short, layer 2 long, layer 3 short. Went with a galvanized and painted deck screw so it can take the weathering. Ran into some problems like making everything level as some of the boards were warped and other ones had undesired aspects like knots and tacky sticker goo I could not remove. So I used them for the base that will not been seen so much. Clamped everything down and called it a day.
Once it was all done and over with, I then brought them back home from my buddies work garage and started to seal them. I went with a boiled linseed oil as its a food safe option should the wood degrade into the soil I will plant in them. I will need to reapply it to the boxes year after year but the main coat is the most important one and I put it on 3 layers with a good dry in between coats. the inside of the boxes that where coated did not degrade at all as the sun did not hit them so it will not need a new coat just the outside. Overall the end result was very impressive for myself, I've never taken a woodworking class ever and It was a near perfect outcome for me. Heavy Duty Planter Boxes for all my gardening needs. I made a last min decision to add in a plastic liner to preserve the wood even longer and stapled that into the frame. it has held up quite well and may need replacing end of 2nd or 3rd year out in the sun. Used a thick moisture wrap plastic with UV protectors in its formula.
Lets see what I can grow in them this year!
m0use's haus of projects - garden box edition
Likes
2
Share


@Comfrey
Follow
Das Substrat ist nach heftigen Regenfällen vollgesaugt aber dennoch gut belüftet. Vitales Pflänzchen. Es stürmt, sie brauchte etwas halt und überstand diese Woche ohne ein nächtliches Glasdach über dem Kopf.
Es sieht vielversprechend aus bis jetzt.



Likes
2
Share


@Indy4
Follow
8.11. chopped exactly at day60, some plants are furtehr along than others, some have amber some milky but with one drying tent you have to make a choice.
Smallest plant from the beginning looks surprisingly good with leaf to flower ratio, the rest will be more trim jail.
Updates on the numbers soon.
20.11. Curing in jars after 12 days in 16c and 60rlf after dry trim. Burping once a day

Likes
54
Share


@ASCBOOGS
Follow
Everything seems fine apart from lower few leafs turning yellow going 12/12 next week so just flushed with half strength nutes at 500ppm if there is anything i could do to that will help or improve things please comment thanks also defoliated today

Likes
31
Share


@Mrs_Larimar
Follow
2024-05-15
No big thing to report,
The Planties doing well, established in the new Pot-
I placed them in the youngsters room,
so they will get stronger light, and gettting more solid structure.
BREEDER INFO
Tangerine Snow F1 Fast Feminised is a 75% sativa, four-way cross of (Boost x Tangelo) with (Lavender x Power Plant).
This Fast F1 hybrid is bred from Cali genetics and boasts great citrus terps, high resin production for extracts,
high levels of THC, very good yields and excellent mould resistance.
Tangerine Snow F1 Fast can be grown indoors as well as outdoors. Indoor flowering times are between 8 - 10 weeks
while harvest time in northern latitudes is during September while in the southern hemisphere growers will be harvesting during March.
Recommended climate regions are hot, dry, humid and warm. These are tall, semi-branched plants that grow in excess of 200cm
and display a high degree of vigour with very good uniformity.
In common with many other heavily sativa-dominant strains, Tangerine Snow F1 Fast offers excellent resistance to mould
as well as to plant pests and diseases. The combination of citrus terps and plenty of resin makes thi
a very good extract strain with the 'washing' method delivering very good yields of hash.
The citrus terpene profile is reminiscent of mandarins and tangerines and also has sweet candy notes.
THC production has been lab-verified at a strong 24% while CBD is low. The effect is uplifting and energising,
perfect for use during the day and early evening.

Likes
4
Share


@StickyFingah420
Follow
Últimas semanas de floración antes de dar paso al lavado de raíz, desde las 2 últimas semanas se agrega overdrive

Processing
Likes
4
Share


@MallorcaBreeders
Follow
Los Riegos con abono son alternados, ay semanas que riego 4 días y otras de 3 días, Los riegos con bnzym y prosilicate los realizo a parte del resto de abonos, en esos días que alterno.
The irrigations with fertilizer are alternating, ay weeks that I irrigate 4 days and others of 3 days, the irrigations with bnzym and prosilicate I realize them to part of the rest of installments, in those days that alternate.


Likes
11
Share


@Papastroumf
Follow
Day 42 : Watering with co2 tab / 5L. Also added food again because i think they need it. Increased ppm to 850. Maybe the next one will be pure water. Ventilation works all the time when lights are on. Temp and humi are stable and this is good for the girls. 6 cm in 3 days. Patience is the key always. Also removed some burned leaves from all ladies. She is beautiful community.
Edit (Day 46) : Watering with co2 tab every 5L. I watered with juices again at 850ppm because i felt that they need it. Only DsD drank pure water because of burns. She stopped height grow. Her buds are the most fat. She will be the first chop chop guys. :D :D :D . She is full of crystals.
Likes
25
Share


@JeyGanesha
Follow
Più ci avviciniamo al raccolto e più sento che ne è valsa la pene investire tempo in questa piantina
Likes
4
Share

@Borberad
Follow
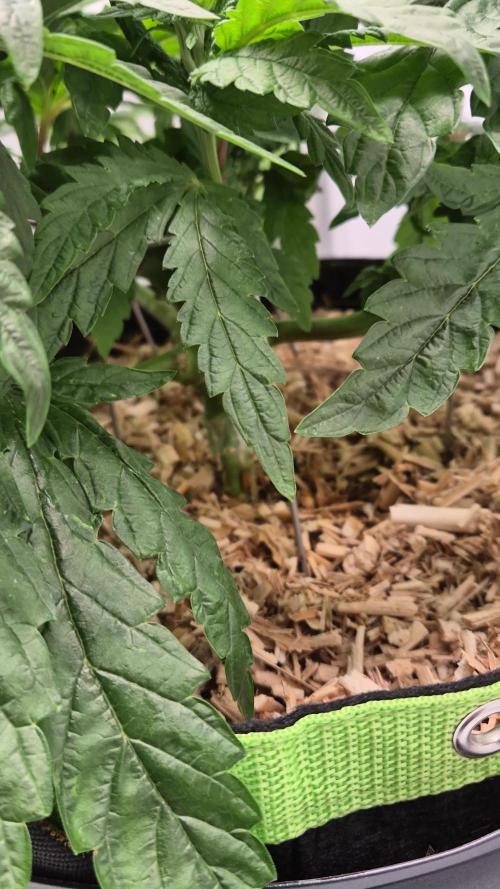
Ihre Symmetrie macht sie zu einem echten Hingucker. Sie wächst sehr weiterhin extrem kompakt.
Tag 55: Es sind ein paar der inneren Blätter entfernt worden.
Tag 56: Wir haben das Blümchen mal etwas geöffnet.
Likes
2
Share


Likes
Comments
Share




Likes
Comments
Share

@Walachiangrowindiary
Follow
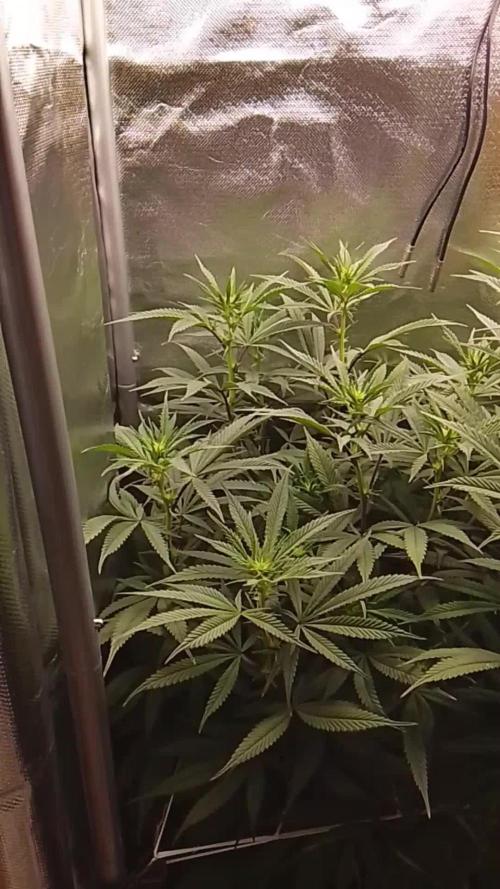
Got to clear underneath of canopy because of deficits lost of lower leaves died. If u have new living soil mix u need time to got IT estabilished by microorganism life by properly moisture and temperature. Compost teas,kelp Are great helpers too. I'm using bioenhancer by ghf that contains fulvic acids and seaweed (kelp).

Likes
8
Share

@GREENPHOENIX6262
Follow
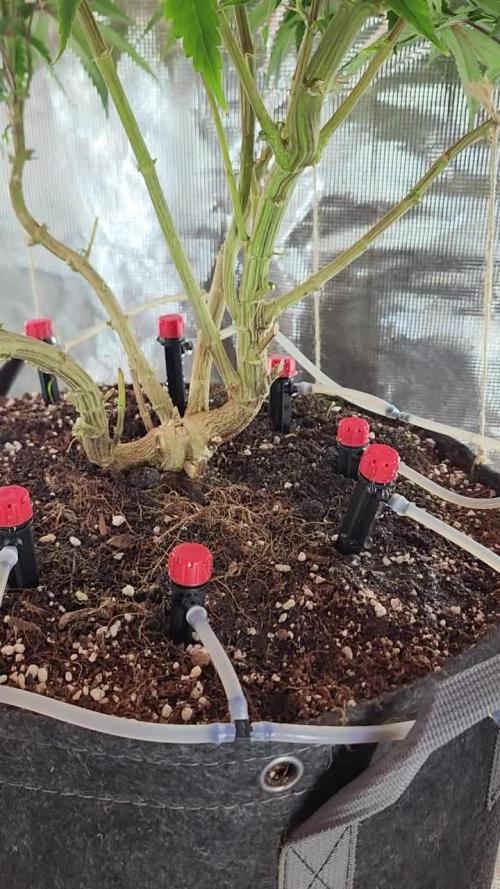
02/23 (M) (Pre-Flower) flipped mother into flower last week - flushed with clean water for 2 days then began giving flower nutes in small doses for now - still feeding off the drip lines seems to be working as planned. Feeds will become more often (once/twice a day - 1 min feeds.
02/23 (C) - 7 of the 15 clones have rooted successfully with thick multi strands in each clone - Green color starting to come back as well - Have begun applying nute feeds to help recovery - Will give the other 8 sometime to begin rooting but if nothing happens in the next week then I will keep the 7 rooting now and cull the other 8.

Likes
11
Share


@UnorthadoxDude
Follow
Well here we are at the harvest. I was going to run her another week or maybe two, but when four of her colas fell over and snapped I figure now would be a good time to harvest.
Overall this has been a really easy and straightforward grow.

Processing
Likes
88
Share


@Fergie
Follow
hey guys so not much happen in last week girls are filling out nicely ,going to repot next week have new 10gallon smart pots coming . still on r/o water with 10ml calmax every gallon . Til next week😀

Likes
11
Share


@Master_weeda
Follow
Bonjour à tous les padawans et maîtres jedis
Jour 29 la plante est vigoureuse je pourrais effectuer une coupe mais je préfère attendre encore 4 ou 5 jours j'espère faire 8 beaux buds je retarde donc les dernières coupes au maximum pour que le tronc soit assez fort pour soutenir la structure sans problème.
Jour 31 arrosage avec 2 litres d'eau ph6.3 à laquelle j'ajoute 4ml de rootboster cellmax, 3ml de cellmax bio organic bloom et 3ml de cellmax bio 8-2-2 par litre d'eau
Jour 33 je décide de pratiquer les dernières coupes demain je la laisserai récupérer 2 ou 3 jours avant que je pratique un LST qui déterminera sa future forme finale
Jour 34 topping (voir video)