


Likes
Comments
Share


It was a nice experience, It helped me with some things that I didn't know before. It was hard at the beginning because the plant was on a bad situation. But thanks to some fertilizers everything changed, also with love and patience. Good production but it could have been more. Next times will be better, now we have to be thankful and ready to continue😜

Likes
48
Share


@McBubatz
Follow
14. Woche, P1 fällt morgen, die ist soweit gut denke ich (ca. 20% aufwärts Bernstein Trichome).
P2 braucht leider noch ca. 1 woche länger.
93. Tag ist für P1 das Ende, sie wurde heute vorgetrimmt und zum trocknen aufgehängt.
Ergebnisse gibt es wenn die P2 auch geerntet wird, denke nächste Woche um die Zeit.
Aber eins kann ich euch versichern, is mit Abstand die schwerste die ich ist jetzt hatte😊🍀🍀.
Gebt euch auch mal wie viele Trichome die gute produziert hat, Duft is noch sehr pflanzlich, Blüten sind ziemlich fest gewesen hoffe das es nach dem trocknen noch so ist. Alles in allem super Run.
Hoffentlich is die gute bei den Top 10 das wäre ein träumchen, wobei ich es wirklich jedem gönne zu gewinnen und bei soviel starker Konkurrenz geht ich wahrscheinlich unter.
ABER was ein geiler Contest trotzdem, hier ein dickes fettes Dankeschön an Zamnesia und Plagron für die Möglichkeit hier überhaupt mitmachen zu dürfen 🙏💙💜
98. Tag , werd die gute am Samstag/Sonntag je nachdem wie ich Zeit finde, umlegen und zum trocknen aufhängen.

Likes
6
Share


@XanHalen
Follow
Dec 12:
Growth has been good, leafs started yellowing as I tried a regular watering as opposed to a feed, and they did not take well to it. I’ve read that it’s good to incorporate waterings between feeds, but 24hr later noticed a bit of yellowing on the lower section, 48hr post watering even more yellowing.
Dec 18:
Going with feed only and yellowing has halted, stretching has officially begun. No adverse effects from the short term nitrogen deficiency (that’s what I narrowed it down to). Playing with budsites to maintain an even canopy, and as soon as I see stretching halt, and fattening begin, I will up the bloom nutes.
Dec 20:

Likes
3
Share


@Ogbangbang2981
Follow
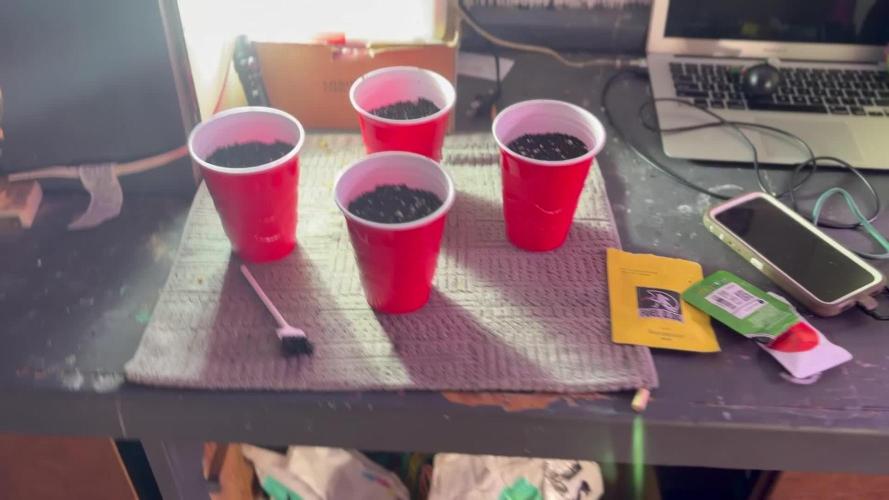
same as last week nothing to special just growing healthy on her bat poo feed coming up nicely I think other people might see differently but that's small grow space C4Matic and friends .




Likes
93
Share


@Ferenc
Follow
Week 10, so from today I stopped watering the Gelato Cookie D'ohpe and on Saturday no more light as well. Sunday is harvest day finally. Not much changed, I raised up the water with 25ml so the Purple Punch gets 200ml 2 x a day. That's all, since last week I started giving 13 hours darkness and 11 hours light and from Monday will be 12/12 after I harvested the Gelato Cookie D'ohpe and I can use the tent only for her. Fertilization will happen on the same days. Sunday fun day, Gelato Cookie D'ohpe is harvested. Purple Punch left alone. From tomorrow I will switch the light schedule 12/12. End of the week Purple Punch is 43 cm.

Likes
22
Share

@BeautyBudsVio
Follow
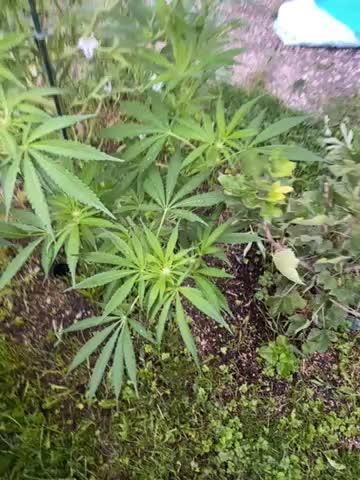
31.08.2025
La Kush Cake photo looks fine.
She build her buds very good so far.
Weather is pure shit, but im sure she will do her best possible :-)
Likes
12
Share

@n1mbu5
Follow
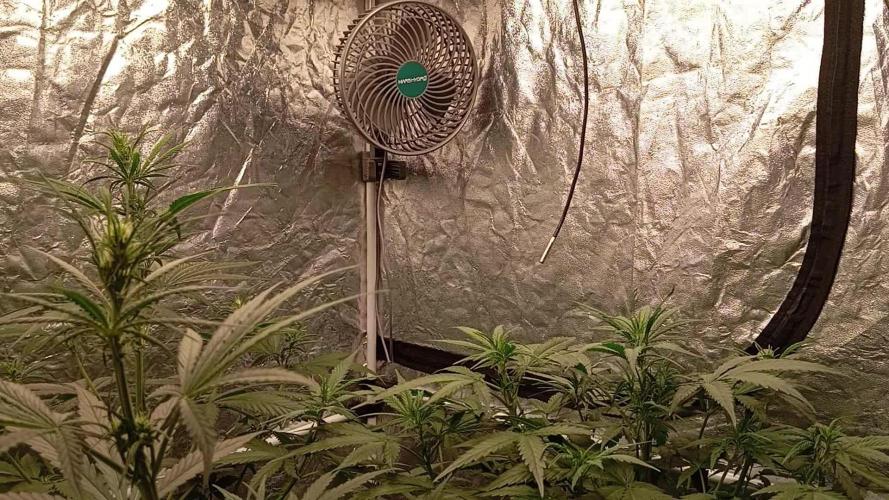
Ok guys been flowering since 05.07
Just moved into the big tent and installed AC infinity autopots
They are getting big!
Was playing around with time lapse and caught one of my girls moving to adjust growth for position in the new tent thought it was pretty cool
I am going to be getting a quality cam for doing professional time lapses soon I'm so excited😍
Likes
51
Share


@Seldom_Seen
Follow
Day 22: First day of LST. Braced the stem down low first in the opposite direction to what it was being bent to protect the roots from being torn. Bending the main stem down is the only bit of LST I done today. I’ll give it a few days to find shape and fill in its own gaps before going at any of the branches.
Day 23: Just gave the main stem another little pull today to bend it down a bit further.
Day 24: Moved the hook on the garden tie up one node on the main stem and pulled down further again. Also started pulling the branches into place and pinning down. Clipped off a few lower leaves.
Day 25: Another bit of LST today. Gaps are filling themselves in nicely already. I started pulling the top of the main stem off to one side to fill the gap shown in the photo. Watered today as well with nutrients(1ml G, 1ml SR). Clipped off one more lower leaf.
Day 26: I didn’t want to remove anymore leaves until next week but there were a few that were either getting in the way or really blocking off light so I removed 3 lower leaves and the one biggest leaf from near the top of the plant. Done another small bit of pulling and pinning. There are 4 branches that I’m waiting to get a bit longer before I pull them into position.
Day 27: Watered today with nutrients (1ml SR, 2ml CM, 3ml G). Pulled the last few branches into place. There will still need to be some more adjustments over the next few days but it has its main shape now. There’s loads of signs of pre-flower but I think I’ll stay on the veg nutrients for another few feeds.
Day 28: We moved from the veg space to the main grow space today, it’s the most beautiful thing me and Babydoll have ever seen. The human helped us move obviously. Turned the lights down to 80% for the first 12 hrs. We found some yellow spots on two leaves. Removed both leaves and posted a help question to Growdiares.

Likes
12
Share


Likes
4
Share

@Emerald_Gardens
Follow
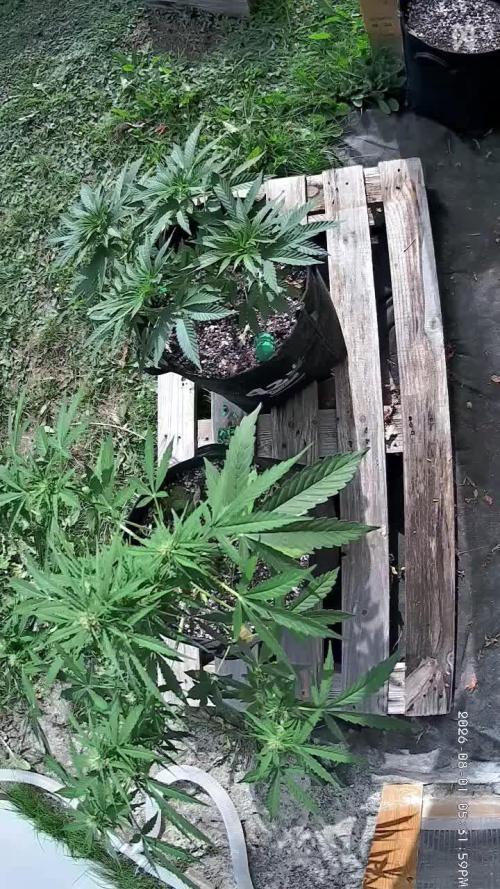
Purple lemonade is harvest at roughly 30gram wet. Very small plant due to early stress. Smell is mild and lemony. Og kush is smelling nice and gassy and is considerably larger than the purple lemonade. Lots of accidental branch snapping which was saved with grafting tape with no leaf sagging and heals almost instantly. Mystery plant is still in veg.
Likes
9
Share


@Arcadios
Follow
So I think this is the week where I started to go a bit wrong. The Dr Earth I added on week 4 fixed my nutrient problem, however, I was impatient and added a bit more. As a result, I had 2-3 crispy, yellow leaves on the Quarter Pounder in the middle. Since then, I've upped my watering a bit and it seems to be fine.
This week
* Lights still at 15"
* Giving about a gallon of water every other day, each. At this stage, I get barely any runoff, but stop when runoff is consistent.
* Top dressed w/ more FFOF with some myco mixed in.
See video for a better view of the nute burn.


Likes
42
Share


@Grey_Wolf
Follow
Barneys Farm Pineapple Chunk update 5th Jan 2020 11th week of veg over and done with.
Ive done quite a bit since the last update as far as this girl is concerned 1st of all i erected a greenhouse that covers all of my Photo period plants.
and secondly I transplanted the Pineapple chunk out of the pot she was in and put her straight into the ground so I'm expecting and hoping that she will explode once the stretch starts in about 5 weeks or so. The soil I moved her into is really nice and fertile as it was used to grow winter vegetables and Broad beans.
The growing of legumes can benefit the soil by bringing nitrogen to the surface to be made available to anything else growwing in the same soil.
I gave the area I transplanted her into a good dose of Azospirillum and Mycorrhizal innoculants after she went into the ground.
Thankyou for checking out my update see you next week 👍
Likes
13
Share


@Robeeriegenetics
Follow
Week 13 not a bad week if I do say so my self …guna tie down this week and begin spraying silver thiosulfate on donor plants then next week I’ll throw the donor plants into flower and begin the actual breeding project …which ever specimen reverses first shall be collected and used to pollinate which ever one doesnt will be killed and removed acord
Likes
10
Share


@Cannabot
Follow
Some night time pics,enjoying their rest mode.Suns been great the past few days.Growing bigger by the day

Likes
2
Share

@GERGrowDesigns
Follow
Welcome to Veg Week 4 of Sensi Seeds Karate Kid
I'm excited to share my grow journey with you from my
Sensi Seeds Project . It's going to be an incredible ride, full of learning, growing, and connecting with fellow growers from all around the world!
For this Project , I’ve chosen the Feminized Photo Strain Karate Kid :
Here’s what I’m working with:
• 🌱 Tent: 120x60x80
• 🧑🌾 Breeder Company: Sensi Seeds
• 💧Strain Info : 25-33%
• ⏳ Flowering Time: 8-10weeks
Likes
2
Share


@Limestone_Island
Follow
Im feeding her steadily at around 825ppm every morning monitoring any possible deficiencies. I did defoliate quite a few leaves from the to[ and bottom once I felt that she is thriving happy and growing more vigorously during the stretch. I raised the light a full 2 feet. during week 1 and now at the end of week 2 the tallest stalk is about 14 inches while most are around 20. reason for a few stalks being taller is because of what happened when our 3rd plant ended up being a male during the transition to 12/12. Im not gna try anything crazy to try and fix it. Obviously there are no problems so dont fix whats not broken I guess. Have a great week !

Likes
33
Share


@Roberts
Follow
Jack herer auto is looking great forca 100 watt grow. She appears to be toward the end if bulking. I inspected some trichromes today, and it was not close enough for my liking to start a flush fade process. I have been growing her under the spider farmer SF-1000, in Athena blended line nutrition. It looks like it will be a good grow for a 100 watt light. Thank you Spider farmer, Athena, and ILGM. 🤜🏻🤛🏻💪🏻❄️🌱
Thank you grow diaries community for the 👇likes👇, follows, comments, and subscriptions on my YouTube channel👇. ❄️🌱🍻
Happy Growing 🌱🌱🌱
https://youtube.com/channel/UCAhN7yRzWLpcaRHhMIQ7X4g

Likes
49
Share


@masterofsmeagol
Follow
7/11 Got half in of rain last night. Glad I didn't water. Ph of rain water is very acidic. Added supports to the blueberry cheese in the 50. I just used string and went diagonal and attached to the cage. Wrote a ton but it disappeared. Anyway looking at previous diaries I was wrong about senescence. It wad the life cycle of those earwigs that did that to my plants (see other diaries). This soil mix is amazing. These plants gave only gotten like two small feeds of big bloom. I showed my commercial buddy and I'll keep it between us what was said but it made me feel really good. I'm considering either expanding the cage in one direction with some lumber I already have or moving a couple outside tge cage. That way I have more room. He said he's seen plants structurally similar reach huge heights (14f) so I'm just trying to avoid future problems. I at least need to get the trellis on. I hope poor that's food enough. Did a real nice video this morning but nothing wanted to upload and it just uploaded the same one twice. I'll try again and hopfully it will go up. If not I'll put it up tomorrow.
7/12 Dad has surgery this morning. I did a quick video and took some pictures. I need to do some rearranging with the plants and cut a pallet to fit in the back. Then I can put a vertical trellis up. Haven't decided if I'll add on to the cage, remove a couple plants or just rearrange things but I'm leaning towards the later. They will need water again and I'm wondering if I should start nutrients but everything looks so good. By this time on past diaries I'd be losing all my leaves bu now. MI think it wad part ear wigs and part to many nutes. This soil mix is taking these plants through veg. I'll probably do a feeding soon but it will be organic and it will he small like a big bloom or ancient amber. Im leaning towards not using growbig this year as my plants seem to be doing great without it. We'll see. I'll keep this updated.
UPDATE: Went back over and gave plants a full watering. Some were slightly drooping. I was going to add nutes but decided against it as I didn't see any deficiency. So far NO Earwigs! I comed through the plants and I did find a jpn beetle which I happily killed. I mixed up 8 gallons of water and gave it to the 11 plants so it wasn't quite a gallon a plant. I need to rearrange the plants so I have room to move around. I also need to cut another pallet and use the spaces I'm not. Trellis needs to go up.
7/13 I think I've got the watering amount down. Now just to find how often which will depend on weather. I've watered very little this year. They loved that gallon. I was going to use big bloom and kelp me/you but looking at my garden I decided not too. My buddy asked what i was addingvthings for and to wait fir what i added to do what I wanted it to do. I see no nutrient deficiencies so why add anything? I think this soil mixture will get me all tgexway through veg. I dont plan on using much in fliwer either. Definitely good genetics. I really need to cut that palley and move the 1 10gallon to the far back coener. It will open thibgs up so much better. The garden looked so beautiful this morning. Getting very aromatic. I started untangling trellis netting but had to leave. I'll update what I do. Happy growing folks
UPDATE: Went back over as I had a slight intuition that I needed to check the garden. I found and killed at least 7 jpn beetles. That's what's been making holes. They tried to escape and bounced off a tarp but I got it. I went through the interiors and found two pillars. If these beetles are gonna be around I'm ordering a net. I'm also close to positive I'm going to extend my cage in the back a few feet. Things are getting unmanageable in here. My buddy said I'll be having problems soon if I don't do something. I'll document what I decide to do.
7/14 Found ONE jpn beetle in the garden this morning. I can manage those well enough. The birds help too. I check my garden multiple times a day so I manually remove many pests. However I've noticed some thrip damage on a leaf and a leafhopper damage on "A" leaf so there are "some" pests around but not enough to spray shit. A couple wasps were doing there job while I was there. Supposed to get thunder storms after three and tonight. Supposed to get over a half inch of rain tonight. I lifted the bags and decided to hold off and let mother nature take care of it as the bags weren't totally dry. Only problem I really have is space. I AM moving that 10gallon (that's the same size as some 20's) in the back. There's 27in not being used and a few feet the other way. My buddy cautioned me that I'm going to have problems since my plants are so crowded. I agree with him. I spoke with me father and we have most materials to extend my cage four feet in the back. I think that's my plan. I'll extend the structure before the stretch then I can put up the supports. We'll see how this goes.
UPDATE: Went back over to check the girls as I had a feeling I ought to. When I got there I saw that a couple of the blueberry cheese were pretty light (liftng the smart pot) but the others seemed to be fine. ONE 10th planet was light like that and the purple punch in the 10 gallon was as well. Each plant thar needed it got at least a half gallon of water. I'm waiting to see if we get the thunderstorms and the half inch of rain. I watered the MASSIVE blueberry cheese in the 50 but I only gave it 1 pitcher which is like 1/4 gallon or so. Don't know why I even gave it that. Looked fine but the soil WAS pretty dry. Next year I'm giving myself way more room. I was running trying to chase these jpn beetles. This time I have the dawn and water and a measuring cup to knock them in. This ain't my first rodeo. I did notice some bright yellow streaks on a leaf edge and I'm hoping it's not septoria. I doubt it but I have an anxiety disorder and I worry. I hope I can get the cage extended sooner rather than later. It's getting hard to move in there and more importantly I can't take any more plant pathogen problems. I'm considering starting a plant doctor regimen just to be safe.
7/15 Got a bunch of rain last night. No jpn beetles in the garden and not really much damage. I did notice this (I think it's leaf hoppers) that leave those dots close together on a leaf so it appears I've got a variety of pests. I'm considering how to approach this. I mean the damage is very minimal but I don't want it to get out of hand. Another thing I need to look out for is leaf septoria or any other fungal pathogens. I believe that has been part of my problems in the past. I think that's what caused my earlier grows to drop all their leaves so quick. I think I'm being overly cautious but its very crowded in there. With my father just getting out of surgery the girls will need to wait a little bit before before I can extend the cage. I could still cut the pallet and move the 1 10gallon and that would give more room. I rearranged a LITTLE BIT so they have a little more room but I've really got to get this cage extended.
UPDATE: IT Rained so hard I had to pull the car over. We hydroplanned the whole way home. After working ob my house I went to see what the damage would be like. NOT A SINGLE BREAK THAT I COULD SEE. I took a video but since the wifi here sucks I'll have to upload it tomorrow. Walking around in the cage even if I cant get it extended I think I'll be OK. It obviously will open me up to lots more issues but at the very least I can reorganize before I build on. The 10 gal purple punch would fit perfectly in the back and I have a pallet I can cut to fit it in place. Putting that one back and pulling the others forward will be much better than what I've got going on now. I'm also thinking about running an extension cord and putting fans under the canopy or at an angle to keep the wind moving. Just thinking outloud. However after that storm the girls looked as happy as I've ever seen them. All happy praying to the sun, thankful for the much needed rain. Mother nature does a pretty good job with out me messing with it. I've noticed a couple interior lowest leaves turn yellow and die like a nitrogen deficiency but everything else is fine. Also noticed a leaf that looked like a p deficiency but again, it was the VERY bottom leaf on ONE plant. Again the rest of everything looks fantastic. I'll keep an eye out for anymore nutrient deficiencies and if anyone that reads this sees some please let me know. I should've taken stills since they looked so good but I got it on video.
7/16 It POURED last night and throughout the day. TORRENTIAL rain. The branch breaking sheet rain that us outdoor growers learned to fear. My plants aren't trellised currently. I know what I need to do now. I have a pallet to put in the back corner and I'm moving the purple punch in the 10 there. And pulling others forward where there's more room. Then when I extend it (it's gotta be done this week) everything g will be in their proper place and I can just throw on a vertical trellis. I also noticed more (leafhopper) damage on a leaf. Different leaf of the same plant so I'm considering spraying something. I have a number of products but I was trying not to use them. Luckily I have these diaries so I can look back and see certain plants reactions to certain nutes or fungacide/insecticide/nutes and the doses used. I haven't been using much but if my plants will remain cramped I'm going to start the plant doctor. I'm seeing more pillar damage too but BT is super narrow so I'm thinking when I fo spray for pests I might use cap jack and be done with it. Then I can apply the BT in flower if it's necessary. I took a video but I have to wait until tomorrow to upload. I took a quick snapshot though.
7/17 Despite the torrential rain I don't have any breaks. I'm noticing more pest damage though. Another leaf on the same plant had those closely shaped round circles. I forget what pest it is but it's there. Caterpillars are there I'm sure so I may do a preclcentative spray. Just unsure what I'm going to use. I lost a COUPLE very bottom interior leaves that look like they just got used up. After this rain I think think the plants might benefit from a feeding. Probably next water after they dry out. I REALLY need that cage extended. I expressed that today and it should be done this week. I'm looking for pallets today. I have the little one that I can put in the back which will allow me to move the 10 gallon and move the other forward. That will help some but I need more room. I'll update as I go.
UPDATE: GOT A SMALL PALLET AND IT FIT PERFECT IN THE BACK ROW. I MOVED THE PURPLE PUNCH IN THE 10 GALLON ONTO IT. I SHIFTED A BUNCHVIF THINGS AROUND. I ROTATED ON BLUEBERRY CHEESE 180 DEGREES SO IT WOULD FIR BETTER. CROP ROTATION IS GOOD ANYWAY. I TOOK VIDEOS AND YOU CAN NOW SEE THE ROWS MUCH BETTER. 2 WITH 3 and 1 WITH 4. IT'S SIGNIFICANTLY BETTER THAN IT WAS. I CAN GET AROUND ALL SIDES OF EVERY PLANT NOW. GRANTED THE LARGE 50 IN THE BACK IS GOING TO HAVE SOME TROUBLE BUT ILL JUST STAKE IT TO THE CAGE. IT WILL GROW TOWARDS THE SUN ANYWAY. IM SUPRISED I DIDN'T LOSE A BUNCH OF LEAVES AFTER THIS RAIN. MOVING THINGS AROUND AND LOOKING ON THE INTERIOR OF PLANTS I FOUND A COUPLE LEAVES THAT HAD BEEN USED UP. I REMOVED A COUPKE LEAVES THAT HAD DONE THEIR JOB. I'LL UPDATE AS I GO ALONG.
