


Likes
Comments
Share

@soil2bud
Follow
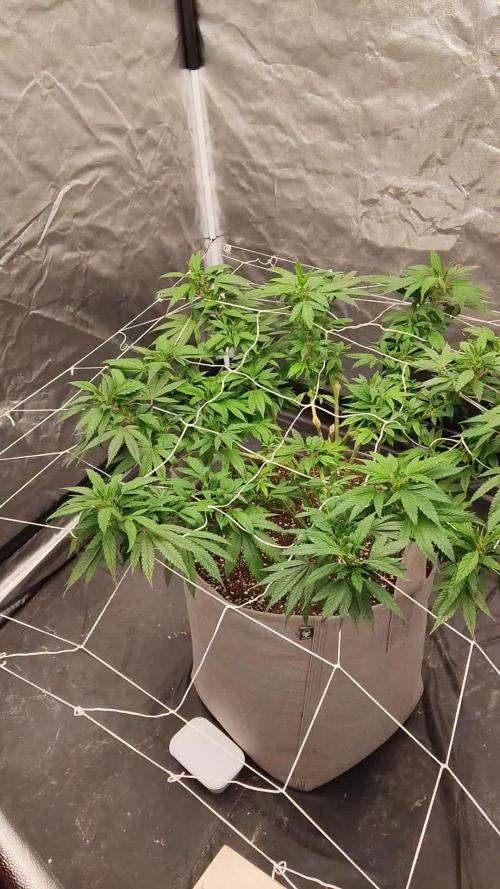
She is recovering well since the transplant. She is much bushier and greener than last week and I am happy with it.
Yesterday I gave her a Bio Fish feed at 2.5ml per liter and next week I will slowly increase it by 0.5ml or as needed. The scrog net is still just being used to keep the frame of the plant down and the 2nd screen will come as soon as I start seeing those 5 and 7 bladed leafs.

Likes
13
Share


@Mrgreengrinch
Follow
One or two more day will start flushing 2 of the girls other two need Anthor week or so at least


Likes
5
Share


@OntarioAutoGrower
Follow
03.22.23. Start Week 3. Today i started the Low Stress Training on the plants. I first carefully start to bend the plant kinda massaging the plants and making the plants softer and easier to bend down. I then tie the base on one end to keep the plant from snapping, and bend the plant the opposite direction and tie it down. I will continue this daily until flower starts to create a perfect even top canopy.
End of week Review. All 3 plants seem to be reacting well to the nutrients and LST they are getting. Also the few leave trimmings seemed to go well with them all. I have officially named the plants. There names are Megan, Lucille, and Alien. Very excited for these plants to start there flowering stage


Likes
5
Share

@Skynets_Growing
Follow
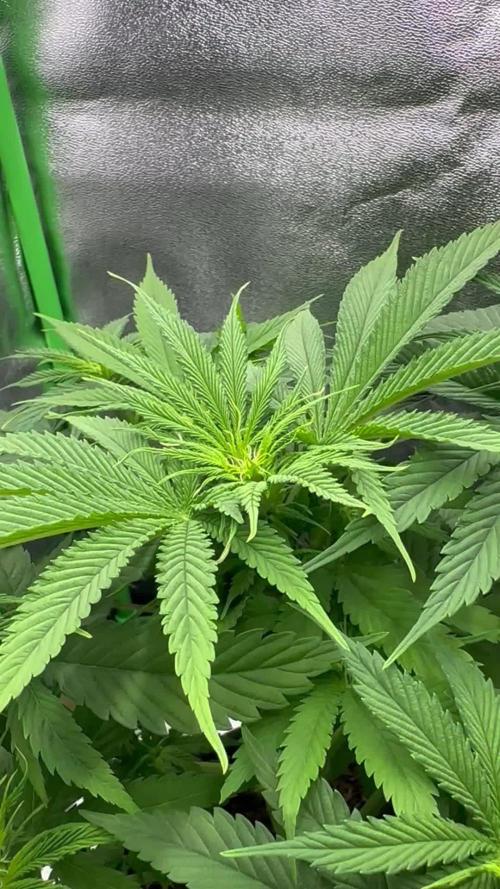
Tessa her first flower week after light change a week ago is being a lot. She had a great stretch a lot of new flower starts und she become a lot fungus gnats. That‘s why I place more yellow tabs. Hopefully it help‘s?
And in my few, Tessa her Green is more Dark and powerful. Hope you enjoy the grow with Tessa and give her a Follow for the Channel to support her 👀😉🤗.
Likes
9
Share


@eldruida_lamota
Follow
Que hay familia, estamos de nuevo actualizando, y es que traigo la sexta semana de floración de las Kritical de la web de GrowBarato.
En este diario dejare más imágenes ya que tengo algún ejemplar más.
Van progresando adecuadamente todas sus flores, esta semana añadiré bien de ExplotaCogollos de Agrobeta.
Ya os comenté que estamos en la recta final y una vez solucionadas las carencias solo les queda engordar y compactar bien.
Agrobeta:
https://www.agrobeta.com/agrobetatiendaonline/36-abonos-canamo
Mars hydro:
Code discount: EL420
https://www.mars-hydro.com/
Las maximas de temperatura no superan los 25 grados y las mínimas no bajan 20, así que no me puedo quejar.
Los niveles de humedad también son los correctos van entre 50%/65% de humedad relativa.
Por supuesto el Ph lo estamos dejando alrededor de 6.
Hasta aquí es todo, buenos humos 💨💨💨.


Likes
18
Share


@VI_Cannabis
Follow
June 14th not a ton happened, I believe I watered them (It seems I am having to water every second day now as they start to get bigger)
June 15th - still just growing away. I went out and got some different ducting so I could pull air from outside better with the ac infinity inline fan. I also received some insulated ducting from Amazon that is a hell of a lot better then the standard stuff I am using. I also grabbed a new 9 inch fan (still deciding the best place to place it, for now it is beside the door). I grabbed a larger oscillating fan aswell to keep air moving around.
June 16th - decided I would do some lst and then I gave them some water. I have been feeding nutrients every second day. I have also on every 3rd watering been doing just ph’d water. The humidity seems to drop quite a bit within 10-20 seconds of the door being open hence the lower reading. I am sitting roughly at 45-55 depending on time of day. As for temperatures I’m still struggling to keep it down during the warm days and it seems the highest I am getting is around 29 since switching the lights off from 11am - 5pm
June 17th - the girls seemed to have perked back up after yesterday’s lst. Not much new today just some growth!
June 18th - Unfortunately I forgot to take pictures today. But not to much difference. I did feed the girls with some nutrient water today.
June 19th - I again forgot to take pictures. They are just growing away and doing there thing. I did check for growth from the topped portion on the bigger plant, no growth from one of the 2 tops. So I indeed cut it to low… I won’t be doing that again haha.
June 20th - finally grabbed something to deal with the heat since it is getting hotter everyday. I picked up a 10,000 btu air conditioner. I have it set at 23 degrees. I also moved the plants around and re-arranged some stuff. I took the inline fan that was taking air out and instead the ac output is going to there. I ended up having to make the vent into a 6inch vent on the trailer. Temps stay around 23 now. Humidity is still 45-55 depending on time of day.
Likes
17
Share


@Karl_Heinz420
Follow
Blütetag 16 🌺
1,5 l Osmosewasser bei PH 6,3 mit Calmag, Bio-Heaven, Fish-Mix, Bio-Grow, Top-Max, ALG A MIC und Bio-Bloom.
Blütetag 19 🌺
1,5 l Osmosewasser bei PH 6,3 mit Calmag, ALG A MIC und Eisen-Dünger F06.
Blütetag 20 🌺
Lollipopping
Sunlight Evo 3-60 60% 55cm Abstand (ca. 625 PPFD)
22-25 Grad Celsius bei 50-55% Luftfeuchtigkeit. VPD 0,8 - 1,0 kPa

Likes
8
Share

@Growverse420
Follow
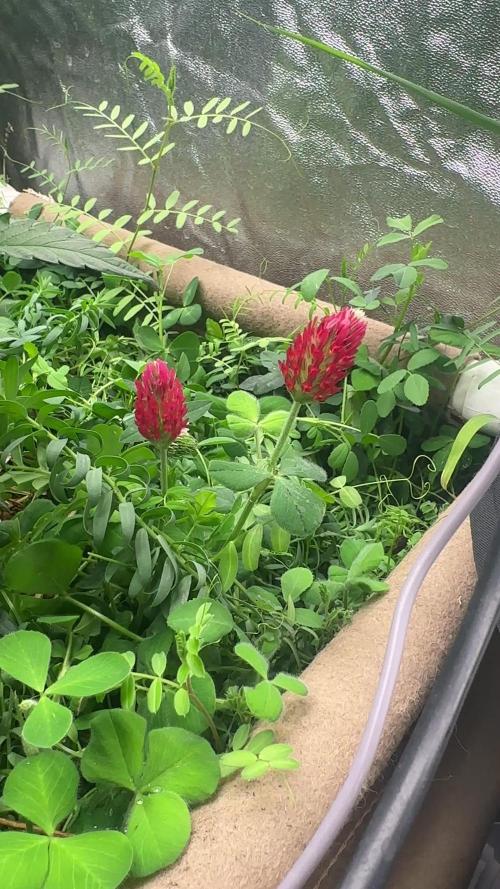
Week 1 of Flower is officially complete, and with that, the stretch is on! The canopy is definitely filling out, and the Jelly Donutz (which was a couple of weeks behind the others) looks like it might end up getting crowded out. I adjusted the oscillating fans to make sure there was no wind blowing over top of the Jelly Donutz, sometimes that can discourage them from stretching up into the wind, and I need the Jelly Donutz to stretch as much as possible. That being said, the two Hella Jelly’s and one Vanilla Frosting are thriving right now. Many bud sites are starting to appear and point up vertically now.
The Hella Jelly and Vanilla Frosting clones have just now started to show roots in the Clone King. That means, this week, I will need to transplant them into small pots so I can maintain them as mothers, in case one of them turns out to be a keeper after harvest! Also, this week in the veg tent, I popped three Frosted Cherry-O’s autoflower seeds from Speedrun Genetics. Two will be growing in an Earthbox, and the other will grow in a 7-gallon fabric pot of living soil that I will feed via topdressing. I’m really excited to see how these autos grow in the Earthbox. The Earth Box is a sub-irrigated planter, which has a separate water reservoir below the soil that the plant can drink from directly (once its roots make it through the bottom grate). The corners of the Earthbox pack the soil tightly, and those corners wick the water up as the plant drinks. This, combined with the ability to really mound top-dressings under the plastic cover, (which keeps the top of the soil moist) is supposed to make the Earthbox a powerhouse for autoflowers. The feeder roots have access to all the nutrients they could need, and the bottom roots can tap into a sort of “underground spring,” where they can drink fresh water whenever they want. This will be my first time using an Earthbox with an autoflower, and I’m excited to see how it turns out. Keep an eye out for that diary to start later this week. The 4x4 is off to the races now, with week 1 of flower DONE! Happy Growing, everybody 😀

Likes
49
Share

@yan420
Follow
FERMAKOR BARREL MIX – BASE IN USE
(Testing on the Fantasy Feast girl we pulled out of another diary
https://growdiaries.com/diaries/274722-grow-journal-by-yan402 )
(FERMAKOR BASE SYSTEM KOH VERSION diary
https://growdiaries.com/diaries/278391-grow-journal-by-yan402)
(Urea & Micros on the way — first week running without them)
🍶💧🍶💧🍶💧🍶💧🍶
💧 30 L Barrel – Current Working Mix
🍶💧🍶💧🍶💧🍶💧🍶
Step 1 – Calcium Nitrate (Part A)
7 L warm water (~35–40 °C) → added 45 g Calcinit, stirred until fully clear.
That’s the calcium + nitrogen backbone for the feed.
Step 2 – FERMAKOR PK Base (Part B)
15 L water in the main barrel → added 30 ml FERMAKOR PK Concentrate, mixed well.
This forms the main P + K part of the formula.
Step 3 – Combine Solutions
Slowly poured the Calcinit mix into the barrel while stirring — no reaction, still crystal clear.
That confirms the mix is stable and precipitation-free.
🌿 Step 4 – FPJ / FFJ Batch
Added 30 ml homemade FPJ (fish + veg batch) ≈ 1 ml/L.
Color shifted to a light-amber tone — looks alive and active.
🍋 Step 5 – Citric Acid Balance
Added 1 tsp citric acid after everything was blended to fine-tune pH and help chelate micros later on.
📦 Step 6 – Top Up & Check
Filled to the 30 L mark with plain water → pH tested with drops, showing yellow-green — roughly 5.8 – 6.0 range.
Nice clean look, stable smell, no residue.
💧 Current Base Ingredients (Active Mix)
Warm Water ≈ 22 L total
Calcinit 45 g → N + Ca foundation
FERMAKOR PK Base 30 ml → P + K support
Citric Acid 1 tsp → Chelation + pH balance
FPJ / Fish Emulsion 30 ml → Organic enzyme booster
Result: clean amber mix, mild and balanced.
I’ll let this version run for a week before adding anything.
👀👀👀👀👀👀
Observations and changes
👀👀👀👀👀👀
27.10.25 VW27 noticed some min burnt tips so I decreased Calcium Nitrate 45 to → 40g, decided to add two more elements micros and Epsom salts just to make sure they got everything, Fetrilon Combi 1 (Micros): 0.5 g, Epsom salts: 8 g
28.10.25 VW27 she seems devoid of any deficiencies, seems ready for the flip to 12/12
02.11.25 VW27 girl is looking good so I decided to stop making daily videos and do a standard once a week update.
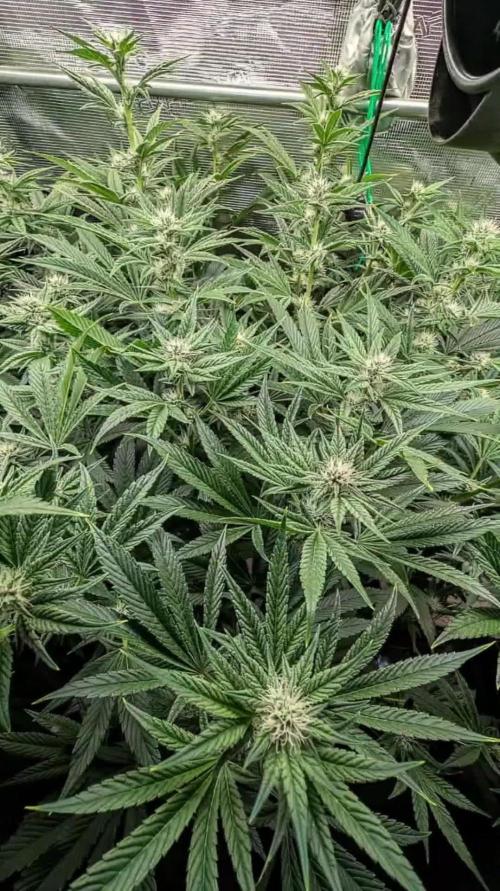
09.11.25 aVW28 7 days since flip,stretch in full swing, first pistils showing, leaf color deep and healthy. Slight tip burn early week → gone after pH stabilized.
Feed stayed clear, no residue, roots clean and sweet-smelling, did what I hope is a last cleanup and pruning🎥
10.11.25 VW29 added Phosphoric acid pH down to the schedule for flowering stage.
14.11.25 FW1 FERMAKOR PK Micros 40 → 50 ml
23.11.25 FW2 got some burnt tips, observe and act accordingly in case it worsens, diluted by 25% for this week.
05.12.25 FW3 about 2 weeks ago Calcium Nitrate 35 g → 25 g, FERMAKOR PK Micros 50 ml → 60 ml
🌱💦🌱💦🌱💦🌱💦🌱💦🌱
🌿Day to day tasks & actions 🌿
🌱💦🌱💦🌱💦🌱💦🌱💦🌱
30.11.25 FW2 – Fed 5l of #1 → 2l runoff
01.12.25 FW3 – Fed 5l of #1 → 2l runoff
02.12.25 FW3 – Fed 5l of #1 → 2l runoff
03.12.25 FW3 – Fed 5l of #1 → 2l runoff
04.12.25 FW3 – Fed 5l of #1 → 2l runoff
05.12.25 FW3 – Fed 5l of #1 → 2l runoff
06.12.25 FW3 – Fed 5l of #1 → 2l runoff
07.12.25 FW3 – Fed 5l of #1 → 2l runoff
💧💦💧💦💧💦💧💦
🌱 Nutrients in 30 L #1 Veg – FERMAKOR
💧💦💧💦💧💦💧💦
Calcium Nitrate (Calcinit / Nitcal): 45 → 40 g → 35 g → 25 g
= 1.50 g/L → 1.33 g/L → 1.17 g/L → 0.83 g/L
= 207 ppm N / 253 ppm Ca → 184 / 225 → 161 / 197 → 115 / 141
PK Concentrate (FERMAKOR Base): 30 → 40 ml → 50 ml → 60 ml
= 1.00 → 1.33 ml/L → 1.67 ml/L → 2.00 ml/L
→ balanced 1:1 P:K + light micros (from extract)
Home-made FFJ/FPJ (Fish + Veg): 30 ml
= 1.00 ml/L
Epsom Salt (MgSO₄·7H₂O): 8 g
= 0.27 g/L → ~26 ppm Mg + ~35 ppm S
Fetrilon Combi 1 (Micros): 0.5 g
= 0.017 g/L
→ Fe 0.7 ppm · Mn 0.7 ppm · Zn 0.3 ppm · Cu 0.3 ppm · B 0.1 ppm · Mo 0.02 ppm
Phosphoric Acid (pH down) + Citric Acid (chelation): as needed
→ First set pH with phosphoric acid, then add a little citric only if you want extra chelation
Target pH: 5.8 – 6.0 (drop test yellow-green)
📦 TOTAL:
Liquids: 60 → 70 → 80 → 90 ml per 30 L
= 2.00 → 2.33 → 2.67 → 3.00 ml/L
Solids (CaNO₃ + Epsom + Fetrilon):
53.5 → 48.5 → 43.5 → 33.5 g per 30 L
= 1.78 → 1.62 → 1.45 → 1.12 g/L
💧💦💧💦💧💦💧💦
YouTube Link: https://youtube.com/-m8h?si=A7x4Zlr2kj-_ga31


Likes
100
Share


@DogDoctorOfficial
Follow
🌾 Harvest Day — The Grand Finale of the Eternity Grow Cup 🌾
Days 72–73 | Trimmed on May 25 | Posted May 27
What a journey this has been — and what a finish. These five incredible Runtz phenos have now completed their cycle, and today, we celebrate the final stage of their flowering life: the Harvest.
We sent the girls into darkness on Day 70, allowing them a full 48+ hours of rest and reset. The dark period was just a bit longer, truth be told, because time… it flows as it must. This extended dark time helps increase resin production, allowing the trichomes to mature just that final bit more.
On Days 72 and 73, we harvested them with care and reverence.
Each plant was hung upside down, whole, in a perfectly controlled 60% humidity environment for 13 full days. Before hanging, we gently removed only the fan leaves, leaving all trichome-rich sugar leaves in place — a natural armor for the delicate resin glands during drying. Why do we do this? Because those sugar leaves help protect the essential oils and terpenes, preserving potency, flavor, and aroma for the smoothest experience later on.
🌿 The Dry Room & The Trichome Guardians
Throughout the drying, we used a moisture meter to monitor the moisture content in the stems. Once it dropped to around 12–13%, we knew it was time. This tool is a simple but game-changing ally in ensuring a perfect dry — not too fast, not too slow.
We then trimmed everything by hand over a 6.5-hour focused session. Armed with trim bins and good energy, we collected an abundance of glistening trichome heads in the process — a golden bonus from these resin-packed beauties. The leaves themselves told a story: deep purples, near-black shades, autumn fades and metallic tones — just stunning.
Each girl was trimmed in order:
#5 → #4 → #3 → #2 → #1,
revealing dense, chunky buds all the way from top to bottom. Not a single pop-corn bud among them — only rock-solid nugs, heavyweight champions in every sense.
📦 Cure Begins – Grove Bags & Glass Jars
Once trimmed, the buds were tucked carefully into Grove Bags and glass jars, each stabilized at around 61% RH. The Grove Bags handle the microclimate beautifully, keeping humidity between 58–61%, perfect for preserving all that hard-earned quality.
We’re now opening the jars daily, monitoring aroma and feel. This part of the process — the cure — is where the soul of the flower truly comes to life.
☀️ UV, Reds & The Perfect Run
Part of what made this run so special was the precision in light spectrum. 40% whites, full reds, UV and IR, and the girls responded like royalty. The UV pushed trichome development to the max. The deep reds gave us thickness, color, and weight. All of it under ThinkGrow Model Ones powered through the Trolmaster ecosystem — everything syncing in harmony.
This run was stable, lush, expressive — a grower’s dream. To my eyes, this was a perfect run.
⚖️ Final Yield: 1,302 Grams (1.3 kg)
In a 4x4 tent — that’s just 1.2m x 1.2m for metric friends — we pulled in 1,302 grams of flower, not even counting the buds that were taken for filming, photos, or “quality control testing” along the way. 😉
Dense. Loud. Sticky. Resinous.
🌿 The Hidden Half: A Tribute to the Roots
In every grow, there’s a part we don’t always see — a part that lives underground, quietly holding everything together. The roots. And this time, I wanted to honor them too.
When we unpotted the plants after harvest, we were met with massive, dense root systems, completely filling the Autopot trays. These roots were vibrant, white and healthy, looking like noodles in a thick herbal soup — a true sign of vitality. The Autopots system, combined with the Aptus Holland Clean Program and Plagron Green Sensation, made sure they had the perfect environment to expand, absorb, and thrive. The PRO-MIX soil was the perfect foundation — light, fluffy, with excellent aeration. It all worked in harmony.
After unpotting, I carefully washed every root system, removing all soil to prepare them for the next chapter of their story. Now, they’re hanging and drying — and will be left to cure for at least one month, possibly more, in a dry, dark, and well-ventilated space.
But why keep the roots?
Because cannabis roots hold ancient value — both medicinal and ritualistic. Though they don’t contain cannabinoids like THC or CBD, they are rich in alkaloids, triterpenoids, sterols, and other therapeutic compounds that can be anti-inflammatory, analgesic, antifungal, and calming.
Medicinal Benefits of Cannabis Roots:
• Friedelin – known for liver protection and anti-inflammatory effects
• Pentacyclic triterpenoids – believed to support immune and anti-tumor functions
• Alkaloids – some studies suggest pain-relief and muscle-soothing properties
• High levels of fiber and tannins – excellent for digestive and skin applications
🍵 Root Medicine — Ways to Use Dried Roots:
Once fully dried (they should snap like twigs, not bend), they can be gently crushed, powdered, or infused:
🌿 Cannabis Root Tea
Soothing & Detoxifying
• 1 tablespoon of dried, ground roots
• 3 cups of filtered water
• Simmer gently (do not boil) for 20–30 minutes
• Add a bit of ginger or lemon for taste
• Sip warm, especially good for menstrual discomfort, inflammation, and general relaxation
🍲 Healing Root Soup Base
Brothy & Nourishing
• Add a handful of dried roots into a veggie broth or bone broth
• Simmer for 2+ hours
• Strain before serving
• This adds a subtle earthy tone and allows the healing properties to infuse your meal
Topical Root Cream or Balm
Great for sore muscles or irritated skin
• Infuse roots in olive oil or coconut oil (low heat, 2–3 hours)
• Strain and mix with beeswax to form a balm
• Add essential oils like lavender or eucalyptus
• Apply to temples, joints, or sore areas
🛁 Root Soak Bath
Perfect for grounding and full-body relief
• Bundle dried roots in muslin or cheesecloth
• Steep in hot bathwater for 15 minutes before entering
• Let the soak draw out toxins and ease tension
⸻
The roots are more than just the anchor of the plant. They are its memory, its foundation, its quiet miracle. By using them, we honor the entire lifecycle — nothing is wasted, and everything has a purpose.
This part of the process is new for many growers, and I truly encourage anyone reading this to try saving and reusing the roots. Dry them, process them gently, and let them offer you one final gift.
Much love to Aptus Holland, Plagron, Autopots, and PRO-MIX — this wouldn’t have been possible without their harmony working underground while the beauty bloomed above.
🌱 The Gift That Keeps Giving: Reusing the Soil
As we say goodbye to one incredible season, we begin quietly preparing for the next. But not everything gets thrown away. In this garden, nothing is wasted. Just like the roots, the soil gets another life.
After each harvest, I carefully remove the remaining roots and break up the soil. I inspect it, rejuvenate it with compost and beneficial microbes when needed, and most importantly, I repurpose it — giving it a second life in my outdoor veggie garden.
Why do I do it?
Because this soil has already done something extraordinary. It has supported life, held moisture, breathed air, balanced nutrients, and fed plants that became medicine. It’s not just dirt — it’s a living ecosystem. And to throw it away would be to ignore its potential.
In my veggie garden, this recycled soil now nurtures cucumbers, tomatoes, courgettes, and so many other little miracles waiting to unfold. It’s a beautiful way of continuing the cycle, taking all the energy and intention that was once used to grow cannabis and transferring it into growing food. 🌞🍅🥒
🌾 The Benefits of Reusing Soil:
• Sustainability — less waste, less environmental impact
• Cost-effective — no need to constantly buy fresh medium
• Soil memory — rich in organic material, microbial life, and structure
• Nutrient potential — amended soil still holds value for many plants
• A deeper connection — a way to honor the entire cycle of growth
When we reuse our soil, we’re not just being resourceful — we’re believing in tomorrow. We’re trusting that what we’ve built can be rebuilt. That what has been used can become useful again. That from what seems like an ending, something new can always emerge.
And maybe that’s the most powerful message of all in this journey:
Planting is believing in tomorrow. 🌍🌱
Every seed in the ground is a little act of faith.
So as this season comes to a close, the first tomatoes have been planted. The cucumbers are reaching for the sun. The courgettes are settling in. And the same soil that once gave us dense, resinous flowers is now feeding the vegetables that will grace the table.
From harvest to hope — the cycle continues. And it’s beautiful.
🎉 The Final Touches
Fun fact:
• Trimmed on May 25
• Photo shoot on May 26
• This report: May 27
• Dry Bud Exclusive Photo Set: Coming soon
Stay tuned — the next upload will be something special, just in time before the Eternity Grow Cup closes on May 31st.
⸻
💚 Thank You
To Zamnesia — your genetics were nothing short of extraordinary.
To GrowDiaries, for hosting such a powerful space for community.
To everyone following this journey, your support, love, and kind words fuel this project and keep the spirit alive.
Let’s keep pushing boundaries, together.
With roots deep in the earth and eyes on the stars — the next chapter begins soon.
Much Growers love always,
🌱 Dog Doctor Official 🌱
Genetics - Runtz https://www.zamnesia.com/6000-zamnesia-seeds-runtz-feminized.html
Nutrients - Plagron https://plagron.com/en/hobby
- Aptus Holland https://aptus-holland.com/
Controls - Trol Master https://www.trolmaster.eu/
LED - https://www.futureofgrow.com/en
LED - https://www.thinkgrowled.com
Soil - https://www.promixgardening.com/en
Germination - Cannakan https://cannakan.com/?srsltid=AfmBOopXr-inLXajXu3QFgKXCXXos4F1oEvScjMKIB5MR5dk8-GJ-F49
DOGDOCTOR 15% off
Smoking Papers - https://ziggioriginal.com/
Terpene saver - https://grovebags.com/
As always thank you all for stopping by, for the love and for it all , this journey of mine wold just not be the same without you guys, the love and support is very much appreciloved and i fell honored with you all in my life
With true love comes happiness Always believe in your self and always do things expecting nothing and with an open heart , be a giver and the universe will give back to you in ways you could not even imagine so
As always, this is shared for educational purposes, aiming to spread understanding and appreciation for this plant. The journey with nature is one of discovery, creativity, and respect. Let’s celebrate it responsibly and continue to learn and grow together!
Growers Love To you All 💚
#EternityGrowCup #RuntzHunt #GrowersLove #CannabisCommunity #AptusHolland #ProMixSoil #TrolMaster #Zamnesia #Plagron #ZiggiPapers #Grovebags

Likes
1
Share

@Northern_Ent
Follow
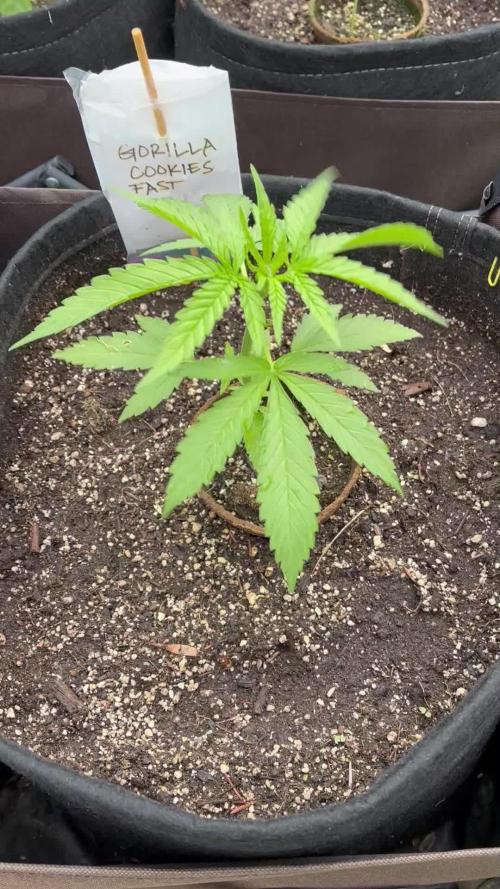
June 6 Day 36: last week was cool and rainy but growth will pickup here soon with warmer temperatures and direct sunlight. Will top it tomorrow to start the manifold. This will be a 16 cola manifold.
June 8 Day 37: plant had five nodes and I topped it back to third node and then removed lower growth tips and small leaves. This is the first of four rounds of topping needed to get 16 colas.
Likes
19
Share


@Naujas
Follow
Amazing!!!!! a wonderful girl, she managed to keep herself so beautiful and strong :) she was not visited very often :) the house has a wonderful smell of tropical fruits :) Thanks to Dutch Passion for the opportunity :)

Likes
17
Share


@CanadianFillmore
Follow
Harvest time for Mandarin dreams round 2. Both phenos did amazing during round 2 under the Mars-Hydro TSW2000 light. The buds are incredible and the way these ladies grew was very impressive. Hopefully they are heavy buds, will know in 7-10 days if they have the dry weight to back up their awesome appearance.
April 16 update - MD2 - 70 grams, MD1 - 73 grams. Again results are close to round 1. The TSW2000 light delivers!


Likes
325
Share


@Metatronix
Follow
Hallo to You all my familly and usual visitors. Thank you for stopping by and all the likes and comments....You make my day!
I gave the Blue Cheese a trim on 5th december and gave her four days of darkness, the chop was performed on december 9th I took a lot of photographs and videos commemorating these events for you to enjoy :)
I think she came out quite decent especially considering that she had some monster/deformed leaves till the 4th week of veg. also looking back I should have moved her to the bigger place in that time...she would be far more symmetrical ;)
It was a joy to work with Mars Hydro and their equipment in this grow. A big thanks to the Mars Hydro team for this opportunity, you truly provide first class grow kits and lamps.
That's all i have for you till the drying & curing process is over I will update then. I want to thank you all for accompanying me in this journey, all the likes and comments...You growmies make me feel here at GD at home thank you 🙌👊😇

Likes
82
Share


@UnorthadoxDude
Follow
Hello growmies! Welcome to week six of An Epsilon Adventure! Massive thanks to both Shogun and Royal Queen Seeds for sponsoring this grow!
So here we are at week six and every one of these girls are at a slightly different stage, it is quite fascinating to watch them develop one after the other.
Today I made the last adjustment to the light possible. I removed the adjustable hangers and affixed a carabiner which I tightly tied to the top of the tent bar. There is about 1.5 inches of space between the top of the shade and the tallest part of the roof of the tent. Plant 1 is already taller than this, and it looks like plant 6 and maybe even plant 5 are going to join it. It's a madness. I am sure you have already looked at the photos but just in case you do what I do and read the diary first...
Here is my assessment at the beginning of week 6:
Plant 1:
Height: 1st (137cm) - what can I say about this ridiculous plant? Day 36... 137cm tall. I have had to raise the light to as high as it is physically possibly to raise it and it's still not high enough. She is done stretching now, she may add 3-5cm over the next week or so but I don't expect more than that, so her top of her main cola going to have to develop above the level of the light. Nothing I can really do, nothing wise anyway. What a monster plant.
Maturation: 4th - early into flower - bud sites developing, pistils just starting to explode.
Plant 2:
Height: 4th (111cm) - this plant has been there or there abouts as the tallest plant for most of the grow, but she has topped out at 111cm. She will gain some during flower but not much more than a few centimetres. Very impressive plant, loads of bud sites, really big strong secondary branches. This one is going to be colas galore.
Maturation: 3rd - well into flower - all white pistils
Plant 3:
Height: 6th (95cm) For some brief days the tallest plant in the room, she peaked early and is now the "shortest" at "only" 95cm for this "50-70cm" strain. She is utterly dwarfed by four of her five sisters in just about every department, being quite a bit smaller even than plant 4 (although I have removed the most lower nodes from this plant). Compared with her sisters she is almost a runt... except that she is 25cm taller than the strain top-end average and matches the maximal height of the previous tallest Epsilon F1 plant I am aware of. It's not that she is small, actually she's pretty big for an Epsilon F1, it's just that the rest of the girls are on another level altogether. Plants 1, 5 and 6 are all absolute beasts.
Maturation: 1st - well into flower - first shades of brown in some pistils.
Plant 4:
Height: 5th (98cm) although only 3cm taller than plant 3, overall she is a much larger plant. Her secondary nodes are the same height as plant 3.
Maturation: 2nd - well into flower - all white pistils
Plant 5:
Height: 3rd (113cm) - one of the two thick/short girls who have grown at a similar pace all along - she is further ahead than plant 6 but not by much and I think she will probably exceed 120cm this week, though I do not think she will outgrow plant 1 or 6.
Maturation: 5th - early into flower - bud sites developing.
Plant 6:
Height: 2nd (120cm) - my predictions were correct about this girl and her continued growth. I now think she might actually outgrow plant 1, which is quite worrying.
Maturation: 6th - early into flower - bud sites forming - by far the least mature plant of the six.
###
Week 6 Day 2 23:00 30/7
Photographed. Raised the light. Rotated the plants. Inspected, measured and reported on each plant.
###
Week 6 Day 3 23:00 31/7
It has not escaped my attention that the plants that are more advanced into flower have darkened and have some burnt tips. I need to flush them and lay off the base nutes a bit. These plants are just growing and maturing so quickly that I cannot keep up.
###
Week 6 Day 5 02:30 2/8
Fertigated 3l of nutrient mix, without either COCO A or B.
###
Week 6 Day 6 01:30 3/8
photographed
---
Thanks for reading growmies! 👊
==========
Tent: 120cm x 120cm x 180cm
Light: 600w HID Elite Dual Spectrum HPS + Angel Wing Reflector
Air: 5" duct fan system with carbon filter ~300 m3/hour + RAM 9" floor fan + 4" intake fan
Pots: Air Pruner Fabric Pots 30l - UGro XL Coco + horticultural grade perlite (~20%)
Seeds supplied by Royal Queen Seeds https://www.royalqueenseeds.com
Nutrients supplied by Shogun Fertilisers https://www.shogunfertilisers.com/en
==========

Likes
2
Share


@hinterhofgrower
Follow
🌱: Day 1 after 108 h
💧: tap water: Day 1 50ml, Day 2 100ml, Day 4 250ml, Day 6 250ml
💡: Dli: 15 mol/m²/d
🤔: really smooth germination, going for this: https://www.youtube.com/watch?v=Fldi-U-kpnA