


Likes
Comments
Share

@Sobreruedas
Follow
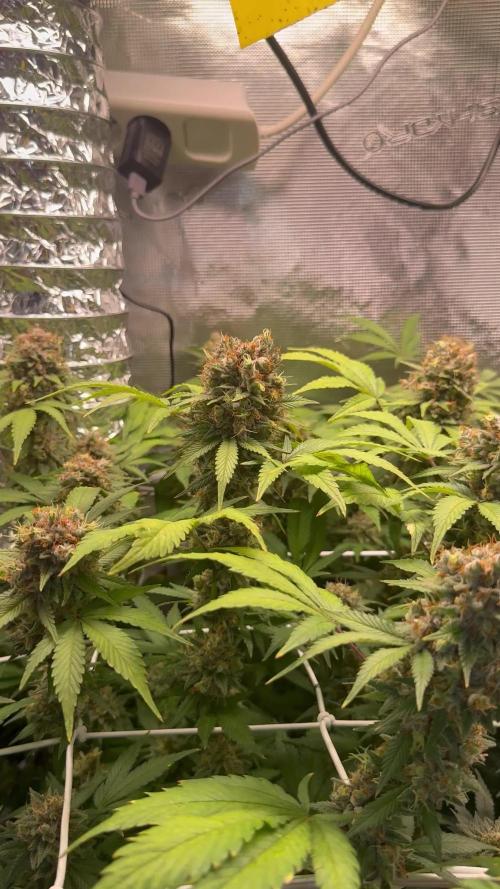
This is week 9, and I’ve started dialing things down as we approach the final stage.
I reduced the light intensity to around 600–650 PPFD to keep things a bit softer towards the end of flowering.
From here on, it’s just a matter of maintaining stable conditions until harvest time 🌸✂️💪

Likes
49
Share


@Guerilla_Jack
Follow
Hello growers!!
Its end of 4 week of flowering..the buds are start swelling up...the girls looks healthy for now.. have a nice green and sunny day all.🙂


Likes
33
Share


@TheSyndicate
Follow
Chugging along. Suffered minor light burn - - no issues moving forward as the underlying cause is rectified.
Another heat wave here in Cali. I will be on alert to help the controlled environment.


Likes
39
Share


@PapaBlob
Follow
04/12 Demain je l'effeuille puis je la coupe à raz du sol..😊 Après viens le plus dur en cette saison par ici, arrivé à la sécher.🙄 La dernière sortie (10 jour) en est Loing. J'ai du la rentrer à la maison. (Je profite de l'absence de la patronne.) 😊👍✨

Likes
18
Share


@VI_Cannabis
Follow
June 7 - We ordered some new lights last week, they are 240w kingbrite samsung lm310h with uv/ir, 3000k, and meanwell drivers.
We setup the new room and moved the girls into there. After a bit of LST and a watering (with nutrients) at roughly 7ph, they were ready to go under the 2 new lights and the same SF-1000 we have been using in this grow.
The new room is a 12 ft enclosed trailer. I moved everything from the small tent into this. I put clear poly on the walls, floor and ceiling. I put poly on the shelf I am going to be keeping in there as well. I bought 50ft of 6mm mylar and lined the floors, roof and sides with it. I plan to get some reflective tape to seal everything and to cover the wood. I did not get much of a chance to watch temp's today as they it was later in the evening after all was said and done. The inline fan blowing in air from outside.
June 8 -
9 AM i checked the plants, they were at 25.2 and 50% RH. Late through the day I had checked and we had gotten up to around 32 degrees. So I moved the inline fan to the closer vent, hooked up to that, and had the air blowing out of the trailer with the inline fan sucking it from above the lights.
I then added oscillating fan and had it blowing air on the left side of the room so it would somewhat circulate once I closed the doors. I then checked at about 9pm and we were at 22 degrees. Definitely noticed a decent amount of growth already. I have the lights on a 22/2 cycle as I was worried about the heat at night time.
June 9 -
Some great growth from the girls, still having problems controlling the temps in the afternoon. I decided to prop the door open a bit to have a constant breeze throughout the day while I am at work. Decided to do some more LST and also a bit of defoliation. I took about 25% of the leaf's that were blocking the new growth as it was getting a bit bunched up. I was then told the leaf's are almost solar panels for them. So from now on I will be trying to just do some tucking unless needed. The leaf's I removed were most of the damaged leaf's, I am not to sure if that makes much of a difference. I gave them a watering with only water as there is a potential I am getting a bit of a nutrient buildup along with the PH problem. Or potentially the reason for the ph problem is nutrient buildup. After watering with A PH of 7 I got some run off and tested it. The smaller plant gave me a PH of about 5.5 where the bigger one is around 5.0.
June 10 -
Plants are looking happy and showing tons of growth. Seems to be trying to stretch outwards. Not a ton of sign of PH issues showing so potentially getting it under control. Still a bit of damage to previous leaf's but it is what it is! The last few days I have been leaving the door open a bit in order to keep the temps down. I decided to test something and turn the lights off (automatically) at 11AM and back on at 5PM so light schedule has now changed to 18/6 and it seems I may have figured out the issue. We haven't had lots of sun the last couple days so it hasn't been to hard and I have yet to know if it truly fixed the heat issue for now. (I will be looking into a ac unit as well since it typically gets to around 30-35 around here.
June 11 - Pulled some of the branches back down and added a few more LST spots. Seems we have a good amount of growth from the smaller plant out of the 2 topped spots. Unfortunately it looks like I fucked up on the bigger plant and only one of the nodes seems to have new growth. I will continue to monitor that but I think I cut the node to low and also to soon. Other then that, the girls are doing great. They seem to be absolutely loving these new lights. I gave them some nutrient water today as well. roughly 3L each. They seem to be A hell of A lot more thirsty under these new lights.
June 12 - The girls are doing great , they are still just doing growing away. Lots of progress everyday. I am going to be getting a go-pro so I can set-up a time-lapse for the rest of this grow. I received my new inline fan, I got A ac infinity CLOUDLINE T4 with the temperature humidity controller. I am going to be having one fan pushing fresh air in and one fan pulling out the hot air. I will be doing that tomorrow since I have to work today.
June 13 - I ordered another 50ft of mylar and that showed up today. I have decided to remove the shelf and add another 3+ feet to the grow space. So today I installed more poly, mylar, the ac infinity fan. I have it set-up to pump in air if it gets to warm. I am thinking of switching it to the output that way if it gets to hot or to humid I can have that air pulled out of the trailer. Right now my other inline fan is the outtake and I just have it set on full. Overall I think everything is set-up a bit better and more accessible. I will be putting my 2x2 tent in there at the left of the doors so I can have a veg room when these 2 are in flower. I plan to have 4 in veg and 4 in flower for the next grow. Still waiting on JOTI seeds, ordered 3 weeks ago and still have not been shipped. I will be getting those going the moment they arrive.
The girls seem to be happy still, did a bit more LST to try to keep everything even, mainly I'm just pulling down on the spots I already have tie wire on.
Likes
5
Share

@burnout
Follow
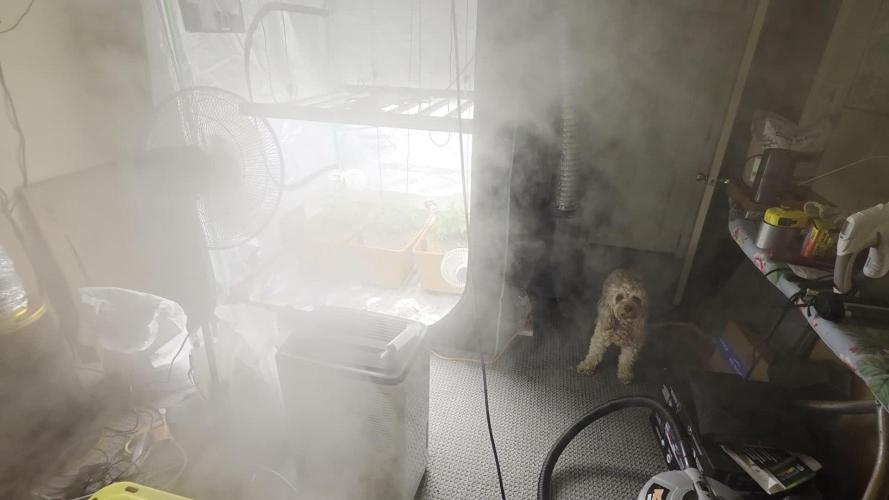
Day 28. Started seeing stigmas on the plant on the left on day 24, now seeing flowering on the plant on the right and just starting on the plant in the middle. The middle plant sprouted first, the other two came up a few days later. Hoping to see some good stretch soon! Took about three days for the reservoirs to go dry last week. Added top dress along with rock phosphate and top watered each box with one gallon of water including the ferment, recharge, and build a bloom. Added another gallon of water to reservoirs today.

Likes
34
Share


@PEAKYPLANTERS
Follow
LADIES AND GENTLEMEN,
MASTERS AND BEGINNERS FARMERS!
MY WORK WITH THIS SUMMER LEMON IS FINISHED.
PLANT EASY TO GROW AND ENOUGH RESISTANT
MAINLY IN SATIVA.
HAPPY AND ABUNDANT HARVESTS FOR EVERYONE

Likes
Comments
Share


@UGrowGuy
Follow
Been a lil busy. Haven't been on here or in the garden as much as i need to. The girls are growing all natural. I have literally taken no leaves off their entire lives. Some of the old fan leaves die during light drybacks. Inuse deybacks for stacking nutes and some light drought stress which can increase oil production. They just have a small cage at two levels. I have cut nutrients to most of them, going for quality smoke as its already more than I can consume lol. Two look like they are still bulking. Some are getting close. Everyone is still getting bokashi/ffj for the terps and ethylene found in the ripe fruits. It helps with senescence.. I turned the lights and temps down to help crop steer ‘em. We are getting close! Thanks for readin
Likes
25
Share

@TrickzCutz
Follow
Servus Moin!
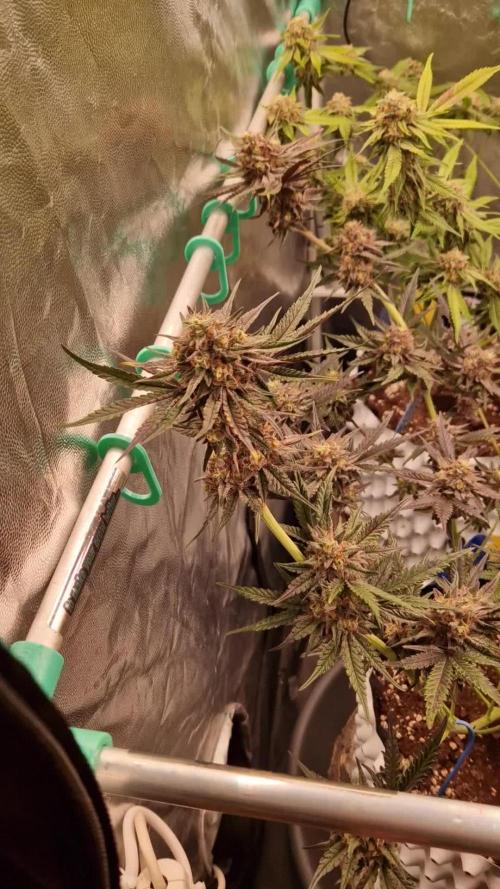
Die Blucci OG sieht fantastisch aus. Ich bin total verliebt in diese Lila-färbung. Die Gerüche von Bubblegum, Citrus und Gas sind sehr süßlich.

Likes
11
Share


@EvilStevil
Follow
Wednesday, January 27
Fed plants yesterday(26JAN) 3/4ga each plant. 2tsp/ga ratio of Bud Candy pH’d @6.3’s. Have a compost tea brewing that I will feed them tomorrow. Compost tea is comprised of 1 Cup of worm castings and a 1/4 Cup of bone meal powder. Bone meal powder is a great source of calcium and phosphorus to help in the flowering stage. I also added 1.5tsp of Great White Myco root powder to 3ga of compost tea. This morning I noticed little white hairs growing out of pistils all over the plants! Finally, signs of early flowering since switching to a 12/12 light schedule this past Saturday. Plants have shown a sizable amount of stretch in the past couple weeks so I’ve projected at about 6-8 weeks from now for a harvest? I’ll keep y’all posted on the days ahead and as always, stay safe and happy growing💚✌️🌱
Thursday January 28
Fed plants about 3/4 ga each of compost tea @6.3pH. Hopefully will respond well to their first tea. I’m going to continue to do more research on compost brews to dial in the process. Stay safe and happy growing💚✌️🌱

Likes
23
Share

@DogDoctorOfficial
Follow
# Tical x Zamnesia — Nectar Drip 🍯💧 | Harvest Report
This one feels special.
Not only because Nectar Drip is a collaboration between Tical and Zamnesia, and not only because this was a limited edition pack that we were lucky enough to get our hands on… but because this entire run had personality from the beginning until the very last cut.
And now?
Harvest time.
Last week, we froze the smallest plant immediately after harvest for future washing and extraction work. We will talk much deeper about that process later on when the time comes, because there is already enough happening in this report alone. For now, she rests quietly in the freezer waiting for her next transformation.
This week belongs to the other girls.
The remaining plants are now officially harvested.
And honestly… wow.
Dense.
Compact.
Heavy.
Greasy.
Colorful.
Beautifully faded.
These flowers finished exactly the way we hoped they would.
The trichomes are right where I personally love to harvest my medicine:
- around 80% cloudy,
- a small touch of amber,
- a few still transitioning from clear into cloudy.
For me, this is the sweet spot.
This is where the plant feels the most “alive” in effect and expression. The majority of the trichome heads have matured fully, but the profile still keeps that brightness, complexity, and energy before moving too deeply into degradation.
If harvested too early:
- many trichomes are still immature,
- cannabinoid development is incomplete,
- effects can feel unfinished or sharp.
If harvested too late:
- more cannabinoids begin degrading,
- THC slowly converts over time into compounds like CBN,
- effects often become heavier, sleepier, and more sedative.
And while there is absolutely nothing wrong with harvesting later if that is what someone prefers, this specific window is personally where I feel the flower expresses itself best for my own medicinal and recreational preference.
That is the beautiful part of growing:
everyone eventually develops their own relationship with harvest timing.
There is no single perfect answer.
There is only observation, intention, and preference.
And these girls were speaking very clearly.
The fade across the leaves was incredible this week. Deep yellows, pale greens, dark fading edges, purples, reds hiding in places the camera barely captures properly. You can almost feel the plant redistributing everything it has left into the flowers before the end.
Even the structure itself became fascinating near harvest.
When we cut into the stems, the inside looked almost like a tiny tree trunk. Huge vascular channels running through the middle, thick supportive tissue, massive water transport systems that carried these flowers through their entire life cycle.
You could feel it physically during harvest.
This was not like cutting a soft plant anymore.
It genuinely felt like cutting small trees.
And honestly, the stem thickness explains a lot about the flowers themselves:
dense structure,
heavy tops,
excellent water transport,
strong support,
healthy development.
The genetics clearly had strength behind them.
The flowers themselves are absolutely covered.
At some points, the sugar leaves are literally curling and twisting under the sheer amount of trichome coverage. Any connoisseur looking at these buds up close immediately understands what they are looking at.
Top shelf flower.
No hype needed.
The plant speaks for herself.
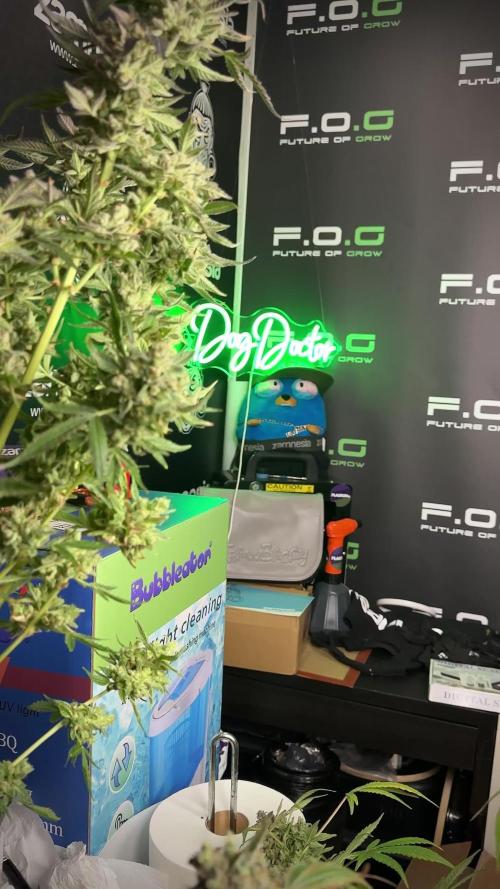
The F.O.G. LED setup continues to impress more and more every run too. The flower quality under these lights has been genuinely outstanding. Resin production, density, coloration, structure, frost expression — everything feels elevated. It really does feel like we are watching part of the future of indoor cultivation unfold in real time.
Of course, before harvest we had to bring these girls into the studio one final time.
And honestly… they were amazing models. 😄
We shot:
- dark dramatic portraits,
- bright detailed flower shots,
- macro closeups,
- studio photographs,
- behind-the-scenes moments,
- live videos,
- and a huge amount of focus-stacked macro photography.
Some of the photographs became entire projects by themselves.
For anyone curious about the “photo stacked” images:
those are not single photographs.
They are multiple photos merged together at different focus distances to create one final image with extreme detail and depth. Some stacks here used:
- 103 photos,
- 110 photos,
- 171 photos,
- 201 photos,
- all the way up to 226 merged frames.
The process takes patience:
shooting,
sorting,
merging,
aligning,
correcting,
editing,
balancing colors,
recovering detail,
and then refining the final image carefully.
But the result is worth it.
You start seeing the flower almost like another world:
individual trichome heads,
resin textures,
tiny color transitions,
leaf structures,
amber glands,
frost patterns,
details the naked eye simply cannot fully appreciate in real time.
And the colors on this Nectar Drip are honestly stunning.
Greens.
Lime tones.
Deep forest shades.
Purples.
Yellows.
Reds.
Silver frost.
Orange pistils.
Some shots leaned into darker cinematic moods, others pushed colorful vibrant expressions. We experimented a little and allowed the flowers to show different personalities depending on light, background, and mood.
Now the plants are hanging peacefully.
Because of their size and density, we could not hang everything as entire full plants. Instead, we divided them into grouped branches for drying. They now rest in controlled conditions for the next week or two while we monitor:
- humidity,
- drying speed,
- aroma development,
- branch flexibility,
- and overall curing preparation.
No rushing now.
Harvest is not the finish line.
Drying is part of the grow too.
And honestly, sometimes it is one of the most important parts.
We also included some video updates because certain things simply cannot be fully captured in photos alone:
the way the flowers move,
how the colors react in real light,
the depth of the frost,
the density,
the atmosphere around the plant itself.
The room felt calm this week.
That strange calm after harvest where the work is technically done, but another important phase quietly begins.
And next week?
Next week will probably be the trimming and smoke review report.
That is why we separated the reports into stages instead of forcing everything into one massive update. There are simply too many details, too many moments, too much material, and too much beauty in this run to rush through it carelessly.
This harvest deserved time.
And before ending this report, as always:
Thank you.
To Zamnesia.
To Tical.
To Plagron.
To F.O.G.
To LumifloraTo the gear.
To the platform.
To the community.
To the longtime followers and OGs.
To the new people stopping by out of curiosity.
To the supporters.
To the skeptics.
To the silent viewers.
To the haters too honestly 😄
To everyone who spent even a few seconds here with us.
If someone stopped scrolling long enough to share this moment with us, then they deserve a little gratitude and a little love in return.
This run was beautiful from beginning to end.
And somehow… I still feel the story is not fully finished yet. 🌱
📡 DELETED @ 1K Please stay tuned.we never quit https://www.youtube.com/@TheDogDoctorOfficial NEW 🙏 Thank you for your patience and continued support.
FOR DISCOUNT CODES AND MORE JUST FOLLOW THE LINK https://website.beacons.ai/dogdoctorofficial
📲 Don’t forget to Subscribe and follow me on Instagram and YouTube @DogDoctorOfficial for exclusive content, real-time updates, and behind-the-scenes magic. We’ve got so much more coming, including transplanting and all the amazing techniques that go along with it. You won’t want to miss it.
GrowDiaries Journal: https://growdiaries.com/grower/dogdoctorofficial
Instagram: https://www.instagram.com/dogdoctorofficial/
YouTube: https://www.youtube.com/@dogdoctorofficial Deleted by Youtube - https://www.youtube.com/@TheDogDoctorOfficial NEW
Vimeo : https://vimeo.com/dogdoctorofficial Under construction stay tuned ⸻
Explore the Gear that Powers My Grow
If you’re curious about the tech I’m using, check out these links:
🔆 Lighting & Environmental Control
• Future of Grow — Advanced LED lighting technology
https://www.futureofgrow.com/
DISCOUNT CODE: DOG20
• Lumiflora — Under-canopy LED lighting
https://lumiflorade.com/
• TrollMaster — Environmental controllers and automation gear (past collaboration)
⸻
Genetics
• Zamnesia Seeds — Genetics used in this project
https://www.zamnesia.com/
⸻
🌱 Soil, Substrates, Boosters & Root Support
• Plagron — Substrates, bio mixes, and supportive products
https://plagron.com/en/
⸻
🎒 Storage, Curing & Preservation
• Grove Bags — Curing and storage solutions
https://grovebags.com/
⸻
📸 Photography Equipment & Tools
(Not sponsors, but part of my creative toolkit)
• Sony A6700
• Sony full-frame macro lens + few more
• Stacking photography workflow - learning
• iPhone (for behind-the-scenes shots)
We’ve got much more coming as we move through the grow cycles. Trust me, you won’t want to miss the next steps, let’s push the boundaries of indoor horticulture together!
As always, this is shared for educational purposes, aiming to spread understanding and appreciation for this plant. Let’s celebrate it responsibly and continue to learn and grow together.
With true love comes happiness. Always believe in yourself, and always do things expecting nothing and with an open heart. Be a giver, and the universe will give back in ways you could never imagine.
💚 Growers love to all 💚
📸 P.S. – The Eye Behind the Lens
All photos in this diary (for now — except for the ones showing the camera, which I took with an iPhone) are taken with a Sony A6700 paired with a Sony full-frame macro lens and a few more.
Photography is part of the story — it’s how we share the fine textures, the glow, and the quiet details that words can’t always capture.
I’ve also started experimenting with photo stacking — a technique where multiple images, each taken at a slightly different focus point, are layered together to create one perfectly sharp image from front to back.
It’s not digital enhancement or AI; it’s pure photography — a way to reveal the plant’s beauty in microscopic depth, from trichome to petal.
You’ll even see a few shots of "ghost me" capturing the shots — camera, lens, setup — because every grow deserves not just to be cultivated, but documented like art.
FOR DISCOUNT CODES AND MORE JUST FOLLOW THE LINK https://website.beacons.ai/dogdoctorofficial
NEW DISCORD - Official Server Invite Link : https://discord.gg/ksjAkA5T74
Likes
21
Share


@NSABND
Follow
Der Start in Woche 8 ist regnerisch und bewölkt bei kühlen Temperaturen und hoher Luftfeuchtigkeit 😳
The start of week 8 is rainy and cloudy with cool temperatures and high humidity 😳
Day 62 "Haircut" for "Hilde" 😏😉


Likes
12
Share


@WheezyMango
Follow
After keeping an eye on the tricomes I've seen most of them turn white so last night I mixed 1.5ml/L of flawless finish and saturated the soil and left to set overnight this morning I flushed all 3 plants so far they dont look stressed out at all I was scared being my first time yet I still dont know if it was successful
Processing
Likes
7
Share


@Chronnoisseur
Follow
Well she seemed to slow down and now her roommates have over taken her. But fingers crossed she still put out some nice buds
The cheese candy is starting to become more smelly this week stay tuned....
Likes
Comments
Share



Likes
9
Share


@greenthumb86
Follow
day one of flush for most of these girls 😁 : update the only one not in flush is the afghan mass

Processing
Likes
9
Share


@High_Grade_Dadli
Follow
Transferred 2 plants to 7gal on Day 17 and apply lst......on Day 18 nod start aiming for the sky🙂......topped on day 21
Likes
57
Share


@TheBudWhisperer
Follow
Week 1 of the latest cycle and starting out with some new hardware and an expanded grow print👍. We’re running 4 autos via a recirculating Dutch bucket system. First time on a dutchy so it’s gonna be interesting to see how it stacks up against DWC. I’ll give a full rundown on the system I’ve cobbled together on the next update.
So far - all seedlings have germ’d without issue using the standard p-towel method. Why more people don’t use this method on GD is beyond me. It’s so reliable that some breeders even warranty your seeds if you use this method and more than 1 seed fails to crack. We’ve got little sprouts coming up now and it’s all just waiting for those first couple fan leaves to come out and those roots to run to the bottom of each bucket. They’ve been placed in root riot cubes (essentially a version of rapid rooters) like most of our runs and I’d recommend their use with all autos. Time and stress on young autos is key so they need the absolute best start you can give them👌.
End of week update - looks like we got 4 quality little seedlings here👍. Alls good other than battling a ph issue for most of the week. Keeps spiking overnight for no real reason - hopefully it’ll even out and isn’t the early sign of a major problem🤞.
Background
The strain line up on this grow is look’n quite saucy 😈. We’ve got 2 FB strains this time around - Gorilla Cookies (seems we always have some GSC cross in the works). Mainly because the colours look stellar and remind me of a sugar breathe we did last year that was 🔥. The other FB is their original Cheese strain... because we already smoked all our cheese... and we really like our cheese...😉. Emerald triangle was kind enough to include a freebie of Lemon Haze. Wasn’t really big on the list but we haven’t done a haze strain to write home about yet so worth a go👍. The last is a Cherry auto from Bomb seeds that we’ve been trying to get to for months. Let’s just hope that she’s not a dud like the last bean.
The new digs for this run are courtesy MarsHydro👊. Their 2x4 single grow tent, paired with a shiny new 240w QB courtesy ViparSpectra.
These folks were kind enough to discuss a collaboration and as a result, here we are to test out the gear with an inaugural run of autos. Each week, we’ll try to expand on some of the benefits of each, as well as any limiting factors or considerations that need attention when pondering purchase.
Already I can say that both are high quality products in terms of overall craftsmanship.
MarsHydro 2x4 Grow Tent:
Excellent construction in terms of durability. Reinforced stitching on the zippers and corners ensures zero tearing. Conveniently placed screen vents and intake/exhaust ports. The ceiling exhaust port only exists on the right side. Perfect for me but not great if you’re running exhaust from the top on the left side (left side wall port makes up for this however). The aluminum frame is rigid enough to support the weight of the lights and accessories. Once you have some weight in the tent, she’s go’n nowhere and you can assemble and break it down in record time if moving or stashing the grow op.
Only limiting factors I’ve noticed is that temp. Control will be an issue for a tent. It just doesn’t have the same insulating ability as a wood cabinet or other permanent enclosed space. No worries, this is offset by a small desktop heater and keeps the environment exactly where desired. The other issue was a production problem - the ceiling vent was accidentally stitched into the corner seams on the assembly line. Again, no real issue - just pulled it out with no damage or fraying to the tent or port👍.
Website link here:
https://www.mars-hydro.com/grow-tent/buy-mars-hydro-grow-tent-24x48x70-2-x-4-cabinet-closet-grow-box-upgraded-diamond-1680d-mylar-for-sale
ViparSpectra 240w Quantum Board:
This thing is sleek and slick in terms of design. Closest comparable to it that I’ve seen would be spiderfarmers line of qbs. They feature the same top-o-the-line components and roughly similar spectrums. Where VS takes the advantage is in the convenience of the dimmer nob which is easily accessible and works great at 50% with no strobing👍. The heat sink is also larger which contributes to lower temps. That’s not a good thing in my case but beneficial for most folks.
I can already say that this will be a great fixture through all stages of growth. Where I know this light will excel will be in the veg. Stage for sure. Dimming function gives seedlings a much better chance of success with the ability to use lower lighting levels early on and the coverage area on a 240w is great. The average grower will find this panel suitable and fitting to their needs in a 2x4 grow space although I’d suggest 2 units if going any larger than that. The total output in this space equates to about 30w/sq.ft. Which is a decent amount of coverage based on power vs. Growprint. Ideal for veg. Certainly but, in flower - I tend to run closer to 50-60w/sq.ft to achieve higher yields. Again, similar fixtures have performed admirably in the past and while this wouldn’t be considered an “entry-level” fixture, I’d recommend that any grower new to the game not skimp on lighting and start with one of these. The price points are a great value for quality LED tech. These days, so there’s little reason to even consider a lesser fixture👍.
I have no detail on limiting factors for this light as yet but have heard that stock branded fixtures don’t necessarily incorporate enough red diodes. I’ve seen no issue myself but confess - I’m no lighting guru.
Website link:
https://www.viparspectra.com/collections/xs-series/products/xs-series-xs2000
***8% discount when using code: “ItBudWhisper”***
Happy to have you along for the ride if you made it this far through my opening rant!!😎🤟😎🤟😎


Processing
Likes
2
Share


@gogreen
Follow
Week four, doing tha same feeding schedule, still growing. This week o started spray water as weel as in the soil. Keep growing! Anxious to get my first harvest.