


Likes
Comments
Share

@Mrdub
Follow
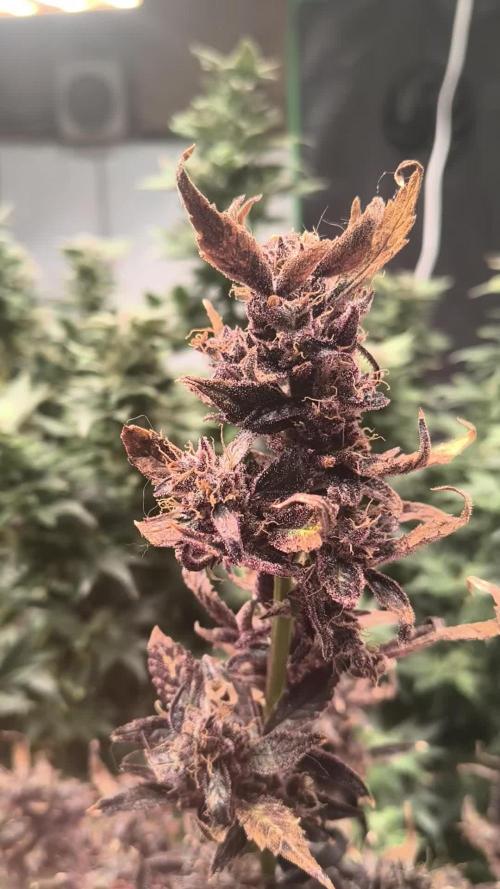
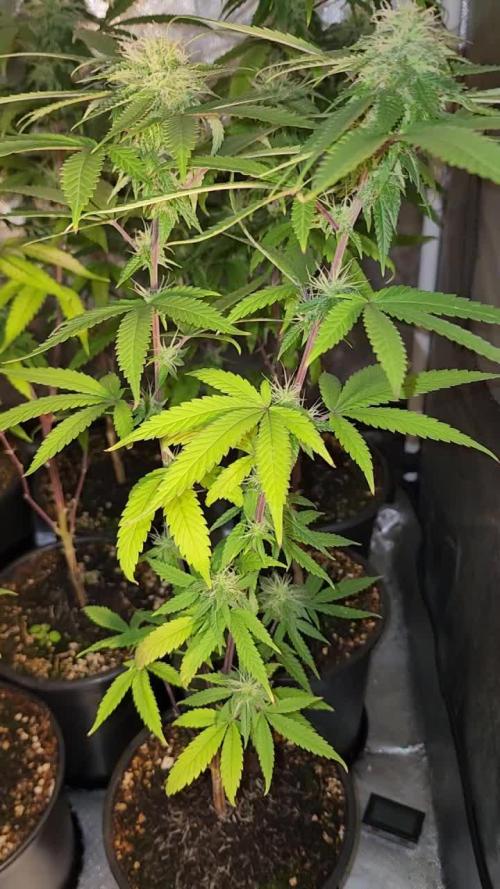
My little purple frost monster is booming right along trichome coverage is crazy and she so purple with golden pistols not much smell yet but does got that GMO stench to her not going to be a big yeilder but is really pretty going to harvest her in a couple weeks about to start giving her carboflush and getting her ready for harvest running 6.2 pH lights at 100 percent she def has a unique fade going on leaves are turning golden so here's to another week of growing lfg



Likes
4
Share


@Canaryweed_tf
Follow
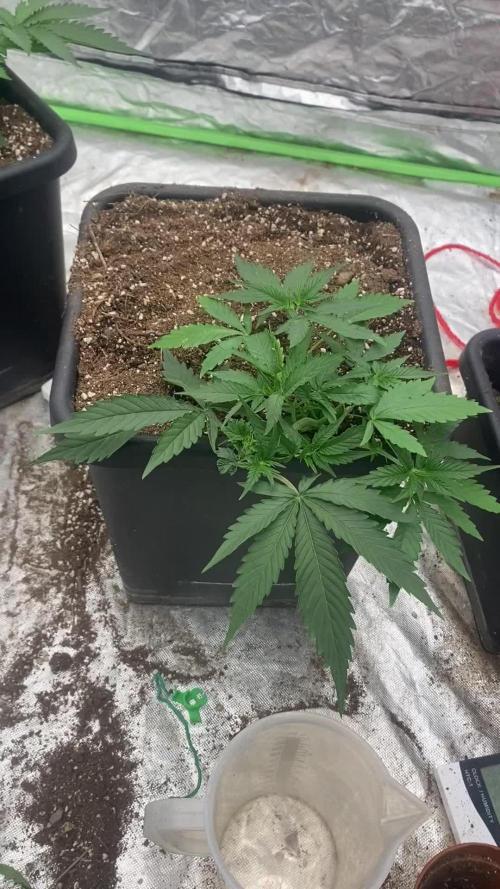
Ya tenemos está cuarta semana de la GorillaKingAuto del banco de Kannabiaseeds. En está semana la planta ha pegado un estirón muy considerable me está sorprendiendo mucho, si se fijan en el video podéis ver que ya le están saliendo los primeros pelitos blancos de flora. Pronto nuevas noticias 😘

Likes
Comments
Share

@Putinhuilo
Follow
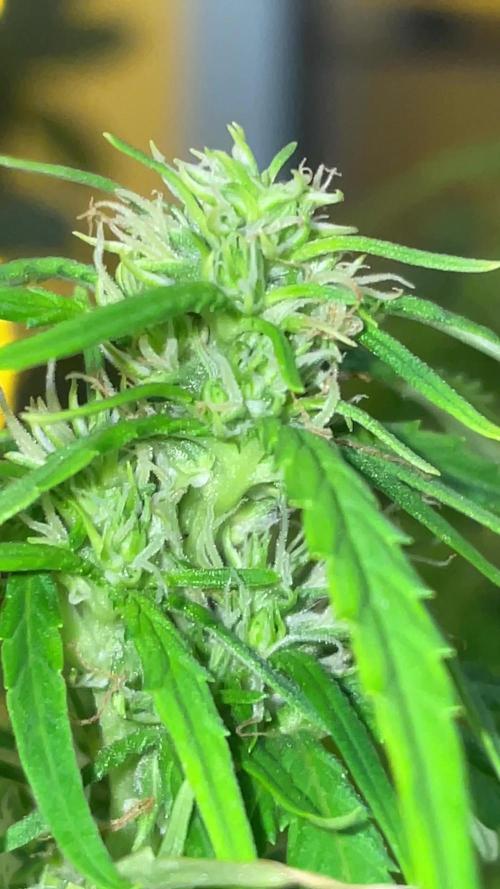
I started 7 week now I add 1000-1200 ml of water and just waiting she start smell a little bit and start make crystals

Likes
40
Share


@Comfrey
Follow
Dutch Passion Shaman
Die Woche war geprägt von stundenlangem Landregen, Sonnenstunden, Nebel am Morgen mit sehr hoher Luftfeuchtigkeit, Sturm und noch mehr Regen. Die Pflanzen wurden deswegen von mir fast täglich auf Mehltau oder Fäulnis untersucht. Ein paar kleine Stellen im Inneren und auf der Wind abgewandten Seite habe ich entdeckt und sofort herausgeschnitten, Mehltau. Nichts Wildes aber es machte mir deutlich, dass die beiden Shamaninnen mit anschwellen der Blüten viel Liebe und Aufmerksamkeit benötigen, vor allem wenn das Wetter nicht so Cannabis freundlich ist, wie wir es uns wünschen.
Shamanin No. 1, die dunklere und größere von beiden, habe ich deshalb einige weitere Blätter genommen, so dass rund um die starken Triebe ausreichend Luft zirkulieren kann. Solange es nun windet und stürmt, sollte alles im grünen Bereich bleiben.
Shamanin No. 2 im kleineren Topf hat begonnen sich von der Spitze ausgehend allmählich farbiger zu zeigen. Sie sieht wunderschön aus und der Duft gefällt mir sehr gut. Sie hat ihren Platz gewechselt und steht nun in einem sonnigeren und luftigeren Teil des Gartens.
Danke für‘s vorbeischauen und das Interesse an meinen beiden Shamaninnen. 💚

Likes
35
Share


@MadeInGermany
Follow
Info:
Unfortunately, I had to find out that my account is used for fake pages in social media.
I am only active here on growdiaries.
I am not on facebook instagram twitter etc All accounts except this one are fake.
Hi everyone :-)
It has developed really well so far :-).
Next week she will be put in the flower tent and before that cuttings will be taken :-)
It was poured twice with 1 liter each this week.
Otherwise everything was cleaned and cleaned.
Have fun and stay healthy 🙏🏻
You can buy this Strain at :
https://www.exoticseed.eu/
Type:
Herz Og
☝️🏼
Genetics:
Larry OG X Kosher Kush
Indica 60 % / Sativa 40 %
👍
Vega lamp:
2 x Todogrow Led
Quantum Board 100 W
💡
Bloom Lamp :
2 x Todogrow Led
Cxb 3590 COB 3500 K 205W
💡💡☝️🏼
Soil :
Canna Coco Professional +
☝️🏼
Fertilizer:
Green House Powder Feeding
☝️🏼🌱
Water:
Osmosis water mixed with normal water (24 hours stale that the chlorine evaporates) to 0.2 EC. Add Cal / Mag to 0.4 Ec Ph with Organic Ph - to 5.5 - 5.8 .


Likes
7
Share


@El_Bottanico
Follow
Hello everyone.
Another week passed, gave her water and some enzimes on day 33, I noticed some leaf intervenal discoloration, not too concerning in my opinion. Maybe the enzimes were too much or some nutrient lock out due to a somewhat excessive fertilization. Any opinion on this issue?
I think will go on with plain water to the end I think, hoping the problem will sort out itself. What do you think?
Other then that I think buds oare forming fast and fine, she's putting out a little resin and smell now.
Ciao 😊

Likes
77
Share


@Basementganja
Follow
Day 14 - This girl was topped above the second node!
She's showing some variegation, but is growing very strong!
She's growing in Schultz premium potting mix, and is getting watered with de-chlorinated tap water at a dosage of 1 red solo cup every day from days 1-7, then 2 solo cups from days 7-14.
Likes
4
Share

@Mrgreenthumbs420
Follow
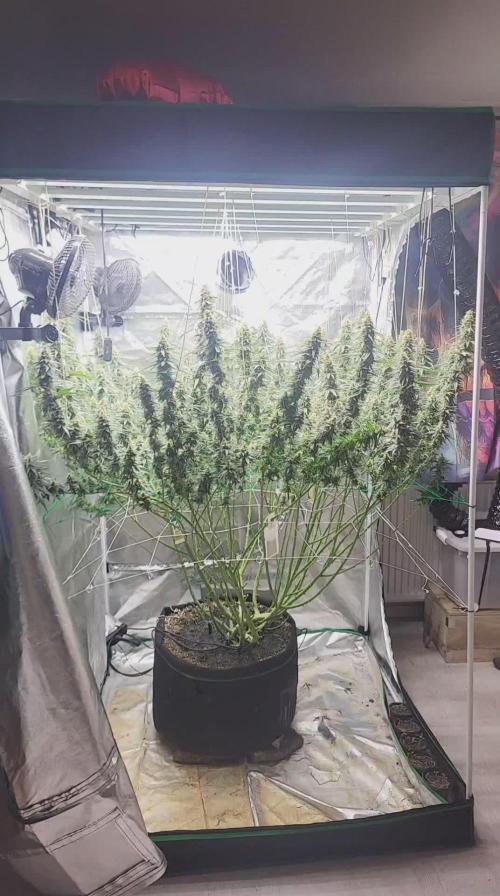
she is growing beautifull big dense buds covered in frosty looking trichomes and stacking up nicely, she has a nice sweet smell with a hint of blueberry, some small purple hughes are starting to appear, I'm hoping those colours are going to intensify come harvest time. she is stacked with bud sites with big dense frosty buds nice sweet blueberry smell to her just a nice growth pattern to her

Likes
209
Share


@BioBuds
Follow
This week I defoliated. Waited three weeks into flowering, to not stress them like I did last grow. She is rewarding me with some fat bud growth at many sites. I overwatered beginning of this week, but hey seemed to have taken it well.
I did another amendment. The first one last week was a test, to see how they responded, they took it well. Just compare last week to this one.
The amendment I did:
- 5 liters of worm castings
- 2 cups bonemeal
- 1 cup wood ash
- 1 cup microlife
I layered this on top of my pots, covering this with bio-coco (pre fertilized) to ward of gnats. The gnats have been getting less and less. They don't like the coco that much, while humidity is just the same and last week higher since I did some more watering.
I watered with the perma tea. While this is pretty acidic (PH 5), I can amend with more wood-ash, if you don't and follow this recipe, don't do too much wood-ash since it will kill off your micro organisms.
I lowered the light diagonally since the outer right plant is longer and closer to it. The SP 3000 is still performing as you can see. Temps were a bit higher with the lights so low, so far the Orange Hill Special doesn't seem to mind. Im totally amazed with the results so far.
Look for the great end of year deals at www.mars-hydro.com.
Thank you for checking in on me again!
Hug Bud


Likes
4
Share

@Ensign420
Follow
|»» LOG DISCLAIMER: Not intended as a grow guide. Grow log entries are usually posted 3 weeks later and are for my learning reference. ««|
Introduction - Week 26 Summary -
Ensign's log, stardate 17608.3,
Wow what a week!
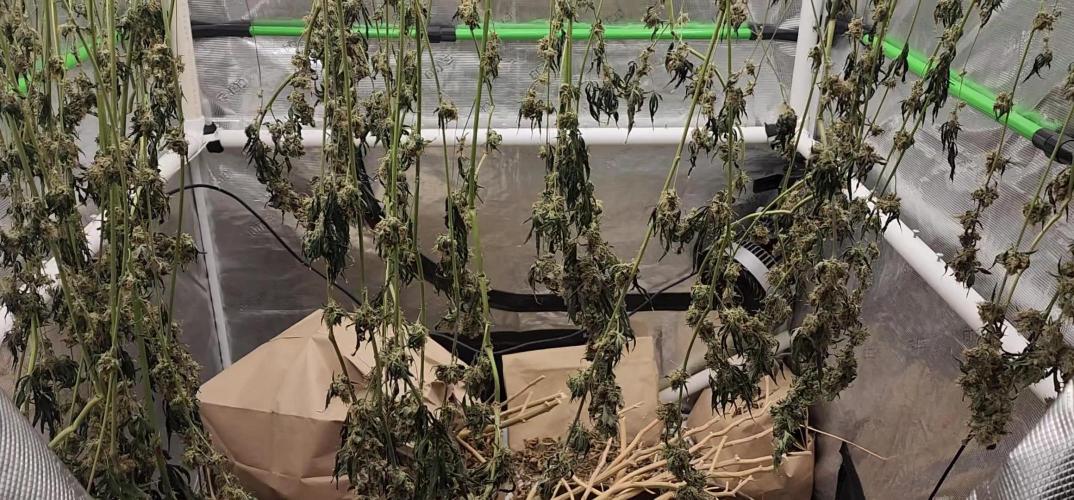
Drying is always pretty simple and been checking daily. Buds are drying nicely and terps are smelling pretty dank!!
Most of the week has been in the veg tent with tissue culture! Mixed another batch of establishment media and took proper explant cuttings. Also super-cropped the mothers to even out the canopy.
Ahh yea! Getting hyped for trim day next week!
Next week will also be the last week for this grow log, but am already planning out the next cycle.
Anyways! Onwards to next week!
[START OF WEEK 26]
==========================================================
---------- [ 4x4 MAIN TENT ] ----------
Heady OG BX1 #1 [Round4 ~Wk19] - WEEK 26 - Dry Wk1
----------- [ 3x3 VEG TENT ] ------------
TKO - WEEK 09 - Full Veg
Gorilla Goat #1 - WEEK 05 - Full Veg
Heady OG BX1 - WEEK 09 - Full Veg
Garlic Budder OG#1 - WEEK 05 - Full Veg
10/13/25 → 10/19/25
This Week's Estimated Goals
----------------------------------------------------------------------------------------------
DLI: ~0 mol/m²/d
PPFD: ~0 μmol/m²/s
VPD: ~1.5 kPa
This Week's Meter Readings & Averages
----------------------------------------------------------------------------------------------
Light On/Off: 00:00 - 00:00 | Wattage: ~000.0W [LV00]
Distance From Canopy: ~00”
DLI: ~0.00 mol/m²/d
PPFD: ~0 μmol/m²/s
VPD: ~1.17 kPa
Soil %: [47.4, 34.1, 35.0, 55.7, 43.7, 43.6, 44.0, 43.3]
==========================================================
Day 01 - Monday - 10/13/25 - Total Days: 183
-----------------------------------
Daily Averages ~[+01:00]
- Temps: 78.8°F [26.0°C]
- Humidity: 64.4%
- VPD: 1.19 kPa
- Soil %: [49, 34, 35, 57, 44, 44, 44, 42]
-----------------------------------
- [22:05]: Night check on the 4x4 tent.
--- Ca-Caw!! Looking great!
--- Heady OG BX1 #1 is drying along and no signs of mold. Also airflow and RH is stable and within the 60-70% range.
--- Getting stoked! Trim day is 9 days away!
- [22:09]: Checked the Ecowitt soil moisture sensor data:
------------------ [ 4x4 MAIN TENT ] ---------------
------ 48% - [CH01 FT » G30 - Heady OG BX1 #1]
------ 35% - [CH02 FB » G30 - Heady OG BX1 #1]
------ 35% - [CH03 BT » G20 - TKO]
------ 56% - [CH04 BB » G20 - TKO]
------------------ [ 3x3 VEG TENT ] ----------------
------ 46% - [CH05 BL » GR7 - TKO]
------ 40% - [CH06 BR » GR7 - Gorilla Goat #1]
------ 40% - [CH07 FL » GR7 - Heady OG BX1 #1]
------ 40% - [CH08 FR » GR7 - Garlic Budder OG#1]
--------- Veg: 38% - 45% | Flower: 45% - 55%
--------- General: 30% [Dry] «| 45 - 60% [Moist] |» 70% [Wet]
- [22:18]: Checked the 3x3 veg tent.
--- Looking healthy in the veg garden!
--- All of the vegging mothers are looking great and the canopy is starting to even out.
--- Also clones look healthy and no need to water yet.
--- The stems, err, I mean, explants, don’t show any signs of contamination.
--- Staying positive, glad the growth media is sterile and the overall procedure was successful.
--- Anyways! Plan to create more establishment media and cut proper explants soon!
- [22:21]: Checked the humidifiers.
--- Tanks are still full and no leaks found.
Day 02 - Tuesday - 10/14/25 - Total Days: 184
-----------------------------------
Daily Averages ~[+01:00]
- Temps: 76.9°F [24.9°C]
- Humidity: 64.8%
- VPD: 1.11 kPa
- Soil %: [46, 34, 35, 56, 43, 43, 44, 43]
-----------------------------------
- [21:44]: Night check on the 4x4 tent.
--- Looking good in the dry tent!
--- Heady OG is drying along and humidity levels look great!
--- Nothing to do but maintain and wait to trim in 8 days!
- [21:55]: Checked the Ecowitt soil moisture sensor data:
------------------ [ 4x4 MAIN TENT ] ---------------
------ 45% - [CH01 FT » G30 - Heady OG BX1 #1]
------ 34% - [CH02 FB » G30 - Heady OG BX1 #1]
------ 35% - [CH03 BT » G20 - TKO]
------ 56% - [CH04 BB » G20 - TKO]
------------------ [ 3x3 VEG TENT ] ----------------
------ 41% - [CH05 BL » GR7 - TKO]
------ 40% - [CH06 BR » GR7 - Gorilla Goat #1]
------ 47% - [CH07 FL » GR7 - Heady OG BX1 #1]
------ 46% - [CH08 FR » GR7 - Garlic Budder OG#1]
--------- Veg: 38% - 45% | Flower: 45% - 55%
--------- General: 30% [Dry] «| 45 - 60% [Moist] |» 70% [Wet]
- [21:59]: Checked the 3x3 veg tent.
--- Looking healthy and growth is raging!
--- All mothers are looking beautiful!
--- Clones are getting taller and looking healthy!
--- Gorilla Goat #2 needs watering. Let’s go Ensign!
- [22:03]: Here is the starting initial watering range:
------ Gorilla Goat #2 » 255.4g → 300.3g and was last watered 4 days ago.
--------- General Solo Range: [Dry] «| [Initial Cup Weight] + ~55-100g |» [Wet]
--- Took the starting weight before watering,
------ Gorilla Goat #2 » 230.8g
--- While on a scale,
--- Gently misted her straw mulch with RO water.
--- Tried to keep the top growth dry.
--- Misted 5-10 sprays. Waited a few seconds, then misted again.
--- Made sure to reference the watering weights.
--- Repeated this process until the cup weighted at least 300g.
--- There was no runoff.
- [22:23]: Took the saturated weight after watering,
------ Gorilla Goat #2 » 345.7g
--- Marked the watering date on the side of the cup. Also marked the saturated weight on the back.
--- Placed her back into the tent.
--- Decided to train and super-crop both clones.
--- Bent the taller branches to lower the canopy.
- [22:38]: Checked the humidifiers.
--- Tanks are still full and no leaks found.
--- Onwards Ensign!
Day 03 - Wednesday - 10/15/25 - Total Days: 185
-----------------------------------
Daily Averages ~[+01:00]
- Temps: 75.6°F [24.2°C]
- Humidity: 63.8%
- VPD: 1.09 kPa
- Soil %: [48, 34, 35, 56, 44, 43, 44, 42]
-----------------------------------
- [+01:33]: Quick night check on the 4x4 tent.
--- Looking great in the dry tent!
--- Also starting to smell dank!
--- 7 more days until the big trim!
- [+01:37]: Checked the 3x3 veg tent.
--- Veg garden is healthy and growth is green!
--- Both the Heady OG BX1 #1 and TKO mothers will need another topping soon.
--- Clones in the propagation tray also look great and no need to water.
--- The explant media is still looking sterile with no signs of contamination.
--- Easy night in the garden. Nice!
- [+01:40]: Checked the humidifiers.
--- Tanks are still full and no leaks found.
--- Okay! Tomorrow plan to dive back into tissue culture and prep more growth media.
--- Onwards Ensign!
Day 04 - Thursday - 10/16/25 - Total Days: 186
-----------------------------------
Daily Averages ~[+01:00]
- Temps: 74.6°F [23.7°C]
- Humidity: 62.2%
- VPD: 1.11 kPa
- Soil %: [46, 34, 35, 56, 43, 44, 44, 45]
-----------------------------------
- [11:41]: Alright! Back to tissue culture and time to start another batch of establishment media!
--- Took the plant growth regulators out of cold-storage (my fridge).
------ [ » SMOKES A BOWL « ]
--- While the products warmed up, gathered the necessary supplies and setup my workstations.
--- Currently, focusing on:
------ PHASE 01 » ESTABLISHMENT
--------- » DAY 01 » MEDIA - PART 01 - Mixing the growth media
--------- » DAY 01 » MEDIA - PART 02 - Sterilization of media and tools [via autoclaving]
--- Going to use the same establishment formula, but doubling the yield.
--- Also using RO water instead of distilled water.
--- Here's the establishment media formula:
--- [» VER.0001 |» INITIAL TROPICAL PLANTS FORMULA |» 0.5L (500mL) RO WATER «]
------ MS [Muashige & Skoog]
--------- » 2.22g
------ Sucrose [Cane Sugar]
--------- » 15g
------ BAP [6-Benzlaminopurine | Cytokinin]
--------- » 0.5mg » 0.5mL » 500μL
------ IBA [Indole-3-Butyric Acid | Auxin]
--------- » 0.05mg » 0.05mL » 50μL
------ AGAR [Jelling Agent]
--------- » 3.5g
------ PH [Potential Hydrogen]
--------- » 5.7
--- [» 1mg/mL CONCENTRATION ratio | 1mg = 1mL | 1mL = 1000μL «]
- [12:59]: Time to prep the growth media!
--- Made sure to turn OFF the lung-room's oscillating fan.
--- Filled a measuring cup with 400mL of RO water.
--- Dropped a clean magnetic mixing bar into the measuring cup.
- [13:05]: Placed the measuring cup on the magnetic stirrer.
--- Turned the unit ON and have the unit on LOW.
- [13:11]: Using a precision scale (sensitive to 0.01g) along with a micro-pipette (1000μL capacity along with tips) and disposable (100mL) weigh boats,
------ Added 2.22g of MS [Muashige & Skoog]
------ Added 15g of Sucrose [Cane Sugar]
------ Added 500μL of BAP [6-Benzlaminopurine | Cytokinin]
------ Added 50μL of IBA [Indole-3-Butyric Acid | Auxin]
------ Added 3.5g of AGAR [Jelling Agent]
------ Then filled the measuring cup to the 500mL line before covering the top with plastic wrap.
--- Alright!
- [13:46]: Let the media mix on the magnetic stirrer for a bit.
--- Have the unit set to LOW with a steady vortex.
------ [ » ~20 MINUTES LATER « ]
- [14:09]: Okay! Time to pH the establishment media!
--- Gently removed the bottom cap of the AC Infinity PH Meter PRO [AC-PHM7]. Placed the cap in the storage case for later. Covered the top with plastic wrap (KCL solution still inside the cap).
--- Swirled the probe in a cup of RO water to rinse off the storage solution.
--- Shook the excess water out and wiped the unit with a clean paper towel making sure all mineral buildup was removed (kept away from the very tip of the probe).
--- Temporarily placed the meter back into the cup of RO water.
--- Removed the plastic wrap of the establishment media.
- [14:13]: Using the AC Infinity PH Meter PRO [AC-PHM7],
--- Took the establishment media's initial pH reading.
--- The pH was at 5.14
--- Using the micro pipette,
------ Added pH Up solution.
--- Made sure to let the media solution mix for a bit before checking for pH readings.
- [14:21]: Adjusted the media's pH until it stabilized to 5.58
--- For this batch, tried to go for a range of 5.4 to 5.8 pH.
--- Also glad that I did not need to add PH down.
- [14:43]: Poured the pH'd establishment media into separate polypropylene containers.
--- Made sure to re-mix the media solution between container fillings.
--- Ended up splitting the media solution into 12 containers.
------ 8x » 125mL Polypropylene Bottles [with screw cap lids]
------ 4x » 236mL (0.5pt) Glass Mason Jars [with polypropylene jamming lids]
--- Have the lids of all vessels loosely on and set each aside for later autoclaving.
--- Also filled 12 empty polypropylene bottles with RO water and placed the lids on loosely (4 bottles are re-used).
- [14:58]: Prepped the tools for sterilization.
--- Took a new 5.25in x 10in sterilization pouch and added the following tools:
------ 3x stainless steel forceps
------ 3x stainless steel scissors
--- Before placing into the pouch, wiped each tool with a paper towel sprayed with 70% isopropyl alcohol.
--- Sealed the bag and marked the date.
--- Time to autoclave everything in the pressure cooker!
--- Filled a Presto 23qt-Pressure Cooker with 12 cups of RO water.
- [15:06]: Added a few aluminum foil balls to the bottom of the pressure cooker.
--- Placed the first rack on top of the foil.
--- Made sure the rack was level and stable resting above the water.
--- Gently placed the containers of media into the pressure cooker and onto the first rack. Lids are still loose.
--- Made sure to give space for each container and kept them away from the sides of the pressure cooker.
--- Placed a second pressure cooker rack on top of the containers of media.
--- Placed the containers of RO water onto the second rack. Lids are still loose.
--- Placed the third rack on top of the containers of water.
- [15:16]: Lastly, placed the sterilization bag of tools on top of the third rack.
--- Took the pressure cooker lid and made sure the release vent was clear of debris before placing it on.
--- Sealed and secured the lid.
--- Pressure vessel has been sealed!
--- Alright! Time to sterilize!
--- While keeping the vessel level and straight up, moved the sealed pressure cooker to the kitchen for heating.
- [15:23]: Placed the pressure cooker onto a butane-gas stove.
--- Turned the stove ON and set it to HIGH.
------ [ » ~20 MINUTES LATER « ]
--- Once steam was venting out of the release vent,
--- Placed the metal rocker onto the vent.
--- Shortly afterwards, the pressure top-lock sprung up to indicate the vessel was under pressure.
--- Then the pressure gauge started to rise.
------ [ » ~10 MINUTES LATER « ]
--- At 15psi, the metal rocker started to rock!
- [15:56]: Turned down the stove down to LOW.
--- Set a timer for 15 minutes and began monitoring the pressure gauge.
--- Maintained the 15psi by making minor adjustments to the stove.
------ [ » ~15 MINUTES LATER « ]
- [16:12]: Turned the stove completely OFF and waited until the pressure cooker's top-lock dropped down which indicated that pressure levels were safe to open.
------ [ » ~40 MINUTES LATER « ]
--- Once the pressure cooker was at safe levels (0psi) and the top-lock was down,
- [16:48]: Moved the pressure cooker into the lung room.
--- The pressure cooker was still quite hot so was careful to keep the vessel straight up and level during transport.
--- Used towels for insulation.
--- Rested the hot pressure cooker onto a stack of 5-gallon buckets covered with layers of towels and folded paper bags.
--- Gently opened the pressure cooker and set the lid aside.
- [16:57]: While wearing nylon gloves, sprayed my hands with 70% isopropyl alcohol.
--- Gently removed the bag of sterile tools placed it onto a Pyrex dish.
--- Removed the top rack and set it aside.
--- Then one container at a time,
--- Gently tightened and secured the lids of each bottle of sterile water before placing onto the Pyrex dish.
--- Removed the middle rack and set it aside.
--- Then one container at a time,
--- Gently tightened and secured the lids of each bottle and jar of sterile media before placing onto the Pyrex dish.
--- Throughout the entire process, kept the gloves on and sprayed my hands regularly with 70% isopropyl alcohol.
--- Decided to store all the bottles in the Pyrex dish.
- [17:16]: Have the dish resting on a shelf in the lung room. The jars of media are set right next to the Pyrex dish on a towel.
--- To prevent dust, covered everything with towels.
--- Done for now and will check on the growth media tomorrow.
--- If all goes well, should be taking new explant cuttings in a couple days!
- [17:39]: Night check on the 3x3 veg tent.
--- Looking beautiful and healthy in the veg garden!
--- All moms are getting bushy and getting pretty close to the grow light.
--- Since I plan to take explant cuttings soon, not going to top or train quite yet.
--- Clones also looking healthy and seem unaffected by the super-cropping. Nice!
- [17:57]: Checked the Ecowitt soil moisture sensor data:
------------------ [ 4x4 MAIN TENT ] ---------------
------ 45% - [CH01 FT » G30 - Heady OG BX1 #1]
------ 34% - [CH02 FB » G30 - Heady OG BX1 #1]
------ 35% - [CH03 BT » G20 - TKO]
------ 55% - [CH04 BB » G20 - TKO]
------------------ [ 3x3 VEG TENT ] ----------------
------ 43% - [CH05 BL » GR7 - TKO]
------ 45% - [CH06 BR » GR7 - Gorilla Goat #1]
------ 42% - [CH07 FL » GR7 - Heady OG BX1 #1]
------ 44% - [CH08 FR » GR7 - Garlic Budder OG#1]
--------- Veg: 38% - 45% | Flower: 45% - 55%
--------- General: 30% [Dry] «| 45 - 60% [Moist] |» 70% [Wet]
- [17:59]: Checked the 4x4 main tent.
--- Ca-Caw!! I got Headies!
--- Wow! Heady OG BX1 #1 is drying along beautifully and she is smelling dank!
--- Also no signs of mold and RH levels look stable!
--- 6 more days until the big trim!
- [18:11]: Checked the humidifiers.
--- Tanks are still full and no leaks found.
--- Wow what a day!
--- Still gots more to do!
--- Let’s go! Let’s grow!
--- Onwards Ensign!
Day 05 - Friday - 10/17/25 - Total Days: 187
-----------------------------------
Daily Averages ~[+01:00]
- Temps: 76.0°F [24.4°C]
- Humidity: 62.0%
- VPD: 1.16 kPa
- Soil %: [48, 34, 35, 55, 44, 44, 44, 42]
-----------------------------------
- [22:57]: Night check on the 4x4 tent.
--- Ca-Caw! Headies is smelling dank!
--- RH levels are getting a bit dry, but are okay.
--- Wow buds are frosty with trichomes!
--- With 5 days until trim day, getting stoked!
- [23:04]: Checked the Ecowitt soil moisture sensor data:
------------------ [ 4x4 MAIN TENT ] ---------------
------ 47% - [CH01 FT » G30 - Heady OG BX1 #1]
------ 34% - [CH02 FB » G30 - Heady OG BX1 #1]
------ 35% - [CH03 BT » G20 - TKO]
------ 55% - [CH04 BB » G20 - TKO]
------------------ [ 3x3 VEG TENT ] ----------------
------ 46% - [CH05 BL » GR7 - TKO]
------ 40% - [CH06 BR » GR7 - Gorilla Goat #1]
------ 45% - [CH07 FL » GR7 - Heady OG BX1 #1]
------ 50% - [CH08 FR » GR7 - Garlic Budder OG#1]
--------- Veg: 38% - 45% | Flower: 45% - 55%
--------- General: 30% [Dry] «| 45 - 60% [Moist] |» 70% [Wet]
- [23:11]: Checked the 3x3 veg tent.
--- Looking healthy in the veg garden!
--- Mothers are getting bushy and tall!
--- Super-cropped and trained the taller branches down to lower the canopy.
--- Plan to take tissue culture cuttings tomorrow so glad there are plenty of tops to choose. Still deciding on which mother to preserve next.
--- Clones in the propagation tray look healthy!
--- The original Garlic Budder #2 clone needs watering.
- [23:26]: Here is the starting initial watering range:
------ Garlic Budder OG#2 » 256.4g → 300.2g
--------- General Solo Range: [Dry] «| [Initial Cup Weight] + ~55-100g |» [Wet]
--- Took the starting weight before watering,
------ Garlic Budder OG#2 » 258.9g
--- While on a scale,
--- Gently misted her straw mulch with RO water.
--- Tried to keep the top growth dry.
--- Misted 5-10 sprays. Waited a few seconds, then misted again.
--- Made sure to reference the watering weights.
--- Repeated this process until the cup weighted at least 300g.
--- There was no runoff.
- [23:40]: Took the saturated weight after watering,
------ Garlic Budder OG#2 » [000.0]g
--- Marked the watering date on the side of the cup. Also marked the saturated weight on the back.
--- Placed her back into the tent.
- [23:45]: Checked the humidifiers.
--- Tanks are still full and no leaks found.
Day 06 - Saturday - 10/18/25 - Total Days: 188
-----------------------------------
Daily Averages ~[+01:00]
- Temps: 76.8°F [24.9°C]
- Humidity: 60.3%
- VPD: 1.25 kPa
- Soil %: [47, 34, 35, 55, 44, 44, 44, 47]
-----------------------------------
- [15:19]: Decided to decrease the VPD level a bit.
--- Within the AC Infinity App,
--- Changed the schedule name from 'Flower [12/12]' to 'Drying [0/24].' Oops.
--- For the Main Tent [4x4] controller,
--- Adjusted the 'Drying [0/24]' Schedule for the exhaust fan.
------ Decreased the VPD LOW trigger value from 1.5kPa to 1.4kPa
--- Adjusted the 'Drying [0/24]' Schedule for the humidifier.
------ Decreased the VPD target value from 1.5kPa to 1.4kPa
--- This should increase the relative humidity a bit and will maintain a 60-65% range
- [16:59]: Evening check on the 3x3 veg tent.
--- Wow the veg garden is raging with healthy growth!
--- Even with the lower veg temps, growth has been perky and bushy!
--- The TKO mother has been looking a bit on the purple-side, but I plan to increase the temps back after trim day.
- [17:23]: Okay! Time to continue the tissue culture journey!
--- Checked on the sterilized media, water, and tools.
--- Ooo yea! The growth media in the glass jars have solidified nicely!
--- The media in the bottles also look great! Found only one that did not gel properly.
--- Hmm. The sterile water bottles are not looking sterile. Unlike the first batch (using distilled water), each RO bottle had tiny white particles floating in the water.
--- I think this was due to the water source. The RO water used was from the plant reservoir. For the next sterilization, will try using water straight from the tap. Will discard the entire batch and try again later.
- [17:34]: Anyways! Time to cut and sterilize another batch of explant cuttings.
--- Using the similar protocols as last time, but with a few changes.
--- Instead of distilled, using reverse-osmosis (RO) water.
--- Also simplifying the workflow and will not be using the sterile water.
--- Only taking cuttings from one cultivar.
--- Today, attempting to preserve Heady OG BX1 #1
--- Unlike the last attempt, going to be cutting apical nodes and will leave all leaf growth on.
--- Last attempt was more for monsteras and not cannabis.
- [17:35]: Made sure the lung room's oscillating fan was OFF during the entire process.
--- Put on a fresh pair of nitrile gloves.
--- Okay! Let's grow Ensign!
- [17:47]: Filled a glass beaker with 180mL of RO water.
--- Using a micro-pipette,
------ Added 20mL of Clorox bleach
--- Mixed the solution.
- [17:52]: Poured the bleach solution into a glass mason jar.
------ Added 1 drop of Dawn dish soap.
--- Dropped a magnetic mixing rod into the jar before setting it onto the magnetic stirrer.
--- Turned the unit ON and set it to a low setting.
--- Placed a polypropylene lid loosely on.
- [18:02]: Rinsed and filled the glass beaker with 70% isopropyl alcohol.
--- Filled another glass beaker with RO water before adding a drop of Dawn dish soap. Mixed the solution.
--- Okay! Time to take the cuttings!
--- Using a clean pair of trimmers,
- [18:09]: Gently cut two clone cuttings from the Heady OG BX1 #1 mother.
--- Stripped each cutting down to 2-inch apical nodes making sure to leave about 0.5 inch of stem growth for planting.
------ Prepared a total of 2 nodal cuttings.
--- Dropped the nodal cuttings into the cup of soapy water.
--- Swirled the cuttings in the soapy water for a bit.
--- Opened the jar containing the 10% bleach solution.
--- Using clean tweezers,
--- Took each cutting out of the RO water and carefully submerged it into the beaker of 70% isopropyl alcohol for about 30 seconds.
--- Then transferred the cutting from the isopropyl alcohol straight into the jar of bleach solution.
--- Once both cuttings were in the jar, sealed the top with the polypropylene lid.
- [18:23]: Flipped and set the entire bleach jar upside down onto the magnetic stirrer.
--- Started using the magnetic stirrer.
--- But the cuttings were getting hit by the bar so ended up turning the unit OFF.
--- Instead, made sure to swirled the bottle every few minutes to agitate the cuttings.
--- For a proper sterilization, the cuttings should be agitated in the hypochlorite (bleach) solution for at least 20 minutes.
--- While waiting for the explants to sterilize, prepped the still air box.
- [18:39]: Unfolded and placed a Safloga still-air box onto my desk.
--- Thoroughly misted the inside of the air box with 70% isopropyl alcohol making sure to coat the entire chamber.
--- Then isopropyl misted and placed the following items inside of the still air box,
------ x1 » Jar of Establishment Media
------ x1 » Bottle of Establishment Media
------ x1 » Glass-Bead Sterilizer
------ x1 » Roll of Plastic Wrap [pre-cut]
------ x1 » Sterilization Bag Containing:
--------- x3 » Stainless Steel Forceps
--------- x3 » Stainless Steel Scissors
--- Made sure to fully coat the outside of the tool bag and each of the containers with 70% alcohol.
--- The bag had a torn corner (Oops), so made sure to spray the inside with a few mists of isopropyl alcohol.
--- For the glass-bead sterilizer,
------ Wiped the entire unit with isopropyl alcohol.
------ Before filling the unit with the included beads, misted the heating chamber with a spray of isopropyl alcohol.
------ Misted the glass beads again with a spray of isopropyl alcohol.
--- Set the cleaned glass-bead sterilizer into the still air box.
- [19:02]: Still air box fully prepped for explants!
--- Okay! Explant nodal sterilization complete!
--- While still wearing gloves,
--- Misted the outside of the explant jar with 70% isopropyl alcohol before placing it into the still-air box.
--- Turned the glass-bead sterilizer ON.
--- Made sure to re-seal the chamber.
- [19:05]: Okay! Finally time to start the tissue culture transplant!
--- Let's go Ensign!
--- Sprayed my gloved hands with 70% isopropyl alcohol (also put on a pair of cloth arm sleeves),
--- Placed my hands through the arm holes and into the still air box to begin the process.
--- Started by laying out my initial workspace:
------ » Far Left Quadrant » Jar of Sterile Establishment Media
------ » Far Center » Bottle of Sterile Establishment Media
------ » Far Right Quadrant » Glass-Bead Sterilizer
------ » Mid Center » Bleach Jar with Explant Cuttings [Main Workspace]
------ » Near Left Quadrant » Empty [Trash Area]
------ » Near Right Quadrant » Bag of Sterile Tools & Roll of Plastic Wrap
--- Opened the bag of tools and placed the forceps and scissors into the pre-heated glass-bead sterilizer.
--- Set the bag in the trash area (near left quadrant).
--- Loosened the lids of both containers of sterile media but did not remove the lids. The lids were resting on top and could easily be lifted.
--- Also took lid off of the bleach jar and gently set it on the table.
--- Took the jar of sterile media and set it in the center of my workspace (to the right of the bleach jar).
--- Using my left hand, took a set of scissors from the glass-bead sterilizer and gently cut the bottom of the first cutting.
--- Once the bottom cut was made, placed the scissors back into the glass-bead sterilizer.
--- Using my left hand, lifted the lid off of the jar of sterile media and inserted the trimmed end of the cutting straight into the growth media (using my right hand).
--- Covered the jar with the lid and placed the forceps back into the glass-bead sterilizer.
--- Tighten the lid of the jar and set it aside.
------ [ » REPEATED THE ABOVE PROCESS FOR THE BOTTLE OF GROWTH MEDIA « ]
--- Once the last cutting was transferred from the bleach jar into the sterile media,
--- Turned the glass-bead sterilizer OFF.
--- Cleaned up my workplace and placed the scrap stem tips and bleach jar out of the way (near left quadrant).
- [19:28]: Wrapped the lid of each explant container with plastic wrap before setting it in the center of the workspace.
--- Explant transplant completed!
- [19:59]: Using a label printer (Brother DT410), made a set of labels for each container:
------ Heady OG BX1 #1 | 04.24.25 | Photo | Reg
------ Formula: v0001 | ExBatch: 0002 | Lot: 01 | Pod: 01
------ Establishment Media | Sealed On: 10/18/25
--- Opened the still air box.
--- Then one container at a time, took an explant out and wrapped the lid with a label.
--- Set the labeled containers onto the propagation tray (in the 3x3 veg tent).
- [20:07]: Done!
------ The explants are around 37 μmol/m²/s which gives a DLI of 2.40 mol/m²/d under an 18/6 light cycle.
--- Will check daily for contamination.
--- Ca-Caw!! Ahh yea!
--- Heady OG BX1 is now officially my first true attempt at cannabis tissue culture!
--- Using this new workflow, I may try reusing the TKO media. Do plan to take new cuttings soon. May even try using the liquid media.
--- Shout out to microclone and Bill Graham! His 'Tissueponics' video contains tips and tricks of the trade that have straight up changed the way I think of DIY cannabis tissue culture.
--- Plan to further refine my process and will continue to refine the workflow with each attempt.
- [20:15]: Checked the Ecowitt soil moisture sensor data:
------------------ [ 4x4 MAIN TENT ] ---------------
------ 54% - [CH01 FT » G30 - Heady OG BX1 #1]
------ 34% - [CH02 FB » G30 - Heady OG BX1 #1]
------ 35% - [CH03 BT » G20 - TKO]
------ 55% - [CH04 BB » G20 - TKO]
------------------ [ 3x3 VEG TENT ] ----------------
------ 43% - [CH05 BL » GR7 - TKO]
------ 48% - [CH06 BR » GR7 - Gorilla Goat #1]
------ 42% - [CH07 FL » GR7 - Heady OG BX1 #1]
------ 45% - [CH08 FR » GR7 - Garlic Budder OG#1]
--------- Veg: 38% - 45% | Flower: 45% - 55%
--------- General: 30% [Dry] «| 45 - 60% [Moist] |» 70% [Wet]
- [20:56]: Checked the 4x4 tent.
--- Ca-Caw! Looking great my ladies!
--- Humidity levels are still a bit on the dry side, but still okay.
- [21:08]: Checked the humidifiers.
--- Tanks are still full and no leaks found.
--- Wow what a day!
--- Oh yea, 4-more days until trim day!! Ca-Caw! Let’s go!
Day 07 - Sunday - 10/19/25 - Total Days: 189
-----------------------------------
Daily Averages ~[+01:00]
- Temps: 76.7°F [24.8°C]
- Humidity: 59.4%
- VPD: 1.27 kPa
- Soil %: [48, 35, 35, 55, 44, 43, 44, 42]
-----------------------------------
- [07:08]: Quick morning checked on the 3x3 veg tent.
--- The veg garden is healthy and perky!
--- All moms and clones are healthy and raging with growth!
--- Both Heady OG BX1 #1 explants also look alive and green!
- [19:26]: Night check on the 4x4 tent.
--- Ca-Caw! We got MENDO DOPE in the trunk!
--- Wow terps are getting loud and buds are drying along nicely!
--- Looking frosty and coated in trichomes!
--- Three more days until trim day!!
- [19:33]: Checked the Ecowitt soil moisture sensor data:
------------------ [ 4x4 MAIN TENT ] ---------------
------ 46% - [CH01 FT » G30 - Heady OG BX1 #1]
------ 35% - [CH02 FB » G30 - Heady OG BX1 #1]
------ 35% - [CH03 BT » G20 - TKO]
------ 54% - [CH04 BB » G20 - TKO]
------------------ [ 3x3 VEG TENT ] ----------------
------ 40% - [CH05 BL » GR7 - TKO]
------ 43% - [CH06 BR » GR7 - Gorilla Goat #1]
------ 47% - [CH07 FL » GR7 - Heady OG BX1 #1]
------ 41% - [CH08 FR » GR7 - Garlic Budder OG#1]
--------- Veg: 38% - 45% | Flower: 45% - 55%
--------- General: 30% [Dry] «| 45 - 60% [Moist] |» 70% [Wet]
- [19:35]: Checked the 3x3 veg tent.
--- Vegging along beautifully in the garden!
--- Mothers are getting taller and probably could train, but will wait until tomorrow.
--- Clones and explants also look healthy and green!
--- Gorilla Goat #2 needs watering!
- [19:44]: Here is the starting initial watering range:
------ Gorilla Goat #2 » 255.4g → 300.3g and was last watered 5 days ago.
--------- General Solo Range: [Dry] «| [Initial Cup Weight] + ~55-100g |» [Wet]
--- Took the starting weight before watering,
------ Gorilla Goat #2 » 244.9g
--- While on a scale,
--- Gently misted her straw mulch with RO water.
--- Tried to keep the top growth dry.
--- Misted 5-10 sprays. Waited a few seconds, then misted again.
--- Made sure to reference the watering weights.
--- Repeated this process until the cup weighted at least 300g.
--- There was no runoff.
- [20:04]: Took the saturated weight after watering,
------ Gorilla Goat #2 » 345.6g
--- Marked the watering date on the side of the cup. Also marked the saturated weight on the back.
--- Placed her back into the tent.
- [21:41]: With a few days before the big trim, decided to sample a few buds!
--- Cut and trimmed branch for sampling and wow she’s got terps!
--- Buds are dense and have a gassy diesel funk! Ca-Caw!! Wow!
--- Without even curing, pretty sure she’s the one!
--- Plan to grow out another cycle (in clone of the same pheno), but I think I found my female for my first breeding project!
- [22:01]: Checked the humidifiers.
--- Tanks are still full and no leaks found.
--- Ahh yea! Three more days until the big trim!
--- Also next week will be the last for this log.
--- But already stoked for the next!
--- Planning on popping more seeds and continuing the pheno hunt for another female!
--- Since I lost TKO this harvest cycle, plan to grow a clone cutting of the same pheno (#2).
--- As for seeds, popping more regulars and going to attempt to grow some of Mr. Grow-It’s Chillout OG!
--- Got a pack of F3s and am stoked to give them a try!
--- Also going to sprout some beans of Dead Ops OG from Zaza Genetics!
--- Chillout OG, Dead Ops OG, and another round of TKO! Let’s go! Let’s grow!
--- Hunters of the dank! Ca-Caw!
--- Anyways!
--- Onwards to next week!
[END OF WEEK 26]




Likes
28
Share


@Bread_n_Buds
Follow
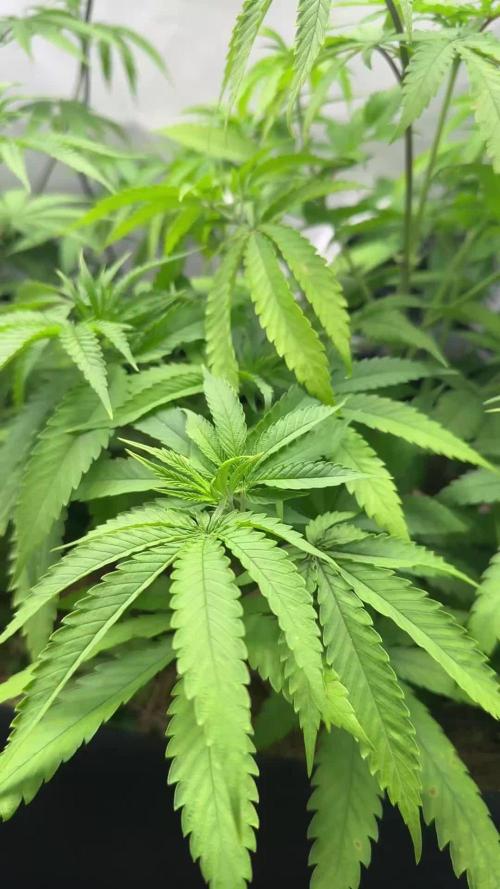
Our number #Lavender had a rough start and a happy ending. At one point she fired a fantastic main cola into the sky and now we are almost ready for the cut.
https://seedsmafia.com/en/
https://www.mars-hydro.com/

Likes
12
Share


@LSchnabel
Follow
Straight water this last week and she sure has changed colors. A pale pink/purple look everywhere.
Entire 4x4 tent willed with one plant. Looking forward to seeing the final yields.
Seeing a good amount of amber/cloudy Trichomes so it’s time to chop.
So far the only downside to this strain is the massive amount of leaf production. It’s way too much to be honest.

Likes
2
Share

@DogDoctorOfficial
Follow
💚 Amnesia Haze Auto by Zamnesia – Pheno A
Week 5 | The Elegant Stretch Before the Storm
Welcome back to another chapter of the 8×8 Adventure!
Every week these ladies remind me why phenotype hunting is such an exciting journey.
Today’s spotlight belongs to Amnesia Haze Auto – Pheno A, a plant that’s beginning to reveal the classic characteristics many growers hope to see from an Amnesia Haze.
Tall…
Graceful…
Open…
And now officially beginning her flowering journey.
While many of her neighbours are building dense canopies, this lady has chosen elegance, creating a beautifully structured framework that should allow every future flower to enjoy plenty of light and airflow.
⸻
🌱 The 12/12 From Seed Adventure
For anyone discovering this diary for the first time, welcome!
This entire project is being grown using my favourite experiment: 12/12 From Seed.
From the day these seeds germinated, they have lived under a 12 hours on / 12 hours off lighting schedule.
The goal isn’t simply producing smaller plants.
It’s about discovering how different genetics and different phenotypes naturally express themselves under identical conditions.
Every plant shares:
• The same grow room
• The same environmental conditions
• The same lighting
• The same nutrition
• The same training philosophy
• The same care
Only the genetics decide how each individual develops.
Amnesia Haze Auto Pheno A is already showing a wonderfully classic sativa-style expression.
⸻
🌿 Stretching With Purpose
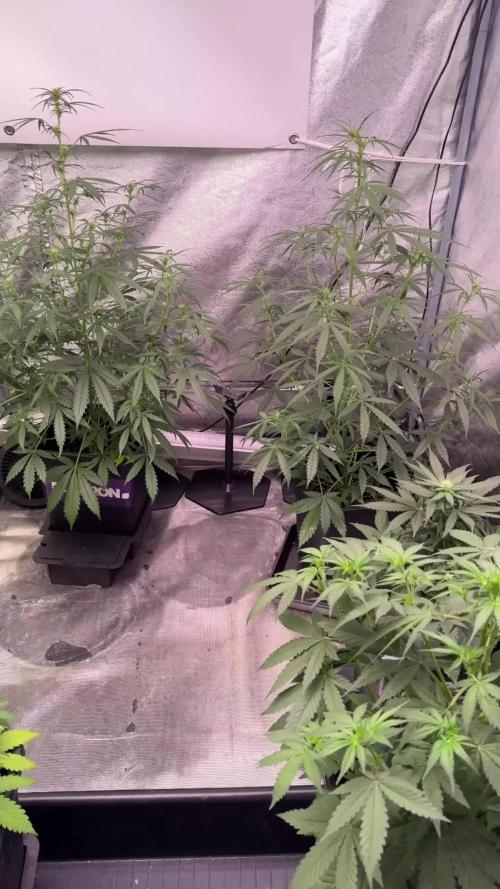
At approximately 75 cm, she’s among the taller ladies in the room and continues displaying excellent vertical growth.
Rather than producing a dense bush, she’s built long internodal spacing with beautifully stacked branches reaching confidently toward the light.
Those longer distances between nodes might look sparse now, but for flowering they’re actually a huge advantage.
Each future bud site has room to breathe.
Each branch receives excellent light penetration.
Each cola has space to develop without excessive crowding.
Sometimes less density early on creates better flowers later.
⸻
🌸 Flowering Has Officially Begun
This week marks an exciting transition.
Fresh white pistils are now appearing across every growing tip, confirming that flowering has officially begun.
Although she’s entering bloom, she’s still carrying plenty of vegetative momentum.
This is completely normal.
During this transition period the plant continues stretching while simultaneously beginning flower production.
Because of that, her feeding program still reflects both stages of growth.
She’s no longer purely vegetative.
But she’s not yet fully flowering either.
She’s standing right in the middle of one of the most important phases of her life cycle.
⸻
🍃 Gentle Leaf Tucking Instead of Heavy Defoliation
Training this week remained very gentle.
Rather than removing healthy leaves, large fan leaves were carefully tucked beneath developing branches to expose additional flowering sites.
Leaf tucking is one of my favourite techniques during this stage because it increases light penetration while allowing the plant to keep all of her valuable solar panels.
Healthy leaves continue producing energy.
Hidden branches receive more light.
The canopy stays open.
It’s a simple technique, but one that often delivers excellent results.
⸻
💧 Feeding Through the Transition
Since the room currently contains plants at slightly different stages of development, the feeding program reflects that transition.
Instead of switching immediately to a full flowering recipe, the plants are currently receiving a carefully balanced combination of vegetative and flowering nutrients.
Current nutrition includes:
• Plagron Terra Grow
• Plagron Terra Bloom
• Power Buds
• Sugar Royal
• Power Roots
• Pure Zym
• pH adjustment using pH Plus and Lemon Kick
This balanced approach allows the plants to continue supporting vigorous green growth while simultaneously providing the phosphorus, potassium, enzymes and biological support needed as flowers begin to develop.
It’s all about easing them smoothly into bloom rather than making an abrupt change.
⸻
🌡️ A Stable Environment
One advantage of documenting every phenotype separately is that each plant shares the exact same controlled environment.
Current room conditions include:
• Day temperature: 31.1°C
• Night temperature: 25°C
• Relative humidity: 72%
• Solution temperature: 21.6°C
• Root zone temperature: 21°C
• CO₂ concentration: 636 ppm
Keeping these parameters consistent allows each phenotype to express its true genetic potential without environmental fluctuations becoming part of the equation.
⸻
📸 This Week’s Gallery
The photographs this week beautifully capture the beginning of her transformation.
The full-plant portraits highlight her elegant sativa structure, with long branches and an impressive central leader dominating the canopy.
The close-up images reveal clusters of fresh white pistils emerging from nearly every node, confirming that flowering has truly begun.
One of my favourite details is the clean spacing between branches.
Rather than competing for light, every future cola has its own place to develop.
The healthy green foliage, strong stems and open architecture suggest this lady is preparing for an exciting flowering stretch over the coming weeks.
⸻
🔮 Looking Ahead
Over the next two weeks I expect this Amnesia Haze to continue stretching before gradually shifting her energy toward building flowers.
If she follows the classic Amnesia Haze profile, those long internodes should soon begin filling with elegant, elongated buds covered in bright white pistils.
The framework is already there.
Now it’s time for the flowers to write the next chapter.
I can’t wait to watch her evolve.
⸻
💚 Thank You
Thank you so much for following another chapter of this 8×8 Adventure.
Watching every phenotype develop its own personality while sharing the exact same environment continues to be one of the most rewarding parts of this project.
A huge thank you to:
💚 GrowDiaries for providing an incredible platform where growers from around the world can learn, inspire one another, and document every stage of their journeys.
Zamnesia for providing the genetics that make this phenotype hunt possible.
🌱 Plagron for supplying the nutrition supporting these plants from seed to harvest.
💡 Future of Grow LED for delivering the consistent light powering every day of this grow.
🌿 TrolMaster for helping maintain a stable environment where each phenotype can express its full genetic potential.
And finally, Growers Love and thank you to everyone following these diaries, leaving comments, sharing knowledge and joining me on this adventure.
Every plant has its own story, and Amnesia Haze Auto Pheno A is only just beginning to tell hers. The stretch is underway, the first flowers are forming, and the best is still to come. 💚🌿

Likes
5
Share


@JerMeds
Follow
These girls are looking great. I lowered the lights down right on them. Don't forget that the bottom half of there soil is 80% coco coir and 20% perlite... I am pretty much treating them like a coco grow at this point so they are getting nutrients every day. Buds are going to swell quick, bet they will double in size in the next week.
I have a few rust spots on the leafs but that's normal for Incredible Bulk Autos in flower. I have added some Sensi Cal-Mag Extra to help and raised the ppm to 420-450.
I had to bend the tall Sativa girl over because she grew too tall. She recovered without issues.

Likes
Comments
Share

@smoking_hills9
Follow
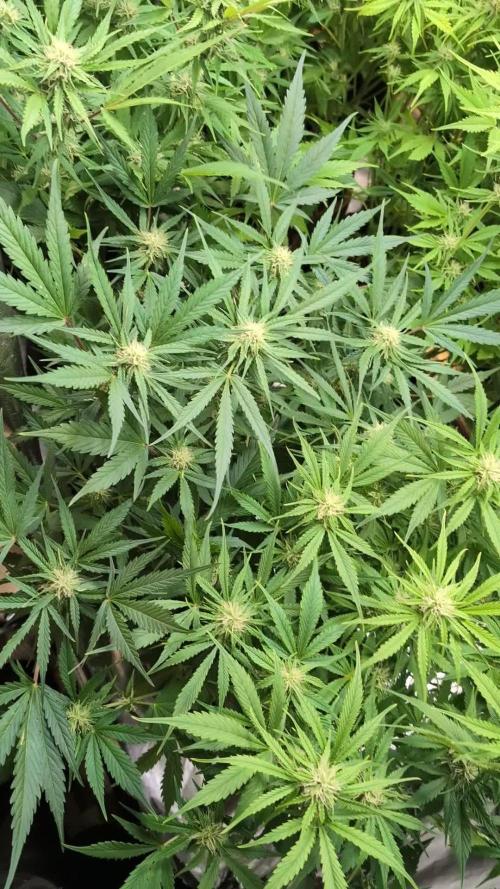
Very happy I went Original Sensible Seeds beens this grow. 🤩 All 3 autos from some special american line, and o boy , they don't disappoint.🔥 Bangers genetics 👏🏻 all trees are huge with 100s of well structured and close to each other bud sites. All very frosty for this stage already. The smell is quite stable on most , sweet creem and lemon pine. I like it a lot 💚

Likes
141
Share


@Anonymous_2022
Follow
Thanks for stopping by.. Please hit the like button if you like what you see and ill be sure to check you out too Growmies 🌱
Its been a fun ride 😎 What a stinky, sticky, frosty harvest..
Light are only on for pictures, these babies will be in well ventilated darkness for the next 7-10 days..
I’ve taken off 90% of the fan leaves and left smaller matter to deal with when doing dry trim ✂️
Temps around 16-20 ✅
Humidity Around 40-50 ✅
overall really happy with how things have gone will update yield once dried 💯
Again Thanks you all for all the Comments, Likes and Support Guys and Girls 🙏💚🙏

Likes
18
Share

@GREENPHOENIX6262
Follow
05/24 - (M) - The mother has been harvested and dried - She produced roughly 3 oz's after drying - Considering I pulled a good amount of clones from her early 3 oz's is acceptable on this harvest - Completely negated the hay smell through drying - Nuggz are full and dense - smoke is clean and smooth.
05/24 - (C) - The clones are coming along nicely - They have about 5 maybe 6 weeks left until harvest - They were moved into the 2x2 tent to finish (Needed the bigger tent for my follow up grow) - The clones have a deep citrus smell - The budsites are filling out accordingly- Thus far no issues through first couple weeks of flower - I included 2 nutrients to their feeds Green Planet Horti Bloom and Late Bloom. Follow my IG for more content IG@Greenphoenix6262😎😎😎😎😎😎😎😎😎
