


Likes
Comments
Share

@CannaArchive
Follow
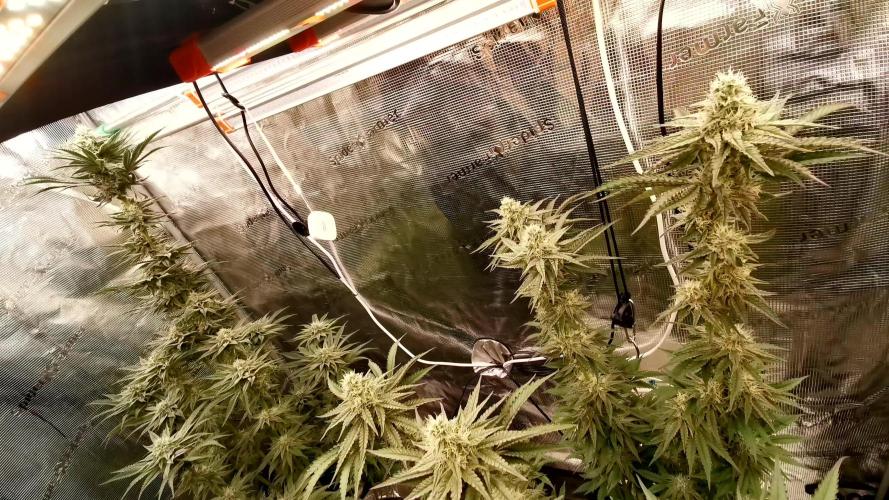
This week the Jelly Donutz clearly entered the heavy resin and terpene production phase 🍩✨
Buds are stacking nicely across the plant and the overall flower formation became much more pronounced.
• Stretch completely finished
• Focus fully shifted toward bud swelling and resin production
• Spear-shaped flowers continue developing across the canopy
The structure remained unchanged at around ~100 cm, confirming that vertical growth has fully stopped. Instead, the plant is now investing all energy into flower mass and trichome coverage 🌸
One of the most noticeable changes this week was the increase in frost production ❄️
Sugar leaves are now heavily coated and trichomes continue spreading deeper into the buds and surrounding leaf material.
The aroma also became significantly louder 👃🔥
The terpene profile is difficult to describe but extremely unique, sweet, fruity and very reminiscent of jam or fruit confiture, with a candy-like background typical of the Jelly Donutz lineage.
Light intensity remained high:
• Top colas receiving up to ~1100 PPFD
• Lower canopy still receiving ~800–1000 PPFD ☀️
Despite the strong light intensity, the plant continues handling it well with only minimal signs of stress.
Water demand remained stable:
• ~4L every 2 days 💧
Feeding this week was intentionally simple:
• RO water + BioBizz CalMag only
Environmental conditions stayed consistent:
• ~24°C temperature
• 50–55% RH 🌡️
No major training or defoliation was performed this week.
The branches were only slightly adjusted and supported with stakes to improve spacing and light penetration through the canopy.
Overall the plant looks healthy, increasingly resinous and very aromatic, with the flowers now entering the stage where density and terpene production begin accelerating noticeably 🍓🔥

Likes
19
Share


@proud_to_grow_loud
Follow
I switched my nutrients to Nectar For the Gods because I didn't have the funds in the beginning to do so. I got their spartan regiment with the extras. Photo-plus and SLF-100 which I use separately and not during feeding. Im watering everyday and feeding every other day. Water days I use SLF-100 and the next water day I use tea with Photo plus. my tea I use bloom by cultured biologics organic easy bloom and compost worm castings from my personal vermicomposting bed. alternating water days with the slf and photo plus was a massive growth in buds. They dense' nd up and just started putting on trichomes. brilliant brand- Nectar! OCGFAM for life now. Feeding is a pain but damn its worth it.
Pricy but worth the investment!


Likes
9
Share


@Headies
Follow
So I had a few issue. I over watered early on, took them out the seed tray early, started feeding them a week or two late, no humidifier yet but they recovered well.

Likes
13
Share


@HeavyHead
Follow
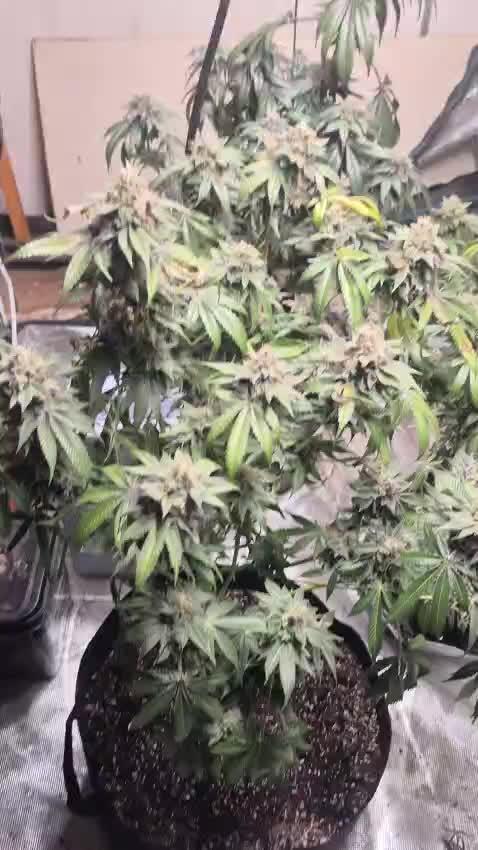
Started giving full strength nutrients and added big bud and bud candy at this point. Dropped my room temperature slightly. Been having a bit of an issue with room humidity and I’m too cheap to buy another dehumidifier so I added a second fan to keep everything dry. Starting to get a nice purple on one of the plants too :)
Also have some orange sherbet autos going in the back of check my other diaries :)

Processing
Likes
11
Share


@MRTHC
Follow
Thanks for tuning in again. The ladies have been flipped. Few days before i have been adjusting my light schedule by reducing the light period by 15 every day to get them accustom to the longer nights. must say that the RH in the tent which used to be around 65 on a good day is now around 70%. Will have to ring out the dehumidifier. They are still on the same water regime but i think during this flower period they consume more water. Also I am unsure how to properly defoliate these ladies. So much mixed literature on the topic. I need to though as the girls are getting bushy and I have found some leaves on laying on top of other leaves and forming wet surfaces. A prime environment for PM and other shit that wanna mess with my harvest.


Likes
6
Share

@nijuana
Follow
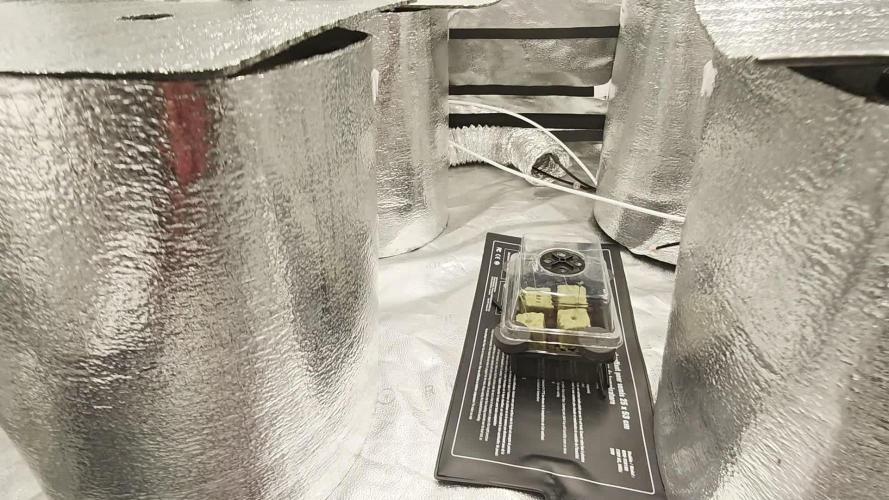
OK NOW I HAVE A GOOD START 😅🙏
I restarted because the first attempt was chaotic with the broken spider farmer g12 and the very poor cotton substrate , second one I does a mistake with the temperature it was too cold ❄️ , now the third one attempt , everything is good
Likes
17
Share


@m0use
Follow
This was a fun project that was a few years in the making and a year later to see if they would last a season for this upload to happen. Before any of this I would bike aorund town grabbing up all the old Ikea solid pine bed slats that I could find and storing them in the basement. I have a lot of wood down there, any size worked as long as I have enough of them. The hot days to find them were the first and last of the months because that's when people where moving in/out. I also kept an eye on the free section on local online classifieds as well. The entire purpose of this was to recycle as much off the streets as I could before buying anything to finalize the project. In the end I only bought sealer, screws and some takeaway/beers. All the wood was 100% free and salvaged off the streets of Toronto saving it from the dumpster bin.
After collecting all the slats for about 2 years I was playing aorund with them on how I wanted to make this work. I had previously done a little project like this before but I messed it up and the boxes where crap. did not last longer then 2 seasons, they where thin and shallow as well could not grow much of anything in them. I Was talking to my friend who is renovating their house and we brainstormed some ideas on the boxes, I found some designs I liked online and said lets make something like this out of what I have here. We tossed out a few of the design features when looking at them as it would have been wasted wood and extra work not needed. If I had more wood them maybe it could have been an option but simple was the name of the game. They taught me what I needed to know like how the miter saw and sander worked, plus all the other tools I was using. They did help out with a table saw and creating the triangle support joints in the corners, They used some pine left overs they had while making a staircase indoors. I did not feel up to the task of using a table saw given all the relatives I know who have lost a finger to them.
In the end we decided the design would be three boards high and take an alternating pattern on corners. layer one short, layer 2 long, layer 3 short. Went with a galvanized and painted deck screw so it can take the weathering. Ran into some problems like making everything level as some of the boards were warped and other ones had undesired aspects like knots and tacky sticker goo I could not remove. So I used them for the base that will not been seen so much. Clamped everything down and called it a day.
Once it was all done and over with, I then brought them back home from my buddies work garage and started to seal them. I went with a boiled linseed oil as its a food safe option should the wood degrade into the soil I will plant in them. I will need to reapply it to the boxes year after year but the main coat is the most important one and I put it on 3 layers with a good dry in between coats. the inside of the boxes that where coated did not degrade at all as the sun did not hit them so it will not need a new coat just the outside. Overall the end result was very impressive for myself, I've never taken a woodworking class ever and It was a near perfect outcome for me. Heavy Duty Planter Boxes for all my gardening needs. I made a last min decision to add in a plastic liner to preserve the wood even longer and stapled that into the frame. it has held up quite well and may need replacing end of 2nd or 3rd year out in the sun. Used a thick moisture wrap plastic with UV protectors in its formula.
Lets see what I can grow in them this year!
m0use's haus of projects - garden box edition
Likes
26
Share


@Magic_frequency
Follow
Sorry as I have accidentally deleted my diary on triple cheese 😪 i got so high and i though it was just to delete one page or a week.😩. Anyway i am gonna start here in the flowering stage.
This plant had been topped and had a triple top and I've topped just the two so i have 5 top colas i hope they yield massive 🙏🙏🙏🙏
Likes
15
Share


@Ronzo9
Follow
Still struggling with humidity but the plant seems to be doing ok! It’s gotten lots more bushy and is starting to grow up the way a bit more which is promising. I dropped the root juice as of yesterday and trimmed down the nutrient dosage as I looked at the bio bizz feeding schedule for my soil (which is all in one) and I was slightly over doing it with the nutes.
I’ve raised the lamp up on the bucket as I was afraid of lamp burn on the leaves and this has dropped the temperature inside the bucket to about 22 degrees.
I’m always open for feedback since this is my first grow.
Thanks guys


Likes
24
Share


@Green_Tool
Follow
Los abonos que se ven no se hicieron en el mismo riego esto es parte de la semana 4 se darán en diferentes días siempre regulando a 0.4, primer abono de VEG con Green Grow de Quemanta, en Fin de Semana se pasan a floración y aplicamos estimulantes de floración.
Riegos foliares cada 3 días con knactive, esta semana se hicieron 2 defoliaciones en diferentes días debido al rápido crecimiento y ya preparándose para la floración.
Se agregará un Ventilador mas para la semana siguiente.


Likes
4
Share


@4F1M6
Follow
Made the flip to flower to start this week. Did a bunch of lst to get the side branches booming for the Scrog. Put a second net right above her to start things off spacing and structre wise. Second she starts to stretch its scrog game on!
Got her on a well balanced diet to support her transition period. Can't wait to see her explode and take off! Start rowing me out some colas! Treated her with lost coast as a preventative. Next up us dr zhymes in 5 days. Until next update. Happy growing and stay lit fam.
Likes
8
Share


@Polliceverde18
Follow
Oggi 7 aprile 3 giorno di fioritura, 30 giorni di veg per la mia Mary cresciuta forte e vigorosa senza carenze. Fine settimana penso in una defogliazione. Cosa ne pensate ?

Likes
6
Share


@Canna_GuyGro
Follow
Happy New to everyone sad to say I’m going through a tough time with the girls grow has seems to slow down since I began training week 3. FBTF 1 is showing preflower
The new growth on a the girl looks smaller and shriveled on FBTF 1 also Gummy bears , where as cheetah the hut is a (photo period) her leaves are drooping and wrinkled. Which I’ve been seeing for a few days including new more drooping I did top Cheetah the hut would the effect her in this way? I’m stressing to figure this out
I have added be light which is 230 true watts which I believe cause some heat/light stress also watered with 1 tbsp of molasses per gallon and gave each pant a qtr about 5 days ago.
Recently watered Dec 30 with advanced nutrients 3 part micro grow and bloom a qtr each ph was 6.1 will letting pots dry to figure this out problem

Likes
5
Share


@PhinolaGreen
Follow
Nähere Informationen und Bilder folgen im Laufe des Prozesses. Die Ladys hängen jetzt zum Trocknen.


Likes
3
Share


@Mr_nugs_lover_David
Follow
This lady looks fantastic for 14 days since planted,let's see how she performs but I trust dutch passion and I know it's gonna be great to grow this beautiful strain! Let's keep on working! 👷♂️👨🌾💚🌱🤞

Likes
6
Share

@Northern_Ent
Follow
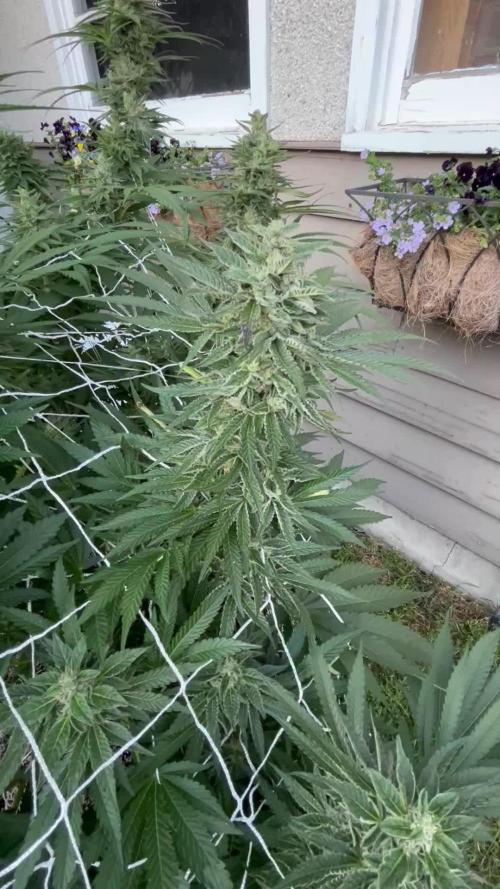
Sep 12: Amnesia Haze is almost ready. Two more weeks at most I think.
Doing Final Flush using 9L in the 27 L of soil.
Sep 13: did another 18 L flush as I decided one pore volume (30% porosity in 27 L) yesterday wasn’t enough. Defoliated leaves to expose buds to sunlight.

Processing
Likes
10
Share


@HisHope
Follow
After dry
Maddie dry weight 126 grams, Tammy now in dry wet weight 815 grams
Tammy yield dry 153 grams
