


Likes
Comments
Share

@DogDoctorOfficial
Follow
Animal Mints — Legends of the Frozen North
Part 2 — Drying, Trimming & Preserving the Harvest
Before we begin, once again, we want to apologize for dividing this harvest into multiple reports. We know it can feel like a long journey to follow week after week, but honestly, this is the only way we can properly document everything in the level of detail that these plants deserve.
Harvesting, drying, trimming, curing, resin collection, storage methods, smoke reviews… all of these stages are part of the final medicine. And instead of rushing through it in one giant post, we prefer to slow down and share every step in the most educational and transparent way possible.
So welcome back to the frozen north.
This is Part 2.
⸻
Ten days later, the room had completely changed.
The giant living plants we harvested in the previous report had now transformed into hanging medicine. Slowly drying in darkness, at around 18–20°C and roughly 60% humidity, allowing the moisture to leave the flowers gradually instead of forcing them dry too quickly.
For the first couple of days, humidity was brought slightly lower to help remove excess external moisture, but after that, conditions stabilized again for the slow dry we love so much.
And then came that moment every grower knows.
That little click.
That beautiful snap in the branches that tells you the plant is finally ready.
Not too wet.
Not too dry.
Just right.
And honestly… after seeing these girls hanging there for days, fully intact, massive branches swinging slowly in the dark, it was finally time to begin the next ritual.
Trimming day.
⸻
Gloves on.
Scissors ready.
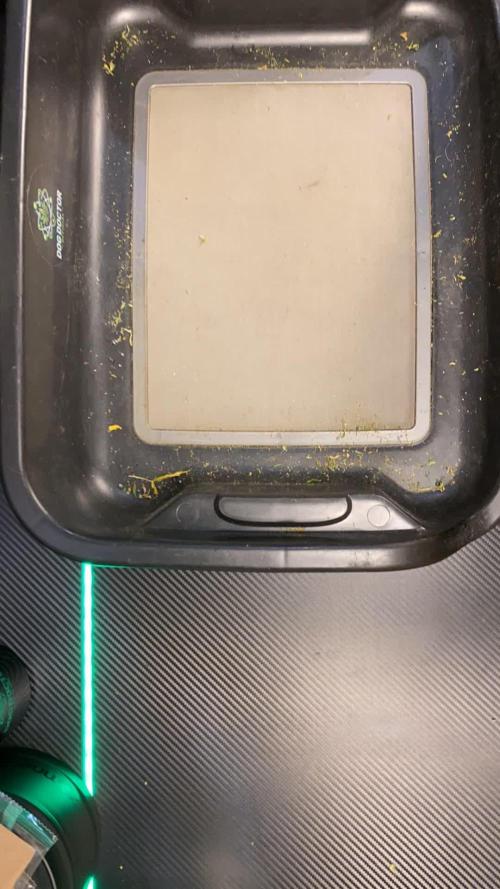
Trim bin prepared.
Medicine beside us.
Mr. Baggy supervising operations as always.
One branch at a time, we carefully broke the plants down by hand, slowly removing each flower from the stems before shaping every nug individually.
No rush.
No machine trimming.
No shortcuts.
Just patience, resin, and respect for the plant.
And these Animal Mints girls absolutely covered everything in trichomes.
The moment trimming started, the gloves became sticky almost immediately. Thick resin building layer after layer until eventually it rolled naturally into small dark hash balls directly from the fingers and gloves themselves.
This is one of those little moments we genuinely love about harvest season.
That sticky resin coating the gloves is essentially concentrated trichome resin — cannabinoids, terpenes, waxes, oils, and all the aromatic compounds that make the plant what it is. With a little warmth from the hands and gentle pressure, it naturally rolls together into traditional finger hash.
Simple. Ancient. Beautiful.
And of course… we also continued our little Moroccan-style “drums” with the trim.
By gently agitating the dried trim across the screens, we collected an absolutely beautiful amount of dry sift. Bright golden-yellow resin, soft and sandy, full of aroma and life. No exact scale numbers this time — this was more about enjoying the process than chasing statistics — but the quality spoke for itself immediately.
Honestly, this type of hash is one of our favorite ways to enjoy the plant.
A little inside a joint, slowly melting together with the flower, enhancing both flavor and depth without overpowering the experience.
Pure magic.
⸻
Now let’s talk numbers.
And honestly… these girls performed beautifully.
Plant A gave us:
127g
Plant B gave us:
247.8g
Plant C gave us:
287.9g
For dense, compact, heavily resinous flowers grown 12/12 from seed, this is an outstanding result in our eyes.
Especially considering the morphology of these plants.
This style of growing continues to impress us more and more every single run. The plants remain relatively compact vertically, but the flower production becomes incredibly efficient. Tight node spacing. Massive bud stacking. Heavy trichome production. Strong support structure. Dense flowers without absurd plant height.
The frozen north delivered once again.
And standing there in the studio holding entire branches in both hands… honestly, it was impossible not to smile.
Happy grower moment.
⸻
Once trimming was complete, the next mission began:
Preserving the terpenes.
Because harvest means nothing if the cure is bad.
So this time we decided to test multiple storage methods side by side.
Some flowers went into traditional glass jars — still one of our absolute favorite methods for long-term curing. Stable, simple, reliable, and something we continue to trust deeply.
Some flowers went into vacuum-style Zamnesia metal containers, where air can be partially removed while maintaining stable conditions inside.
Others went into vacuum plastic containers with pressure-sealed lids.
And finally, part of the harvest also went into Grove Bags, since the yield was simply too large not to use multiple preservation systems.
Inside several containers we also added 62% humidity control packs.
These packs are not “magic terpene creators” or anything like that — they simply help stabilize relative humidity inside the container, preventing flowers from becoming either too dry or too moist during curing.
The flowers themselves were already dried correctly before storage. That part is important.
Humidity packs are not there to fix bad drying.
They are there to help maintain stability afterward.
And honestly, one of the most exciting things now will be revisiting these exact same flowers months later to compare how each storage method affected aroma, texture, smoothness, and terpene expression over time.
Because curing is alive.
Medicine changes.
Terpenes evolve.
And that journey is part of the magic too.
⸻
One thing we also want to mention is how much easier trimming became with the curved point Zamnesia scissors.
It might sound like a tiny detail, but those curved tips genuinely help reach deep into dense flowers without damaging structure, allowing cleaner trimming while preserving the natural shape of the buds.
Small tools. Big difference.
⸻
By the end of this session, trays were full, jars were packed, hash was collected, gloves were destroyed by resin, and the studio smelled absolutely unreal.
pine, diesel and earthy.
Animal Mints is looking amazing.
And honestly… looking at those giant trimmed branches in the studio lights, it was one of those moments where you simply stop for a second and appreciate the entire journey from seed to harvest.
Because this is more than growing plants.
This is preservation of flavor.
Preservation of resin.
Preservation of time, patience, and intention.
⸻
But we are still not done.
Not even close.
The next report will be the final chapter of this frozen journey:
the smoke review, terpene breakdown, curing evolution, flavor analysis, effects, and our complete final thoughts on Animal Mints from seed to harvest.
And trust us…
This girl still has a lot to say.
⸻
Huge thanks once again to everyone following this journey:
Zamnesia for the genetics, Plagron,FOG Lighting, the gear sponsors, the community, GrowDiaries, the growers supporting from day one, the silent followers, the commenters, the critics, the legends, the OGs…
And of course, thank you to everyone taking the time to read these reports week after week.
The frozen north continues.
📡 DELETED @ 1K Please stay tuned.we never quit https://www.youtube.com/@TheDogDoctorOfficial NEW 🙏 Thank you for your patience and continued support.
FOR DISCOUNT CODES AND MORE JUST FOLLOW THE LINK https://website.beacons.ai/dogdoctorofficial
📲 Don’t forget to Subscribe and follow me on Instagram and YouTube @DogDoctorOfficial for exclusive content, real-time updates, and behind-the-scenes magic. We’ve got so much more coming, including transplanting and all the amazing techniques that go along with it. You won’t want to miss it.
GrowDiaries Journal: https://growdiaries.com/grower/dogdoctorofficial
Instagram: https://www.instagram.com/dogdoctorofficial/
YouTube: https://www.youtube.com/@dogdoctorofficial Deleted by Youtube - https://www.youtube.com/@TheDogDoctorOfficial NEW
Vimeo : https://vimeo.com/dogdoctorofficial Under construction stay tuned ⸻
Explore the Gear that Powers My Grow
If you’re curious about the tech I’m using, check out these links:
🔆 Lighting & Environmental Control
• Future of Grow — Advanced LED lighting technology
https://www.futureofgrow.com/
DISCOUNT CODE: DOG20
• Lumiflora — Under-canopy LED lighting
https://lumiflorade.com/
• TrollMaster — Environmental controllers and automation gear (past collaboration)
⸻
Genetics
• Zamnesia Seeds — Genetics used in this project
https://www.zamnesia.com/
⸻
🌱 Soil, Substrates, Boosters & Root Support
• Plagron — Substrates, bio mixes, and supportive products
https://plagron.com/en/
⸻
🎒 Storage, Curing & Preservation
• Grove Bags — Curing and storage solutions
https://grovebags.com/
⸻
📸 Photography Equipment & Tools
(Not sponsors, but part of my creative toolkit)
• Sony A6700
• Sony full-frame macro lens + few more
• Stacking photography workflow - learning
• iPhone (for behind-the-scenes shots)
As always, this is shared for educational purposes, aiming to spread understanding and appreciation for this plant. Let’s celebrate it responsibly and continue to learn and grow together.
With true love comes happiness. Always believe in yourself, and always do things expecting nothing and with an open heart. Be a giver, and the universe will give back in ways you could never imagine.
💚 Growers love to all 💚
📸 P.S. – The Eye Behind the Lens
All photos in this diary (for now — except for the ones showing the camera, which I took with an iPhone) are taken with a Sony A6700 paired with a Sony full-frame macro lens and a few more.
Photography is part of the story — it’s how we share the fine textures, the glow, and the quiet details that words can’t always capture.
I’ve also started experimenting with photo stacking — a technique where multiple images, each taken at a slightly different focus point, are layered together to create one perfectly sharp image from front to back.
It’s not digital enhancement or AI; it’s pure photography — a way to reveal the plant’s beauty in microscopic depth, from trichome to petal.
You’ll even see a few shots of "ghost me" capturing the shots — camera, lens, setup — because every grow deserves not just to be cultivated, but documented like art.
FOR DISCOUNT CODES AND MORE JUST FOLLOW THE LINK https://website.beacons.ai/dogdoctorofficial
NEW DISCORD - Official Server Invite Link : https://discord.gg/ksjAkA5T74


Likes
18
Share


@Lorenzo96
Follow
3rd week of Veg
Day 18 26/02
I'm very happy how they are growing so far they look healthy so lets keep it this way 😁
Today I gave them nutrients, I mixed the nutes in 8ltr bucket of water, had to be a dose of 16ml of each nutrient and gave 2 cups to each plant.
Excited to see how they will go this week, all good so far.
Day 21 01/03
Its been 3 days after their feeding, they are growing day by day strong and healthy :)
I used LST on some of the auto's, some of them are still not ready for LST, by the end of this week they should be.
For the Mimosa Evo I used Topping technique on their 3rd node.
Also gave them water with PH 6.5 about 3 to 4 cups each
Day 24 04/03
Another 3 days past and they are rapidly growing. Mimosa Evo has been 3 days since there topping and they are already showing signs of recovery.
Today I used LST on all of the auto's. The critical kush auto that I used LST on them 3 days ago are doing very good, I also cut the fan leaf that blocks the light from the bottom stems and now they are stretching for the light 😌
I gave them their nutrients today same dose as before I haven't raised it yet, probably next feeding I will.


Likes
46
Share


@KingSalomonsWeed
Follow
22.07.
Hallo,
Tag 26. Blüte 1
Zwei 2 girls im Growschrank von Zelsius.
Einer, im Westflügel des Anwesens.
Läuft, so habe ich es gehofft.
23.07. Greenception GC4.
4 COB LED. Zwei in Weiß. Eine in Blau (eine kostet soviel wie 3 weiße). Und eine in Rot(noch teurer).
Uva leds uvb leds. Und 2 Lüfter.
128w/h.
Und ist sehr gut abgestimmt.
Das ist mein high tec high budget grow.
Meisterweed bekomme ich hin.
Grins.
Dies soll mein Eintritt zum Großmeister grower werden.
(ich fänds passend)
Dazu sollten sie terpen reich(da könnt ich mogeln, denn ihr könnt es nicht riechen), kristallhart, und glitzernd sein. (Ich liebe glitzerndes weed).
Yield : I still don't care.
BIO WEED.
Thats all what I want!
24.07. Alles durchgewurzelt bis unten. Beide. Pflanzen sehen top aus.
25.07. Bobo dreht durch. 29 Tage alt. Blühte 4. Stamm mindestens 40 mm
Ca 1,57 zoll. Jetzt schon! Das habe ich noch nie gehabt.
27.07. Das Männchen steht kurz davor seine Samenkapsel zu öffnen. Ich werde den Pollen Sammeln zur späteren Verwendung. Und nachdem er ordentlich gemolken wurde darf er nach Spinnenart gehen.
Kill after sex.
29.07. Bobo! Tina! Geschwister.
Eine riesig. Eine normal. Sind tolle Pflanzen.
Bobo hat die größten Fächerblätter ever.
Die unteren Äste, Verzweigungen sehen komplett gleich aus.

Likes
13
Share


@Fidoe1
Follow
Good week for the girls..started way hot but has been getting cooler witch is great for flowering...they growing very fast now and have shot out meny new bud spots. My clones will db my yield and have been a great learning experience ...I have raise every kinda plant ..but these girls are a joy to grow... challenging ..frustrating .. but always a joy!


Likes
76
Share


@ItsLegalInMyHouse
Follow
So it’s day 64 week 10! Dopey is being harvested on Sunday. Now doing a week of flush for her! She smells gorgeous, reminds me of super lemon haze. Really nice lemon/citrus :D can’t wait for harvest day! I will provide an update on the other 2 soon :D
Day 67 - Dopey is not ready for harvest, waiting another 1-2 weeks. Dopey and Lazy are looking healthy but Snow White has some leaves with yellow/brown spots - is this sign of leaf septoria?

Likes
12
Share


@Sublyme_ness
Follow
it's working.. trying to get some more green to the thing, nutrients slowly,will give it a whiel; I've b3en hacking at it recently. just treating it like an experiment atm... I need a little usb fan too....

Likes
67
Share


@420DeepGrow
Follow
Octava semana de floracion, continua el engorde de los cogollos, me pase con los nutrientes a principios de la floracion, pero me di cuenta a tiempo y he salvado la cosecha. La proxima vez será mejor.
📅 Dia 50: Riego con nutrientes EC 450, necesito que se aclare un poco mas.
📅 Dia 51: Descanso
📅 Dia 52: Riego con nutrientes EC 950
📅 Dia 53: Descanso
📅 Dia 54: Riego con nutrientes EC 450, se va quedando limpia, lo noto en el color de las hojas.
📅 Dia 55: Descanso
📅 Dia 56: Riego con agua EC 450
Likes
3
Share


@Shadowpup369
Follow
Seems to be doing well. I still can't place the smell. I think it will be tasty and potent.


Likes
11
Share


@WeedM8
Follow
So beautiful looks its going vey well apart of thats its too hot the heat from the lights if there is no air circulation it gets very humid and i have to leave the tent open


Likes
26
Share


@XperencdGmanXG
Follow
Well, these girls are well on their way into bloom. They are really stacking it on since the addition of the worm castings. I strongly suggest everyone use worm castings in your soil mixes, even if you are using salt-based nutrients.
Likes
65
Share


@Dendegrow
Follow
Woche 4 bricht an und es läuft hervorragend! Die Orange Sherbet bekommt diese Woche frischen Boden: eine Mischung aus Bio-bizz All-Mix und Greenhouse-Feeding, perfekt für die letzten Vegetationswochen und blüte. Zudem hat sich die Orange Sherbet sehr gut mit dem Backhefe-Buttermilch-Melasse-Experiment entwickelt, was zu einem starken CO2-Anstieg auf bis zu 1500 ppm geführt hat. 💨 Ich bin gespannt, wie sie sich in der neuen Umgebung entwickeln wird. Auf der anderen Seite explodieren die Frozen Black Cherries förmlich in der Hydroponik! 🌱 Die Entwicklung ist beeindruckend, und ich könnte nicht zufriedener sein mit ihrem Fortschritt. Die Blütephase rückt näher, und ich bin gespannt, wie sich alles weiterentwickelt! Ich halte euch auf dem Laufenden! 🚀
Week 4 is here, and things are going great! The Orange Sherbet is getting new soil this week—a blend of Bio-Beth All-Mix and Greenhouse-Feeding, setting her up perfectly for the final weeks of vegetation and . Additionally, the Orange Sherbet has responded well to the back yeast-buttermilk-molasses experiment, resulting in a significant CO2 increase of up to 1500 ppm. 💨 I'm excited to see how she adapts to her new environment. Meanwhile, the Frozen Black Cherries are absolutely thriving in hydro! 🌱 Their growth has been phenomenal, and I couldn't be more impressed with their progress. The flowering phase is getting closer, and I can't wait to see how everything unfolds! I'll keep you updated! 🚀

Likes
65
Share


@Le_Duc_Du_Bud
Follow
Début de semaine 7 de floraison
12/12 - Days 56 : magnifique
13/12 - Days 57 : Defoliation LST , arrosage 1,5l + Booster 3ml + Bloom 2ml + sugarbabe 2ml + Bio-heaven 4ml
14/12 - Days 58 : Ras très belle
15/12 - Days 59 : magnifique cette widow
16/12 - Days 60 : ce porte a merveille
17/12 - Days 61 : magnifique tellement heureux
18/12 - Days 62 : arrosage 1,5litre d'eau pure
Fin de semaine 7 de floraison
Likes
10
Share


@ZweetZkittlez
Follow
Activaron 24hs en un vaso de agua sin cloro. Luego al tupper con papel (rollo de cocina).
Luego de 3 / 4 días ya se pasaron a tierra.
En los primeros días y luego, en toda la etapa vegetativa vamos a usar un humidificador para tener una humedad entre el 70% y 80%


Likes
8
Share


@Mr_Puff_N_Stuff
Follow
Starting off week 13. Plants are healthy and smelling lovely. Looks like this may be their last week. They were watered in this morning with 2 liters of clean water.
Let’s go!


Likes
2
Share

@tterpy
Follow
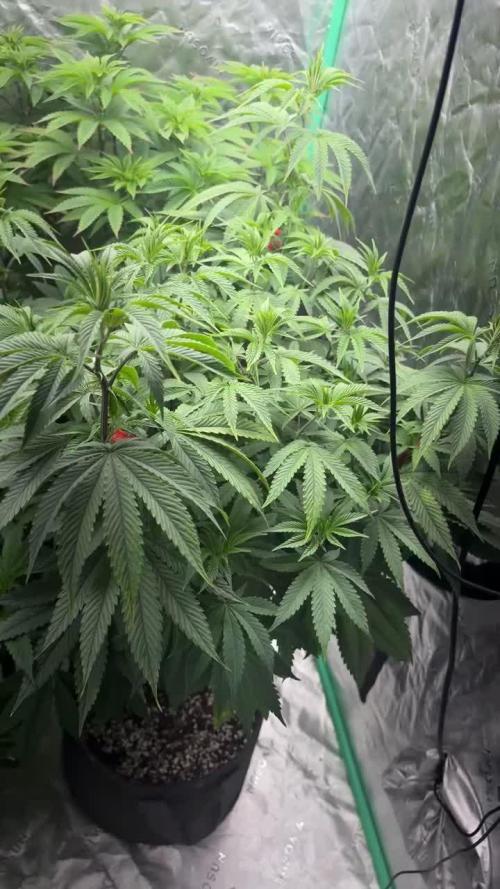
So many tops :)
Fed with water: 5/3/26
Fed with lotus 5/5/26
Fed with water 5/7/26
____________________
Flipped on 5/9/26
Processing
Likes
4
Share


@UK420hydrogrow
Follow
ok so ive repotted the clones into bigger pots and im thinking of moving them outside tbh i wanna get rid of this strain has done it for last 2 crops took a few weeks to notice any new growth roots forming etc but now plants are looking good and ready to be vegged properly