
Likes
Comments
Share


Likes
8
Share


@MoneyGrows
Follow
Same nutes . Colors are in . The cereal killer is here !! 🔪 great grow and even better genetics ! Can’t wait to dry . Chopping after 24 hours darkness
Likes
17
Share


@Noob_quest
Follow
Such Bittersweet Joy
Added this week as ‘Flowering’ although technically should be harvested as I but I haven’t had a chance to weigh or anything. I will do that next week once trimmed etc.
So finally cut them down on D89, it was a beautiful day outside and it just felt right.
Although when it came to the deed itself I felt sadder than I thought I would for my girls and the time we had together.
All 6 (I’m growing another 3 different strains but not included on this diary) are now hanging to dry in the tent. Temp -18 C; Humidity-60% seems to be holding steady with no tinkering thankfully.
After the 3 days they have all dried noticeably, perhaps 4/5 more before trimming / curing.
I’ve had quite a close look at most of the harvest and as far as this noob can tell, there doesn’t seem to be any issues with mould / bud rot. Fingers remain crossed.
I did have one very profound moment this week... It happened as I was surveying the harvest hanging up for the first time.
I could feel my mindset change suddenly from the constant paranoia over their health and overcoming my impatience to “I actually have a crap load of weed”.
It was beautiful beautiful moment...
Thanks for reading. Have a great week 😊

Likes
11
Share


@Guerilla_Jack
Follow
Hello growers an breeders.this is the end of flowering time for my girls.i flash them with flawless finish this week.smoke report in week🙂


Likes
14
Share


@fivegrow
Follow
This was my first cycle in tent.
The Autopot System is amazing ang brings autonomy.
I used fert Plantprod, calcium nitrate, magnesium sulfate and MKP.
PH around 6.0 and solution fert in tank 1200 PPM .
This strain is fantastic.
It withstood the intense heat of the southern hemisphere's tropical climate.
It was easy to prune and defoliate to control the size.
The smell is of tangerine and flowers produces a lot of resin.
I am very satisfied with this harvest!
Thank you Sweet-seeds!!

Likes
10
Share


@Arcadium
Follow
Stretch slowing down, secured the existing net for some support and to help with LST. Stretch has slowed down for sure. budlets beginning to form. Did a heavy top dress of Gaia Green, 13 TBSP Power Bloom to 7 TBSP All Purpose, mixed with a few scoops of compost. When I pulled back the mulch to top dress I snapped a few pics and videos of the soil, wow, SO much life it's incredible, one giant heap of life. I find mixing top dress with compost lets gives the roots something to adhere to, and nothing like increasing that root zone! Kept up with some light defoliation and LST with some bud clips and netting, not much else to do but wait! All the excess trim from defoliation and nearly everything you see in the background will get mulched up and added in the fall for next years crop. Circle of life yo!
Had some very very minor Powdery Mildew on some fan leaves after we have some 95% humidity roll through, I had company so skipped a spraying of Lactobacillus, and it showed. If you haven't tried it, it's EASY to make and it works wonders, plants love it as a foliar spray or a root soak, I use molasses to keep it stable, so it's double good for flowering time.
This will HAVE to get harvested end of September regardless, that gives me 7 weeks from now, so here's hoping for that FastBuds "Fast Flower" action.
Likes
16
Share


@BucerosRhinoceros
Follow
***day 8 (17/11)
- mix nourish nutes 5ml (4-0-1) with 500ml of ph balance water.
***day 9 (18/11)
^^DAY^^
temp 28'c-29'c
hd 50-55%
^^night^^
temp 25'c-28'c
hd 55-65%
-thats basically my daily temp and hd..did nothing today...soil is still damp from yesterday watering. second set of true leave starting to be more obvious.
**day 10 (19/11)
-mixing and water it 500ml of ph 6.5 water with 5ml noursh and 2.5ml growth. Bought a new fan..now Temp and HD are more stable..temp around 25-26'C, HD around 60-65%
**day 11 (20/11)
-raise the led to 60cm from plant because i think it looks overheat. and also might over water it..will stop watering til its dry.
**day 12 (21/11).
-3 leave are getting obvious.this morning check temp are perfect 27'C...humidity is 66%..kinda improve because one of the two fan is broken...but temp are still manageable. after increasing led height, leaf color improve a bit. today I increase it again to 70cm.. growth are still slow for me.
**day 13 (22/11)
-grew a bit..today my humidifier came..so i diy an icevream box for the humidifier reservoir. TEMP tonight 27'C, HUMI 65%.
**day 14 (23/11)
-last day of second week. 2ND set of tru leave are becoming more bigger and the 3rd set starting to see.
Likes
6
Share

@CalGonJim
Follow
2/16, 10:35 AM Monday everyone’s flipping to flower pretty nicely. Pretty good luck so far.
2/20 5:45AM Just finished adding 2nd light to Tent 1

Likes
64
Share


@CHILLING_RACOONS
Follow
Dear Friends ❤️
in this week we topped again and bended these two Slurricane by Anesia Seeds.
They recovered really fast from this stress again, from now they will develope a lot of bud sites!
I missed to give top crop Big one at 14 october, it is important to give 10 days before flowering
The last day of this week we switched the light to 12/12
week #5 of vegetation
The 240w light is working at 50% power and now it is combined with the 480w quantum board.
I consider week 4 the week from 18/10 to 24/10.
day to day fert schedule:
📅 18/10
📅 19/10 NEEM OIL
📅 20/10
📅 21/10 Top Veg 3ml/L-Deeper Underground 2ml/L - Green Explosion 2ml/L - big one 2ml/L - PURPINATOR 1,2ml/L
📅 22/10
📅 23/10
📅 24/10
we are starting a new grow cycle with a lot of AMAAAAAZING genetics. We can't wait to show you our progresses with these little babies.
I really want to thank Martin of Anesia Seeds, he helped us with the strain's choiches, so THANK YOU Martin, thank you Anesia seeds.
Seeds and merchandising ( my god we love these things ❤️❤️❤️) were sent in a dark discret package, shippin was incredibly fast, now is our mission to achieve the best from these lovely seeds.
Germination was incredibly fast, less than 36Hours to make the root sprout on.
ABOUT: Slurricane
Slurricane was created by crossing two first-class trend varieties: a Nor-Cal-Cut of Do-Si-Dos was crossed with an extremely potent and long-selected Purple Punch. The result is an outstanding Indica dominant hybrid with an extremely high THC content and a complex terpene profile.
Slurricane is currently one of the most popular strains in the United States. We became aware of the genetics early on and got down to work to get the best out of it and bring the strain to its limit. Anesia ‘s Slurricane is currently one of the strongest cannabis strains in the world and can produce an incredible THC level of up to 30%. Its resin production is gigantic and the aroma is simply stunning.
The plants from the Slurrican seeds are easy to cultivate, grow quickly and vigorously. With sufficient light, the plants develop into real gems that leave nothing to be desired. Within the flowering period of 64 days, the variety forms very dense and compact flowers that have an oversized resin production. The buds are covered with a glittering thick layer of resin.
The aroma is intensely fruity and sweet like berries with a fresh citrus note. Not only its taste becomes an unforgettable experience. The high offers an amazing potency, with strong physical and cerebral effects. Slurricane is a knock-out strain and the effects last long and create happiness. It will bring your body to complete relaxation and envelop you in a warm cloud, while at the same time creating positive feelings that bring all your senses to a higher level.
The thick, dense buds carry a very unique und tasty trichome covering that make them ideal for producing cannabis concentrates.
Data sheet:
genetics: Do-Si-Dos (Nor-Cal-Cut) x Purple Punch
• feminized seeds
• flowering period: 64 days
• 60% Indica, 40% Sativa
• yield: 450-500 g/m²
• Medical uses: mood enhancement, stress, pain, muscle tension
💸💸💸💸💸Buy Slurricane https://anesiaseeds.com/product/slurricane/
🔧💡WHAT WE ARE USING💡🔧
-LIGHTS:
💣Quantum board - 480w - 4x120w Boards by Zhoangshan Koray Opto-Electronic Ltd.
Samsung LM301B 288 led/board
+24led/board led Osram 660nm
Efficiency 2.6 umol/J 220 lm/w
Driver: Meanwell HLG-480H-36B
temperature: 3000k
Heat dissipator board: No
Noise: 0dB
💣Quantum board - 240w - 2x120w Boards by Shenzen Yuanhui Led Ltd.
Samsung LM301H 504 led
+24led/board led Osram 660nm
Efficiency 2.7 umol/J 220 lm/w
Driver: Meanwell HLG-240H-48B
temperature: 3500k
Heat dissipator board: YES 15MM
Noise: 0dB
-ESTRACTION FAN:
Blauberg 125 Turbo Pro Series
Power: 42-50W
RPM: 1940-2620 minimum -1
Maximum air flow: 430-560 m³ / h
Sound pressure level at 3 m: 32-44 dBA
-FANS:
A)OSCILLATING FAN
Maximum consumption: 20 W
Minimum consumption: 17 W
Fan diameter: 15 cm
Housing diameter: 20 cm
Height with handle: 35 cm
2100 revolutions per minute
Two speeds
B) COMPUTER FAN Sunon DP200A - 230V
Nominal power: 22/21 Watt
Noise level: 44 / 49dB (A)
Rated speed: 2700/3100 RPM ± 10%
Air delivery: 95/115 CFM
C)Cornawall Electronics Multifan Turbo, three speeds, can be used both on support surfaces and mounted on the wall. High capacity, about 740 m3 / h, can be used in medium-sized rooms. High silence and reliability make it adaptable and versatile.
Technical details:
Rotation range of 90 degrees
Tilt adjustment
Three speeds of rotation
Suitable for wall and ceiling suspension
Power Consumption: 35 Watts
Air Flow: Approx. 740 mc / h
Operating noise: approx. 39 db
Diameter: 20 cm
Voltage: 220-240V
Frequency: 50Hz
Dimensions: L 28 x D 16 x H 28 cm
💊💉💊FERTILIZERS:
MAIN FERTILIZER BRAND: TOP CROP
I use these products:
-DEEPER UNDERGROUND: to stimulate roots system
-TOP VEG: for a excellent growth in the vegetative phase
-GREEN EXPLOSION: to promote creation of bud sites and to allow a faster growth
-MICRO VITA: bacterias for equilibrate the soil and to make the plant healty
-BIG ONE: to stimulate bud sites and to stimulate resin production
-TOP BLOOM: to achieve excellent big and hard buds
-TOP CANDY: to feed the buds with molasses for a tastier smoke and to gain weight
-TOP BUD: to enlarge buds and to gain weight
PLAGRON: PK 13-14 to have big and hard buds and to feed plants with lower effort
ADVANCED NUTRIENTS: Sensi Cal-Mag Extra-> for cal mag deficiency
GROTEK: CAL MAG for cal mag deficiency
HESI: PowerZyme to clean and balance the soil. It feeds the plant cleaning the soil.
GHE: - Final Part (ex Ripen) accelerate the final flowering phase, dissolves minerals in excess
- Flash Clean to flush the plant and to be sure that all excesses are out from plant and pot
These two products improve A LOT the smoke of our babies
-PURPINATOR to stimulate flavonoids and to have a better taste and smell.
____________________________________________________________________________________________
❤️ THANK YOU FOR BEING HERE ❤️
Please leave a comment with your opinions, it is very important to us to have a comparison.
If you like our job, tap the weed button and follow us. It will be really appreciated.🙏
🌿Thank you again🌿
❤️Sweet hugs❤️
👨🌾CHILLING_RACOONS👩🌾


Likes
4
Share

@FireAntTheGrower
Follow
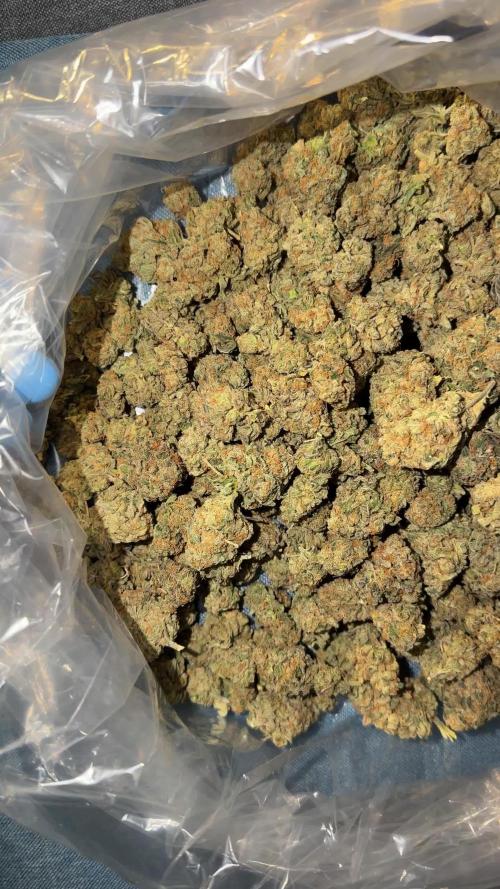
Wrapping Up DQ she has been fun growing. Giving gassy… can’t note much till I smoke a tester. On last day cure cycle. 4 days dry and 4 days cure… happen to fall on 4/20 today, happy 420 stay green and uplifting:)
Likes
13
Share


@NordicClosetGrower
Follow
Finally received a couple of humidifiers to test from the local shop. These shitty low cost humidifiers will not really do, I can only have them on non stop until the water runs out. If I connect them to a sensor that switches them off, it won't go back on because it doesn't have a mechanical switch, I have to press on each time.
Still, let's see if this helps my poor dry leafs a little bit
Likes
1
Share


@Cannerd
Follow
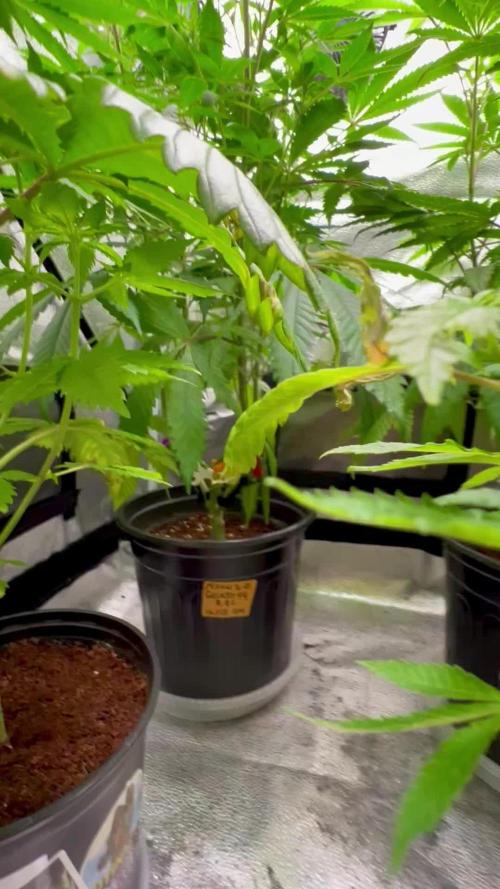
I'll be updating the comment with the daily log shortly, but figured I'd get the photos and weekly overview up.
I started off this week with a topping at about the 4th node, leaving the larger fan leaves on for now. I then left then alone for a bit while I waited for the new branches at the nodes to grow out, rotating as needed. By the end of the week, they had all bushed back up with new foliage and growth.
I also included photos pf the flowering mother plant to keep up with that sneak peak. She still wasn't showing signs of flowering, so I gave her an extra 24 hours of darkness to hopefully kick start the process. As I went to go shut unplug the light source, I noticed that there was a smaller light leak from one of the vent ports, so I also made sure to close that up. At the end of the week when she started to show signs of flowering, I defoliated her to help with light penetration, as she's got massive fan leaves. You'll see in the photos that I took that opportunity to decarb the trim as well. I'm sure there's little to no THC-A, but whatever other compounds are present should make for a nice addition to some butter later on down the road. I just won't factor it in when approximating the potency of the final product.
Likes
5
Share


@VeeDro203
Follow
Well! We are looking great! I filmed one time and it paid off! Will be doing more branches next run. (LONDON POUND CAKE)
anyway got some good dark purple coming in strong!!
Likes
10
Share


@HideAndFly420
Follow
Day 43 this orange is running absolutely faster than the last I did. Every day flowers are getting bigggers and resin is awful to be at 42 days.
I’m really loving aptus product, but I really can’t ell what’s is pushing her so fast.
Behind, in the video, you can see another auto is a strawberry banana and germinated with just 24 h difference but is starting just now to get into flowering, same soil ‘, same feeding..
incredible
Let’s see what s happen
Likes
13
Share


@goeser
Follow
All plants growing well , buds developing well. Fat banana much stronger against the feeding then the Bubble Kush Auto, but still both growing well and dense buds .
Likes
27
Share


@420
Follow
Das kleine 150 Watt Licht macht sich bemerkbar.
An Tag 40 sind sie schon etwas zu sehr ausgetrocknet. Dann mit 2L pro Pflanze gegossen.
Likes
3
Share


@CannaGods
Follow
Now we are going to week four, the plants have started to really vegetate, I have seen rapid growth in cannabis and other plants before, however, this strain is growing very large at a tremendous pace.
I am having no issues so far, I am doing very light training and I started using pH down, as the plants ingest the nutrients the pH is rapidly rising. I hope to preserve perfect pH within the next week and continue on. I have been adding a gallon of water every three days to keep the reservoir at the right level. The plants are receiving a constant PPM of 400.
Not only am I seeing five-finger leaves but I am also seeing seven-finger leaves. The plants are looking very healthy and there are no issues at all so far.
I have Started to train the plants and started mainlining, I have also slightly defoliated the plant. This Plant is overgrowing the free seed from seedsmen.
( in hindsight I have never gotten any good free seeds from seedsmen)
Science:
There are a few ideas in this grow journal that I am toying with.
The first idea is putting low-voltage conduction through the roots of the plants, I strongly believe that stimulating the the roots with electricity will induce larger and stronger vegetation.
The other idea is blasting the plants with low decibel sound waves. We will see.
There is another idea I have with string LED lights. However, I'm going to keep some of my secret sauce to myself.
Likes
22
Share


@Chucky324
Follow
Hello. I'm starting my Dos Si Dos #33 diary here.
These clones have been growing in the veg tent all summer. I had stuff growing in the greenhouse all summer and it gets really hot in that cement room in the middle of summer, so I shut down that grow room till now. I got it up and running last week but I was a little embarrassed to make a diary starting last week because I had treated the clones badly and they looked rather leafless. They look much better this week, so I'll start.
I would like to start playing around with making feminized seeds. So, I need some extra clones to spray to make the feminized males. I've read about it, now it's time to try. Some of these clones I take will be turned to males next year.
I gave some clones to my friend Jerry for his summer crop. I was over to his house the first week in October, to take pictures of his plants. Some of the lower plants that were not getting sun anymore were just starting to show some powdery mildew on some of the big fan leaves, so he decided to cut them down. He did a real good job on growing them this year. I think he said he was going to cut the big bud off the ends of the branches and let the smaller buds fatten up, under cover, in the sun, on the deck.
This is the strongest plant I grow. It gets me pretty baked with 5 or 6 tokes. It grows on the taller side, so I'll make lots of tops to slow the growth down. And it tastes like fruity ice cream!!! Yummy!!!
The other plants in the room are Amnesia Lemon by Barney, Pink Kush the original clone I found 27 years ago, Nova OG by Anesia Seeds, Sweet Sensations by Sweet Seeds, The White (Whitey) by Dr Greenthumb.
I will put in next week more Fat Freddie's Cat cartoons and I have some more puzzles to finish off that puzzle book. Then when that's finished, I'll put in some Fabulous Furry Freak Brothers cartoons.
Man, the spiders are getting big around here. We've had 1 mm of rain in 3 months and it's very warm for this time of year, so they are getting big!!!
Keep Growing Straight. Chuck.

Likes
13
Share


@DrewbieDoobieNoobie
Follow
This is more Indica dominate, small bushy plant with lots of lower growth I did not lollypop this as well as I should have. The buds are surprisingly dense and a light mint green in color.
I will try this again as I feel the strain has a high potential for rosin production. solid THC levels for an auto.


Processing
Likes
13
Share


@William38
Follow
This week was good plant looks better add root farm bloom 10 ml....what went wrong well making video I snapped a branch off 🤔...tryed honey to try and root it seen on YouTube some guy did it so I tryed need to get clone x or something like that any ideas???
