


Likes
Comments
Share
@Dottgreenthumb
Follow
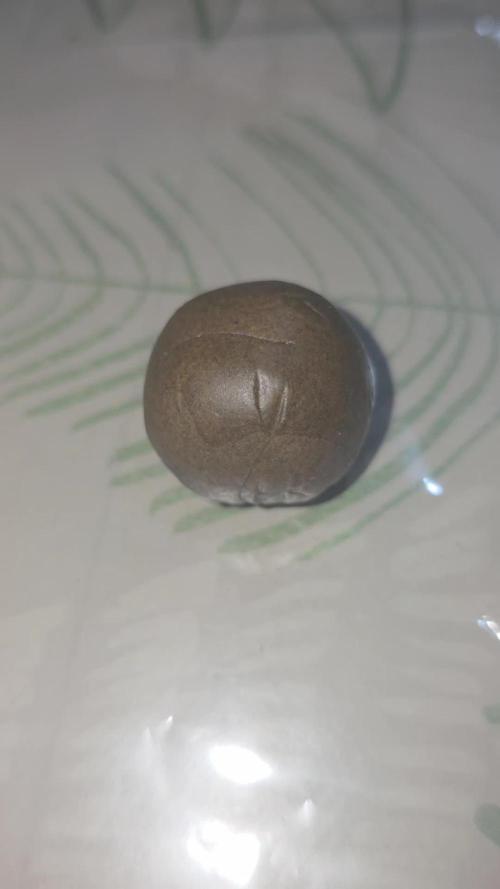
l essiccazione è avvenuto in tenda con una temperatura di 17 gradi e un umidità del 55 giorni trascorsi 12 poi ho messo in concia nei barattoli in vetro al buio senza infiltrazione di luce



Likes
13
Share


@BB_UK
Follow
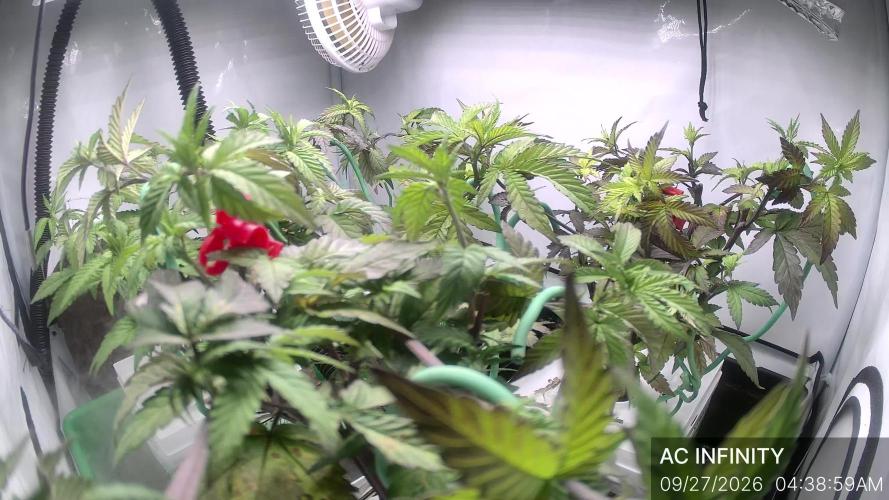
Was supposed to update my diaries yesterday but literally forgot lol #edibles but they’re flowering nicely and stretching as they go! They’re truly loving life under the ts1000 can’t wait to see what the next week brings!
Likes
4
Share


@burnercorona
Follow
A great week. Healthy and strong. So I chopped her up. Loved my last go at mainlining so I figure this is the way. The 2 branches to crack a bit at the knuckle but she should be good I'll just have to support her more down the road.
Likes
15
Share


@38PLAN
Follow
Siamo arrivati alla 8 settimana,le piante dimostrano una forza incredibili,sono le piu grandi che abbia mai fatto.é successa una cosa incredibile,in un vaso c'erano due piante che sembrano essersi fuse assieme diventando tipo un gogeta della marijuana,questo sembra avergli dato una forza incredibile,riuscendo a raggiungere i 2m di altezza senza essere entrata completamente in fioritura,crescerà ancora,per essere indoor hanno raggiunto dimensioni da record,é una pianta che ha bisogno di MOLTO spazio


Likes
14
Share


@Bigbombbudz
Follow
Another week closer....
These girls have been a pleasure to grow so far they love everything you can give them ...no deficiencies no problems.....earlier in the week a slight tip burn but after 2 days they adjusted and ask for more.....as they are eating up the nutrients I am replacing and upping it each time...pushing these girls and they are showing there love....17 days since I switched the light and they are filling in nicely.
Until next week, smoke a fatty, help out you're fellow grower

Likes
6
Share


@Green_Guanche
Follow
Las plantas siguen engordando que dan miedo, no han estirado mucho, pero las flores están gordas y duras como piedras.
El aroma terroso se ha acentuado esta semana.
Por parte de la planta mutante sigue con su curiosa historia, atrajo cochinilla algodonosa y un tipo de gusano verde (dejo video)
Ese dia quite el gusano y pase de la planta, no tenia tiempo y me fui desanimado pensando como lidiar con las plagas ahora en engorde, siendo una pesadez el limpiar a mano hoja por hoja.
Pues al dia siguiente se hizo la magia de la madre naturaleza, llegué preparado para limpiarla y la planta estaba perfecta, ni rastro del mas mínimo insecto.
Me estaba dando unas caladas mientras miraba la planta intentando entender que había pasado y de repente aparece una avispa y empieza a pasar por la parte inferior de todas las hojas de la planta y el tallo, respetando las flores xD
Queda explicado, apareció la señora avispa y se dio un festín con tanto insecto y huevos que habían en la planta, conseguí grabarla un poco con el teléfono.
Siempre había odiado a las avispas y mira por donde me salio una amiga / aliada inesperada, puede venir cuando quiera, esta invitada a comer xD


Likes
7
Share


@MrsGreen_98
Follow
She took 5 days to germinate!!
Day 1 - Mon 8th March
She has sprouted but still has a helmet. Will give a few more days to see if she breaks free herself if not I’ll give her some help!! 🍁🍁 Very happy to have her sprout though I was getting worried!!
Day 2 - Tue 9th March
She’s managed to break free from her casing with a little help from me. Gave her a little more water and her leaves are starting to open.
Day 3 - Wed 10th March
Looking this morning she is growing but she has white on one leaf. She’s also wrapped her self in a clear substance not too sure what that could be? Any thoughts? Tried to get pictures best I could. Happy growing!
Day 4 - Thursday 11th March
(Her nick name is Nemo) so from the pictures you’ll see she’s got an underdeveloped leaf but aside from this she is growing well.
Day 5 - Friday 12th March
Nothing new to updated today really. Have a good weekend!!! 🍁 🍁

Likes
7
Share


@WolverineGreens
Follow
Finally starting to flower only 5 days behind when I wanted to start so not 2 bad but still waiting on deliveries. Amazon is Killen me
Alaskan Purple...Gelato og....Skywalker og....do si do cookies....runtz....white widow...Bruce banger for this grow


Likes
39
Share


@Hazecat_420
Follow
Comenzamos la 6ta semana, con LST realizado y cada vez más dobladas para ir mostrando todos sus brotes. Se realizó una defoliación a las hojas más grandes para que los brotes pudieran tener luz directa. Respondieron bien al LST que se le fue haciendo (apretando cada vez más los hilos) y a la defoliación. Se aplicó diatomeas al sustrato para evitar posibles plagas. Terminando la 6ta semana se cambia el fotoperiodo a 12/12 para pasarlas a floración


Likes
8
Share


@sevengreenfingers
Follow
Hello everyone! I promised to track this grow very closely this time and ufortunately life got in the way. Here is a quick sumup of the grow.
First of all- One of the sour stomper plants unfortunately didn't make it. It died at about week 4. The main stem somehow had rubbed/broken down. That's why it was falling down. It was almost like a mini beaver had chewed it off at the point where the stem touches the riot rooter. At first I thought nothing much of it, maybe it hasn't been rooted in quite well yet or something. And I was constantly touiching it when watering, that made it worse. Soo the leaves were dropping and the plant looked very weak. Then I decided cut thr rapid rooters top layer and found out the severity of the problem. Tried to tape it up and other things, but it was too late. At the end it appeared all good as the remaing plants got so big the I had some space issue so I wouldn't have been able to fit another plant in anyway.
At that time I finally made my self-draining saucers. I took me a while and a lot of effort, but finally they were ready and working well. I also installed the self watering system and flowering was starting. Pretty soon I started noticing weird leaf symtoms. Brown spots, different kind. Some plants had it more, some less. Sour Stomper looked pretty good throughout the grow. Mango smiles seemed sensitive and Strawberry Nuggs were pretty strong until the end.
The grow was basically me experimenting with the setup- changing watering schedules , changing ppm, ph and all that stuff to keep the leaves looking healthy and it was very hard I have to admit. Probably my hardest grow in that regard. But somehow, the bud leaves remained healthy and the buds really fattened up good. I got away with an amzing 700G dry bud harvest which was def a new record from one grow. And the bud quality is very good too!
Next time definetly no more than 4 plants as they got pretty big and I thought it was a little overcrowded. I was doing some good defoliation too. I should have defolited strawberry nugs more tho. Sour Stomper got some amazing bud development from top to bottom because it was was growing next to strawberry nuggets which were really small most of the grow. They actually took the most time to harvest even longer than Mango smile. Mango smiles were ready quite early. Sour Stomper was just in time!
I topped sour stomper and both Mangoi smiles, left SNs both normal. Looking back at it, the way I grow them, Should have topped SNs too. Would probably have more space in the middle and longer side branches. Probably wouldn't have been as bushy!
I followed the full Terra aquatica feed chart until the end. I was supplementing with CalMag a lot as I thought the symptoms could have been from a CalMag deficiency as this was my first grow with RO water.
Overall a very challenging but good grow at the end. First time no mold problems. A record breaking yield for me. Basically surpassed the upper limit for all plant probable harvest sizes. Got good smelling quality bud. Very happy overall and will continue experimenting with Mephisto beans in the future for sure! I guess what I like the most about Mephisto is how close to description the plant is, very stable genes in that regard.
Next time I will also have to start feeding plants higher PPM feed faster at the very start. and during flowering. But still not 100% sure what caused the leaf symptoms.

Likes
10
Share


@OrganicAutomatic
Follow
Begining of the week, one of them is still struggling.
I am going to keep her for now.
1ml/4l bio grow start with small dose, water about 3l every 2 days and spray the top soil when dry
Likes
42
Share


@MadeInGermany
Follow
Hey everyone 😊.
Both phenotypes do very well and both look beautiful 😍.
Again two super genetics from Sweet Seeds 👍.
Let's start with the weekly overview:
Flowering day 15
Today both were carefully checked for health and sprayed with Canna Cure.
Flowering day 16
Today both were poured with 1 l each. The tent was cleaned and fresh osmosis water was filled into the tank.
Flowering day 17
Both were sprayed with canna cure and checked for health.
Flowering day 18
Today both were once again poured with 1 liter because they are very thirsty 😃. and like every day they were checked for their health.
Flowering day 19
Today there was nothing to be done except to fill the humidifier :-).
Flowering day 20
Today both were lifted out of their pots and the roots on the root ball checked, everything was great ☺️👍.
For this purpose, the plants were sprayed with Canna Cure.
Flowering day 21
to the At the end of the week, another 0.8 l was poured per plant :-).
Both checked for health, and the humidifier refilled.
I wish you all the best until the next update, stay healthy and let it grow 🙏🏻👌.
You can buy this Strain at :
https://sweetseeds.es/de/cream-caramel/
Type:
Cream Caramel
☝️🏼
Genetics:
Blue Black
x
Maple Leaf Indica
x
White Rhino
👍
Vega lamp:
2 x Todogrow Led
Quantum Board 100 W
💡
Bloom Lamp :
2 x Todogrow Led
Cxb 3590 COB 3500 K 205W
💡💡☝️🏼
Soil :
Canna Coco Professional +
☝️🏼
Fertilizer:
Green House Powder Feeding
☝️🏼🌱
Water:
Osmosis water mixed with normal water (24 hours stale that the chlorine evaporates) to 0.2 EC. Add Cal / Mag to 0.4 Ec Ph with Organic Ph - to 5.5 - 5.8 .
Likes
3
Share


@stolen_cheese
Follow
Die Pflanze hatte ordentlich durst und hat direkt 10 L bekommen, das sollte erstmal reichen. Zusätzlich wurde sie mit einer hohen Dosis Pflanzengeflüster (Harpin-Protein) besprüht, so früh in der Blüte ist das noch okay, das war aber insgesamt die letzte Anwendung davon.
Einige untere Triebe und Blätter wurden entfernt, manche Triebe wurden via Super Cropping "neu positioniert", sodass das Zelt ordentlich ausgefüllt wird. In der Vegi hatte ich zu wenig Zeit um mich ordentlich um die Pflanze zu kümmern, daher musste das jetzt stattfinden. Hoffentlich ist das nicht zu viel Stress gewesen.
Eingesprüht wurde die Pflanze mit 4 g / 1 L Pflanzengeflüster, bis sie Tropfnass war. Der Rest wurde auf andere Pflanzen verteilt.
Der Drain in der Wanne bleibt und sollte bald aufgesaugt sein - die Färbung davon kommt von der Erde selbst.
Likes
38
Share


@Tesla
Follow
Week 10 since switched to 12/12h. (it's in time if the first week of blooming is deducted.)
Trichomes're 80% cloudy. I didn't find any amber trichome yet. Pistils are 50% orange 50% white.
Today I started flushing the coco (a lot!). I really don't want any sign of fertilizer in my pot. So, from here no more food, only plain water.
Suggestions are always welcome!


Likes
6
Share


Processing
Likes
29
Share


@IndicaRising
Follow
=================================================================================
CRIB NOTES - I'M USING A LIGHT CYCLE OF 6 ON 2 OFF THIS SHOULD KEEP THE LADIES FROM STRETCHING AND GROW VERY COMPACT.
Many growers advocate the use of an 18/6 light schedule (18 hours on, 6 hours off) while plants are in Veg. However, this may not be the most beneficial light schedule. Switching to a series of 6/2 (6 hours on, 2 hours off) light patterns may increase plant growth while also potentially creating a more stable controlled environment.
While this new schedule may sound risky, it actually comes with a number of benefits.
Cannabis is a “short-day plant,” meaning that it will only flower when exposed to long periods of darkness and short periods of light. For cannabis to flower, there must be at least 12 hours of continuous darkness. This allows for the use of a series of shorter light schedules while the plant is in Veg – as long as the plant receives less than 12 hours of continuous darkness, it will stay in Veg.
BENEFITS OF A 6/2 LIGHT SCHEDULE
There is a lot of research that suggests that cannabis plants can only process a certain amount of light per day. After that level has been reached, the plant can no longer absorb more light, and any additional light is essentially wasted. By breaking the light cycle into multiple 6 hour periods, the plant is able to rest and process the light it has received. When the lights come back on 2 hours later, the plant will be ready to process additional light, allowing you to get the most plant growth out of every minute your lights are on.
At a biological level, cannabis’s inability to grow more once it has received a certain amount of light can be attributed to the way the plant processes carbon dioxide (CO2). A majority of the mass accumulated in cannabis is associated with the amount of CO2 found inside plant cells. While under light, cannabis tries to prevent CO2 from leaving its cells by cutting off transpiration. However, this prevents new CO2 from entering into the cell, blocking new growth. When the lights are turned off, and no photosynthesis is occurring, the plant is able to absorb new CO2 into its cells.
Additionally, when plants are exposed to 18 straight hours of intense light, they become stressed. Signs of stress – droopy or curled leaves – will usually appear towards the end of the light cycle. While some stress can be beneficial to plant growth, too much stress can cause harm to your plants and prevent them from reaching maximum growth potential.
Giving plants 6 hours of intense light at a time not only puts less stress on the plants, it also spread out the load on your cooling system over a longer period of time. The cooling system works the hardest when lights are on. By turning off the lights for 2 hours at a time throughout the day, your cooling system will get a break between light cycles, allowing the room to be cooled to desired temperatures before the lights come back on. With a properly sized cooling system, this benefit will be minimized as the system will be designed to handle the heat load throughout the entire light cycle.
While there are many approaches to Veg light cycles for cannabis, a 6/2 schedule allows for maximum plant growth. A 6/2 schedule allows plants to process more intense light, prevents plants from becoming stressed and puts less stress on your cooling system. It’s a win all around. Give your plants a break every 2 hours and you’ll be amazed at the results.
=================================================================================
Day 1 October 1st - 2018 - The 3 Seeds are in germination at the present. The seeds were soaked in reverse osmosis water for 16 Hr. then transferred to a paper towel.
DAY 2 October 2nd - 2018 - 2 out of the 3 seeds have germinated. the first 2 will be put into hydrofarm soilless seed starters using Revers Osmosis water and placed under 3 grolux flor 45 watt.
Day 2 October 2nd - 2018 1:00 Pm. All 3 seeds planted into hydrofarm soilless seed starters using Revers Osmosis water and placed under 3 grolux flor 45 watt
Day 3 October 3rd - 2018 - 9:00 Am. 2 ladies have popped out there little heads.
Day 4 October 4th - 2018- 9:30 Am Seedlings are doing fine. All 3 seeds have germinated.
Day 5 October 5th - 2018 ROW being installed. 2:30 Pm ROW installed.
Day 5 October 5th - 2018 Seedlings are getting first set of single serrated leaves.
Day 5 October 5th - 2018 The tent is setup and running R.O.W.
Day 5 October 5th - 2018 Washed all Hydroton Clay Pellets in ROW. NO DETERGENTS. Rinse and Rinse again. Using R.O.W. so the medium has a practically no Ph.
Day 6 October 6th - 2018 - Transferred the best 2 seedlings to tent under Veg. 1000 Watt L.E.D. Each bucket contains 19 liters of R.O.W. no nutrients added. This will continue for the next 2-3 weeks depending on growth.
Day 6 October 6th - 2018 Seedlings put under Light Cycle of 6 On 2 Off Ect.
Day 7 October 7th - 2018 - Seedlings looking good. Seems everything is fine on 6 on 2 off light cycle.
Day 7 October 7th - 2018 - The 3rd seed germinated is looking very healthy. Transplanted it from the hydro seed starter to a 1 gallon planter with soil. Placed this in between the 2 main plants in the D.W.C. & used R.O.W.
