


Likes
Comments
Share
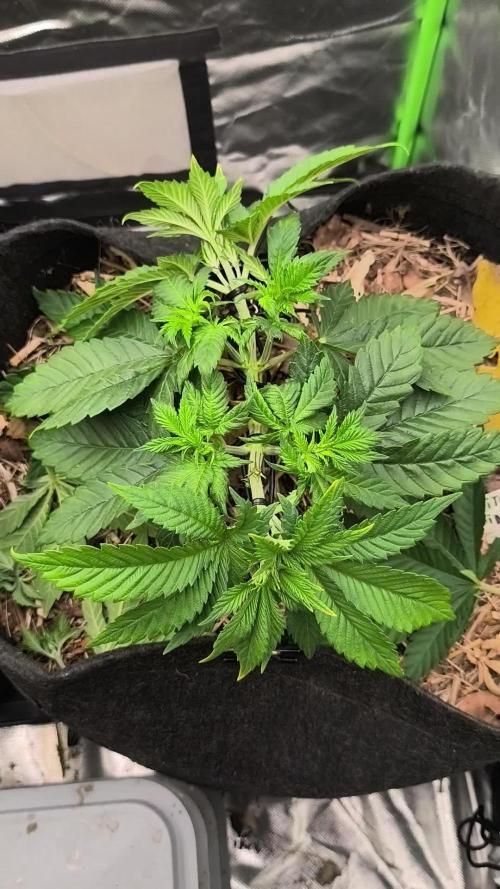

@Hou_Stone
Follow
May 2, We are on day 39 of grow
This week i keep doing some cut and management to en ourage the plants grow using main lining techniques
At this stage I use my 300W light is at 70% of power , extractor at 30% and i have 2 PC Fan in the tent for the air circulation

Likes
24
Share


@CannaCoPassion
Follow
No defoliation this week, letting her fill out a bit and will do another defoliation next week. Added half strength of big bloom and grow big with about a half liter on each plant since they are in for and so far they seem to have no issues.

Processing
Likes
31
Share


@AbroCadabro
Follow
I wasn't paying attention to the plant and she got a little dried out. I noticed that the lower leaves were stating to curls and She was just looking very unhealthy. I flushed the pot and defoliated all the growth below the top two nodes on each branch. gave her a couple days to recover from the defoliation and then added a feeding of nutrient solution. She has recovered nicely. However, there are some leaves that are still showing signs of damage but also improvement. That is the reason that this week is lacking in photos. I had to play doctor to the plant.

Likes
48
Share


@AsNoriu
Follow
Day 64. Girls took defoliation like champs and they are overstretched Champs !!!
Girls slow down with drinking, thinking today will be first watering after training session, but its normal, i have full shoping bag of leaves ...
This week Feed, water and hopefully one more water.
Let's see flowers forming everywhere !!
Day 67. Girls got Great White and its Jungles, think I will be doing at least second wave of defoliation. Girls are stretched with tops, highest 3-4 nods covering loads of flowers under secondary crown, need to get light there !!!
3 huge plants at the back - Blue Dreams, they are MONSTERS !!
3 lowest in the middle - Runtz, super compact and super stacked !
4 infront - Kalini Asias, still no pink colours yet ...
Day 69. Got some funky box from a friend. He grew Barneys Farm - Jack Ripper and its lovely weed, some lemony aftertaste, really strong i would say !
But !!! Zamnesia will be better ;))))) They are pure JOY !!!
Happy Growing !


Likes
3
Share


@CaptonianMoneymaker
Follow
Had rain For 2 days high humidity buds also added another wave of pistills on 1 cheese strain


Processing
Likes
2
Share


@Fergie
Follow
Hey guys so another couple weeks hav3 passed this lady's is coming along nicely . Started pre flower and stretch should come this week .

Likes
123
Share


@MrHightimes
Follow
I just cant get over how well things are going!!!! I've come so far in only 3 generations of plants!
Today I did my FIRST DEFOLIATION EVER!!!!! It went so well!!! Shout out to Bill Ward for having some good views to brush up on!
My first grow I didnt have enough leaves to defol and last grow I was to scared to lol. This time I made them my bitch!!!! It was EASY!
NEVER BE AFRAID OF YOUR PLANTS!!!!
I'm tinkering with the light so they aren't super happy atm. I turned on the exhaust and the Vaporizer. I also raised the light to 2ft and will try to consistently keep the light at that distance.
I bumped up the nuets to 2ml. I'm a little lower than my schedule called for but i might bump it this week. Gonna watch the ladies!
I tested the runoff and its 6.1, perfect. Starting to see how the plant is gonna look.
__________________________________________________________________________________________
The plants came down with some spots. i did some reading and i came to the conclusion that they needed a bit more cal-mag. I also had noticed some of the newer growth had reddish stems too. I checked my discords and that's what they thought too!!! I was going to bump it anyway bc I've seen alot of diaries on here with ALOT more Cal-mag than me.
Otherwise they look great! I got them out tonight for a light watering and noticed they had grown like 4or5 inches! Go Baby Go!
__________________________________________________________________________________________
I fed them this evening and gave them a small haircut for some light penetration. I put a few spacers in that I printed and they seemed to help salvage my LST. I think the stakes dont hold up to the plant. Next Grow I will use wire. Still monitoring the leaves and while its slowly spreading I don't think I will see the effects of the extra calmag for a while. I have double downed on my videos, working on editing and hope to really develop my dairies!
__________________________________________________________________
Things are going great as we wrap up the week. The plants are almost fighting for space in the tent, and i'm dialing in how much water the pots hold, I think this is the sweet spot size. Defoliated about 20 leaves, just a trim and tuck. I didn't do well at LST at all this round, i noticed all the main stems are ramrod straight, but using the spacers seems to be making the plants into pretty nice lil trees. I think the best part is right around the corner!!! Its about to get very pretty up in there!
Likes
5
Share
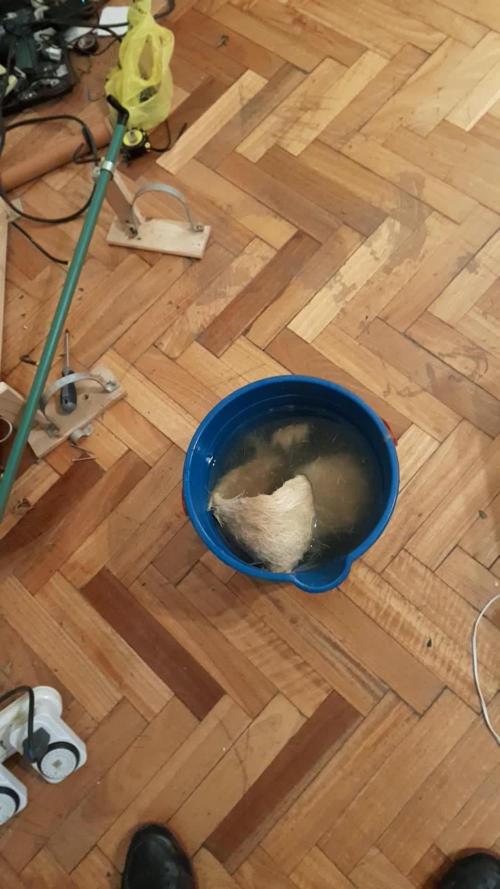

@MicroHidroGrow
Follow
Fue un ciclo interesante. Sabía que era poco espacio, pero necesitaba armar esta idea con un poco más de prolijidad. Voy a tener que armar uno más grande, pero entre tanto, los resultados de este indoor me han sorprendido. Las variedades ayudaron mucho también. Eran muy productoras ambas, principalmente la polaris.
A la planta grande ya le había cortado la rama grande que invadía a la polaris. Por eso parece mas chica al final.
Ya tengo enraizando las canpat one, pero aún no están listas. Espero pronto arrancar con el próximo proyecto.
Finalmente el peso seco fue de 190 gramos. Lo cual es muy extraño, dado que son 3 plantas nada más. El secado lo hice en 15 días. No parece que las flores hayan retenido tants humedad. Pero en el curado iré viendo. Me parece excesiva la cantidad tomando en cuenta el espacio. Los frascos en la foto tienen 10g cada uno y sin contar lo que vengo fumando y la rama grande que corté y saqué antes.
Likes
16
Share


@MisterMaGoo
Follow
OK So had some non plant related as well as plant related issues this week.
Been hectic with personal life, and still finding my groove with the girls ..
I decided against any sort of training .... get it you can maximaxe and all but m all about letting them do their thing with some love and help, i feel like the hst and defoliation is just not for me at present time. If i get into commercial i definately see the advantages... Im growing for just myself , have zero friends and girlfriend doesnt really part take except the sometimes will hit a vape pen and shes done .. so all the fruits are for me and just do not see the need to mutalate my plants to get extra,, ill just grow more :D
Recap :
5 - Barneys Glue Gelato Autoflowers
2 - "Freebie" Caramel Cream Aut o <I believe Maine Clone Company > though did not have label.
All seeds came from AMAZING
NORTH ATLANTIC SEED COMPANY
.... ZERO issues ordering , shipping and popped 7 for 7 seeds even with some pretty disasterious goofs , see week 1
1. Struggled with Lighting - Definatly had the California Lightworks Solar Extreme TOO CLOSE .. now keeping a good 24 inches and will adjust soon with flowering
2. Struggled with PH
- My well water is great .. low PPM and 7.0 ph . BUT i use ph down it seems each day with the top off water to bring the girls down from 6.5 - 6.8 to a nice 5.9-6.0 Eariier not too bad as the girls were not drinking so much ... which leads me to next
3. THEY ARE DRINKING BOY ... Holy cow this week they became drinkers liike i did not expect. I run my lights 2 pm to 8 am and turn off until 2 pm each day .... I top off in the morning before i put them to sleep , the bigger girls ... 4 of the glue gelatos autos are drinking almost half gallon each per day atm . While my lil girls <caramel cream autos > are much shorter and i have one gelato glue auto on the smaller side . They do not drink nearly as much maybe a quart .
4. I goofed on the BLOOM, I did not expect bloom so early i was planning on this week to start them .... but nope showed signs of sulfur deficiency , caught it early and changed the feeding to bloom cycle and WOW they took the hell off ... Have TREMENDOUS growth in past week sinced changed cycle ... Again im following FAST BUDS auto feeding chart for expert for general hydro to the T and adding HYDROGUARD
5. I have one caramel cream auto with mag deficiency signs on some bpottom fan leaves but i believe i got that fixed when i did the water change, not sure why just her , unless i goofed on the bucket mix.
Which brings me to next statement ...
IM INVESTING IN A GDAM 13 GALLON x 8 bucket plus RES kit for next grow ...
Doing and maintaining 7 buckets is a royal pain in the ass . I honestly only expected 4 plants out of the 7 . AND expected fully i would kill something along the way
I am visually impaired and BRain Tumor Dude .. so i gots some issues sometimes . .. but if you check out the videos i post in a bit here you can see, WTF i am doing ok i feel like .
Great looking plants from my amateur opinion , always room for improvement as i am super critial of everything i do OCD/ADHD glorious combo
BUT YES a better setup is needed for ease of use .. I bought my complete setup at PA HYDROPONICS , meaning my BUCKETS with fittings and hydroton . 200 bucks could not find better price anywhere
he does a great fallponics custom build with 3 inch pvc that i have seen in action and tis a thing of beauty for us home growers. Plus i can add a small chiller to the mix to keep that temp a tad bit lower. IT about an 800 dollar upgrade BUT for the rest of my setup it belongs :
vivosun 4x9 tent
Ac Infinity T8 x 2 <one for vent one for blower , also have a great merv 13 filter box from ac infinity so as not to such in yuck from basement.
2 california solar extreme 550
So i figure adding an 8 bucket fallponics to fill the tent would look so much better tahn my 5 gallons and the constant checking each one and filling etc ....
Having the res would be nice I also see the cons of it as if you goof you goof on all not just one .... But i m fairly certain i will upgrade.
*****************
So right now it looks like nice buds are starting to form on all 7, the Glue Gleatos are much taller and full than the caramel creams ...
I am tracking water being added and at this rate will need another change over in a day or two if drinking 1/2 gal a day and about 3 gallons <12 liters> labout inch from bottom of net pot.
Rule of thumb being water change to replace nutes when you replace a volume equal to the total volume ... which is about every 6 days , last water change being 8/7
I will post some more when i inspect the ladies when i turn on the lights at 2 pm
First time grower in setu


Likes
143
Share


@SwissKush
Follow
Day 64 - flowers are so nice! - 201 watts of light
a. the buds are covered in frost, this week will begin the Ripen
b. added 5L of fresh spring water, ppms 900ppm, she likes 800-1100 ppm
c. PH in DWC has been yellow the entire grow with hints the slightest hints of green from time to time, 6.0-6.1.
d. uploaded video of grow
e. like Pineapple Express, this plant will harvest a bit earlier than most of mine. pistils are turning colors fast.
f. trichomes are very milky, still some clear, no amber yet
Day 65
a. replaced the 5L gone in the DWC with fresh spring water
b. will gradually take PPMs down closer to the 700 range for the ripening phase, tamping down with spring water for a week
c. DWC has plenty of nutrients in it.
d. the buds are incredibly sticky.
Day 66
a. doing very well, the smell is very inenst, my carbon filter is not powerful enough to filter the smell... good thing I like the smell
b. 4L gone from the DWC overnight, added more spring water, ppms down to 840 to get ready for Ripen tomorrow at 800ppm, probably 10 days or so.
c. the trichomes are very milky, but there are plenty of clears still present. The pistils are turning nice colors, and no new pistils are forming!
Day 67 - Ripening Day 1 - only TA Final Part (GHE Ripen) 5ml/L
a. Started TA Final Part (GHE Ripen) at PH 6.0, 800ppm, she is loving it, consumed 4L overnight of Ripen solution
b. I will keep the Ripen between 700 and 900ppm for the next week or more.
c. The trichomes are filling fast, no ambers yet.. The buds are noticeably swelling
Day 68 - Ripening Day 2
a. she is consuming 5L a day of ripening solution
b. the buds are becoming noticeably larger, thanks Ripen you always work well!
c. adding spring water to the DWC to top up and keep ppms between 600-800.
Day 69 - Ripening Day 3
a. 4.5L gone overnight from the DWC, will top up with Ripen solution to keep ppms 600-800
b. the resin is very sticky and smells amazing, rubbing a sugar leaf and the fingers stick together
Day 70 - Ripening Day 4
a. 5L gone from the DWC, topped it up with 1/2 strength ripen, ppms 800
b. the smell has overtaken the internal carbon filter and is coming out into the grow room
c. she will be finishing up next week
Likes
3
Share


@CordersGreen
Follow
👉DIA : 13/12/21👈
Metodo de germinacion: 👉<< VASO DE AGUA >>👈
seleccionamos las cantidades deseadas de semillas y en un pequeño vaso con agua opmotizada insertamos las semillas para nutrirlas durante 12H, situada en un lugar sin luz, apropiadamente tapada con un trapo.😉
__________________________________________________________________________________________________________________________________________________________________________________
👉DIA : 14/12/2021👈
👇👇👇👇👇👇👇👇👇👇👇👇
una vez pasada las 12 H de germinacion en vaso de agua , depositamos las semillas bien colocadas en un recipiente con papel de cocina humedecido con agua y 1ML de estimulador de raices (TOPCROP).
Esperamos de 1 a 2 días a que salga la raiz de la semilla y ser transportada a los Jiffy😉
___________________________________________________________________________________________________________________________________________________________________________________
👉DIA 17/12/2021👈
👇👇👇👇👇👇👇👇👇👇👇👇
Pues pasados los 3 dias de germinacion en el metodo de papel, vemos que ya salieron a luz las raices y con sorpresa😱 NUNCA habia visto una cosa asin!!
An salido GEMELAS, sii sii !!😵 de una misma semilla an salido dos raices una cosa impresinante!
y damos paso a colocarlas en los Jiffy.
👉Instrucciones:👈
- Colocación de los jiffy en un recipiente con 2L de agua y 2ML de enraizantes de top Crop.
- Dejamos actuar durantes varios minutos hasta que el jiffy se extienda.
- Abrimos un pequeño orificio en los Jiffy para introducir la semilla con el cáliz dejandolo hacia afuera.
- Colocamos en un pequeño invernadero para que tengan la suficiente humedad.
- Ayudandonos de unos foco de pocos waltios, le damos a luz necesaria para esta face de germinacion dejandolas 24 horas de luz.
________________________________________________________________________________________________________________________________________________________________
DIA 22/12/2021
Colocacion de Jiffy en Maceta de 3,25L
👇👇👇👇👇👇👇👇👇👇👇👇
👉Instrucciones👈
-Pasados varios dias vemos que el periantio(semilla) ya se rompió y empezo a salir los cotiledones con una hermosa raiz blanca por debajo del jiffy.
-rellenamos macetas de 3,25L con sustrato de top crop(anterior cultivo).
-introducimos los jiffy en las macetas dejando la plantula bien colocada.
-regamos con 3L agua opmotizada y 1ML/L enraizante Voodoo ADVANCED NUTRIENTS
- Permanecemos con las 24 horas de luz con foco led.
_________________________________________________________________________________________________________________________________________________
👉DIA 25/12/2021👈
👇👇👇👇👇👇👇👇👇👇👇👇👇👇👇
pasados 3 dias desde que se plantó en maceta. A dado unas respuestas increibles !!👍
las volvemos a regar y a cambiar las horas de luz que se pasarian a 18H

Likes
3
Share


@Organic473
Follow
This girl smells amazing...She was also pollinated a couple day ago with the SKUNK #1. I can't wait to grow those seeds. No complaints this week...It's rainy season here so I'm just working around that.

Likes
2
Share


@georgekristyan98
Follow
The nutrients on here are only for the LA Divas and the mutants, not for the critical. That's still only on 2ml/l growth boom atm.
The LA's are coming on beautifully, and starting to get faster and faster. The indoor especially. It seems to be going through a crazy fast growth boom.
Preflowers everywhere!
The crirical is looking amazing. Please stay tuned for that naughty girl after the harvest of the LA's and mutants.
Day 33
40cm L.A Diva Indoor
21cm L.A Diva Outdoor
Critical 28 cm.
2 mutants are about 10 cm tall. Probably not worth keeping but I may as well, they're Alive and flowering, and very strong and sturdy. Why not.

Likes
16
Share


@Hawkbo
Follow
The hulk is swelling up at a rapid clip I think she'll have some big buds on her. Started giving less grow down to 2 ml per gal and more bloom. Added in some TNB co2 as well which I usually only use on the autos. Instead of feeding on the previous feed I gave them the enhancer from green house feeding just humic acids and enzymes and they responded very well as I think there was beginning to be a build up. I'm happy with how they look right now.

Likes
40
Share

@SundancerS
Follow
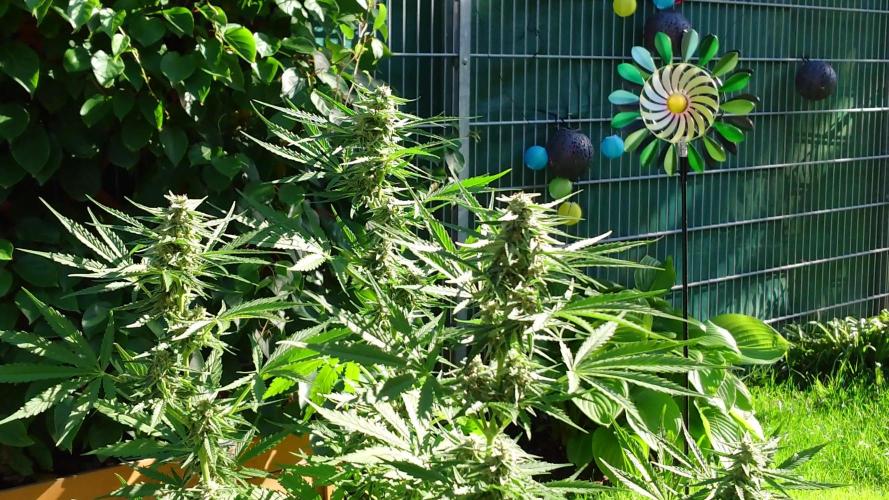
Die Green Crack F1 Auto zeigt sich bisher als echtes Kraftpaket. Sie wächst zwar etwas wilder als ihre Nachbarinnen, aber genau das scheint zu ihrem Charakter zu gehören.
Normalerweise steht sie etwas geschützter als im Video, trotzdem sieht man gut, wie problemlos sie mit Wind und Wetter zurechtkommt. Die Triebe werden von Woche zu Woche kräftiger und die gesamte Pflanze wirkt erstaunlich stabil.
Das einmalige Toppen hat ihr sichtlich gutgetan. Sie bleibt dadurch etwas kompakter, baut aber eine schöne breite Struktur auf und scheint ihre Energie lieber in stabile Seitentriebe als in unnötige Höhe zu stecken. Gerade Outdoor kann das später ein echter Vorteil sein, wenn die Buds schwer werden.Außerdem macht sie dadurch einen deutlich transportableren Eindruck. Wer seine Pflanzen bei Gewitter, Hagel oder anderen Wetterkapriolen mal schnell umparken muss, weiß das durchaus zu schätzen.
Bisher macht die Green Crack F1 Auto jedenfalls genau das, was man sich von einer Outdoor-Pflanze wünscht. Robust, unkompliziert und immer mit einem kleinen Hauch von Chaos. 💪

Likes
1
Share


@Baltimoregrower
Follow
So this week I added nutrients for the flowering stage. I gave her a little trim as well as added her netting. I flipped her on last Sunday PP