Check the winners The Grow Awards 2026 🏆 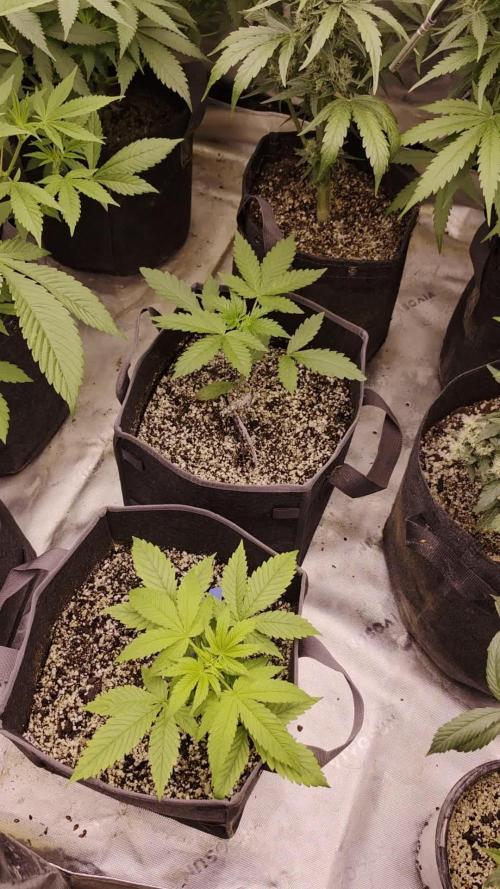


Likes
Comments
Share
@Count-Dooku
Follow
Another sub in, I'm gonna give the gskz a week or two to build roots, since I pulled it out of the dwc cloner to pot. This blue dream is billed as a mostly sativa, so actually it should take longer than the apple blossom.
Likes
16
Share
@Mrg7667
Follow
I finally feel like we are getting some good vertical growth! And all cut spots have put on at least 2inches. So i flipped into flower this is day 1-0

Likes
38
Share
@Cariboo_OG
Follow
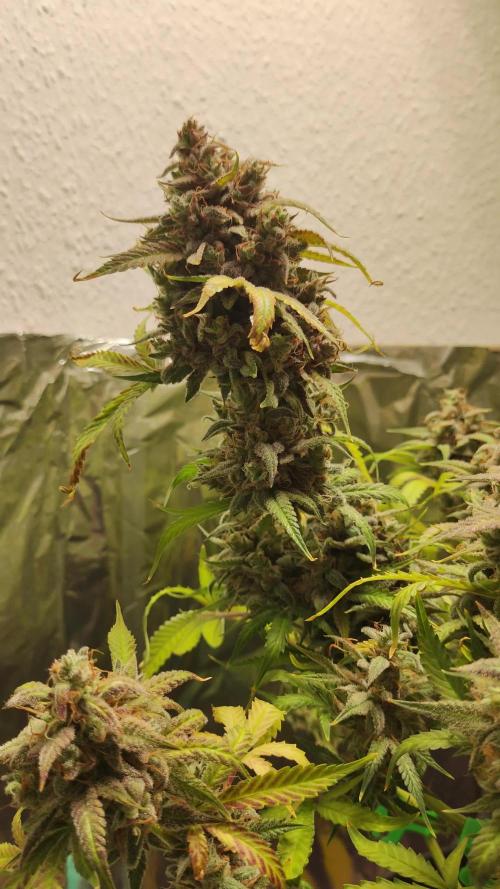
Utopia Haze is a rare heavily sativa dominant hybrid (90% sativa/10% indica) strain created through back crossing Brazilian Sativa strains. This tasty little bud took home 1st Place for Best Sativa in the 2008 High Times’ Cannabis Cup and for good reason – with its potent 18-22% average THC level and long lasting cerebral effects, Utopia Haze is one powerhouse smoke. The Utopia Haze high comes on soon after you finish your first toke, hitting you with a strong cerebral lift that infuses you with a sense of hazy relaxation.
Type: Feminised/Photoperiod
Cultivation: Indoor/Outdoor
Flowering Time (days): 70-75
Indoor Yield (g): Up to 650
Feminised Outdoor Harvest Month: October
Feminised Outdoor Harvest Month Week: 3rd-4th week
Aroma: Citrus, Woody, Pungent, Mint
Effect: Cerebral Lift, Hazy Relaxation, Sleepy
Welcome Everyone to the Final Entry of my Utopia Haze Grow !
There is so much to discuss ! I have been extremely busy as of late trying to get this Harvest together, but i am happy to have it here for you now !
I Seriously under estimated the amount of time, help from others, and my own necessary skills to pull this off.. and i still kind of screwed it up lol !
But its worth noting i have never actually done this before and trying to document it during....was extremely hard.
It is next to impossible to work an iPhone with rubber gloves on !
First I want to discuss everything step by step so before you jump straight into the comments on how the end product is so small in "quantity"
Rest assured i am happy with its"quality"...and thats all that matters to me because Life is a journey not a destination! and i have learned so much from this grow that I couldn't be any happy even if i messed some things up :)
But at the very least I hope you read through this entry in its entirety with an open mind and focus more on the process, rather than just the outcome!
I ran out of Ice & i was only able to wash three times..(normally I've heard you should go sometimes 5-6 washes)
Preparation is Key & things will be much better next round :)
Photos 1-22
These are pretty self explanatory but for those of you just tuning in now.. this is what happens to a very happy plant when you don't have the necessary tools to monitor key components of growing cannabis.. Ph, as well as EC levels play a very key role in the outcome of your grow lol that being said I was just able to save this plant by purchasing both tools but that doesn't mean the plant didn't suffer because of the prior events.. This was a Huge reason behind me choosing to turn this harvest into what i would consider
"Solventless Hash Rosin" from "Ice water extracted Bubble hash".
Pictures 23
The idea here is the process of using "fresh Frozen Cannabis" this has been discussed many a time online on such sites as instagram and here on grow diaries as well.. I personally have Never tried the process so i decided to try it out and make a judgement for myself..
Video 24
The Cannabis has now been in the freezer for 72 hours making it very well frozen.. as you can tell i struggled getting it all into the 25u Screen Wash Bag. One thing of note i would do differently is i will de-stem my next batch as i also believe this played a part in the amount of plant matter that escaped through the sieves.
Photo/Video's 25-28
The idea here is "ice water Seiving" & especially with the bags that I am using here that are only have screen material on the bottom portion of the bag it is very important to have spaces in-between the screens to allow the water to pass directly through the screens into the bottom bucket with the least amount of resistance.. because the hash is so extremely temperature dependant if it gets warm on the side of the bag.. it will stick there and not make it to the bottom to become use able product..
29
You do not need to use as much Ice as i used here lol... the idea is to keep everything very cold..i certainly achieved that but at the sacrifice of using so much that i ended up grinding product and producing "contaminants" but in the end they are just plant matter that i would be smoking when i rolled up my joint either way so.. I'm not super disappointed..
But it should be noted that what you want to achieve here is a Layering effect where you have the wash bag between two small layers of ice while the "water current" washes the Trichomes away allowing them to be separated by the screens setup below :)
Before Starting the machine you should allow some time (i.e.;10-12minutes pre soak to allow the product to become saturated) before the first cycle.
By video 32 I have just ran out of ice lol..
Video 33-34
Here I have a tip for you.. to separate the screens that you sieve through.. cut 5 gallon buckets to stretch them across nice and tight.. it'll make scooping your Bubble that much easier ! i learned this from the many "Frenchy" videos I have watched :)
Picture 35
Here in lays the problem for most people.. drying your hash without loosing vast amounts of "Terpenes" whilst also stay ever vigilant against mold !
Thanks to all those videos I've watched on youtube.. id like to think this was one of my most successful parts of this process..
Things to Note; Terpenes start to seriously evaporate at temperatures 68F or 20C
you need to stay as cold as possible whilst bringing the Relative Humidity in the space down into the 40-30% to stay away from that nasty mold !
I used my cold storage room in the basement.. with a dehumidifier running to keep the space at 45% RH & staying at a constant 15c.
All while spreading the hash as thin as possible across parchment paper, on top of the white screens with a fan moving air across both sides of the paper.
Pictures 36-38
These are some macros i took in the middle of my drying session I fell in love with the colour.
Yes i know the black spots are plant material but they will get caught when i bag the hash & squish the oil out.
Thing to Note; at this stage it is important to ensure you 'micro plane" the hash down as fine as you can whilst staying weary of the temperature... any "chunks" will hold pockets of moisture.. that lead to potential problems..ie; mold ...
Picture/Video 39-41
Successfully planed bubble hash ready to be bagged and Squished !
Picture 42
Ive decided to follow Pedro.. from Pedros Grow Room and double bag to be on the safe side so i don't have any blow outs.
So thats One 25u bag inside one 160u bag ! :)
Pictures 43
This is almost 3 grams of the bubble hash from above, already melting in the bag.. this is where i ran into trouble again lol things started getting to warm in the house and i was only able to get one of the three squish's i did on video :( things started getting sticky.
Picture 44
This is basically just a photo of the equipment I'm using; 3x5 LowTemp Cage in the frame I built myself, with a 20Ton bottle jack.
Something to note here is this is an older Lowtemp model with only a single heating zone which is which i have it closed here heating Both sides of the press :)
As well as the importance of having adequate pressure on your plates.. my rig is very overkill for the size of hash bags..lol
Video 45
Here is the lovely press video.. its didn't quite work the way i wanted either lol my directional folding wasn't quite tight enough for a big "drip" :)
&the Press was set to 65°c
Photo's 46-50 are pretty self explanatory :) I had a blow out.. but still managed to pull an 80% return from the hash once squished...& yes it tasted amazing :)
Was it worth it in the end... that could be debated.. for some..i understand..its not your thing, but for those of us that are interested in making our own concentrates.. free from Solvents...
I wouldn't make it any other way :)
If even ONE of you reading this diary finds it helpful to reference for ANYTHING.....even if its "what not to do" ill consider it a success !
Thanks again for tagging along on this garden adventure.. its been one heck of a journey !
Much Love from B.C. Canada,
Until Next time,
Cariboo

Likes
Comments
Share
@Muuuy
Follow
Beginning of week 13 was harvest time!
Checking the trichomes on their main buds led to the decision to harvest them. Almost all of them had already milky looking heads and some of them even turned amber. Their incredibly sour smell was barely tolerable as well.
Made the decision to harvest them all at once, so the grow room can be turned into a drying room for them. Since this is considered an experiment after all, we wanted to try out wet trimming as well to compare it to the dry trim we're used to.
So considering #3 had the least amount of effort due to the low amount of head buds overall, we choose that one to be wet trimmed. It surely was a very sticky and still time-consuming activity, but we're pretty happy with the result.
Can't wait to see and taste them when they're finally ready, dried properly and cured a bit!
This is plant #2.
She still remained my absolute favorite one of them, having the biggest and most beautiful looking main buds. Would've expected a bigger stretch at the start of flowering though, so her branches were still growing pretty close to each other, which isn't that bad but also wasn't really the desired look overall. Plant #2 is one of the dry trim ones. Just made sure to remove the biggest leaves that could prevent a good airflow between the buds when they're hung up.

Likes
30
Share
@Gorgonite
Follow
Chopped the Gorilla Glue. I definitely think I stunted it a bit with the HST, which cracked the main stem open. Also, while learning how to water properly. I couldn’t be happier with myself and results though. Will have more photos and details to come after drying process. Thanks again to everyone who has help me getting to this point. 🤘💚

Likes
2
Share
@Skunkiest_bender39
Follow
Wetter wird schlechter viel Regen und hohe Luftfeuchtigkeit, werden langsam klebrig, habe 2/3 bereits entlaubt die andere wird folgen samt Fotos.


Likes
12
Share
@StonedandSteady
Follow
#AutoBlueberry Total Dry Yield, DIY Dry Box, Full Garden Update and Smoke Sesh: Super Cropped with Low stress Training for Big Bushes and Bulbous Budz! Big Girls getting Flipped to Flower on 9-24-21
AutoBlueberry 14th w/ 9th W/ Flower breed by #DivineSeeds #DivineSeedsSquad #DivineSeedsBreedingCompany
No 6th feed of #NukeHeads Nutrients #PlutoniumBloom this week, I Flushed her out for the last 5 days of her life w/ 2 gallons a day w/ some Cold Declorinated Tap water and Checked her Tricks every few days till she was Ready for Steady! Lol These Lush Ladies and those Awesomely Purple Budz with Trippy Trichomes Growing on! I made and/or converted one of my Budz into a Polyploid (Bigger and More Bulbous Bud) This AB is Flowering out and her Smells are Super Strong of Gasy and Candied Blueberries! I recently Trained down her branches to expose more Bud sites and Removed the Biggest fan leaves to expose the Bud site's to this Glorious #BloomPlusBP1500w #GrowStarQB1000w #OsreeQB1000w Full Spectrum Grow Lights! I've also Super Cropped, Topped um, Defoliated, Leaf tucked, and Implement the 3D's method like my Broski #TigerfishOrganics to remove the Dead, Dying and Diseased leaves!
Origin:Afghani/Thai
Type:50% Indica/ 40% Sativa/ 10% Ruderalis
Flowering:56 days
THC:22%
Harvest:400-550 g/m2
Height:110-150 cm
They were Growing under the #Growatt600w and in my #TopoLite 24×24×48 Grow Tent but I've Upgraded and Updated it to my #OsreeQB100W I'm also using #TNBNaturals #TheEnhancer Co2 Despersal Canister and using thier Ph⬆️⬇️ for my Decolinated Tap Water!
Green and Growing Up Great! She's Growing into her 9th week of Flower! She's Growing in my special blend of ProMix potting mix, a 1/2 bag of Earthworm castings and 2 light handfuls of Diatomaceous Earth mixed Up well for before transplanted! Diatomaceous Earth: Diatomaceous earth is made from the fossilized remains of tiny, aquatic organisms called diatoms. Their skeletons are made of a natural substance called silica. WHAT IS DIATOMACEOUS EARTH?
In a nutshell, DE comes from the fossilised remains of small marine organisms called diatoms. Over a 30 million year period, these hard-shelled algae collected on the bottom of bodies of water, eventually forming into a type of sedimentary rock. Fast forwarding, it wasn’t until around 1836 that a German peasant Peter Kasten discovered the ivory-coloured, powdery substance while drilling a well in northern Germany. Ever since, the usefulness of DE for multiple purposes, including industrial and horticultural applications, has been well-reported. Just sprinkle some diatomaceous earth on top of your soil and watch mother nature's secret weapon work its magic.CONDITIONS THE SOIL
When it comes to growing cannabis, everyone strives to provide the best soil to grow the best plants—but there’s always a way to make it even better. Making the soil a better medium is called soil conditioning, which is exactly what diatomaceous earth does. It works by improving the retention of moisture in your potting soil, holding a large amount of fluid and drying at a rate that’s much slower. This natural soil additive also helps to retain nutrients and allows for better oxygenation of the substrate. NATURALLY CONTROLS PESTS
DE is an all-natural, safe-to-use substance that doesn’t harm the cannabis plant with toxic chemicals. The nature of diatomaceous earth makes it useful against most types of insect infestation you might be experiencing; and unlike chemical insecticides, insects can’t develop a resistance to the effects of DE. So once they’re gone, they’re gone for good. DE is an abrasive. and when used as an insecticide, it gradually scrapes away an insect’s exoskeleton, absorbs the fluids, and dehydrates insects and other critters to eventual death. IMPROVES PLANT STABILITY
When using DE in your soil, it can be especially beneficial as it frees up nutrients so that they are made available to the plants as needed. This works via the silica content of DE being absorbed into the plant tissue, which helps improve the plant’s ability to respond and receive more nutrients as DE activates. This in turn results in greater yields and better stability under small pH fluctuations!
https://divineseeds.net/
https://instagram.com/divine.seeds?igshid=osxe2v7en33v https://divineseeds.net/
Thanks Again to All my Friends, Family's, Teams, Sponsors, Followers and Subscribers!!! Your Genetics are Merry Magnificent, Mega Marvelous and Mighty Medical! Love um!!! I really Can't stress enough how Thankful and Grateful I am of All of you and what you've Shared with Us! Means the World!!! It's definitely a Pleasure being able to Grow with these Phenomenal Grow Lights! Please Enjoy! BudBrothers4-Life! Cheers Famz!!! Much Props and Much Topz!💯🔥 #BloomPlus #Osree #GrowStar #Growatt #TNBNaturals #TNBTeam #GrowYourOwn #Bliss
https://instagram.com/bloom.plus?utm_medium=copy_link
https://instagram.com/growstarstore?utm_medium=copy_link
https://instagram.com/osree.light?utm_medium=copy_link
https://instagram.com/as420.ca?igshid=1f116alw054wp
The Grow Bags: https://www.as420
https://instagram.com/tigerfish_organics?utm_medium=copy_link
TN Tonny Dual headed Clip on Fan Amazon Link: https://www.amazon.com/dp/B07PJH8CDT/ref=cm_sw_r_cp_awdb_imm_6E4BCKYN6HTAASNQDJSM?_encoding=UTF8&psc=1


Likes
1
Share
@BAM_BAM
Follow
A Note From (BAM):
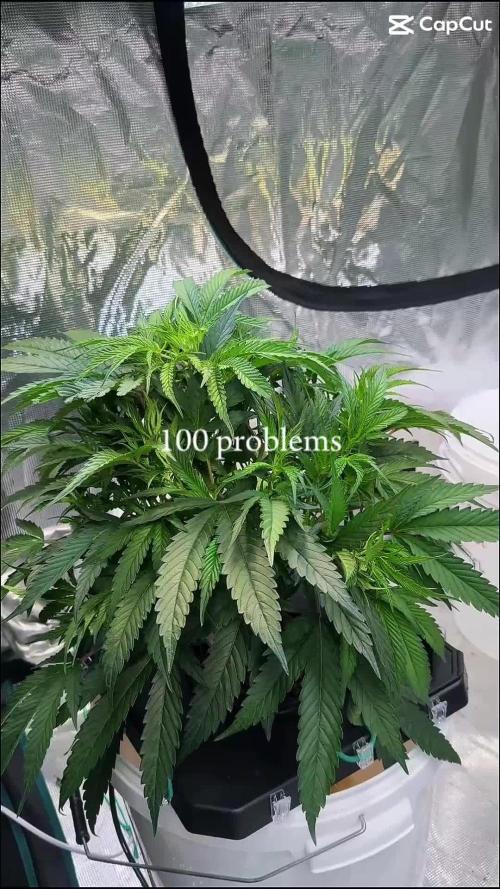
"This week was a battle with the environment. The plants grew like crazy, but the controller tried to sabotage us every single night. I learned more about VPD, airflow, and the limits of automation than I ever wanted to. But by the end of the week, the plants were wider, the roots were thicker, and I was in control — not the controller."
---
Day 8–9: LST & Light Upgrade
The FIM sites had fully healed, so I started Low Stress Training (LST) — pinning branches outward with clips to create a flat canopy. I also added the second Sanlight EVO 4-120, angling both lights inward at 40 cm. The plants responded immediately with faster growth and wider leaves.
---
Day 10–11: The Fan Controller Nightmare
The AC Infinity Controller 69 Pro showed a fatal flaw: every night, when VPD fell below the trigger point, it sent an OFF command to the fan — even with Minimum Speed set to 1. The tent would spike to 80% humidity and 29°C. I tried everything: lower triggers, higher minimums, different modes. Nothing fixed it. The controller simply ignores the Minimum Speed setting when it decides to turn off.
The workaround: I have filed a warranty claim with AC Infinity. In the meantime, I am running the fan on a fixed manual speed to ensure continuous airflow.
---
Day 12–13: Nutrient Stability & Canopy Width
PPM was drifting too low (440–480), so I learned to make a concentrate (2g A + 2g B in 1L RO water) for daily top-ups. This gave me precise control without full reservoir changes.
Plant PPM pH
Plant 1 509 5.91
Plant 2 519 5.94
Canopy width is now ~45 cm per plant, height 30–33 cm. Roots are thick, white, and starting to fill the buckets.
---
Week 2 Summary Table
Metric Start End
PPM ~570 509 / 519
pH 5.8–6.0 5.91 / 5.94
Canopy width ~30 cm ~45 cm
Plant height 27–30 cm 30–33 cm
Light setup 1 light at 50% 2 lights at 75%
Controller status Intermittent failures Warranty claim filed
---
What's Next (Week 3)
· Final 2 weeks of veg: Let the LST branches stretch and fill the canopy. Target width: 60–70 cm per plant.
· Full reservoir change tomorrow (Sunday): Fresh Sensi Grow A+B, CalMag, Voodoo Juice. PPM target 550.
· Controller workaround: Run fan on fixed manual speed until replacement arrives.
· Flip to flower: Approx. 30 May — this will be the last veg diary entry before bloom nutrients.
---
Closing Thought for Week 2
"The plants forgave the controller's glitches. The roots kept growing. The canopy kept spreading. And I learned that the best automation tool in the tent is not a chip — it's a grower who pays attention."
— Master Verdant


Likes
7
Share
@Mr_nugs_lover_David
Follow
Really happy with the performance of my 2 Haze berry plants by Royal Queen Seeds, both phenos have the exact same fragrance I love in this strain, very fruity and sweet smell it makes you forget about everything, you feel like you're in the Caribbean just enjoying a nice fruit salad, I cannot wait to see how this ladies will get on the 4th week of flower! Stay with me to see how this 2 girls keep developing their beautiful flowers! 💚❤️💛
Likes
9
Share
@eldruida_lamota
Follow
Que hay familia, estamos de nuevo actualizando, y es que traigo la sexta semana de floración de las Kritical de la web de GrowBarato.
En este diario dejare más imágenes ya que tengo algún ejemplar más.
Van progresando adecuadamente todas sus flores, esta semana añadiré bien de ExplotaCogollos de Agrobeta.
Ya os comenté que estamos en la recta final y una vez solucionadas las carencias solo les queda engordar y compactar bien.
Agrobeta:
https://www.agrobeta.com/agrobetatiendaonline/36-abonos-canamo
Mars hydro:
Code discount: EL420
https://www.mars-hydro.com/
Las maximas de temperatura no superan los 25 grados y las mínimas no bajan 20, así que no me puedo quejar.
Los niveles de humedad también son los correctos van entre 50%/65% de humedad relativa.
Por supuesto el Ph lo estamos dejando alrededor de 6.
Hasta aquí es todo, buenos humos 💨💨💨.

Likes
25
Share
@MadeInGermany
Follow
Day 5
since time change
to 12/12.
Hey everyone ☺️.
Finally the time has come :-)
The lady moved into the flower tent on January 6th, 2021 😁.
The day before, of course, a cutting was taken 👍.
In the flowering tent, the distance between the plant and the lamp is 40 cm so that she can get used to the strength of the lamp. After 3-5 days I go down to 30 cm.
This week it was watered twice with 1 l per plant. GHSC enhancers were added to one wash :-).
Flower fertilizer will only be added in 12-16 days as soon as the first blossoms are there :-).
Otherwise the tent was completely cleaned and the humidifier refilled. For the next few days I have filled fresh osmosis water in canisters again :-).
Next week I will remove the bottom shoots so that the energy doesn't end up going into small popcorn buds 😉.
There is nothing more to report this week and I wish you all a lot of fun with the update 😀.
Stay healthy and let it grow 🙏🏻🍀
You can buy this Strain at :
www.Zamnesia.com
Type:
Purple Punch
☝️🏼
Genetics:
Granddaddy Purple x Larry OG
👍
Vega lamp:
2 x Todogrow Led
Quantum Board 100 W
💡
Bloom Lamp :
2 x Todogrow Led
Cxb 3590 COB 3500 K 205W
💡💡☝️🏼
Soil :
Canna Coco Professional +
☝️🏼
Fertilizer:
Green House Powder Feeding
☝️🏼🌱
Water:
Osmosis water mixed with normal water (24 hours stale that the chlorine evaporates) to 0.2 EC. Add Cal / Mag to 0.4 Ec Ph with Organic Ph - to 5.5 - 5.8 .
Likes
16
Share
@btcywtsitw
Follow
These were quite an experience to grow. My second grow ever and they are great. I loved the way they flowered and how they responded to topping. They absolutely loved it. I would 10/10 grow again. Strong genetics and a very strong high.


Likes
10
Share
@terpamine
Follow
Very happy overall with this week. Banana Daddy R1 transitioning to veg very quickly! Banana Daddy looking very healthy!


Likes
36
Share
@Themythicalchristine
Follow
These plants are tremendous!
they smell incredible, cheesy and fruity, very blueberry and purple kush like.
These plants have packed on some good weight this week, they look great as we move closer to harvest time.
This week we watered with fresh water and a molasses water mix.
We are allowing these to munch up the last feed worth of nutrients, and slowly flushing them to prepare for harvest in a few weeks time.
Very pleased with these three 🥊


