Likes
Comments
Share
@UDUDUDUDU
Follow
šŸ§ ā„ļøšŸ’ŽšŸ’ AdaMšŸ’ŽšŸŗšŸŗšŸŗšŸŗ
Likes
1
Share
@OS_Farmz
Follow
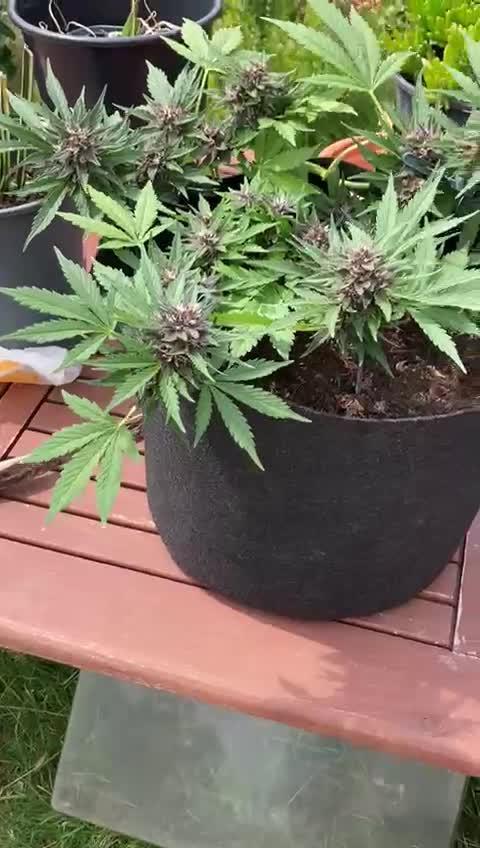
3rd week of flowering goes quite well. The big baby stretched out and almost touched the led. Since she's around 135 cm long now i had to bent the top brannches under the scrog. Everything else is going well.
Likes
2
Share
@QoverQ
Follow
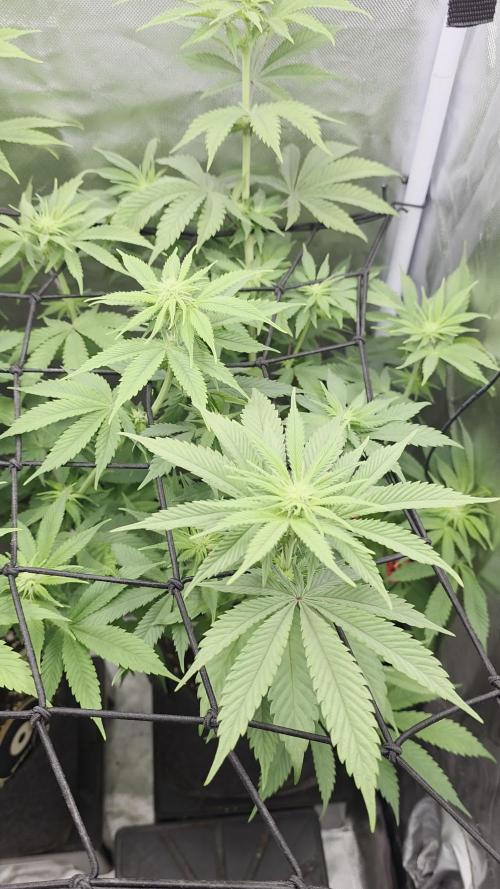
Hey guys :) The girls got topped once now, they still recovering from the light burn i did, Trying to ā€šLSTā€˜ šŸ˜„ Started giving nutes in a Half dosage at week 3 !
Likes
18
Share
Praying my girls are not all in different stages of dying 😭More to follow... 1/9/21 These girls were finally dry enough to water I weighed each post before and after watering. I am going to try weighing the pots and water when the weight is about half as dry.as I normally do. So Maybe I should water @ 3lbs heavier... somewhere between 8-9lbs 1/10 I changed the light cycle so that my "night time" is in the middle of the day for heating reason, so this morning when I woke up, after being under the lights for 18 hours I actually had growth on two plants. Gorilla Glue and my photo plant Chocoloope that is growing with the autos. They were both under the VIPARSPECTRA 2020 Pro Series P1000 LED Grow Light. The other two plants were under BLOOMSPECT Double Chips Series 1500W LED Grow Light Full Spectrum. I wish I hadn't made so many mistakes with this grow because I know there is no way to know if it is the light that made them grow better than the other two or they were just a little healthier. I don't think so because Gorilla Glue is the worst plant and she actually grew but who knows. Anyways I switched the plants around so they are under the opposite light when their day time starts and we will just have to see. PE Length 8' Height 7' Width 8.5" Dry weight 6lb 4oz Wet weight 13lb 11oz GG Length 8" Height 7" Width 8.5" Dry weight 5lb 14 oz- Wet weight 11lb NB Length 11" Height 10 " Width 10.5" Dry weight 6lb 9 oz Wet weight 12lb Choco Length " Height Width " Dry weight Wet weight 1/11/21 DAY 46S HELP if ANYONE SEES THIS .... last night I decided not to switch the plants around after all, but I did rearrange the tent because I had a plug running through door and I am still struggling to regulate the humidity and temp. I thought I still had good air circulation but apparently I did not and the plants are not happy. Gorilla Glue is not going to make it. She turned real dark green after watering her on Saturday, she had a small amount of growth Sunday but now all the leaves are laying down. I don't know if I should use Sledge hammer but after flushing a week ago letting her dry for a week and then watering Saturday I don't know if I flushed her with sledge hammer if that would finish her off or perk her back up. I weighed her and she was 4 pounds lighter than when I watered her on Saturday and still 2+ pounds lighter than when she is the driest. Some background on how I tried to kill my plants... 😭 I started this grow by watching a zillion videos with my key take away being 1-don't over water 2- don't transplant autos 3- don't feed full strength. I took it seriously, so my tiny little sprouts were put into 3 gallon pots of Fox Farm happy frog potting soil. (didn't realize this already had enough nutrients to last several weeks so I started nutrients in the 2nd week of Veg) I use Fox farm nutrients and follow their soil feeding schedule. I bought the Dirty Dozen starter kits and it did not have 2 products in that the feeding schedule but since they were not in the kit I assumed they must not be too important. They were.... Wholly Mackerel & Marine Cuisine fertilizer. I used a turkey baster to slowly drip a couple ounces of water around each plant I water just like in this picture. https://prnt.sc/wjq0gi for over a month. I didn't realize by watering like this for a month that I was making the nutrients build up just below the the root line each watering. I waited to water till the plants were very dry. Now looking back Way way to dry before watering. I am sure that is why they were not growing. I was only giving them enough to stay alive not thrive. So a little more back info Day 14 I watered the plants with plan water Day 23 after not having to water the plants for 9 days I watered them, 1/4 gallon each with week 2 schedule, with the addition of calmag+(2-0-0) @ 50% strength Day 27 they were light and needed to be watered and they had grown a little. so I gave them nutrients same as above Day 30 The plants were not quit as dry as usual but I was beginning to think I was underwatering them so I gave them 1/2 gallon of THIS IS WERE IT ALL GOES WRONG...(Actually after reviewing my grow journal just now my problems started Day 1 and was showing signs I just didn't know it and I still am not sure how to fix any of it Almost makes me think I should scrap it all and start over. These poor plants will be lucky to produce anything) Someone could seriously use my grow journal as a "everything not to do" guide. Day 35 since the plants were finally big enough to soak the pots fully. I also decided since they had used 1/2 gallon water in 3 days and they grew a ton I upped the nutrients to full strength and the calmag plus as well. This was the first time I had any runoff sadly I let the plants sit in the runoff and reabsorbed all the runoff. Day 38 Flushed each plant with with 5 gallons of tap water that had a PH of 6.4 & water temp was 62 degrees. My run off started at 4300ppm with a ph of 6.2. The PH was consistent in every plants runoff and all of them had off the chart PPMs. I brought NB down to 250ppm. Gorilla Glue and Pineapple express I brought the runoff down to 450. For some reason I decided that since my plants were probably in shock from no water and nutrients to more water and a whole lot of nutrients and I figured flushing them would reset the soil and I reasoned they would need food after not getting any from being in shock so I gave them each a half strength nutrients. I waited a full week then posted this question. Day 45 I have each plant plain water and checked the run off. The Gorilla Glue had a run off of 584ppm with a ph of 6.47 , The northern lights X had 750ppm and 6.38ph pineapple express had 1170ppm runoff so I ran a less less than an extra half gallon of water and that brought the ppm down to 706. PH was 6.3. I have a photo period that I didn't add to this dairy but has been with these plants and it is starting to show the same signs as the others they are just all in different phases of whatever I did to almost kill them. I started the next week on Friday so I will be adding pictures and a couple videos I took from today in my grow dairy tonight. I don't know what to do next.
Likes
20
Share
Not much to say this week. Still feeding the same amount. Looks like it might be starting to foxtail. It's really a bummer there is no purple yet, I grabbed this because I wanted a modern purple strain!
Likes
2
Share
A little longer than a week update here. Lots to talk about since the last time. I increased nutrients because they are full on flowering now (505 ppm total). I had to remove lower foliage and thin them out to get air flow through. Water intake has definitely increased. Overall they look great, the short one is bushing out nicely, the other has stretched way more.
Likes
11
Share
December 16: Seeds places into rapid rooters for germination. December 21: Germinated seed just starting to push plug out of rapid rooter. December 22: Planted in seedling pot. December 23: Seedling having issues shedding seed. December 24: Removed shell and casing, seedling showing signs of recovery.
Likes
3
Share
Likes
21
Share
@Chubbs
Follow
420 Fastbuds Week 3 Amnesia Zkittlez Auto What up grow Fam. Time for our weekly update on these wonderful ladies. One has started to really take off upward as the other seems to be stacking up really tight. Seeing g a couple rust spots so keeping an eye incase I have to add a little CalMag to the feeding. Seeing what looks like pistols forming so preflower I'm going to guess will be happening very soon. Happy Growing
Likes
12
Share
@Lazuli
Follow
Shes putting on some serious weight The smell is insane its one of my favorites Very candy like, almost rainbow candy not a single whif of earthyness or lemons just pure candy I water her now twice ever 12 hours because of the 25celcius now, and soon 33. The EC goes up a lot in summer always, so more waterings or even just pure rainwater to drop it lower
Likes
16
Share
@GYOweed
Follow
It's looking like a nice cannabis plant. Surprisingly not very loud yet.
Likes
4
Share
@Ensign420
Follow
|»» LOG DISCLAIMER: Not intended as a grow guide. Grow log entries are usually posted 3 weeks later and are for my learning reference. ««| Introduction - Week 16 Summary - Ensign's log, stardate 17547.8, Wow what a great week in the garden! By the end of the week, the main tent has pretty much doubled in size! Upgraded the scrog frame and now have a second layer of netting about 14in above the original netting which is already filling in and looking incredible! The tent’s floor slightly flooded, but fixed it. Also trying Stash Blend for the first time! As for the veg tent. To preserve the genetics, started the mother plant cycling process and took more clone cuttings (which were rooting in Coco Coins by the end of the week). To make more room, also bonsaied all mother plants. The stretch is starting to slowing down and next week begins the first week of bloom! Ca-Caw! Let’s go! Onwards Ensign! [START OF WEEK 16] ========================================================== ---------- [ 4x4 MAIN TENT ] ---------- Heady OG BX1 #1 [Round4 ~Wk9] - WEEK 16 - Pre-Bloom [Stretch Wk2] TKO [Round2 ~Wk14] - WEEK 16 - Pre-Bloom [Stretch Wk2] ----------- [ 3x3 VEG TENT ] ------------ Garlic Budder OG#1 - WEEK 09 - Full Veg Garlic Budder OG#2 - WEEK 09 - Full Veg Gorilla Goat #1 - WEEK 09 - Full Veg Gorilla Goat #2 - WEEK 09 - Full Veg 08/04/25 → 08/10/25 This Week's Estimated Goals ---------------------------------------------------------------------------------------------- DLI: ~13 mol/m²/d PPFD: ~300 μmol/m²/s VPD: ~1.0 kPa This Week's Meter Readings & Averages ---------------------------------------------------------------------------------------------- Light On/Off: 19:00 - 07:00 | Wattage: ~326.5W [LV04] Distance From Canopy: ~31ā€, 27ā€ DLI: ~15.60 mol/m²/d PPFD: ~361 μmol/m²/s VPD: ~0.69 kPa Soil %: [40.7, 47.0, 38.1, 56.6, 41.9, 42.7, 42.9, 43.9] ========================================================== Day 01 - Monday - 08/04/25 - Total Days: 113 ----------------------------------- Daily Averages ~[+01:00] - Temps: 83.6°F [28.7°C] - Humidity: 83.6% - VPD: 0.66 kPa - Soil %: [49, 37, 45, 60, 44, 43, 43, 45] ----------------------------------- - [+00:14]: Night check on the 4x4 tent. --- Holy Cannoli! Wow! These girls are in full stretch! --- Both cultivars have grown beyond the netting and have stretched beyond the (green) Vivosun’s CFM bars! Heady is a bit low on the left, but the canopy is pretty even and perky! --- Ca-Caw! Let’s go cuddies! --- Heady OG (BX1 #1) is starting off shorter than TKO, but am pretty confident that she’ll catch up. --- TKO is looking incredibly healthy! She’s the larger plant, but also in the smaller 20-gallon pot. Well she is 5 weeks older than Heady OG so makes sense. Regardless of the growth difference, absolutely stoked for this grow cycle!! - [+12:19]: Checked the Ecowitt soil moisture sensor data: ------------------ [ 4x4 MAIN TENT ] --------------- ------ 46% - [CH01 FT Ā» G30 - Heady OG BX1 #1] ------ 37% - [CH02 FB Ā» G30 - Heady OG BX1 #1] ------ 48% - [CH03 BT Ā» G20 - TKO] ------ 62% - [CH04 BB Ā» G20 - TKO] ------------------ [ 3x3 VEG TENT ] ---------------- ------ 41% - [CH05 BL Ā» GR7 - Garlic Budder OG#1] ------ 44% - [CH06 BR Ā» GR7 - Garlic Budder OG#2] ------ 40% - [CH07 FL Ā» GR7 - Gorilla Goat #1] ------ 50% - [CH08 FR Ā» GR7 - Gorilla Goat #2] --------- Veg: 38% - 45% | Flower: 45% - 55% --------- General: 30% [Dry] Ā«| 45 - 60% [Moist] |Ā» 70% [Wet] - [+00:14]: Checked the 3x3 veg tent. --- Ooo yea! The veg garden is looking incredible! --- All mamma plants are looking bushed out and beautiful! - [+00:37]: Super-cropped and bend the canopy down a bit. --- Lowered the canopy down a few inches. Really need to defoliate soon. The top growth is bushing out and getting really thick! --- Clones are also looking incredible and both are rotting along beautifully! Heady is going to make it and she is looking great! - [+00:38]: The cuttings are looking good for the most part. One is looking pretty droopy (damnit Ensign). --- Misted the cups with RO water. --- Think the RH may not be consistent enough and the cups might be drying out too quickly. - [+00:41]: Checked the humidifiers. --- Tanks are still full and no leaks found. --- Another day done! --- Okay! Since growth is raging upwards, decided to upgrade the scrog frame and plan to add a second layer tomorrow. --- Ahh yea! This grow is turning out to be an epic one! Day 02 - Tuesday - 08/05/25 - Total Days: 114 ----------------------------------- Daily Averages ~[+01:00] - Temps: 83.3°F [28.5°C] - Humidity: 83.3% - VPD: 0.67 kPa - Soil %: [49, 38, 47, 62, 41, 43, 43, 45] ----------------------------------- - [16:25]: Evening check on the 3x3 veg tent. --- Ooo yea! The clones are looking incredible! --- The cuttings still seem to be struggling. --- Hmm. - [16:27]: Misted the cups with RO water. --- Made a slight modification and wrapped the top of both cups with plastic wrap. --- Cut a slit from the middle to the edge. Misted the cup through the slit with RO water (2-3 sprays each). --- Then gently slipped the cups over each cutting. --- Also slightly misted each Coco Coin with RO water. --- Great! This should hopefully make a better seal and will keep the RH higher. I think. --- Anyways! --- The mother garden is vegging along beautifully! --- Growth is getting really bushy and need to do a heavy defoliation soon. - [16:56]: Checked the Ecowitt soil moisture sensor data: ------------------ [ 4x4 MAIN TENT ] --------------- ------ 48% - [CH01 FT Ā» G30 - Heady OG BX1 #1] ------ 36% - [CH02 FB Ā» G30 - Heady OG BX1 #1] ------ 47% - [CH03 BT Ā» G20 - TKO] ------ 61% - [CH04 BB Ā» G20 - TKO] ------------------ [ 3x3 VEG TENT ] ---------------- ------ 41% - [CH05 BL Ā» GR7 - Garlic Budder OG#1] ------ 43% - [CH06 BR Ā» GR7 - Garlic Budder OG#2] ------ 41% - [CH07 FL Ā» GR7 - Gorilla Goat #1] ------ 49% - [CH08 FR Ā» GR7 - Gorilla Goat #2] --------- Veg: 38% - 45% | Flower: 45% - 55% --------- General: 30% [Dry] Ā«| 45 - 60% [Moist] |Ā» 70% [Wet] - [19:03]: Night check on the 4x4 tent. --- Ooo yea! Wow these girls are stretching! --- Growth has clearly grown since the last checkup and getting taller! --- Ca-Caw! Let’s go ladies! - [19:14]: Wait. Uh-Oh! --- The tent seemed to have flooded slightly.. DAMNIT ENSIGN! ------ [Ā» A FEW HOURS LATER.. Ā«] --- Okay! Think I figured out why the tent flooded and how to fix it. --- The main reason was the new soil sensor which was probably not in proper contact with the soil. --- Fixed this by re-seating the unit. Also adjusted the drip ring a bit. --- Also poured about a cup of water straight onto new sensor. This should make the surrounding soil wetter and will hopefully fix the dry pocket. I think. --- For added redundancy, added additional trigger conditions to both Ecowitt WittFlows (TKO and Heady OG). - [23:45]: Adjusted the watering triggers for the auto-watering system for TKO. --- Changed the ON trigger from: --------- When CH3 soil moisture is under 45% ------------ Updated to: --------------- When CH3 soil moisture is UNDER 45% --------------- AND When CH4 soil moisture is UNDER 50% --- Changed the OFF trigger from: --------- When CH3 soil moisture is OVER 50% ------------ Updated to: --------------- When CH3 soil moisture is OVER 50% --------------- OR When CH3 soil moisture is OVER 50% --- Applied similar watering triggers for Heady OG. --- Changed the ON trigger from: --------- When CH1 soil moisture is under 45% ------------ Updated to: --------------- When CH1 soil moisture is UNDER 45% --------------- AND When CH2 soil moisture is UNDER 50% --- Changed the OFF trigger from: --------- When CH1 soil moisture is OVER 50% ------------ Updated to: --------------- When CH1 soil moisture is OVER 50% --------------- OR When CH2 soil moisture is OVER 50% --- Will check back daily to make sure the flooding has completely stopped. --- Well that pushed everything back a bit. --- Okay! Anyways, - [23:57]: Time to both build and install the second frame and netting. Let’s go! --- Got four 1in PVC corner fittings (local Lowes) along with four 1in PVC pipes (10ft long each). Also got more self-tapping screws. --- For the netting, using mason string. Usually use the braided nylon, but the twisted variant is a lot cheaper. --- To build the frame, I cut the 1in PVC pipes down to two different lengths: ------ [Ā» x2 @ 42.5in Ā«] – Front / Back ------ [Ā» x2 @ 44in Ā«] – Left / Right --- This makes the frame slightly thinner from left to right. --- Saving the extra piping for future projects. - [+04:04]: Okay! The new frame is built and looking sturdy! --- Did not use any glue and simply dry fitted each component. --- For easier fitting, smoothed the ends of each pipe with sand paper. --- Also marked each pipe to indicate the front, back, left, and right sides. --- For the fittings, used corner fittings and have open slot facing downwards. This way I can add the legs. --- After the frame was built, marked and drilled screws about 3in apart (self-tapping). Made sure to mirror the screw spacing on the opposite side. --- Time to weave the netting! - [+04:06]: Using some mason string, --- Started at one corner and strung all the horizontal lines. --- Double-wrapped each screw. --- After the horizontal lines were strung, continued and wrapped the vertical lines. - [+04:44]: Now that the frame is built and the netting fully weaved, time to install the frame! --- First the support poles. Cut and sanded more 1in PVC piping. ------ [Ā» x4 @ 14in Ā«] – Vertical Support - [17:56]: Installed the back support poles before the front ones. --- Temporarily removed the front CFM bar and had to raise the fan up a bit (was not easy, but got it done). --- Once the support poles were installed, gently set the new frame on top. - [+06:07]: Done and wow she’s a beauty! --- Well that took a bit longer than anticipated (also the flooding did not help), but glad the frame fit perfectly and the netting looks great! - [+06:12]: Checked the humidifiers. --- Tanks are still full and no leaks found. --- Ooo yea! What a day! Day 03 - Wednesday - 08/06/25 - Total Days: 115 ----------------------------------- Daily Averages ~[+01:00] - Temps: 83.9°F [28.8°C] - Humidity: 83.1% - VPD: 0.69 kPa - Soil %: [42, 54, 43, 60, 42, 43, 43, 45] ----------------------------------- - [+00:17]: Night check on the 4x4 tent. --- Ca-Caw!! Let’s go cuddies! Growth is looking beautiful and green! --- The second layer of scrog netting was not the easiest to install, but wow the garden is looking incredible! --- Both Heady OG and TKO are still stretching upwards with new nodes branching out everywhere! --- The canopy hasn’t reached the top net yet but hoping a few will make it. --- Regardless, absolutely hyped for this flower cycle! - [+00:23]: Checked the 3x3 veg tent. --- Looking beautiful in the veg garden! --- Wow the mothers have bushed out and have reached the grow light! - [+00:32]: Super-cropped and lowered the canopy --- The canopy is getting really thick! Plan to do a pretty heavy defoliation tomorrow. --- Clones look great and stoked that both Heady OG and TKO seem to be rooting along in the cups. Need to check the weights. Let’s go! - [+00:37]: Here are the starting initial watering ranges: ------ Heady OG BX1 Ā» 261.4g → 301.2g ------ TKO Ā» 240.9g → 301.4g --------- General Solo Range: [Dry] Ā«| [Initial Cup Weight] + ~55-100g |Ā» [Wet] --- All cups were last watered 5 days ago. - [+00:37]: Took the starting weight of both clones before watering, ------ Heady OG BX1 weighed 250.4g ------ TKO weighed 240.9g --- Oops! Probably should have watered earlier, sorry ladies! --- Stoked that Heady OG is clearly going to make it! Also good to know the soil dryback can be at least 10g from the initial pre-saturated weight. --- Anyways! --- While on a scale, --- Gently misted the straw mulch of both cups with RO water. --- Focused on the straw and sprayed as evenly as possible. --- Misted 10-20 sprays. Waited a moment, then misted again. --- Made sure to reference the watering weights. --- Repeated this process for both cups. --- There was no runoff. - [+01:08]: Took the saturated weight of both clones after watering, ------ Heady OG BX1 Ā» 335.5g ------ TKO Ā» 345.1g --- Marked the final wet weight on the back of each cup. Also marked the watering date on the front. --- Placed both phenos back into the tent. --- Cuttings are looking better! --- Glad that the slight modification to the cups helped to keep the moisture in (covered both with plastic wrap). --- Gently removed both cups and re-misted each with RO water (~2 mists). --- Carefully placed the cups back onto the cuttings. - [+01:21]: Checked the Ecowitt soil moisture sensor data: ------------------ [ 4x4 MAIN TENT ] --------------- ------ 34% - [CH01 FT Ā» G30 - Heady OG BX1 #1] ------ 52% - [CH02 FB Ā» G30 - Heady OG BX1 #1] ------ 39% - [CH03 BT Ā» G20 - TKO] ------ 58% - [CH04 BB Ā» G20 - TKO] ------------------ [ 3x3 VEG TENT ] ---------------- ------ 44% - [CH05 BL Ā» GR7 - Garlic Budder OG#1] ------ 47% - [CH06 BR Ā» GR7 - Garlic Budder OG#2] ------ 41% - [CH07 FL Ā» GR7 - Gorilla Goat #1] ------ 46% - [CH08 FR Ā» GR7 - Gorilla Goat #2] --------- Veg: 38% - 45% | Flower: 45% - 55% --------- General: 30% [Dry] Ā«| 45 - 60% [Moist] |Ā» 70% [Wet] - [+01:23]: Checked the humidifiers. --- Tanks are still full and no leaks found. Day 04 - Thursday - 08/07/25 - Total Days: 116 ----------------------------------- Daily Averages ~[+01:00] - Temps: 84.9°F [29.4°C] - Humidity: 82.0% - VPD: 0.75 kPa - Soil %: [32, 51, 37, 57, 42, 43, 43, 45] ----------------------------------- - [09:42]: Quickly checked on the propagation dome (in the 3x3 veg tent). --- Nice! Clones are both looking great! --- Heady OG is clearly recovering and looking better! --- Wow! TKO is looking incredibly healthy! Top growth has perky leaves with a few nodal growth sites starting to stretch. As far as cloning, she has been healthiest with no issues the entire way! --- Both Heady OG cuttings are looking beautiful and should be rooting. Plan to check for roots in a few days. --- Plan to do a pretty heave defoliation today. --- Also going to start the mother plant cloning process. - [17:12]: Evening check on the 3x3 veg tent. --- Mother garden is looking beautiful and the canopy is bushy with growth! --- Both Heady OG and TKO clones also look green and healthy! --- My main focus for today is the veg garden and the preservation of the genetics . --- Lots of work to do and time to also start the mother cycling process! --- This time, going to do a pretty heavy defoliation! --- Going to pretty much bonsai each mother while taking a few clones to preserve the genetics. --- Let’s go Ensign! - [17:58]: Filled a measuring cup with 1.5 cups of RO water. ------ Added 1/8tsp of Horticultural Aloe --- Mixed the solution and poured it straight into a clear solo cup. --- Repeated this process until 4 cups were filled. - [18:05]: Also marked each cup with the corresponding mother plant name. --- Time to defoliate and take the clone cuttings! - [18:07]: Using a pair of trimmers (AC Infinity), --- Bonsaied each mother plant. Removed over 75% of overall growth leaving several branches and nodes. - [19:44]: Done and wow what a difference! --- Pretty much removed all growth leaving a few nodal growth sites to heal. --- This is my first time going this heavy and am hoping that they recover. --- If this bonsai defoliation heals up with healthy growth, this can also be an alternative to a full plant cycling. --- Anyways! - [19:46]: To preserve the genetics, made sure to cut clone cuttings from each mother plant. --- To ensure successful rooting, took several cuttings. --- Made sure to clean each cutting by trimming most of the branches off leaving the top one or two nodes. --- Did not cut any leaf fingers and made sure to cut the tip of the stalk (about 45°) before placing into the cup of aloe solution. - [19:55]: Placed the fresh cuttings into the 3x3 veg tent. --- Have each cup resting on top of the corresponding mother plant. --- Okay! Let the two-day soak begin! - [20:00]: Mulched the trimmings in a paper bag. --- Since the bottom of the paper bags tend to decompose, have the bag in a used BuildASoil soil bag which should not decompose (these are meant for soil). --- Also added a bit of Kashi Blend and worm castings to the bottom of the bag. --- Back to the Heady OG cuttings! --- Gently removed the cups and misted the inside of each with RO water (~2 mists each). - [20:02]: Carefully placed the new cups onto the cuttings. --- Great! Plan to check for roots soon. - [20:08]: Checked the Ecowitt soil moisture sensor data: ------------------ [ 4x4 MAIN TENT ] --------------- ------ 31% - [CH01 FT Ā» G30 - Heady OG BX1 #1] ------ 51% - [CH02 FB Ā» G30 - Heady OG BX1 #1] ------ 35% - [CH03 BT Ā» G20 - TKO] ------ 56% - [CH04 BB Ā» G20 - TKO] ------------------ [ 3x3 VEG TENT ] ---------------- ------ 41% - [CH05 BL Ā» GR7 - Garlic Budder OG#1] ------ 40% - [CH06 BR Ā» GR7 - Garlic Budder OG#2] ------ 42% - [CH07 FL Ā» GR7 - Gorilla Goat #1] ------ 44% - [CH08 FR Ā» GR7 - Gorilla Goat #2] --------- Veg: 38% - 45% | Flower: 45% - 55% --------- General: 30% [Dry] Ā«| 45 - 60% [Moist] |Ā» 70% [Wet] - [20:12]: Checked the 4x4 tent. --- Ca-Caw! Ah yea! The garden is looking incredible and wow growth is raging! --- The tallest growth is just barely under the netting! --- Not much to do in the main tent now but to wait until the stretch slows down. --- Time to relax and let the grass grow! Let’s go! - [21:34]: Have an extra stainless steel rack and thought of a better way to hold the solo cups in the veg tent. --- The cups are balancing on the edge of the pots am concerned that they may tip over. --- Carefully too each cup out of the tent. - [21:36]: Placed the rack upside-down in the middle of the tent. --- Have the rack positioned on top of all 4 pots just above the center floor fan. - [21:39]: Gently placed each cutting cup onto the rack. --- The floor fan can easily still blow through the grid of the rack. Great! --- This should be way more stable while still allowing decent airflow. - [21:40]: Checked the humidifiers. --- Tanks are still full and no leaks found. Day 05 - Friday - 08/08/25 - Total Days: 117 ----------------------------------- Daily Averages ~[+01:00] - Temps: 84.5°F [29.2°C] - Humidity: 82.5% - VPD: 0.72 kPa - Soil %: [32, 50, 30, 53, 40, 42, 41, 42] ----------------------------------- - [23:02]: Night check on the 4x4 tent. --- Ahh yea! The garden is thriving! --- Both Heady OG and TKO are still stretching upwards and the canopy is getting dense! --- Wow! TKO has reached the top netting! Heady OG is just under the top netting. --- Ca-Caw! Let’s go ladies! - [23:11]: Checked the 3x3 veg tent. --- The veg garden is looking great! --- The bonsaied mother plants are still recovering from the heavy defoliation. But growth is looking a lot better than I would expect from such a large biomass reduction. Nice! --- Cuttings are looking great as well! - [23:13]: Time to swap the aloe water out! --- Replaced each solo cup with a clean one filled with fresh RO water (1.5cups). --- Plan to start using the propagation dome soon! --- Going to let these soak for another day before transplanting into Coco Coins for rooting. - [+02:05]: Quickly checked on the auto-watering system. --- System is still charged and no leaks or kinks found in the tubing. - [+02:08]: Checked the humidifiers. --- Tanks are still full and no leaks found. Day 06 - Saturday - 08/09/25 - Total Days: 118 ----------------------------------- Daily Averages ~[+01:00] - Temps: 83.4°F [28.6°C] - Humidity: 83.3% - VPD: 0.67 kPa - Soil %: [32, 50, 35, 52, 41, 40, 41, 41] ----------------------------------- - [07:55]: Quickly checked on the 3x3 veg tent. --- Looking great in the veg garden! --- Mothers are all recovering nicely from the bonsai defoliation. Great! --- Cuttings also look healthy and ready for transplanting! --- Both Heady OG and TKO clones are looking perky and getting bigger! --- Heady OG cuttings also looking green and rooting! I think. Will check for roots in a few days. - [20:58]: Night check on the 4x4 tent. --- Ca-Caw! This is why we grow! Wow! --- Also hyped that the canopy is getting dense with nodal growth! --- TKO has more tops stretching through the top scrog netting! Heady OG has not reached the net yet. --- Stoked the 14in space in between the netting is filling quite nicely and just going to let everything grow! - [21:01]: Checked the Ecowitt soil moisture sensor data: ------------------ [ 4x4 MAIN TENT ] --------------- ------ 29% - [CH01 FT Ā» G30 - Heady OG BX1 #1] ------ 50% - [CH02 FB Ā» G30 - Heady OG BX1 #1] ------ 34% - [CH03 BT Ā» G20 - TKO] ------ 53% - [CH04 BB Ā» G20 - TKO] ------------------ [ 3x3 VEG TENT ] ---------------- ------ 40% - [CH05 BL Ā» GR7 - Garlic Budder OG#1] ------ 40% - [CH06 BR Ā» GR7 - Garlic Budder OG#2] ------ 40% - [CH07 FL Ā» GR7 - Gorilla Goat #1] ------ 40% - [CH08 FR Ā» GR7 - Gorilla Goat #2] --------- Veg: 38% - 45% | Flower: 45% - 55% --------- General: 30% [Dry] Ā«| 45 - 60% [Moist] |Ā» 70% [Wet] - [21:05]: Checked the 3x3 veg tent. --- Growth is still recovering quite nicely! This may be my solution to maintain mother plants longer between cycles. --- Mother clone cuttings are also looking healthy and ready to be rooted! --- Was originally planning on rooting all of the cuttings, but since the mother plants are recovering better than anticipated, just going to plant one of each pheno. --- Let’s go! - [21:23]: Filled a measuring cup with 1.5 cups of RO water. ------ Added a pinch of Quillaja Saponaria Extract [60] ------ Added 1/64tsp of Horticultural Aloe ------ Added 1/32tsp of Mycrobe Complete --- Mixed the solution thoroughly. - [21:26]: Dropped 4 Coco Coins into the measuring cup. --- The coins immediately started to expand. ------ [Ā» ~10 MINUTES LATER Ā«] --- Placed each fully saturated Coco Coin into half-cut solo cups. - [21:41]: Using a squeeze bottle filled with Clonex, --- Gently filled each pre-made hole with Clonex rooting gel. - [21:43]: Time to plant the cuttings! --- Using a pair of clean trimmers, made a final 45° cut. --- Also stripped and scrapped some of the stem’s outer membrane. --- To help with planting, gave each Coco Coin a squeeze to loosen the coco. --- Made sure to insert each stem straight and snug with the tip about a 1/4 inch from the bottom of the Coco Coin. --- Also secured the stem by pinching and pressing in the top of the Coco Coin. --- Once each cutting was planted, - [22:11]: Placed each pheno into the propagation dome’s tray. --- Made sure to keep each clone properly tagged. --- Added 1/4 cup of RO water to the bottom of the tray. --- Placed the side extensions onto the tray. - [22:15]: Misted the top of the propagation dome before covering the cuttings. --- Vents are fully closed. --- Also lowered the intensity from 5 to 1. --- At the current light intensity (LV1), the PPFD is around 110 μmol/m²/s which gives a DLI of 7.13 mol/m²/d under an 18/6 light cycle --- Will check back daily to cycle the air under the dome. - [22:17]: Placed the extra mother cuttings back on the rack. Will try to keep these cuttings alive until the planted ones root. --- Will need to change the water every day or two. --- Also need to water the Heady OG and TKO clones. --- Ca-Caw! Let’s go! - [11:33]: Here are the starting initial watering ranges: ------ Heady OG BX1 Ā» 261.4g → 301.2g ------ TKO Ā» 240.9g → 301.4g --------- General Solo Range: [Dry] Ā«| [Initial Cup Weight] + ~55-100g |Ā» [Wet] --- All cups were last watered 3 days ago. --- Took the starting weight of both clones before watering, ------ Heady OG BX1 weighed 257.0g ------ TKO weighed 259.7g --- While on a scale, --- Gently misted the straw mulch of both cups with RO water. --- Focused on the straw and sprayed as evenly as possible. --- Misted 10-20 sprays. Waited a moment, then misted again. --- Made sure to reference the watering weights. --- Repeated this process for both cups. --- There was no runoff. --- Also defoliated and removed the lowest growth on both clones. - [23:03]: Took the saturated weight of both clones after watering, ------ Heady OG BX1 Ā» 345.3g ------ TKO Ā» 355.4g --- Marked the final wet weight on the back of each cup. Also marked the watering date on the front. --- Placed both phenos back into the tent. Have them now resting on the rack (on drip trays). - [23:14]: Checked the humidifiers. --- Tanks are still full and no leaks found. Day 07 - Sunday - 08/10/25 - Total Days: 119 ----------------------------------- Daily Averages ~[+01:00] - Temps: 83.9°F [28.8°C] - Humidity: 83.6% - VPD: 0.66 kPa - Soil %: [49, 49, 30, 52, 43, 45, 46, 44] ----------------------------------- - [08:02]: Quickly checked on the 3x3 veg tent. --- Ooo yea! Looking great in the veg garden! --- All mothers are still green and recovering. New growth is starting to develop and growth is looking healthy! --- Quickly checked on the propagation dome. --- All clone cuttings are looking green and healthy! - [19:04]: Night check on the 4x4 tent. --- Ca-Caw! Ah yea! Heady OG has reached the top scrog net! --- TKO has several tops above the netting and she is raging with healthy! --- Canopy is also showing more signs of pistil crowning and vertical growth seems to be slowing down. I think. - [19:07]: Checked the Ecowitt soil moisture sensor data: ------------------ [ 4x4 MAIN TENT ] --------------- ------ 48% - [CH01 FT Ā» G30 - Heady OG BX1 #1] ------ 49% - [CH02 FB Ā» G30 - Heady OG BX1 #1] ------ 36% - [CH03 BT Ā» G20 - TKO] ------ 55% - [CH04 BB Ā» G20 - TKO] ------------------ [ 3x3 VEG TENT ] ---------------- ------ 41% - [CH05 BL Ā» GR7 - Garlic Budder OG#1] ------ 43% - [CH06 BR Ā» GR7 - Garlic Budder OG#2] ------ 43% - [CH07 FL Ā» GR7 - Gorilla Goat #1] ------ 43% - [CH08 FR Ā» GR7 - Gorilla Goat #2] --------- Veg: 38% - 45% | Flower: 45% - 55% --------- General: 30% [Dry] Ā«| 45 - 60% [Moist] |Ā» 70% [Wet] - [19:10]: Checked the 3x3 veg tent. --- The veg garden is recovering beautifully! --- Since the stretch seems to be slowing down in the main tent, going to give these ladies a little extra. - [19:17]: Going to feed some Stash Blend for the first time. --- This blend of beneficial microbes and mycorrhizal fungi also includes a bit of silica which should help during the bloom phase. --- Also shout out to Mr. Grow It, Rob (from CLTV), and Pigeons420! Stay lifted! - [19:19]: Filled a pitcher with 16 cups (1gal) of RO water. ------ Added 1/8tsp of Quillaja Saponaria Extract [60] ------ Added 1tsp of Stash Blend --- Mixed the solution before pouring 6 cups straight into a pump sprayer. --- Gave the sprayer a good shake before spraying the entire solution onto Heady OG’s straw mulch. - [19:52]: Repeated this process again for TKO. --- Depending on how growth develops, may start feeding these ladies weekly. --- From personal experience, the veg phase can easily be grown with straight RO water. --- Flower is probably the most important time to feed because there are more roots and the plants are trying to produce more biomass. I think. --- Anyways! - [20:10]: In the veg tent, repeated the watering process for all mothers (1 cup + 1 cup RO each). --- Focused mainly on the straw (2 cups each). - [20:13]: Checked the humidifiers. --- Tanks are still full and no leaks found. --- Wow what a grow week! --- The difference in growth from Monday until now has been incredible! [END OF WEEK 16]
Likes
8
Share
They are no longer teenagers and are women in their prime! The buds harden and thicken and it is a joy to watch the changes day by day. Now we start observing the trichomes and wait for the optimal day D, hour H.
Likes
15
Share
@Borberad
Follow
Woche 14 Da die Gute recht spät in die Blüte gewechselt ist, wird sie wohl noch ein paar Tage brauchen. Optisch sieht sie die durch die langen Stempel und das dichte Blattwerk der Sugerleafs sehr wild und struppig aus. Dieser Anschein wird durch das leichte temperaturbedingte Foxtailing noch unterstützt. Aktuell ist sie noch dunkelgrün und die Trichomproduktion ist weiterhin im Gange.
Likes
2
Share
Very hot weather, girls are managing better than I thought. Cleaned up all the girls extra leaves, really needed to get some more airflow through it Cut out 2 small nugs that had a little bit of spiderweb mildew Done nutrients and done instant compost tea
Processing
Likes
50
Share
@MyCloset
Follow
Still week 12 changed to 12/12 on day 90, thought my system is working properly now and nutrient solution seems to be alright now.. maybe it can improve but its fine for now. They are growing ridiculous fast even when its not in perfect conditions, im definitely staying with rdwc the stem of this plant is about 3-4 cm big wich is insane before flower
Likes
17
Share
Gracias al equipo de AnesiaSeeds, Marshydro, XpertNutrients y Trolmaster sin ellos esto no serĆ­a posible. šŸ’šŸ Violet Face: Esta variedad feminizada es como un dream team de la realeza del cannabis, que mezcla la majestuosa Blue Face con las frĆ­as vibraciones de la Frozen Black Cherry. Es como el perfecto dĆ­a de verano: vibraciones soleadas con una brisa fresca. Blue Face aporta esa refinada magia Z, con notas cremosas de naranja y pastel de plĆ”tano que te harĆ”n sentir como si estuvieras en un paraĆ­so tropical. A continuación, Frozen Black Cherry entra en escena con su aspecto escarchado y su aroma a cereza dulce y Ć”cida que es sencillamente adictivo. Sube el volumen porque Violet Face golpea fuerte con niveles de THC que se disparan hasta el 35%. Cada calada es un billete al paraĆ­so, que combina los lujosos aromas de la cereza con una embriagadora mezcla de dulzura y sabor afrutado. Violet Face no es sólo un estilo de vida relajado; tambiĆ©n es una campeona de peso pesado, con rendimientos de 600 g/m² en interior y unos exuberantes 900 - 1200 g por planta en exterior. Esta belleza florece en 8-9 semanas, y estĆ” lista para la cosecha a finales de septiembre. Tanto si la mantienes acogedora en interior como si la extiendes bajo el cielo, Violet Face se extiende con alturas de 80-120 cm en interior y 160-200 cm en exterior. šŸŒ»šŸš€ Consigue aqui tus semillas: šŸ’”TS-3000 + TS-1000: se usaran dos de las lĆ”mparas de la serie TS de Marshydro, para cubrir todas las necesidades de las plantas durante el ciclo de cultivo, uso las dos lĆ”mparas en floracion para llegar a toda la carpa de 1.50 x 1.50 x 1.80. https://marshydro.eu/products/mars-hydro-ts-3000-led-grow-light/ šŸ  : Marshydro 1.50 x 1.50 x 1.80, carpa 100% estanca con ventanas laterales para llegar a todos los lugares durante el grow https://marshydro.eu/products/diy-150x150x200cm-grow-tent-kit šŸŒ¬ļøšŸ’Ø Marshydro 6inch + filtro carbon para evitar olores indeseables. https://marshydro.eu/products/ifresh-smart-6inch-filter-kits/ šŸ’» Trolmaster Tent-X TCS-1 como controlador de luz, optimiza tu cultivo con la Ćŗltima tecnologĆ­a del mercado, desde donde puedes controlar todos los parametros. https://www.trolmaster.com/Products/Details/TCS-1 šŸ£šŸ¦šŸŒ“ Xpert Nutrients es una empresa especializada en la producción y comercialización de fertilizantes lĆ­quidos y tierras, que garantizan excelentes cosechas y un crecimiento activo para sus plantas durante todas las fases de cultivo. Consigue aqui tus Nutrientes: https://xpertnutrients.com/es/shop/ šŸ“† Semana 6: Esta semana ha explotado šŸ’£, los cogollos comienzan a tomar densidad y llenarse de resina, me hubiera gustado aplicar algo mas de nutrientes en la fase vegetativa, la próxima vez serĆ”.