

Likes
42
Share


@Grow420pice
Follow
Es blüht...
09.06.2021
Strawberry Pie ist in die Blütephase eingetreten.
Blackberry auch, knapp dahinter. Hat schwarze, violette Pistolen. Cool!
Forbidden Runtz kommt jetzt langsam in die Blüte. Wächst sehr schön und gut. Temperaturen sind im Moment optimal. Nächste Woche soll es so bleiben... Bin gespannt wie lange es noch dauert.
10.06.2021
Ich werd sie einfach wachsen lassen und nicht trainieren. Ich habe nur die unteren, schwächsten Triebe abgeschnitten und werde sie hin und wieder mal ein wenig entlauben.
Runtz scheint sich sehr gut zu entwickeln.
Strawberry Pie blüht schon. Fühlt sich auch wohl.
Blackberry hat sich erholt und sieht wieder sehr gut aus. Hat ein Sprung gemacht. Blüht auch.
11.06.2021
Super Wetter ist angesagt für die nächsten Wochen!!!
Blackberry hat Strawberry Pie eingeholt und überholt, ist jetzt 2. Knapp hinter Forbidden Runtz.
13.06.2021 Heiße Tage... 🌞🤩💚
Heute morgen gutes Futter bekommen, eine kräftige Lösung. Trocknen sehr schnell aus. Zwischendurch bewässere ich.
14.06.2021
Runtz ist jetzt auch komplett in die Blüte übergegangen.
Weiter geht's...
🌱🙏😎
Likes
15
Share


@Homegrown93
Follow
This week I can already tell she’s starting to swell, I’m excited to see how much! I think this might be her last week or so until I start flushing, we’ll see about that. Humidity has been great and temperatures also are under control.

Likes
8
Share


@Dabking
Follow
Plant 1: 2.40 Oz dry (chopped day 84)
Plant 2: 4.85 Oz dry (chopped day 88)
Happy with them so far. Will update post cure and smoke report.
Likes
88
Share


@Roberts
Follow
Gorilla Jealousy F1 is doing her thing. She is shifting into a bulking stage. She did show a major ph drop yesterday to today. She is likely due for a solution change. I will try to redo her solution this next week when I get a chance. Her smell has not really started up strong yet. I feel that will change over the next few weeks. Thank you Spider Farmer, and Seedsman. 🤜🏻🤛🏻🌱🌱🌱
Thank you grow diaries community for the 👇likes👇, follows, comments, and subscriptions on my YouTube channel👇.
❄️🌱🍻 https://www.seedsman.com/?a_aid=Mrsour420. This is my affiliate link to seedsman.
Thank you Happy Growing 🌱🌱🌱
https://youtube.com/channel/UCAhN7yRzWLpcaRHhMIQ7X4g


Likes
Comments
Share

Likes
13
Share


@Youngicons
Follow
Transporting tomorrow to final pot of 2 gl.
Going to use happy frog. However I think I need some nitrogen cause I'm noticing some leaving starting to yellow.
Also I am throwing out another 8 plants that haven't grown since last week's post.
Likes
14
Share

@Bncgrower
Follow
One more week and this is the last one before switching to 12/12h, I decided to clean a few more sheets and I'm sure it will recover very quickly..
Happy growing! ✌️🌱🌿🍁

Likes
8
Share


@Youngun
Follow
fighting the cold at lights off temps dipping lower than I would like, adjustments have been made so hopefully I’ve not done too much damage, will start slowly cutting the nutrients down from now on by 5 ml a week, the cold has slowed them down abit so I’d be guessing at a 10 week flower on these girls, the middle plant has the more solid bud structure than the others with a notable size difference already, I’ll be trimming lower leaves in the canopy this week to open them up and get some light down to lower bud sites


Likes
41
Share


@Ganjagrandaddy
Follow
Hi all , here we are for another fun run with a some of Fast Buds most delicious looking ladies to harvest. With each strain having it's own amazing appearance and buds , i am hoping to spoil them like a rich kid at the seaside with this new FC3000 provided by the generous sponsors at Mars Hydro. Thanks Susie. It is a 300w draw with a full spectrum of gloriousblumens to develop and create some hard , chunky and downright delectable buds.
Easy to set up with a removable driver too. Very handy of the heat builds up and we need to reduce it somehow. There is more than enough extension chord(2m) to re hang the driver out of the growing area. It has a dimmer to allow it to offer seed to harvest capabilities all in one unit. No need for separate lights for each stage of the grow. The unit size is more than big enough to cover the 6 plants and the 100L x2 beds that they are going to be grown in. It is nice and light too so no worries about the hangers being stressed. It came with a hanging kit too so nothing to stop you getting it on out of the box. At 100% it really kicks some light out and has even worried the more than capable sp3000 sat next to it. A beautiful piece of kit that will no doubt be a good as it looks too.
Having had a few issues with germination over the summer and totally failing seeds , I went back to plugs. They hold the perfect amount of moisture and dont fall apart when lifted either. Again they proved excellent with 100% success of these genetically brilliant seeds . Seeing them poking their heads up on 2 already only only day 3 was a pleasant surprise as i have had these in waiting a while now. No soaking the seed just straight into the cube from the packet..
Now fully germinated with no helmets for the unwary seedling either. ( can occur using cubes for.me!) We are officially in veg I think!.
7th Oct veg started......
I hope you will join me on this run to see what this light unit can do with 6 genetic wonders and 200L of well composted living soil/coco in newly set up No-till beds. I have been trying to use the living organic soil but find that in mid to late flower , I had to supplement to keep the hungry girls green and mean which i feel was due to only 60L of soil to work in effectively. With 3 plants sharing the 100L i am hoping they communicate via the root system and keep each other happy and healthy. I do intend to add some wrigglers and also some myco and a cover crop too. (Inspired by UKPersonal420 ).
The ladies are domed and comfortable ar present and I am hoping to remove the domes in a day or 2 but temps here have dropped a fair bit so I will have to be mindful of the delicate girls getting too cold .
Plan is to train them into the light with as many mains as I can manipulate using l.s.t , supercropping , topping or maybe a f.i.m or 2.
Any comments, advice , observations or just chat for the hell of it are more than welcome . Be safe and well. Welcome to some fun
INFO ON THE LIGHT AND SPECIFICATIONS BELOW
https://marshydroled.co.uk/products/fc-3000-led-grow-light-samsung-osram-commercial-greenhouse-medical-indoor-hydroponics-lamp/
Likes
12
Share


@Fccfarms
Follow
Vegged for 19 days in the big tent and 2 weeks f seed in propergation room proir.
Week 1 day 1 of flowering cycle. Started on Saturday 22nd June. Bring on the summertime heat . I wonder how these girls will cope.
Likes
10
Share


@CanarianGrow92
Follow
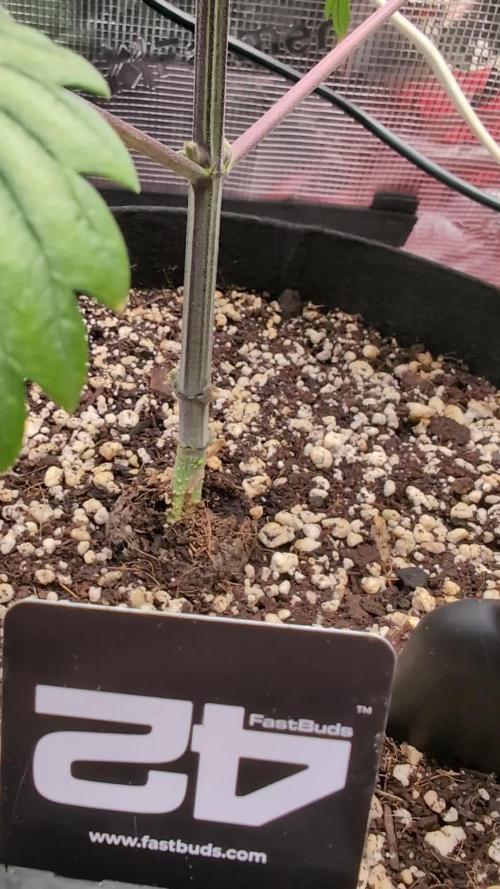
Week 2 vegetation for the ztrawberry from fastbuds 420.
All good at the moment, we are testing the xpert line with these girls.
1ml of master grow A+B
1ml of master root
We removed the 2 lowest sets of leaves and branches. We do this because we have the girls in 7 liters and quite some plants together, so i prefer to concentrate on the main bud and only some side buds
Likes
23
Share


@Christo
Follow
Late to the party ….. anyway.
Germ’d in final 12.5L airpots. Just water and root juice at ph 6.8 so far. First 2 pics are day 14
Pictures 3 and 4 are day 15 all the other pics are day 18 and 19
First “feed” solution today (day) 19
LST on all 11 (one didn’t pop) everything seems to be on track an looking good so far …….
Likes
32
Share


@Compassionate_Gardener
Follow
This cycle was all along a great pleasure. The plants developed MUCH BETTER THAN EXPECTED, the result under the Q6W-Gen. 2 LED lamps from SANlight is FANTASTIC. I have NEVER harvested more from plants of the same strain under HPS and the quality of the bud (trichomes, taste aroma) is MUCH BETTER when grown under LED, my decision is definitely made, I will continue to solemnly grow with LED-lights in the future. I harvested 2250 gram of Shiva Skunk and 3009 gram of Serious Kush, that a total amount of 5259 gram. In relation to the 3000 Watts (incl. dimmed part!) power of the LED-lights thats an AMAZING 1,753 gram per Watt.


Likes
2
Share


@Greenfox89
Follow
Hello dear readers, welcome to week # 10.
We are not far from the goal here. In the last 2 weeks the effect of the Lst has really been shown.
There are really good colas and they also look nice and frosty. At the beginning of the week I easily defoliated them, everything that was dead or yellow and shadowed was removed.
The plant has been rinsed since the beginning of the 8 weeks. The harvest will surely take place in the following day. The Fox🦊

Likes
9
Share


@Colo420
Follow
Todo marcha en orden, la floración interior va 10 puntos. A la de exterior le esta costando la adaptación por los excesivos calores 37°C.
Saludos a todos y gracias por las buenas vibras.


Likes
12
Share


@Naturalist
Follow
AG#1+6 bolted to showing male sacs & were pulled from tent, guess I'm glad it happened before flipping to 12/12 (today), I'm pretty certain the other 4 are female. I wiped the tent down & water sprayed the rest of plants to be safe.
I did some more LST on AG#4+5
Plants seem to be recovering pretty well from the Cal-Mag deficiency, most burn is gone.