


Likes
Comments
Share

@GERGrowDesigns
Follow
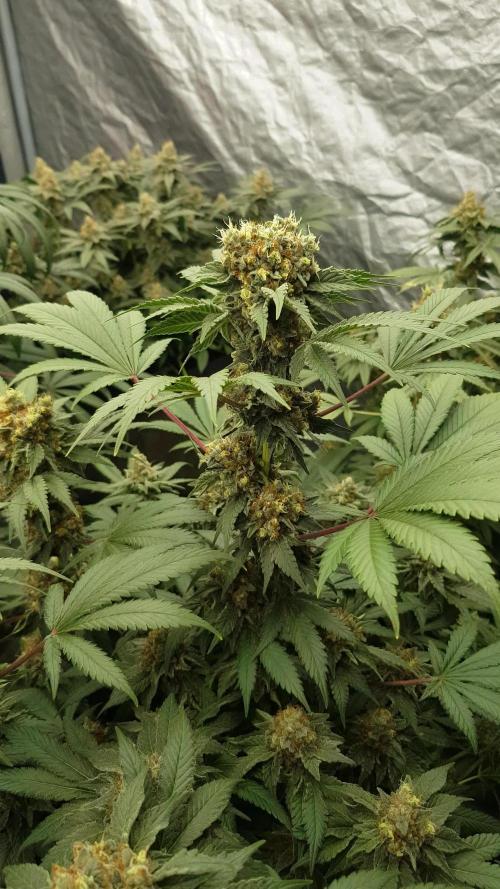
Welcome to Flower Week 7 of SuperStrains Amnesia
I'm excited to share my grow journey with you from my
SuperStrains Project . It's going to be an incredible ride, full of learning, growing, and connecting with fellow growers from all around the world!
For this Project , I’ve chosen the Feminized Photo Strain Amnesia :
Here’s what I’m working with:
• 🌱 Tent: 225x150x150
• 🧑🌾 Breeder Company: SuperStrains
• 💧 Humidity Range: 45
• ⏳ Flowering Time: 10 Weeks
• Strain Info: 25%THC
• 🌡️ Temperature: 26
• 🍵 Pot Size: 20
• Nutrient Brand: Hy-Pro
• ⚡ Lights : 600W x 2
A huge thank you to SuperStrains for allowing me to try my Best with this amazing collection from Photo Strains they managed to Sponsore side by side with theyre Hy-Pro Nutriets . Big thanks for supporting the grower community worldwide! Your genetics and passion speak for themselves!
I would truly appreciate every bit of feedback, help, questions, or discussions – and of course, your likes and interactions mean the world to me as I try to stand out in this exciting competition!
Let’s grow together – and don’t forget to stop by again to see the latest updates!
Happy growing!
Stay lifted and stay curious!
Peace & Buds!

Likes
21
Share


@JuicyFruit
Follow
Fast Eddy
Week 4
So ive been doing LST to get better light coverage and intensity on all parts of the plant :) this one was very small and bushy which made it hard to get all leaves a place to sit comfortably... ive also been watering using less water but watering more often to get oxygen to the roots :) these autoflowers dont care what i throw at them. fast eddy is alot smaller than my quick one plant but has a nice veg smell from the cheese x juanita the tearful. cant wait to get into heavy flowering!
Finally im hoping to get 20-25g off this plant. and as its medical weed im really excited to try this. if it works then goodbye high thc strains!
Thanks for following my diary :) it means alot!
happy growing people!

Likes
21
Share

@DogDoctorOfficial
Follow
Before starting this harvest chapter, I want to apologize once again for not uploading everything directly into the official harvest and smoke review tabs.
GrowDiaries has been struggling a little with very large uploads lately, and with the amount of photos, videos and information involved in this Ghost Train Haze harvest, I decided to split everything into multiple parts to make sure nothing gets lost or broken during upload.
And honestly… this plant deserves the full story.
So welcome to Part 1 of the Ghost Train Haze harvest. 🌱✨
Before talking about harvest itself, let’s do a quick recap of how we even arrived here.
This was another 12/12-from-seed run.
No traditional vegging.
Very little manipulation.
Minimal training.
Mostly just letting the plants naturally express themselves while guiding environment, airflow, watering and light intensity carefully around them.
Instead of forcing the plants into a shape, the goal here was to let them grow naturally into the PPFD and into the environment themselves.
And wow…
Ghost Train Haze really showed personality during this run.
Most of the attention naturally went toward the massive main plant everybody keeps seeing in the photos — the giant colorful spear covered in fading reds, dark purples and swollen flowers — but there were multiple plants in this room, and in this harvest report we’ll finally start talking about all of them and the different directions they took after harvest.
By Week 14, the room looked absolutely incredible.
The fading on these plants became something special.
Deep reds.
Dark purples.
Almost black tones in some areas.
Golden fading leaves.
Heavy trichome coverage.
Color spreading through the sugar leaves and surrounding flower tissue.
One of those harvests where the plants almost stop looking real.
And underneath all those colors:
extremely heavy flowers.
Dense.
Massive.
Sharp aromas.
Long spears everywhere.
The branches became so heavy during late flower that support was absolutely necessary. Yo-yos were holding branches constantly, helping prevent collapse under the weight of the flowers.
And the moment the supports came out during harvest…
everything opened and leaned downward immediately under its own weight.
That alone says a lot about the size and density of these flowers.
There are photos in this report where I’m holding entire plants, and honestly, seeing them outside the tent really puts scale into perspective. It’s one of those plants that instantly makes you imagine how unbelievably huge she could become outdoors in native soil with unrestricted root space.
Harvest day finally arrived, and from there the project split into two different paths.
Some plants were harvested whole and hung for traditional drying.
Others were fully broken down, every single flower removed from the branches, vacuum sealed into bags and immediately frozen for ice-water extraction work.
And this is where things start becoming really interesting.
Because this report is not only about harvesting flower.
It’s also about exploring different post-harvest directions and understanding why growers process material differently depending on their goals.
The flowers selected for traditional drying will continue their journey in Part 2, where we’ll focus much more deeply on drying conditions, moisture management, branch snapping, trimming and curing.
But for now…
let’s talk about the frozen material and ice-water extraction. ❄️
After harvesting, the flowers destined for washing were separated carefully and placed into vacuum bags before going into the freezer.
Freezing fresh material helps preserve volatile compounds, terpene expression and trichome integrity while preparing the flowers for ice-water extraction.
And no — this is not simply “throwing weed into ice.”
There’s actual science and technique behind this process.
Before washing, the frozen material is combined with ice and extremely cold water, ideally close to 0°C. The goal is to make the trichome heads brittle enough to detach cleanly while keeping unwanted plant contamination as low as possible.
At the same time, the flowers need time to fully soak and rehydrate slightly before agitation starts. This helps reduce excessive breakage of plant material during washing.
And then comes the wash itself.
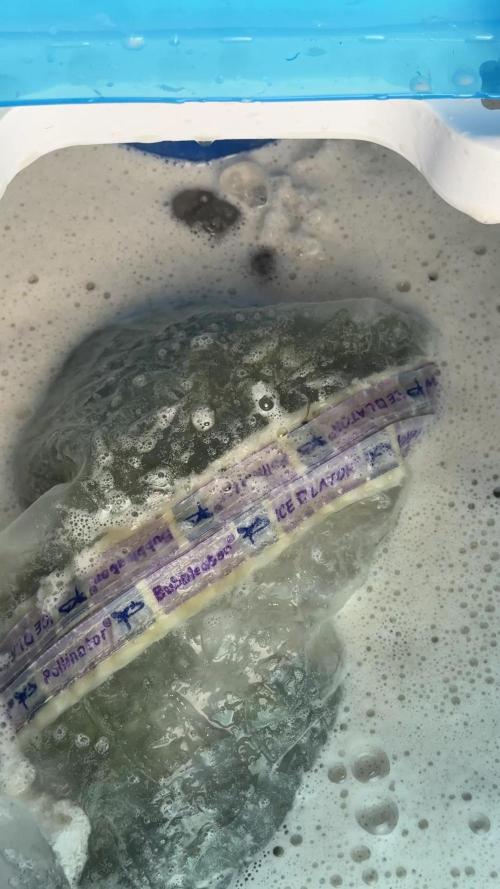
The bubble washer machine agitates the mixture gently, allowing trichome heads to separate naturally from the plant material and suspend inside the cold water.
From there, the water passes through a series of filtration bags with different micron sizes.
25 micron.
45 micron.
73 micron.
90 micron.
120 micron.
160 micron.
220 micron.
Each size captures different grades and sizes of resin heads and contaminants.
We are not using every single bag configuration during this run, and we’ll go much deeper into grading, collection quality, drying and final results later in the series. But since this report already includes videos and photos of the process itself, I thought this was the perfect moment to explain what ice-water extraction actually is — and what it is not.
This process is not about adding anything.
It’s about separating what the plant already naturally created.
Water.
Ice.
Agitation.
Filtration.
Patience.
That’s it.
And honestly…
watching these resin-covered flowers moving inside ice water almost feels hypnotic.
The harvest itself may be finished…
but the real post-harvest journey is only beginning now.
This report will continue in the next update very soon because there is simply too much material, too many photos and too much information to fit properly into a single upload without risking GrowDiaries crashing or losing content again.
Part 2 will continue deeper into:
the drying process,
environmental control,
trimming,
flower handling,
and the continuation of both post-harvest paths.
And eventually, Part 3 will close the circle with curing, smoke review, flavors, extraction reflections, effects and final thoughts.
As always, thank you to everybody following this journey.
To Zamnesia for the genetics.
To Plagron for the nutrition.
To all the gear keeping this room alive day after day.
To GrowDiaries itself.
To the community.
To the longtime followers and OGs.
To the new people arriving every day.
To the curious ones.
To the silent supporters.
To the lovers.
To the skeptics.
To the haters.
To everyone who stopped by, even for a moment.
Thank you for being here. 🌱
Part 2 coming very soon. ✨
📡 DELETED @ 1K Please stay tuned.we never quit https://www.youtube.com/@TheDogDoctorOfficial NEW 🙏 Thank you for your patience and continued support.
FOR DISCOUNT CODES AND MORE JUST FOLLOW THE LINK https://website.beacons.ai/dogdoctorofficial
📲 Don’t forget to Subscribe and follow me on Instagram and YouTube @DogDoctorOfficial for exclusive content, real-time updates, and behind-the-scenes magic. We’ve got so much more coming, including transplanting and all the amazing techniques that go along with it. You won’t want to miss it.
GrowDiaries Journal: https://growdiaries.com/grower/dogdoctorofficial
Instagram: https://www.instagram.com/dogdoctorofficial/
YouTube: https://www.youtube.com/@dogdoctorofficial Deleted by Youtube - https://www.youtube.com/@TheDogDoctorOfficial NEW
Vimeo : https://vimeo.com/dogdoctorofficial Under construction stay tuned ⸻
Explore the Gear that Powers My Grow
If you’re curious about the tech I’m using, check out these links:
🔆 Lighting & Environmental Control
• Future of Grow — Advanced LED lighting technology
https://www.futureofgrow.com/
DISCOUNT CODE: DOG20
• Lumiflora — Under-canopy LED lighting
https://lumiflorade.com/
• TrollMaster — Environmental controllers and automation gear (past collaboration)
⸻
Genetics
• Zamnesia Seeds — Genetics used in this project
https://www.zamnesia.com/
⸻
🌱 Soil, Substrates, Boosters & Root Support
• Plagron — Substrates, bio mixes, and supportive products
https://plagron.com/en/
⸻
🎒 Storage, Curing & Preservation
• Grove Bags — Curing and storage solutions
https://grovebags.com/
⸻
📸 Photography Equipment & Tools
(Not sponsors, but part of my creative toolkit)
• Sony A6700
• Sony full-frame macro lens + few more
• Stacking photography workflow - learning
• iPhone (for behind-the-scenes shots)
We’ve got much more coming as we move through the grow cycles. Trust me, you won’t want to miss the next steps, let’s push the boundaries of indoor horticulture together!
As always, this is shared for educational purposes, aiming to spread understanding and appreciation for this plant. Let’s celebrate it responsibly and continue to learn and grow together.
With true love comes happiness. Always believe in yourself, and always do things expecting nothing and with an open heart. Be a giver, and the universe will give back in ways you could never imagine.
💚 Growers love to all 💚
📸 P.S. – The Eye Behind the Lens
All photos in this diary (for now — except for the ones showing the camera, which I took with an iPhone) are taken with a Sony A6700 paired with a Sony full-frame macro lens and a few more.
Photography is part of the story — it’s how we share the fine textures, the glow, and the quiet details that words can’t always capture.
I’ve also started experimenting with photo stacking — a technique where multiple images, each taken at a slightly different focus point, are layered together to create one perfectly sharp image from front to back.
It’s not digital enhancement or AI; it’s pure photography — a way to reveal the plant’s beauty in microscopic depth, from trichome to petal.
You’ll even see a few shots of "ghost me" capturing the shots — camera, lens, setup — because every grow deserves not just to be cultivated, but documented like art.
FOR DISCOUNT CODES AND MORE JUST FOLLOW THE LINK https://website.beacons.ai/dogdoctorofficial
NEW DISCORD - Official Server Invite Link : https://discord.gg/ksjAkA5T74


Likes
32
Share

@yan402
Follow
⚗️ FERMAKOR – Neutralisation & Filtering (Final Stage)
🧠 “From reactor to bottle — the first real batch.”
---
13.10.25 — Pulled about 1L of the finished FERMAKOR extract into a 5L bucket and added roughly 2L of clean water. Let it sit for a bit to calm down and cool off before touching the pH.
Sample came back around pH 6.8–7, totally non-caustic — exactly what I wanted before acidifying for storage.
Started adding phosphoric acid (59%) slow and steady, stirring between each pour.
Ended up using about 50ml total before the colour flipped red on the GHE drops, landing the mix right around pH 3–3.5.
No foam, no violent reaction, just smooth. Smell turned clean and metallic-sweet — the kind of smell that tells you it’s done reacting.
---
Filtering setup
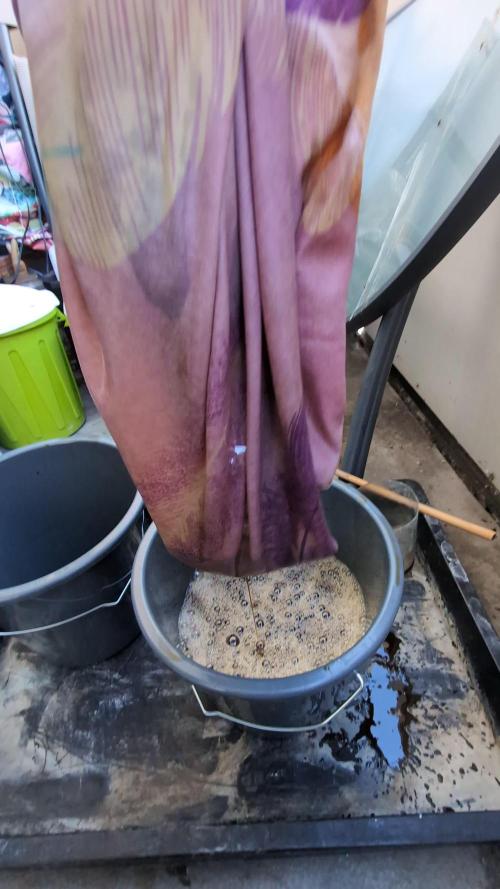
Used a pillowcase and cheesecloth layered together as the filter stack.
The pillowcase handled all the heavy junk, the cheesecloth grabbed the fine silt.
It came out thick, dark amber, glossy — zero grit.
I’ll leave it to rest overnight, open, just to let any tiny bubbles or gases clear out before bottling.
---
Final note
This batch is officially FERMAKOR B Concentrate V1.0 (1:4).
Storage pH locked between 3.3–3.8, ready to bottle and shake before use.
This one’s rich in P, K, Mg, and micros, while Calcium Nitrate will handle the N and Ca on the A-part side.
---
🌱 Closing the diary
That’s it for this round — extraction phase complete.
I’ll be closing this diary here and opening a new one called “FERMAKOR A+B Test Grow – V1.”
Testing starts Monday, 20.10.2025 on a single plant.
Time to see if this brew actually works in the tent.
📸 All images videos to be added later — filter setup, pH colour, and final concentrate.
Processing
Likes
4
Share


@Nookandplant42o
Follow
previous watering was fed with nutrients this is one with the highest EC of the three that are in the tent, and my temperature is not low so it should go with minimum to medium quotas with more water avoiding burns without much runoff taking place mixing with the soil compounds and mycorrhizae for better performance i know i need calcium magnesium for better performance the problem is money i will continue to use salt Epson the option i have at the moment the direct sulfur in the soil mix has helped me hear a change visible.
water ph 6.2 solution temperature 20 ° - 0.50 g of great white mycorrhiza 2 days earlier were sprayed with water without ppm via leaves - lights off to serve as a cooling shower in the heat is great for stomata .
Simple led panel added as main light source 260watts being divided to 3 plants in the fullspectro tent model, did not get much difference in temperatures compared to HPS, is more the same spectro ratio and UV to reach more directly in the trichomes and terpenes.
this amnesia is not as fast as your sister but from the stress she had back in the beginning, I admire her strength with thinner sativa leaves her trichomes are coming close to the smaller leaves.
LST has reduced its size by half as its sister is 40 cm while her tree-shaped sister is 88 cm.


Likes
Comments
Share


Likes
4
Share

@Hempface86
Follow
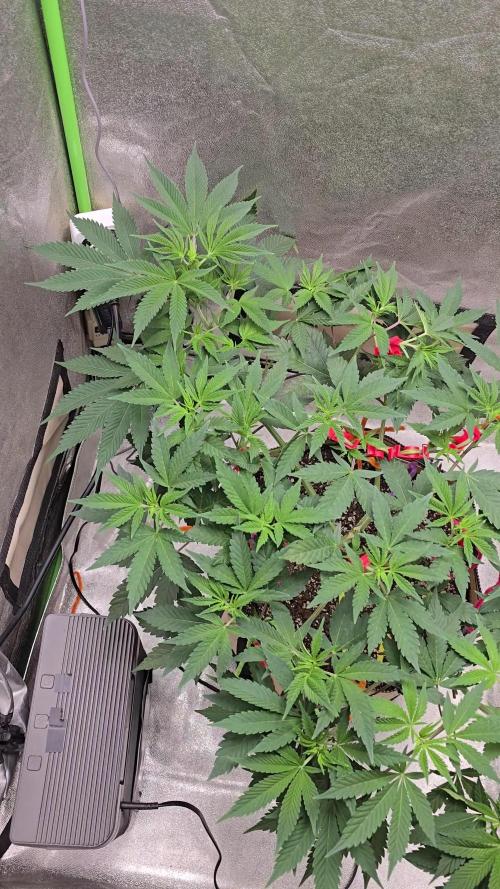
Alright, so I flipped her a couple days ago and she's staying in the big tent for obvious reasons... this should be a big girl... Now i've kept her in veg for longer than the dots say, but she has not been lacking anything , but if she starts asking for stuff, I will have it for her.. i still have some green sensation for late flower, as well as some other bloom boosters, and if she needs nitrogen, I got her there too, but I have a feeling she's not gonna need much aside from a tea here and there... I'm looking forward to this one... Really hoping I pull at least 10 oz... Hope everyone is doing well.God bless and happy growing 🙏


Likes
8
Share


@ZombieKushAddicted
Follow
FC-E 4800 lamp ,
to view this lamp or any other marshydro product go to: https://instagram.com/marshydro_aliexpress?igshid=YmMyMTA2M2Y=

Likes
35
Share


@eldruida_lamota
Follow
Red hot cookies, no me digáis que no suena bien? Menuda variedad que sacaron los de sweetseeds este 2020, veremos que tal se comporta como crece y que cualidades nos saca, según etiqueta es un híbrido potente con posibilidad de sacar flores rojas.
Pues las germine y las 4 han salido sin problemas, las coloqué en macetas de 0,4l y dejaremos que crezcan un poco.
.
La humedad al ser la primera semana la mantenemos entre 70/80% , la temperatura está entre 22/24 que no está nada mal, y el ph en cada riego lo mantenemos en 5.8.
.
Gama agrobeta.
0,5 ml x L Piramid , vía radicular.
0,5 ml x L Growth black line , vía radicular.
0,1 gr x L Cancerbero , vía radicular.
0,1 ml x L Tucán , vía radicular.
0.1 ml x L Flash Root , vía radicular.
0,4 ml x L Great Green , vía foliar.
.
Nos vemos la semana que viene, saludos fumetillas 💨💨💨
Likes
34
Share


@Kynareth
Follow
dia 67 , semana 10 - Esta semana el espigamiento ya se ha detenido y empieza a aumentar la cantidad de resina, se puede ver en las hojas ese tono blanquecino semitransparente, una muy buena señal

Likes
12
Share


@thonhash
Follow
Sorprendido gratamente del resultado final tanto de producción como de sabor/efecto.

Likes
35
Share

@eldruida_lamota
Follow
Bueno familia ya finalizamos, estas red hot cookies son una cepa bestial.
La verdad que el secado muy bien 7 días en Malla y a los botes, 45% humedad y 23 grados es la temperatura ambiental que han tenido en el secado.
4 plantas que se cultivaron en un armario de 1.20 pero estos ejemplares solo ocuparon 80x80.
Así que ya está cultivada esta gran variedad que es novedad este 2020, americana de la familia Cookies, la Tropicanna Cookies (Girl Scout Cookies x Tangie) con un porcentaje de thc entre los 17/25%, una bomba.
Que decir de Agrobeta, lo peta 💪 en cuanto a nutrientes. Un saludo y buenos humos.
Likes
2
Share


@Ezcashinc
Follow
Can really see the plant getting potent according to what I have read, I really don’t know exactly when to harvest, maybe can get some tips from you guys out there.

Processing
Likes
10
Share


@Greenwizhun
Follow
I have bought 400W 3050k 41000 ceramic metal halide
(Best Than hps
Hps 56000lm for human eye
Cmh’s 41000 lm in par range
Likes
12
Share


@H2Smith
Follow
📅 23.04-21 (Flo day 57)
📜 trichome analysis: not ready to flush.
⚗️ 1.85
💦 6.2
🌊 40L
📏 cm
📅 24.04-21 (Flo day 58)
📜 removing 30l from the system, the plants drank 30l. 60l filling. EC dropped to 1.83 at 1:00 AM. Trichome analysis: not ready to flush.
⚗️ 1.88
💦 6.2
🌊 30L
📏 cm
📅 25.04-21 (Flo day 59)
📜 trichome analysis: not ready to wash. Plants have drunk 40l at 8:00 PM 50l at 11:00 PM
⚗️ 1.77
💦 6.2
🌊 50L
📏 cm
📅 26.04-21 (Flo day 60)
📜 Set Ph 6.1 to the Ph Controller.
⚗️ 1.79
💦 6.18
🌊 30L
📏 cm
📅 27.04-21 (Flo day 61)
📜 Trichome analysis: Not ready yet.
⚗️ 1.80
💦 6.10
🌊 45L
📏 cm
📅 28.04-21 (Flo day 62)
📜 drained 50 liter from the RDWC system. Objective EC 1.60. Add 175ml total care
⚗️ 1.78
💦 6.10
🌊 35L
📏 cm
📅 29.04-21 (Flo day 63)
📜 -------------------- Nothing to say
⚗️ 1.67
💦 6.10
🌊 40L
📏 cm
_____________________________________________________
📅 Day - 📜 Note - ⚗️ EC -💦 PH -🌊 Water -📏 Height
Equipment:
Idrolab 12 bucks
Chiller teco Hy500
weather controler with Co2 : PRO-LEAF BECC-B2
Bavagreen 720w
Bavagreen 720w
Bavagreen 240w
Bavagreen 240w
Nutrients and PH controller: PRO-LEAF PHEC-B2
Nutrients: Green House feeding - powder feeding hybrids | Powder feeding boost
Extractor: primaklima PK250-1 PK250-L1 x2
System and roots care: Idrolab Total care

Likes
69
Share


@DeepWaterGrower
Follow
[DAY 64] - 3/8/2022
- Lamp 40 cm from the center of the canopy (20 cm from the top) and 100% dimmer (144 watt);
- TEMP. 30°/31° - RH 40-50%;
- EC 1.7 - PH 6; started with EC 1.7 and after 24 hours EC is 1.95;
- 73 cm height;
- LST on 4 branches to open the canopy;
- Removed some damaged leaves;
- Added new PH down: CANNA PH DOWN BLOOM (instead PH DOWN by GHE). I prefer GHE, it seemed more effective;
- Let's see what happen this week, I want to see big flower by the end of this week; next one I'll add Bloombastic again;
- A lot of leaves with yellowed tips, I hope it is not suffering excessively the temperatures.
[DAY 65] - 4/8/2022
- Lamp 40 cm from the center of the canopy (20 cm from the top) and 100% dimmer (144 watt);
- TEMP. 30°/31° - RH 50%;
- EC 2 - PH 6; tomorrow I add lighter solution to keep EC to 1.7;
- In the last couple days I noticed plant drank less than usual, the half. I guess it was very stressed due defoliation, but seems to be recovering well.
- Today I did bit defoliation and in the coming days I let the plant rests, then we'll see if another defoliation is still needed. I don't want to exaggerate.
[DAY 66] - 5/8/2022
- Lamp 40 cm from the center of the canopy (20 cm from the top) and 100% dimmer (144 watt);
- TEMP. 31°/32° - RH 60%;
- EC 1.7- PH 6; tomorrow I add lighter solution to keep EC to 1.6;
- Did a growquestion about some brown spots on some leaves: https://growdiaries.com/grow-questions/49286-brown-spots-on-some-leaves.
[DAY 67] - 6/8/2022
- Lamp as yesterday;
- TEMP. 31°/32° - RH 60%;
- Plant is having problems. It is drinking little and I believe it drinks very few nutrients. For this reason I did a DWC change and added a lighter solution (EC 1). Despite this, the EC is continuing to rise. I hope it recovers soon! If tomorrow it continues to rise, I try to further dilute the solution.
- Added a new better quality video.
[DAY 68] - 7/8/2022
- Lamp as usual;
- Temp. 31°/32° - RH 60%;
- EC still rising, that's the reason why I added 2 l. demineralized water to bring EC to 1.1;
- Solution in DWC at the moment has this composition: Silicate 0.25 g/l - Calmag: 0.25 ml/l - A: 0.8 ml/l - B: 1.6 ml/l up to EC 0.94 - Bloom stim. 0.5 ml/l and Bloombastic up to EC 1.05.
[DAY 69] - 8/8/2022
- Lamp as usual;
- Temp. 32° - RH 50%;
- EC 1.2, almost blocked all day long. Added 2 l. dem. water to lower EC a little bit;
- I guess plant is drinking about 2 l. of solution / day, good!
[DAY 70] - 9/8/2022
- Lamp as usual, I'm planning to lower it near the tallest bud (from 20 cm to 15 cm) to reach better the lower bud sites
- Temp. 30° - RH 50%;
- Last day of this week, some problems last days.
Likes
3
Share
@Wierie
Follow
The girl is doin fine, she is gettin a bit yellow here and there but thats ok...
Tops growing nice...
10 drops sugar royal
10 drops pk13/14
10 drops power buds
On 0.5 liters water
Im goin from 7 drops to 10 starting today....
Lets see...
Most of the times she gets 0.5 liters a day...
If she gets realy light she gets 1 liter
Have a good day there grow friends 🌴

Processing
Likes
5
Share


@Ensign420
Follow
Week 02 Introduction
This week has been a bit of a struggle. Had my first experience dealing with slime and brown algae. But I think adding enzymes and increasing the beneficial bacteria helped to fix the issue. Also experienced nutrient burn for the first time. My nutrient solution strength got as high as 671 PPMs. So backed it down to about 430 PPMs during the end-of-week reservoir change. Also cut Hydroguard (expired?), CaliMagic, and Superthrive from this grow. Now she's still stunted, but is starting to recover. Hopefully...
[START OF WEEK 02]
Day 01 - Monday - 08/10/20 - Total Days: 008
-----------------------------------
- [0830]: Still looks a bit yellow. But getting larger!
--- Solution strength was at 248 PPMs.
--- Just topped off with a bit of distilled water
--- PH went up to 6.1 so PH'd down to 5.8
--- Ran the top feed for a bit to wet the hydroton.
- [2130]: She's looking even more yellow now.
--- Even the new leaves are really yellow.
--- Decided to add more base nutes.
--- Added 4ml of Sensi A
--- Added 4ml of Sensi B
--- Now at about
--- Solution Strength went up to 304 PPM.
--- PH was at 6,
--- Also raised the water level a bit more.
--- I really hope it's a nutrient deficiency and not an over-watering issue.
--- Please live!
Day 02 - Tuesday - 08/11/20 - Total Days: 009
-----------------------------------
- [0830]: Looking less droopy. But still yellow.
--- Decided to do a reservoir change.
--- 4.5gal of distilled water
--- 8ml of Sensi Grow A
--- 8ml of Sensi Grow B
--- 8ml of Voodoo Juice
--- 4ml of B-52
--- 4ml of CaliMagic
--- 4ml of Hydroguard
--- 4 drops of Superthrive
--- PH'd down to 5.8
--- Solution strength: 302 PPM
--- Since I didn't want to risk over-watering the rockwool, I did not to do a top feed, may do one tonight after the sleep cycle (lights are still set to go off at 10am and back on at 4pm).
--- As I was doing a reservoir change, I noticed that the tubes and bucket were a bit slimy. Didn't really stink or anything. Is this normal? Maybe due to the Hydroguard and Voodoo Juice?
--- I hope she gets better soon!
- [2215]: Getting larger! But still yellow.
--- Also can see a root growing through the net pot! Tiny little thing but it's there! Will have to start dropping water once more appear.
--- After looking over a few DWC diaries using AN nutes, seems like my solution strength is still too low. Most around this stage average around 500 PPMs with about 4ml per gallon.
--- Top fed for a minute to wet the top of the hydroton.
--- Solution strength went down to 263 PPM.
--- Added 8ml more of Sensi A
--- Added 8ml more of Sensi B
--- Now base nutes are at 16ml for 4.5 gal of water.
--- PPMs went up to 411.
--- Still lower than 500 PPMs, but that's okay.
--- PH was at 6. Not sure if I should adjust PH using AN nutes. So going to not ajdust unless PH goes above 6.1.
Day 03 - Wednesday - 08/12/20 - Total Days: 010
-----------------------------------
- [0830]: Looks like more root growth!
--- She still looks yellow. But leaves are perky.
--- PH was at 6.2 so lowered down to 5.8.
--- Solution strength was at 394 PPMs
--- Since roots are still growing, I decide to lower the water level a bit. Now water level is a bit below the net pot.
- [2200]: Root is getting longer!
--- Slime is returning. Not sure why.
--- Solution strength: 357 PPMs
--- PH: 6.1
--- Decided to add an enzyme along with more beneficial bacteria to hopefully cure the slime.
--- Added 16ml of Sensizym
--- Added 5ml of Hydroguard
--- Added 8ml of Voodoo Juice
--- New solution strength: 430 PPMs
--- New PH: 6.1
--- Top fed for a minute.
--- This slimy residue is really freaking me out! I hope the added enzymes will help eliminate the slime.
--- Going to do a full reservoir sterilization/nutrient change over the weekend. Please survive until then girl!
Day 04 - Thursday - 08/13/20 - Total Days: 011
-----------------------------------
- [0930]: I think the enzymes worked! There is little to no slime now!
--- Although I think the root was also dissolved in the process. It's now just a little stub sticking just below the net pot. The enzyme is also suppose to dissolved dead roots too but guess that root was too weak? Not sure what happened there. But I think the slime is cured!
--- Solution strength went down to 395 PPMs. Decided to add more base nutrients.
--- Added 8ml of Sensi A
--- Added 8ml of Sensi B
--- Added 4ml of B-52
--- Solution strength went up to 598 PPMs.
--- PH was at 6.1
--- As long as the PH is between 5.5 and 6.3, I'm not going to use PH Up or Down. But still will monitor PH levels.
- [1715]: Checked up on her after her nap and shes looking alive but stunted. But no slime!
--- Decided to add some sugars to help maintain the enzymes and beneficial bacteria.
--- Solution strength was at 587 PPMs.
--- PH was at 6.2
--- Added 8ml of Bud Candy
--- Solution strength went up to 671 PPMs.
--- PH also went up to 6.3
--- Lowered water level a bit to hopefully promote more root growth.
--- Top fed for a minute.
--- She is getting bigger, but still looks yellow.
Day 05 - Friday - 08/14/20 - Total Days: 012
-----------------------------------
- [0915]: Leaves look a little burnt on the tips. Still no slime.
--- Going to back off on the PPMs to hopefully fix the nutrient toxicity.
--- Solution strength was at 632 PPMs
--- PH was at 6.3
--- Added/Removed water until PPMs were at 536.
--- PH was still at 6.3
--- Raised water up a bit, then top fed for a minute.
- [2200]: Looking better. Still yellow though.
--- Solution strength: 514 PPMs
--- PH: 6.5
--- Added PH down.
--- New solution strength: 518 PPMs
--- New PH: 5.2
--- PH was kind of high. So decided to PH down. Had to use quite a bit to bring it down. But eventually got it to drop down to 5.3. A little low, but so far, the PH has always gone up so wanted to start it really low.
--- Ran the top feed for a minute to re-saturate the top of the hydroton.
Day 06 - Saturday - 08/15/20 - Total Days: 013
-----------------------------------
- [0830]: She looks stunted. leaves are still yellow.
--- Solution strength: 514 PPMs
--- PH: 5.6
--- Top fed for a minute.
--- Not sure what to do at this point. Going to do another reservoir change soon. Hoping she lives until then.
- [2145]: Looking pretty much the same.
--- A bit of slime has returned. Since I've been diluting the nutrient solution, the enzyme ratio has dropped. So I guess this is expected.
--- Also noticed that slime build up was on the air-stones. Never really checked the stones so not sure how long that has been there. Looks brown too, which can't be good.
--- Going to do an H202 sterilization of the system (minus the net pot) tomorrow so did not add anything.
--- Lowered the water level to below the net pot.
--- Then top fed for a minute.
Day 07 - Sunday - 08/16/20 - Total Days: 014
-----------------------------------
- [0900]: STERILIZATION DAY!
--- Decided to skip today's night cycle for a deep clean.
--- I'm hoping that skipping a night cycle won't be too stressful.
--- Temporarily moved her to a new bucket.
--- Used about a half of gallon of straight distilled water to flush out the net pot.
--- Drained the system and wiped up all the brown sludge. Also removed the air stones and cleaned up all the goo.
--- Filled the system with 2 gallons of distilled water and at least 30ml of food grade hydrogen peroxide (35% strength).
--- Yea its a lot, but since I'm not going to sterilize the system overnight, I went with a really high doseage. Basically I kept adding until I started to see little bubbles start to form.
--- Then I ran the water pump.
- [0915]: Boiled the air stones in tap water for about 10 min. Then reconnected them to the airlines.
--- I let the air stones and hose soak in the sterilization solution for about 5 minutes so the peroxide can absorb into the stones. Then ran the air stone to help mix and agitate the solution.
--- Occasionally, I'd repeat the process of turning the air pump off for a few minutes to let the stones soak.
- [1000]: Covered the top two row of holes of the net pot with some aluminum tape. Hopefully this solves the light leaking in through the hydroton.
- [1200]: Used an old toothbrush and scrubbed the pump clean. Then drained the system.
--- Refilled with more distilled water and peroxide. Again added a lot.
--- Ran system again to sterilize even more.
- [1530]: Drained the system and refilled with distilled water to rinse.
--- Ran the system for a few minutes, then drained and rinsed again.
--- Did this a few more times over about an hour.
- [1630]: Added 4 gallons of fresh distilled water.
--- Added 15ml Sensi Grow A
--- Added 15ml Sensi Grow B
--- Added 12ml of B-52
--- Added 16ml of Voodoo Juice
--- Added 16ml Sensizym
--- Solution strength was at 430 PPMs
--- PH was at 5.6
--- I was going to add Hydroguard, but I think the bottle is expired. Since 2017 or 2018!? I think Hydroguard is good for up to 2 years from the date on the bottle or 6 months after opening. So not going to use from now on. I wonder if this could have contributed to the slime build up.
--- Also removed the CaliMagic and Superthrive too. Going to only use AN products to eliminate the chance of incompatible nutrients.
--- Placed her back in the bucket and top fed for a minute.
--- Here's hoping for the best. Going to let it ride until morning! Please feel better!
[END OF WEEK 02]
