


Likes
Comments
Share

@Gympaddy
Follow
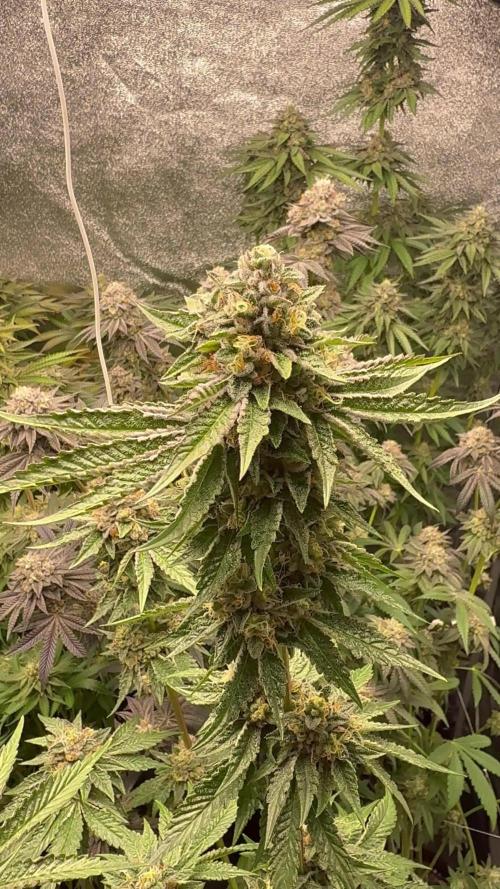
The party's almost over, the girls have gotten some great volume again. Now it's just a flawless finish. I think the Mimozz can come out by the end of next week. The Bogota will stay in after that.


Likes
14
Share

@Kirsten
Follow
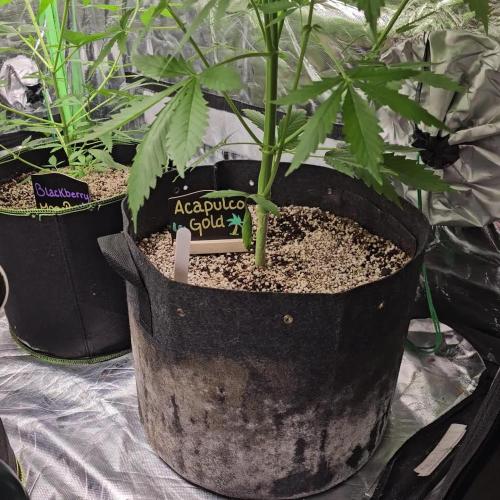
Ok so this week, I'm a little concerned at the height and structure. We all know the typical Christmas 🎄 tree shape. Well, I have an inverted, or upside down Christmas tree shape.
I'm going to need to stake the base, as its very top heavy, and I'm concerned that it will topple and snap the stalk.
Also, I cannot LST the plant as necessary due to the top heavy nature, as well as the extremely thick main stem which will easily snap if I were to train her.
The plant is also suffering from light stress. The leaves are folding up, and down. The leaves haven't darkened up either but this may just be the strain.
I have lowered the intensity of the lighting a few times, but due to being un-trainable, the plant will keep growing into the light.
I'm having a headache trying to figure out what to do with her, so if you have any ideas please let me know in the comments!
Anyway here's what I did this week.
14.7.25:
I watered with 2ltrs of dechlorinated water PH'd to 6.4, containing the following nutrients;
💜 2ml Ecothrive Trace
💜 1/4 TSP Ecothrive Biosys
PH: 6.4
PPM: 365
15.7.25:
I watered with 2ltrs of dechlorinated water PH'd to 6.6 with;
💜 1/2 TSP Mega Crop Part B
💜 1/4 TSP Ecothrive Biosys
PH: 6.6
PPM: 746
18.7.25:
I top dressed with the following organic dry amendments;
As a base for the dry amendments I used:
🧡 Worm Castings - 2 Cups
🧡 Coco - 2 Cups
🧡 Perlite - 1 Cup
Dry Amendments:
💚 Ecothrive Life Cycle 1TBS
💚 Ecothrive Bloom 1 TBS
💚 Ecothrive Charge 1TBS
💚 Diatomaceous Earth 1TBS
I watered with 2ltrs of dechlorinated water PH'd to 6.4 with 2ml Ecothrive Trace.
PH:6.4
PPM: 340.
Thanks for stopping by this week and if you have any ideas let me know in the comments section below 💚😊🍃✌️🌱🙏

Likes
Comments
Share

@hassehujasse
Follow
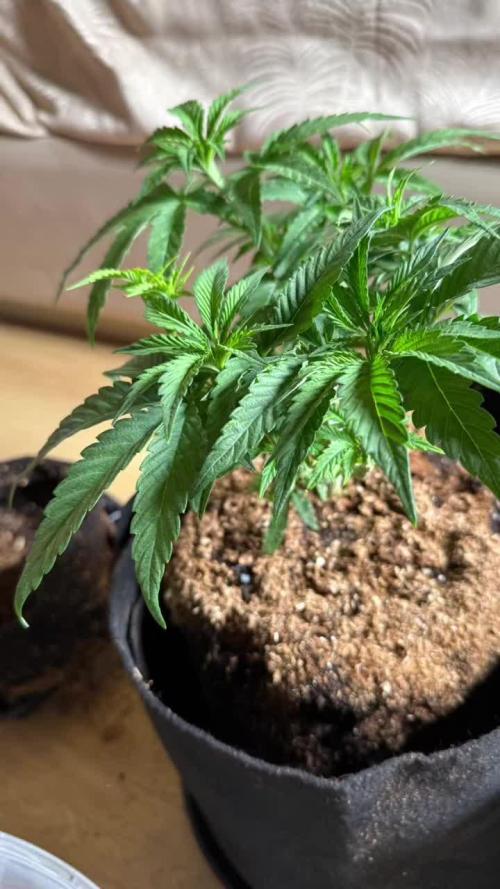
I can see her bright future under high light intensity and Co2 enrichment
Responding well to all my errors and 4sure she is gonna be pretty woman

Likes
19
Share


@Adam420
Follow
She drinks 6+ gallons almost daily no problem.
Every other day is nutrients with the other day just water.
Last week before flowering as I can see lower branches showing thc

Likes
Comments
Share


@Dankmark420
Follow
Now it’s just a waiting game to watch theese beautiful flowers bud up🙌🏼💪


Likes
252
Share


@BudBoutique
Follow
Welcome to Bud Boutique Grow Diary - really appreciate all your love and support :)
Dont forget to check out my other current grows!
🗓️ This Week:
- bud developing is going further
- really a lot of trichs already on buds and on the sugar leaves itself - see night picture
- 1/3 plants got some deficiency, so I will take more care about this and increasing nutrients for this plant
- in general plants looking a little hungry so gonna increase Plagron Bloom from 4ml/l to 5ml/l and see if further adjustment needed
- started Plagron CalMag (5-5-0) for all but especially for the 1/3
- stopped with Power Buds + Sugar Royal because of their high N to compensate the CalMag
___________________________________________
--- 🌱 Strain ---
🏷️ LEMON DRIZZLE by Barney's Farm
https://www.barneysfarm.com/lemon-drizzle-649
---💡 Lighting ---
💡LUMATEK ZEUS PRO 600
https://lumatek-lighting.com/zeus-600w-pro-29/
--- 🥗 Nutrients and Feeding
* 🍸 PLAGRON Algae Baseline grow/bloom + Additives: Power Roots, Sugar Royal, Pure Enzym, Silic Rock, Power Buds, Green Sensation
* 📅💪 baseline grow/bloow: 4ml/l & additives: 1ml/l each
https://plagron.com/de/hobby/produkte
--- 🏭 Grow Setup ---
* 🏠🌿 Indoor: Homebox 120x120x200cm (4x4)
* 📐🌀 PrimaKlima exhausting Fan 1180m3/h (running on 60-80%) & Can Light Filter 800m3/h & 1x Fanbox 1x Dyson fan for Air circulation
https://primaklima.com/de/shop/ventilatoren-de/ec-ventilatoren/pk160ec-tc/
https://canfilters.com/products/filters/
All Likes and comments are highly appreciated!!!
don't forget to check out my Instagram: budboutiquee <3
- Bud Boutique


Likes
1
Share

@c_sevilla_g
Follow
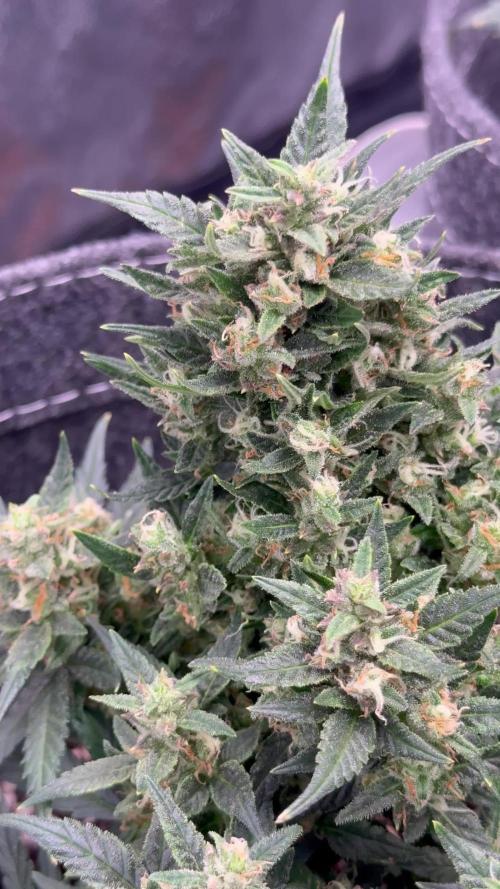
Ya comencé con el flush y Ya tienen un 2-5% de tricomas color ámbar las Pound cake, y la purple lemonade tiene aproximadamente 10% color ámbar (las colas más altas, los bajos tienen menos). Nose en cuanto tiempo más cortar para que estén en un 20-25%

Likes
45
Share


@Ultraviolet
Follow
2nd net is up. Early bud formations are promising. holding up to the extremes pretty well, some leaves taking minor damage, but overall, she is holding up, gave her 1 night at 50F see how she would react, stressful. Not advised as it messes with her metabolism, but I want to see if it triggers any anthocyanin response. Love to see her purp up but no signs yet. Remember, For every molecule of glucose produced during photosynthesis, a plant needs to split six molecules of water. This process provides the hydrogen needed for synthesizing glucose and other organic compounds, while oxygen is released as a byproduct.
Homework.
If Rubisco activity is impaired and it cannot properly function or regenerate its substrate, the plant's leaves are likely to turn a pale green or lime green, a condition known as chlorosis. Essentially, Rubisco activity is highly regulated and susceptible to various environmental and metabolic factors that can cause it to become inhibited, leading to an apparent failure in RuBP regeneration due to a lack of consumption.
Rubisco regeneration is intrinsically linked to nitrogen supply because Rubisco is a major sink for nitrogen in plants, typically accounting for 15% to over 25% of total leaf nitrogen. The regeneration phase itself consumes nitrogen through the synthesis of the Rubisco enzyme and associated proteins (like Rubisco activase), and overall nitrogen status heavily influences the efficiency of RuBP regeneration. RuBisCO is a very large enzyme that constitutes a significant proportion (up to 50%) of leaf soluble protein and requires large investments in nitrogen. Insufficient nitrogen supply limits the plant's ability to produce adequate amounts of RuBisCO, thereby limiting the overall capacity for photosynthesis and carbon fixation. Maintaining the optimal, slightly alkaline pH is crucial for the proper function and regeneration of Rubisco. Deviations in either direction (too high or too low) disrupt the enzyme's structure, activation state, and interaction with its substrates, leading to decreased activity and impaired RuBP regeneration. (Lime/yellowing)
Structural Component: Nitrogen is an essential building block for all proteins, and the sheer abundance of the Rubisco protein makes it the single largest storage of nitrogen in the leaf.
Synthesis and Activity: Adequate nitrogen supply is crucial for the synthesis and maintenance of sufficient Rubisco enzyme and Rubisco activase (Rca), the regulatory protein responsible for maintaining Rubisco's active state. Nitrogen deficiency leads to a decrease in the content and activity of both Rubisco and Rca, which in turn limits the maximum carboxylation rate, Vmax, and the rate of RuBP regeneration Jmax, thus reducing overall photosynthetic capacity.
Nitrogen Storage and Remobilization: Rubisco can act as a temporary nitrogen storage protein, which is degraded to remobilize nitrogen to other growing parts of the plant, especially under conditions of nitrogen deficiency or senescence.
Nitrogen Use Efficiency (NUE): The allocation of nitrogen to Rubisco is a key determinant of a plant's photosynthetic nitrogen use efficiency (PNUE). In high-nitrogen conditions, plants may accumulate a surplus of Rubisco, which may not be fully activated, leading to a lower PNUE. Optimizing the amount and activity of Rubisco relative to nitrogen availability is a target for improving crop NUE.
Photorespiration and Nitrogen Metabolism: Nitrogen metabolism is also linked to the photorespiration pathway (which competes with carboxylation at the Rubisco active site), particularly in the reassimilation of ammonia released during the process.
To increase RuBisCO regeneration, which refers to the process of forming the CO2 acceptor molecule Ribulose-1,5-bisphosphate (RuBP) during photosynthesis, the primary methods involve optimizing the levels and activity of Rubisco activase (Rca) and enhancing the performance of other Calvin-Benson-Bassham (CBB) cycle enzymes.
Biochemical and Environmental Approaches:
Optimize Rubisco Activase (Rca) activity: Rca is a crucial chaperone protein that removes inhibitory sugar phosphates, such as CA1P (2-carboxy-D-arabinitol 1-phosphate), from the Rubisco active site, thus maintaining its catalytic competence.
•Ensure optimal light conditions: Rca is light-activated via the chloroplast's redox status. Adequate light intensity ensures Rca can effectively maintain Rubisco in its active, carbamylated state.
•Maintain optimal temperature: Rca is highly temperature-sensitive and can become unstable at moderately high temperatures (e.g., above 35°C/95F° in many C3 plants), which decreases its ability to activate Rubisco. Maintaining temperatures within the optimal range for a specific plant species is important.
•Optimize Mg2+ concentration: Mg2+ is a key cofactor for both Rubisco carbamylation and Rca activity. In the light, Mg2+ concentration in the chloroplast stroma increases, promoting activation.
•Manage ATP/ADP ratio: Rca activity depends on ATP hydrolysis and is inhibited by ADP. Conditions that maintain a high ATP/ADP ratio in the chloroplast stroma favor Rca activity.
Enhance Calvin-Benson-Bassham (CBB) cycle enzyme activity: The overall rate of RuBP regeneration can be limited by other enzymes in the cycle.
•Increase SBPase activity: Sedoheptulose-1,7-bisphosphatase (SBPase) is a key regulatory enzyme in the regeneration pathway, and increasing its activity can enhance RuBP regeneration and overall photosynthesis.
•Optimize other enzymes: Overexpression of other CBB cycle enzymes such as fructose-1,6-bisphosphate aldolase (FBA) and triose phosphate isomerase (TPI) can also help to balance the metabolic flux and improve RuBP regeneration capacity.
Magnesium ions, Mg2+, are specifically required for Rubisco activation because the cation plays a critical structural and chemical role in forming the active site: A specific lysine residue in the active site must be carbamylated by a CO2 molecule to activate the enzyme. The resulting negatively charged carbamyl group then facilitates the binding of the positively charged Mg2+ion. While other divalent metal ions like Mn2+ can bind to Rubisco, they alter the enzyme's substrate specificity and lead to dramatically lower activity or a higher rate of the non-productive oxygenation reaction compared to Mg2+, making them biologically unfavorable in the context of efficient carbon fixation. The concentration of Mg2+ in the chloroplast stroma naturally increases in the light due to ion potential balancing during ATP synthesis, providing a physiological mechanism to ensure the enzyme is activated when photosynthesis is possible. At the center of the porphyrin ring, nestled within its nitrogen atoms, is a Magnesium ion (Mg2+). This magnesium ion is crucial for the function of chlorophyll, and without it, the pigment cannot effectively capture and transfer light energy.
Mg acts as a cofactor: Mg2+ binds to Rubisco after an activator CO2 molecule, forming a catalytically competent complex (Enzyme-CO2-Mg2+). High light + CO2) increases demand: Under high light (60 DLI is a very high intensity, potentially saturating) and high CO2, the plant's capacity for photosynthesis is high, and thus the demand for activated Rubisco and the necessary Mg2+ cofactor increases. Mg deficiency becomes limiting: If Mg2+ is deficient under these conditions, the higher levels of Rubisco and Rubisco activase produced cannot be fully activated, leading to lower photosynthetic rates and potential photo-oxidative damage.
Optimal range: Studies show that adequate Mg2+ application can enhance Rubisco activation and stabilize net photosynthetic rates under stress conditions, but the required concentration is specific to the experimental setup.
Monitoring is key: The most effective approach in a controlled environment is to monitor the plant's physiological responses e.g., leaf Mg2+ concentration, photosynthetic rate, Rubisco activation state, and adjust the nutrient solution/fertilizer to maintain adequate levels, rather than supplementing a fixed "extra" amount.
In practice, this means ensuring that Mg2+ is not a limiting factor in the plant's standard nutrient solution when pushing the limits with high light and CO2.
Applying Mg2+ through foliar spray is beneficial to Rubisco regeneration, particularly in alleviating the negative effects of magnesium (Mg) deficiency and high-temperature stress (HTS). While Mg can be leached from soil, within the plant it is considered a mobile nutrient, particularly in the phloem. Foliar-applied Mg is quickly absorbed by the leaves and can be translocate to other plant parts, including new growth and sink organs.
Foliar application of: NATURES VERY OWN MgSO4 @ 15.0g L-1 in a spray bottle. For those high-intensity workouts when 1 meal a day is just not enough!
Foliar sprays are often recommended as a rapid rescue measure for existing deficiencies or as a supplement during critical growth stages, when demand for Mg is high. Application in the early morning or late evening can improve absorption and prevent leaf burn. The plant was getting a little limey yellow in the centre. Shortly thereafter, she was back in business, green mostly regenerated. The starting point [of creativity] is curiosity: pondering why the default exists in the first place. We’re driven to question defaults when we experience vuja de, the opposite of déjà vu. Déjà vu occurs when we encounter something new, but it feels as if we’ve seen it before. Vuja de is the reverse—we face something familiar, but we see it with a fresh perspective that enables us to gain new insights into old problems.
Confidence is evidence... nothing more. You are confident because you have driven 10,000 times, you are confident because you have spoken 10,000 times. People think confidence is a feeling, but it's not. If you want more confidence, then you need to create evidence, take more shots, collect more data, build more experiences, take more risks; fail, confidence doesn't come first; it is the reward you get for doing the work. no one else wants to do.


Likes
25
Share


@Jimmy89
Follow
All photos taken day 25 of flower. Started to develop a nice aroma now, I’ll have a little de leaf in a day or two to help lower humidity and uncover some flower sites. Can’t wait for it to warm up so I can switch my heaters off! ✌️

Likes
15
Share


@XperencdGmanXG
Follow
girls are starting to recover from the neglect i gave them earlier as my timing was off a bit thanks to the last grow taking a wee bit longer to be ready. Time to feed the microbes with all kinds of tea's.
Likes
18
Share


@VI_Cannabis
Follow
June 7 - We ordered some new lights last week, they are 240w kingbrite samsung lm310h with uv/ir, 3000k, and meanwell drivers.
We setup the new room and moved the girls into there. After a bit of LST and a watering (with nutrients) at roughly 7ph, they were ready to go under the 2 new lights and the same SF-1000 we have been using in this grow.
The new room is a 12 ft enclosed trailer. I moved everything from the small tent into this. I put clear poly on the walls, floor and ceiling. I put poly on the shelf I am going to be keeping in there as well. I bought 50ft of 6mm mylar and lined the floors, roof and sides with it. I plan to get some reflective tape to seal everything and to cover the wood. I did not get much of a chance to watch temp's today as they it was later in the evening after all was said and done. The inline fan blowing in air from outside.
June 8 -
9 AM i checked the plants, they were at 25.2 and 50% RH. Late through the day I had checked and we had gotten up to around 32 degrees. So I moved the inline fan to the closer vent, hooked up to that, and had the air blowing out of the trailer with the inline fan sucking it from above the lights.
I then added oscillating fan and had it blowing air on the left side of the room so it would somewhat circulate once I closed the doors. I then checked at about 9pm and we were at 22 degrees. Definitely noticed a decent amount of growth already. I have the lights on a 22/2 cycle as I was worried about the heat at night time.
June 9 -
Some great growth from the girls, still having problems controlling the temps in the afternoon. I decided to prop the door open a bit to have a constant breeze throughout the day while I am at work. Decided to do some more LST and also a bit of defoliation. I took about 25% of the leaf's that were blocking the new growth as it was getting a bit bunched up. I was then told the leaf's are almost solar panels for them. So from now on I will be trying to just do some tucking unless needed. The leaf's I removed were most of the damaged leaf's, I am not to sure if that makes much of a difference. I gave them a watering with only water as there is a potential I am getting a bit of a nutrient buildup along with the PH problem. Or potentially the reason for the ph problem is nutrient buildup. After watering with A PH of 7 I got some run off and tested it. The smaller plant gave me a PH of about 5.5 where the bigger one is around 5.0.
June 10 -
Plants are looking happy and showing tons of growth. Seems to be trying to stretch outwards. Not a ton of sign of PH issues showing so potentially getting it under control. Still a bit of damage to previous leaf's but it is what it is! The last few days I have been leaving the door open a bit in order to keep the temps down. I decided to test something and turn the lights off (automatically) at 11AM and back on at 5PM so light schedule has now changed to 18/6 and it seems I may have figured out the issue. We haven't had lots of sun the last couple days so it hasn't been to hard and I have yet to know if it truly fixed the heat issue for now. (I will be looking into a ac unit as well since it typically gets to around 30-35 around here.
June 11 - Pulled some of the branches back down and added a few more LST spots. Seems we have a good amount of growth from the smaller plant out of the 2 topped spots. Unfortunately it looks like I fucked up on the bigger plant and only one of the nodes seems to have new growth. I will continue to monitor that but I think I cut the node to low and also to soon. Other then that, the girls are doing great. They seem to be absolutely loving these new lights. I gave them some nutrient water today as well. roughly 3L each. They seem to be A hell of A lot more thirsty under these new lights.
June 12 - The girls are doing great , they are still just doing growing away. Lots of progress everyday. I am going to be getting a go-pro so I can set-up a time-lapse for the rest of this grow. I received my new inline fan, I got A ac infinity CLOUDLINE T4 with the temperature humidity controller. I am going to be having one fan pushing fresh air in and one fan pulling out the hot air. I will be doing that tomorrow since I have to work today.
June 13 - I ordered another 50ft of mylar and that showed up today. I have decided to remove the shelf and add another 3+ feet to the grow space. So today I installed more poly, mylar, the ac infinity fan. I have it set-up to pump in air if it gets to warm. I am thinking of switching it to the output that way if it gets to hot or to humid I can have that air pulled out of the trailer. Right now my other inline fan is the outtake and I just have it set on full. Overall I think everything is set-up a bit better and more accessible. I will be putting my 2x2 tent in there at the left of the doors so I can have a veg room when these 2 are in flower. I plan to have 4 in veg and 4 in flower for the next grow. Still waiting on JOTI seeds, ordered 3 weeks ago and still have not been shipped. I will be getting those going the moment they arrive.
The girls seem to be happy still, did a bit more LST to try to keep everything even, mainly I'm just pulling down on the spots I already have tie wire on.


Likes
2
Share

@TTerpz
Follow
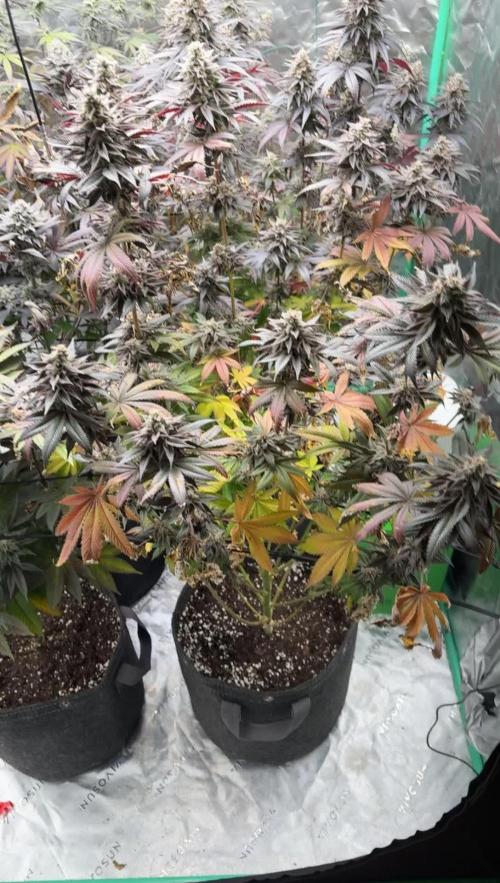
Start of week 13
(Day 49 of flower)
9/20/25
Fed with 1/4 strength of nutrients: 9/24/25
Flushed with water 9/26
Likes
1
Share

@Naujas
Follow
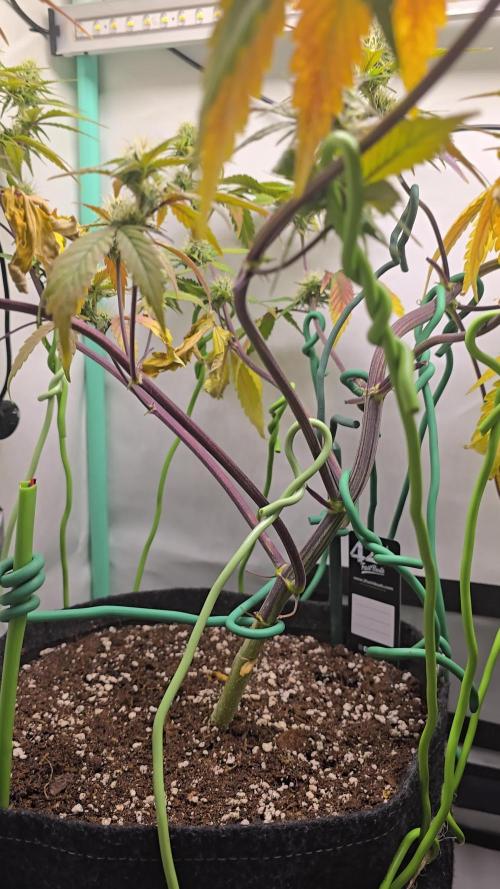
42 diena...... ir mergytei labai blogai, net nežinau, kas jai darosi, duodu jai vandens 6,3 pH oro temperatūra 27° drėgmė 55%. tai mano kaltė, nežinau, kaip auginti su tokiu dirvožemiu, teko į jį įberti perlito, ko nedariau :( tik iš viršaus matosi perlitas, giliau jo nėra :( ...... be to, dirvožemis labai maistingas, ir dar įbėriau papildomų maistinių medžiagų, tikriausiai jų padauginau......... vienu žodžiu, prastas augimas..
Likes
5
Share


@smoking_hills9
Follow
Top strain, very easy 2 grow with amazing results in the end. Didn't try it yet, but when I hit it , I will definitely update on here. 1 more tree still waiting in line 2 be chopped. Will update pics once it's ready and final weight ✌️💚
So final results are 260gr of quality solid buds🤩✔️ that's not include the bottom trim and small buds.
The whole harvest of 54 trees has the weight 5kg of solid quality buds, and around 2 kg of bottom trim and small buds🤩😶🌫️✔️


Likes
38
Share


@Cariboo_OG
Follow
Utopia Haze is a rare heavily sativa dominant hybrid (90% sativa/10% indica) strain created through back crossing Brazilian Sativa strains. This tasty little bud took home 1st Place for Best Sativa in the 2008 High Times’ Cannabis Cup and for good reason – with its potent 18-22% average THC level and long lasting cerebral effects, Utopia Haze is one powerhouse smoke. The Utopia Haze high comes on soon after you finish your first toke, hitting you with a strong cerebral lift that infuses you with a sense of hazy relaxation.
Type: Feminised/Photoperiod
Cultivation: Indoor/Outdoor
Flowering Time (days): 70-75
Indoor Yield (g): Up to 650
Feminised Outdoor Harvest Month: October
Feminised Outdoor Harvest Month Week: 3rd-4th week
Aroma: Citrus, Woody, Pungent, Mint
Effect: Cerebral Lift, Hazy Relaxation, Sleepy
Welcome Everyone to the Final Entry of my Utopia Haze Grow !
There is so much to discuss ! I have been extremely busy as of late trying to get this Harvest together, but i am happy to have it here for you now !
I Seriously under estimated the amount of time, help from others, and my own necessary skills to pull this off.. and i still kind of screwed it up lol !
But its worth noting i have never actually done this before and trying to document it during....was extremely hard.
It is next to impossible to work an iPhone with rubber gloves on !
First I want to discuss everything step by step so before you jump straight into the comments on how the end product is so small in "quantity"
Rest assured i am happy with its"quality"...and thats all that matters to me because Life is a journey not a destination! and i have learned so much from this grow that I couldn't be any happy even if i messed some things up :)
But at the very least I hope you read through this entry in its entirety with an open mind and focus more on the process, rather than just the outcome!
I ran out of Ice & i was only able to wash three times..(normally I've heard you should go sometimes 5-6 washes)
Preparation is Key & things will be much better next round :)
Photos 1-22
These are pretty self explanatory but for those of you just tuning in now.. this is what happens to a very happy plant when you don't have the necessary tools to monitor key components of growing cannabis.. Ph, as well as EC levels play a very key role in the outcome of your grow lol that being said I was just able to save this plant by purchasing both tools but that doesn't mean the plant didn't suffer because of the prior events.. This was a Huge reason behind me choosing to turn this harvest into what i would consider
"Solventless Hash Rosin" from "Ice water extracted Bubble hash".
Pictures 23
The idea here is the process of using "fresh Frozen Cannabis" this has been discussed many a time online on such sites as instagram and here on grow diaries as well.. I personally have Never tried the process so i decided to try it out and make a judgement for myself..
Video 24
The Cannabis has now been in the freezer for 72 hours making it very well frozen.. as you can tell i struggled getting it all into the 25u Screen Wash Bag. One thing of note i would do differently is i will de-stem my next batch as i also believe this played a part in the amount of plant matter that escaped through the sieves.
Photo/Video's 25-28
The idea here is "ice water Seiving" & especially with the bags that I am using here that are only have screen material on the bottom portion of the bag it is very important to have spaces in-between the screens to allow the water to pass directly through the screens into the bottom bucket with the least amount of resistance.. because the hash is so extremely temperature dependant if it gets warm on the side of the bag.. it will stick there and not make it to the bottom to become use able product..
29
You do not need to use as much Ice as i used here lol... the idea is to keep everything very cold..i certainly achieved that but at the sacrifice of using so much that i ended up grinding product and producing "contaminants" but in the end they are just plant matter that i would be smoking when i rolled up my joint either way so.. I'm not super disappointed..
But it should be noted that what you want to achieve here is a Layering effect where you have the wash bag between two small layers of ice while the "water current" washes the Trichomes away allowing them to be separated by the screens setup below :)
Before Starting the machine you should allow some time (i.e.;10-12minutes pre soak to allow the product to become saturated) before the first cycle.
By video 32 I have just ran out of ice lol..
Video 33-34
Here I have a tip for you.. to separate the screens that you sieve through.. cut 5 gallon buckets to stretch them across nice and tight.. it'll make scooping your Bubble that much easier ! i learned this from the many "Frenchy" videos I have watched :)
Picture 35
Here in lays the problem for most people.. drying your hash without loosing vast amounts of "Terpenes" whilst also stay ever vigilant against mold !
Thanks to all those videos I've watched on youtube.. id like to think this was one of my most successful parts of this process..
Things to Note; Terpenes start to seriously evaporate at temperatures 68F or 20C
you need to stay as cold as possible whilst bringing the Relative Humidity in the space down into the 40-30% to stay away from that nasty mold !
I used my cold storage room in the basement.. with a dehumidifier running to keep the space at 45% RH & staying at a constant 15c.
All while spreading the hash as thin as possible across parchment paper, on top of the white screens with a fan moving air across both sides of the paper.
Pictures 36-38
These are some macros i took in the middle of my drying session I fell in love with the colour.
Yes i know the black spots are plant material but they will get caught when i bag the hash & squish the oil out.
Thing to Note; at this stage it is important to ensure you 'micro plane" the hash down as fine as you can whilst staying weary of the temperature... any "chunks" will hold pockets of moisture.. that lead to potential problems..ie; mold ...
Picture/Video 39-41
Successfully planed bubble hash ready to be bagged and Squished !
Picture 42
Ive decided to follow Pedro.. from Pedros Grow Room and double bag to be on the safe side so i don't have any blow outs.
So thats One 25u bag inside one 160u bag ! :)
Pictures 43
This is almost 3 grams of the bubble hash from above, already melting in the bag.. this is where i ran into trouble again lol things started getting to warm in the house and i was only able to get one of the three squish's i did on video :( things started getting sticky.
Picture 44
This is basically just a photo of the equipment I'm using; 3x5 LowTemp Cage in the frame I built myself, with a 20Ton bottle jack.
Something to note here is this is an older Lowtemp model with only a single heating zone which is which i have it closed here heating Both sides of the press :)
As well as the importance of having adequate pressure on your plates.. my rig is very overkill for the size of hash bags..lol
Video 45
Here is the lovely press video.. its didn't quite work the way i wanted either lol my directional folding wasn't quite tight enough for a big "drip" :)
&the Press was set to 65°c
Photo's 46-50 are pretty self explanatory :) I had a blow out.. but still managed to pull an 80% return from the hash once squished...& yes it tasted amazing :)
Was it worth it in the end... that could be debated.. for some..i understand..its not your thing, but for those of us that are interested in making our own concentrates.. free from Solvents...
I wouldn't make it any other way :)
If even ONE of you reading this diary finds it helpful to reference for ANYTHING.....even if its "what not to do" ill consider it a success !
Thanks again for tagging along on this garden adventure.. its been one heck of a journey !
Much Love from B.C. Canada,
Until Next time,
Cariboo
