
Likes
Comments
Share


@all_about_420
Follow
Der Moment der Ernte ist gekommen und die drei Amnesia Haze von @GanjaFarmerSeeds haben das Zelt mit einem betörenden Aroma verlassen. Die Qualität der Blüten ist durchweg beeindruckend: Während die mittlere und die große Pflanze mit ihren tiefen Purpletönen und massiven Bud-Strukturen bestechen, hat die kleinste Lady durch die drei zusätzlichen Tage Reifezeit massiv an Dichte und Trichombesatz aufgeholt. Alle drei Phänotypen sind nun perfekt ausgereift und zeigen eine klebrige, schwere Harzschicht, die die Scheren ordentlich fordert. Um die gesamte Reise dieser Genetik festzuhalten, habe ich ein Zeitraffer-Video von Tag 1 bis zum Ende hochgeladen, das die beeindruckende Transformation und Vitalität dieser Sorte dokumentiert. Jetzt geht es in die kontrollierte Trocknung, um die Terpenprofile optimal zu konservieren.

Likes
13
Share


@Oyziphar
Follow
Mother Gorilla is a new and improved version of Royal Madre. The strain is a cross between Reina Madre (Queen Mother) and Gorilla Glue (GG # 4).
As with any cross, the offspring have pronounced Reina Madre as Gorilla types and everything in between.
Reine Madre has a complex terpene profile with sweet, sour and spicy aromas. However, the buds are rarely pronounced sweet or sour. The vast majority of the plants are rather spicy. However, it is difficult to give a specific description of this spicy aroma. When smoking, you can recognize it by its specific taste.
The Gorilla specifications are also there: high in THC and the fantastic aromas of pine, chocolate and diesel.
Mother Gorilla has a stimulating sativa-dominant effect. Energy and excitement without being overwhelming. A stimulating and creative effect. Euphoric at higher doses.
The strain is great for small gatherings and parties and puts you in a social mood. It is also ideal to enjoy at home, if you are looking for some inspiration and introspection.
The taste is rather spicy. With some plants, this gives a pronounced taste that may not please everyone. Sweet and sour is always well balanced, but never pronounced. The effect is mild and rather social. Larger doses really create a strong euphoric mood.
The plant is fairly easy to grow. Her branches are fairly sturdy for a sativa, but also flexible enough for just about all pruning and bending techniques. Flowering time is at least 9 weeks.
I am very satisfied with the autopots. You can leave for a few days without worrying. I wouldn't use them if you live on a floor. Occasionally they leak sometimes .... The pots are wet and heavy, but strangely enough you don't have problems with budrot.
Here is a list of all 16 plants:
# 1 89cm 13.9gr Small Plant, Small yielder. Incredibly soft aroma, with a very subtle Reine Madre taste. Delicious!
# 2 144cm 53.0gr Beautiful large plant with a high yield. Beautiful buds. Sativa. Hazey. Excellent!
# 3 144cm 33.0gr Pronounced foxtail sativa buds. Lower yield. Softer aroma than # 2.
# 4 129cm 28.7gr Perfect mix between sweet and sour aromas. What a beauty!
# 5 117cm 37.6gr Surprising yield for this smaller plant. Balanced sour / sweet. Great!
# 6 92cm 21.2gr Beautiful plant. Seems a bit like the small version of plant # 13. But here too the aroma is less pleasant.
# 7 123cm 29.0gr Hazey taste due to the many sativa influences. But also surprisingly sweet. Sugared with trichomes. Superb!
# 8 124cm 38.0gr Good hard bud yield. With a pronounced strong spicy Reina Madre aroma. Don't stick your nose in the jar for too long. Splendid !
# 9 102cm 24,7gr Most beautiful Sativa-style buds, swollen, hard and ripe. Magnificent! A lust for the eye. And that taste ... incredible!
# 10 65cm 16.3gr Small plant, low yield. Small tops with beautiful brown pistils. Subtle slightly spicy sweet Reine Madre fragrance.
# 11 71cm 15.6gr Too bad about the low yield, but what a wonderfully soft and sweet aroma! The tops smell like super soft shortcrust with a very light touch of vanilla. Fantastic!
# 12 111cm 24.0gr Less pleasant odor. Catpiss ...
# 13 113cm 54.0gr Very different plant. Looks a bit like Critical 47 from Positronics that I once grew. Plant # 6 is also such a phenotype. Probably stray seeds…. Large yield of skunky buds with many orange-brown pistils. However, the fragrance is not skunky, but unpleasantly sour.
# 14 92cm 21.4gr Top quality. Firm hard ripe swollen buds. Beautiful brown pistils. Many trichomes. Fantastic aroma. Splendid !
# 15 126cm 67.1gr Extreme heavy yielder. Rocket-shaped mega top. The weed is less beautiful and has less trichomes, but does have the typical Reine Madre smell and taste. Topper!
# 16 88cm 16.4gr Small plant with small buds and relatively much leaves. Low yield. A lot of trichomes.

Likes
15
Share


@Roope
Follow
This week was fuked up multiple reason, first clonecubes has been molding and reason was old bread pack and ain looking good for lastones (maybe can still take clone maybe not?) And I didn't wash box as good it should wash (silly me

Likes
45
Share


@valiotoro
Follow
Very very sticky i had to change gloves every 2-3 buds!🤓
Delicious smell🤤

Likes
27
Share


@eldruida_lamota
Follow
Bueno pues ya llegamos al final familia, do sweet dos es una variedad bastante productiva. De cuatro plantas casi 180gs y la verdad que bastante contento, no tuve tiempo para poder hacer más fotos y trabajar más este post pero con la prisa y la mudanza pues bueno, bastante e cosechado.
Humedad en el secado relativamente baja al 40% y la temperatura estuvo entorno a 23 grados ambientales.
Hasta aquí todo familia, os recomiendo también la gama de productos de agrobeta, ya que los resultados son llamativos.

Likes
56
Share


@Ganjagrandaddy
Follow
The Gorilla girls all popped the soil overnight from potting. Day 1 with a bang. lol
The cheese broke on the second evening and even now at day 11 , 2 are still struggling to escape the soil fully. Frustrating to watch helplessly.
The Gorilla girls are all nice and settled in on day 11 ( today) . I am watering occasionally and keeping it wider than the plugs width to encourage the roots to explore out. The Amnesia are still dormant so I have excluded them from rhe grow this far. dissapointed is not the word and no idea why they failed so badly ??.
The potential growers are settling in now so hopefully a good weeks growing will bring them to heel.
Likes
6
Share


@420Hydro
Follow
I think i have cal mag deficiency..Ran out ...I usually start cutting back on my cal mag this week...but think i am add it for another week or so..Sorry for the pictures had use old camera this week..hopefully there not to bad....Stay safe and grow on..
Likes
12
Share


@Leonweed10
Follow
Ya más comodas una semana en su maceta definitiva las 20 nenas,tomando mas fuerza y hermoso color.
Likes
17
Share


@Grey_Wolf
Follow
Mexican Joker
Cannabiogen seeds Purple Mexican
21st August 2020
This is a seed that took ages to germinate , but looks quite healthy now 😎
I'll be growing it 12/12 from Seed and with my 100% Organic soil mix
I'm not expecting to get lots of weed, for me it's pretty much just a quick run to sample
the genetics before deciding what to grow this summer.
Also I'll be extremely busy moving Houses halfway across the state and all of my
grows may get neglected for a few days here and there whilst that happens.
Basically If I really like the strain after Ive finished growing it and the smoke is great then I will
Run it again in higher numbers to maybe find a keeper plant 👊
I named the Diary after the Hilarious South Park episode "Mexican Joker"
And I absolutely mean no offence to anybody from or living in mexico
I just couldnt resist after getting this strain and then I saw that episode 😆 Old Randy Marsh is the best Lol
As for the Purple Mexican Variety it's from an awesome mob called Cannabiogen &
Ive heard quite a few good reports regarding them and this variey in particular as it is created from a cross with an oaxaca Strain 👌
Anyway That's enough talk.. Lets Grow!!
Thankyou For Stopping By 👍

Likes
17
Share


@Fabhz
Follow
Very resilient plant. Almost fully recovered, the buds are looking good, a bit red. Some nutrients deficit but i dont care, thanks for visiting.


Likes
16
Share


@AestheticGenetics
Follow
4/15/25 This plant is blowing my freaking mind. Long stacked colas. Even the lower buds are plumping up like golf balls. This is an exceptional plant so far.
Shes starting to show the classic "sherbert" purple that ive noticed shows up with anything that has sunset sherbert in the lineage. Some of the leaves are starting to fade slightly and the purple is coming in.
The rs11 that this seed came from, produced the most from a single plant out of all plants ive grown and trained and kept that small. She yielded 3.5 ounces or a 1/4lb of top nugs from a plant that was only about 18 inches tall and vegged for 6 weeks before flip.
Once i start to clear out all of the fan leaves later on in flower, its just going to be buds running the length of the stems
4/18/25
I really believe this may be a keeper. She is absolutely stunning. Just everything is perfect. She has super long stacking of buds up and down the stems.
Im actually super stoked to see how she finishes up.
One of the craziest parts is that shes in a plastic 2 or 3 gallon pot and this plant is going to yield insane.

Likes
11
Share


@Growing420Dreams
Follow
En el ultimo riego con producto he bajado la dosis de A + B, he notado síntomas de sobrefertilización en una de las plantas. Se les ha aplicado defoliación quitando el 80% de hojas para facilitar que llegue la luz a los puntos más bajos.
Likes
6
Share


@SecretC8keSociety
Follow
Wedding Glue is frosty . I cleaned them up bout to switch the filter on the humidifier so they can stay close to 60 % and I’m using my AC got it set to 73 in the tent though be at 77-68 which good for me until I elevate my equipment and grows…. I’ll recommend. Looking forward to Gorilla Cookies 🍪


Processing
Likes
7
Share


@ReapwhatyouSow
Follow
Growing great. No large issues. Just fighting the leafs every day. Pulling 20-25 leafs per day?
Temps are lowering at night, want to say 62F is about the lowest i have seen.
No bugs!
No flowers yet, lite concerns on height. i have about 3-4 feet max to work with. can always scrog again or super crop.
Likes
15
Share


@Taskot_Joe
Follow
Huge signs of progress this week! The smell has come in strong as well as the nice fat crystal flowers starting to plump up, Definitely a tall growing strain but all signs are pointing towards the yield being of a good quality! Have ordered a USB loupe that will be arriving tomorrow as the current is too hard for photos!


Likes
10
Share


@Skinnytalls420
Follow
Day 38- 18/01/22 and we are now in flowering everything is looking good I’m still cutting down the plants from my last grow Afghan kush and once I’m done with that I’ll be moving everything that isn’t chemdawg into the HPS tent!!! Day 42-22/01/22 moved al into hps tent!!!


Likes
2
Share

@GoodTimesOrganics
Follow
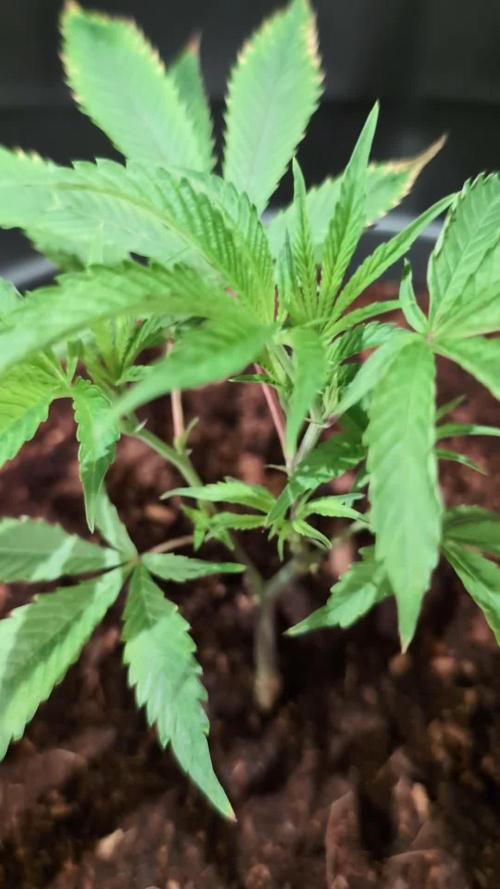
Hi liebe Community and Welcome Back! 🌿💚
Permanent Marker von Seed Junky Genetics x Doja Exklusiv!
Ich habe für ein Projekt Mal noch einen eigenen Stecki gezogen und den seht ihr hier!
Wir befinden uns in Wachstumswoche 3 seit dem Eintopfen (Tag 15).
Allmählich kommt der Steckling gut in der neuen Umgebung an, und beginnt mit dem Wachstum.
Die unteren Blätter haben angefangen mit welken, daher habe ich diese entfernt.
Jetzt geht es dann erst richtig los.
Gegrowt wird wie immer rein Organisch!
Die Bedingungen für einen Steckling, bis er gut angewachsen ist sind gerade Top:
—————
🌞 Temp: 26
🌚 Temp: 18°C bis 19°C
💨 RH: 64%
VPD: 1,1 kPa
💡ppfd: 330 mpm
—————
