
Likes
4
Share


@SamDo
Follow
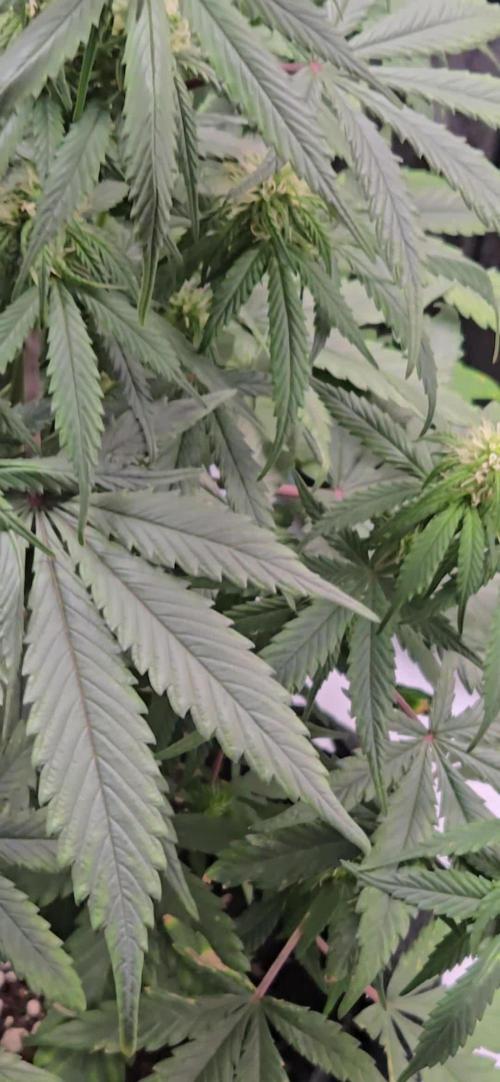
Vegetative Week 5 – Pineapple Upside Down (Round 2)
This week brings a clear and positive shift compared to the previous ones.
The plant has visibly regained vigor, with a noticeable difference in overall growth and structure.
New shoots and branches are actively developing, and foliage density is increasing.
Leaf shape and color look much more natural and healthy than before.
Although the plant still shows some irregular structure due to early-stage stress, the general appearance is now clearly positive.
Growth momentum is back, and the plant is rebushing nicely.
The main objective this week is stabilization.
No pruning or training has been performed yet, as the priority is to allow the plant to fully recover, build strength, and establish a solid base.
Structural work and shaping will only begin once growth is fully consistent.
Nutrition remained unchanged from last week.
Maintaining stable inputs seems to be working well, as the plant is responding positively without any additional adjustments.
While some time was lost earlier in the cycle, the delay is significantly less severe than in the previous run.
This recovery phase is encouraging and provides valuable insight for improving future starts.
Overall, this week ends on a positive note.
The focus moving forward will be on consistency, care, and supporting this renewed growth.
See you next week, take care.


Likes
3
Share


@Spankstheedanks
Follow
Sorry I haven't been keeping up with my updates but other then temperature drop in the days and nights I stopped giving her nutrients and only giving molasses in ice water to speed up and bring put some color she's getting really heavy as you can see she's not supporting herself
Likes
150
Share


@FrenchxFarmer63
Follow
Bonjour à tous,
Après avoir pris une petite semaine de vacances , ces demoiselles n'ont eu qu'un seul arrosage avant mon départ...
Stupéfait que celle ci soir encore en "pleine forme" malgré les chaleurs qu'il a fait et le manque de nutriment !! Elles ont encore grandit.. !! J'ai donc du re faire une sorte de palissage , (Photo before / Photo After).
Pour leurs redonner du Peps' comme ont dit chez nous, je leurs es tapisser au pied , une bonne couche de fumier de vache très riche en nutriment et surtout en Azote avec un gros arrosage pour que tous les nutriments puisse bien parvenir dans les racines 👍👍👍
La près floraison est toujours semie présente mais aucune fleurs n'apparaît... Sur aucun pieds...
Si vous avez des remarques , je suis preneur !!
Affaire à suivre !!!! 🙌🙌🙌🙌🙌🙌

Likes
9
Share


@Topshelf_only
Follow
Running for 2 more day then 48 hrs darkness. Had to set a portable ac to bring temperature down this week getting way to hot. Not quite where I would like it but averaging around 7 degrees cooler.


Likes
8
Share


@Creme_De_La_Creme
Follow
So.... as you guys can see above i HAD to go brutal with this lady applying the "SuperCropping" technique, im not gonna lie that i was very worried since i had stress out the plant just a few day before this with heavy lollipopping and defoliation, but i had no other choice, the plant was still going up, no matter what hahah, she is a REAL BEAST, and it does not matter what i do she still want to be hugging the light hahaha, im FKD, but whatever lets see how this goes!!
the recover was super fast, amazing how she just did almost not care at all with all the pinching and breaking of the stems and went right back up!!
stay tuned
Likes
6
Share


Likes
7
Share

@Chubbs
Follow
Weekly update on these lovely ladies. This week has been fun to watch the flowers form and swell. They definitely are starting to smell, as soon as you open the tent it hits you like a ton of bricks. I'll be doing my final dedoliation this week taking off some of the bigger fan leafs allowing more light to the lower flower sites. All in all Happy Growing


Likes
32
Share


@GreenHouseLab
Follow
Through out the week she received a foliar spray of Epsom Salt to prevent any Mg issues the others had in the tent. She is the shortest and smallest of the bunch but her foliage is the most vibrant. Very healthy and strong stems forming.

Likes
Comments
Share


@LokalGrenz
Follow
Added some cal mag to the ro water besides that everything looking good so far
Added bloom 6/25

Likes
2
Share


Likes
6
Share

@MisterTree
Follow
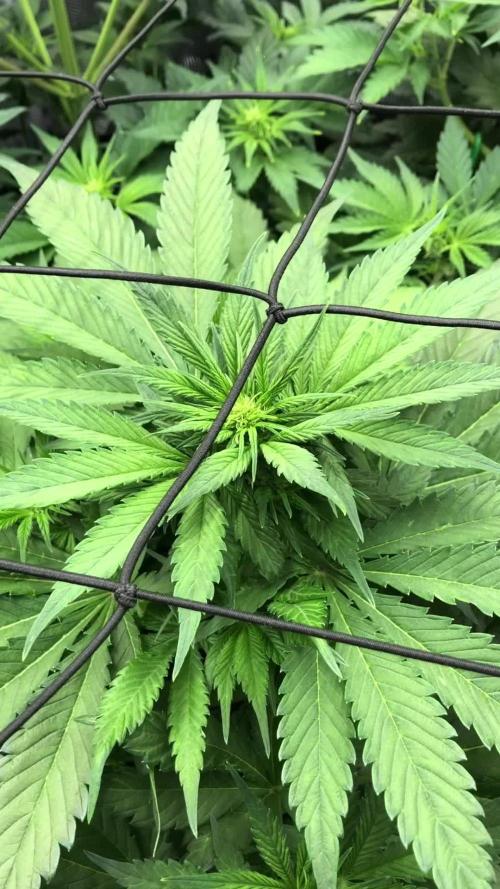
Tag 28 meiner Ladys sie wachsen gut - heute früh wurde das Netz eingesetzt.
Die Lady‘s sind noch gut feucht, werde heute nicht gießen- gestern zuletzt ( 7.10.25 ) 5/6 Liter (Tap-Water).
Habe LST letzte Woche bei allen 3 unternommen - und Leaf tuck in ( Blätter runter gesteckt )
Licht wurde auf 80% gedimt.
Werde die Tage Updates von den Pflanzen (zu dieser Woche) hoch laden und spezifische Veränderungen, falls welche entstehen sollten.
Bleibt Gesund und viel Spaß beim Grow
Update selber Tag : ( 8.10.25 ) / 6 Bilder
LST + Netz angezogen. Nicht ohne Verlust leider wie man auf den Bildern sehen kann.
Sehr gespannt auf die nächsten Tage.
10.10.25 - Alle 3 Pflanzen mit 6 Liter gegossen jeweils ca. 2 Liter pro Lady.
Punkte auf vereinzelten Blättern - gehe von Lichtstress aus, denke nicht es sind Insekten bin aber Anfänger ( untere Seite vom Blatt sieht auch gut aus, ohne Spuren )
Falls jmd ein Tipp hat gerne bitte kommentieren 🙏🏽
11.10.25 - Catwalk Video - lasst es euch gut gehen Leute 🙏🏽
Cya in da next Episode
Likes
9
Share


@Anonymous_buds
Follow
really good as very thing I had popped 100 seeds and they all popped percent :-),,,,, THANKS fastbuds
Likes
13
Share

@Chucky324
Follow
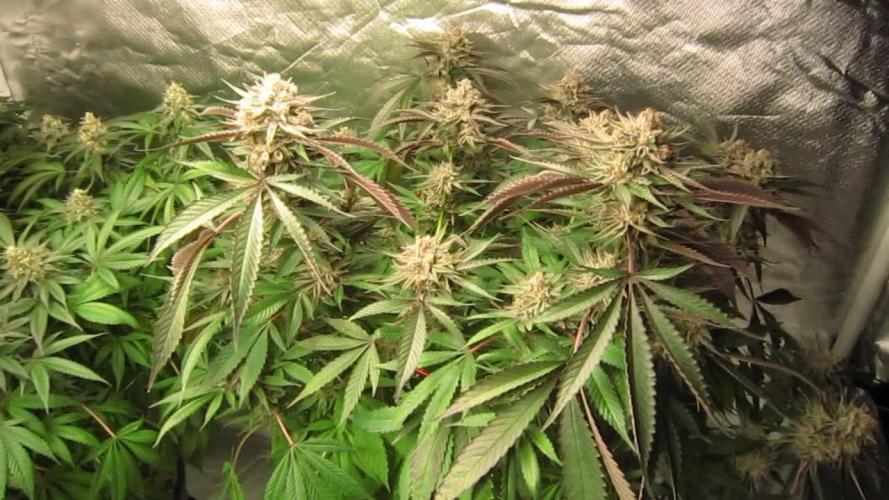
Hello. This is the end of week 8 and the beginning of week 9 of flowering.
This plant look good. Nice baseball sized buds. Great Smell. Got some purple happening.
Starting flushing today, for 2 weeks, to get all the extra nutrients used by the plant.
There will be some yellowing of the fanleaves.
I could make my 50% off code for UHKTA Seeds available soon. Needs to be used by May 1st.
I won the Candy House strain first, so they have my address, Then I placed 28 out of 30 to get a 50% of code.
Then I placed 8 in the last diary of the month winning more of their seeds.
When I get or know my seeds are coming I'll give out the code to someone who's interested.
Check back next Wednesday to see if it available... if your interested.
Remember it's 50% off the first order and needs to be used by May 1st this year.
OK. Be Cool
Chuck.

Likes
9
Share


@CAPITAN_COGOLLO
Follow
° Esta semana se observa ligero avance en las plantas al alejar el foco LED, y además al regar se aplica 1 litro de agua con fertilizantes, en razón 2 ml / 1 litro, agua de riego con PH 5.9
° Se mantiene T° media de aproximadamente 16°C por el invierno y aproximadamente 55% de humedad media
° Se cambia ciclo de luz a 20/4
° Se sube video para concursar en tiktok fast buds
Likes
13
Share


@kakanero
Follow
I try Topping first time, I hope I've done everything right. The plant, its structure and color are still perfect :)
