Likes
Comments
Share
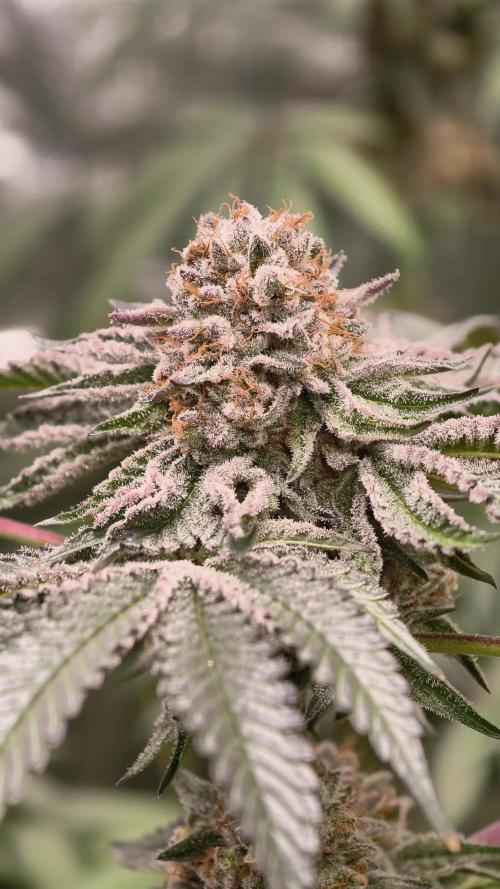
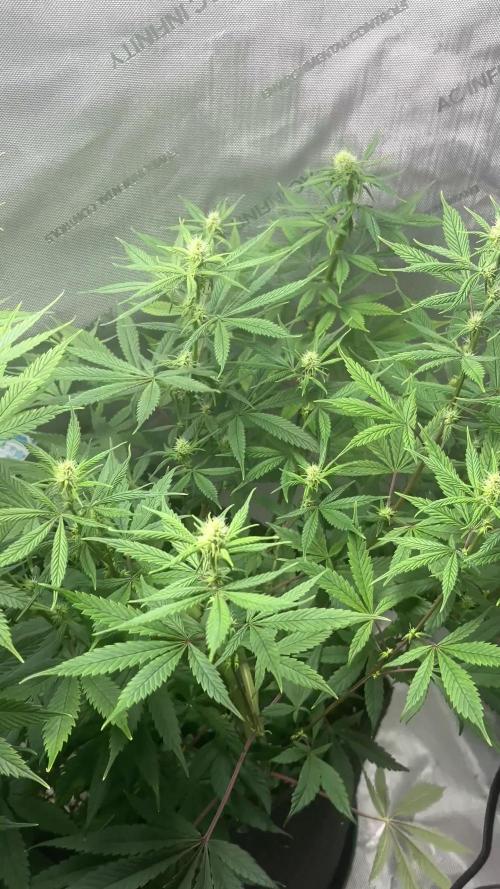
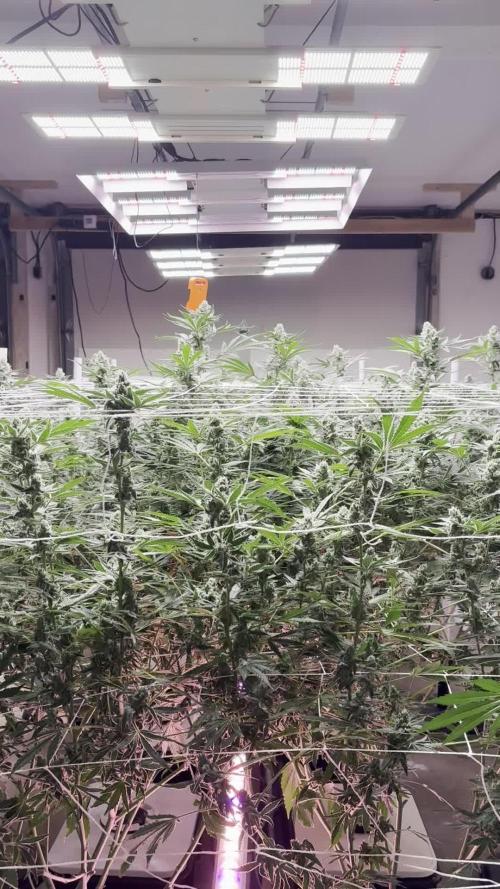
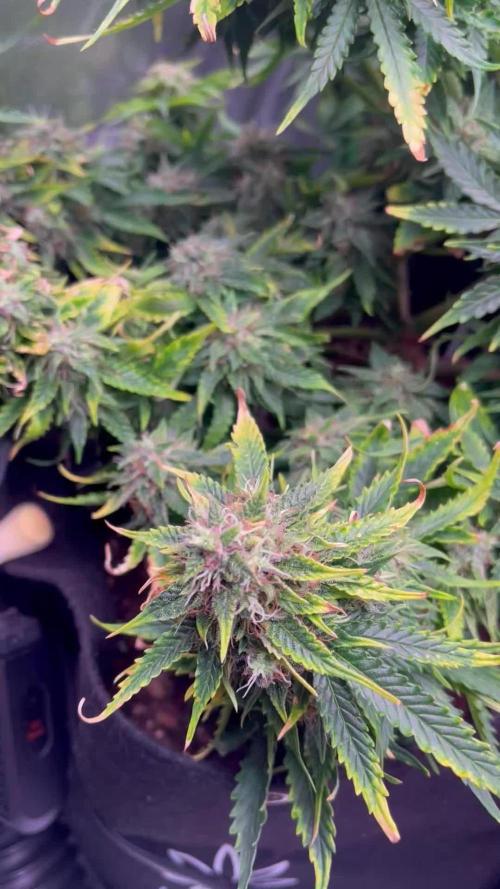
day 28 from seed No flower... day 29 from seed No flower... Day 30 from seed Finally signs of flower. First pistils came trough. Around 550-600 ppfd
Likes
5
Share
@Knert
Follow
This lady started growing like crazy. She's become really bushy and quite tall, with side branches being mostly equally high all over the plant. Flowers starting to develop well, but smell stays on the weak side. I'm expecting her to slow down and eventually stop growing over the next couple of days. Nutrient-wise I used more or less the same schedule as for my Northern Light lady, only did I now give her phosphorous grains at D7 already: * D7: 25g of organic granular phosphorus grains (bone meal) (6-16-0) * D20: 25g organic granular fertilizer (6-3-3) * D28: 35g organic granular fertilizer (6-3-3) * D35: 30g organic granular phosphorous grains (bone meal) (6-16-0) * D42: 20g of organic potassium grains (2-0-20) I'm really curious about how much (if any) she's still going to grow in size and how the buds will develop over the following weeks. Next few days, will be very warm and sunny!
Likes
Comments
Share

🌿Week 4: Defoliation & SCROG Setup Week 4 was all about structure and airflow. The canopy was getting bushy fast, with a ton of inner growth, so we went in for a solid defoliation session across the board. Lower fans, overlapping leaves, and shaded internodes were cleaned up to let light penetrate deeper into the canopy and reduce potential humidity traps. Right after that, we finally dropped the SCROG net, stretched out gently across the canopy to guide the branches horizontally and prep for flower stacking. Some of these phenos are already reaching for the sky, so the timing felt just right. Captured a full-time-lapse clip of the defoliation + netting process. It’s super satisfying watching the chaos turn into clean lines. Nature meets intention. Feed Bloom since 20/6 22/6 Defoliation 🌱 Plant Response: After defol, they bounced back fast. Tops are perky, leaves are praying, and stretch is continuing in a controlled way. The structure’s more open now — better airflow, better light distribution, better everything.
Likes
2
Share
Benefitted from the extra time
Likes
2
Share
This week don't listen to none of the info I just wanted to post pictures, videos
Likes
4
Share
I’m loving the Trichome development on this, Nana glue! Probably got a couple more weeks on her .im Definitely a couple weeks plus on the Hindu.
Processing
Likes
29
Share
================================================================================= CRIB NOTES - I'M USING A LIGHT CYCLE OF 6 ON 2 OFF THIS SHOULD KEEP THE LADIES FROM STRETCHING AND GROW VERY COMPACT. Many growers advocate the use of an 18/6 light schedule (18 hours on, 6 hours off) while plants are in Veg. However, this may not be the most beneficial light schedule. Switching to a series of 6/2 (6 hours on, 2 hours off) light patterns may increase plant growth while also potentially creating a more stable controlled environment. While this new schedule may sound risky, it actually comes with a number of benefits. Cannabis is a “short-day plant,” meaning that it will only flower when exposed to long periods of darkness and short periods of light. For cannabis to flower, there must be at least 12 hours of continuous darkness. This allows for the use of a series of shorter light schedules while the plant is in Veg – as long as the plant receives less than 12 hours of continuous darkness, it will stay in Veg. BENEFITS OF A 6/2 LIGHT SCHEDULE There is a lot of research that suggests that cannabis plants can only process a certain amount of light per day. After that level has been reached, the plant can no longer absorb more light, and any additional light is essentially wasted. By breaking the light cycle into multiple 6 hour periods, the plant is able to rest and process the light it has received. When the lights come back on 2 hours later, the plant will be ready to process additional light, allowing you to get the most plant growth out of every minute your lights are on. At a biological level, cannabis’s inability to grow more once it has received a certain amount of light can be attributed to the way the plant processes carbon dioxide (CO2). A majority of the mass accumulated in cannabis is associated with the amount of CO2 found inside plant cells. While under light, cannabis tries to prevent CO2 from leaving its cells by cutting off transpiration. However, this prevents new CO2 from entering into the cell, blocking new growth. When the lights are turned off, and no photosynthesis is occurring, the plant is able to absorb new CO2 into its cells. Additionally, when plants are exposed to 18 straight hours of intense light, they become stressed. Signs of stress – droopy or curled leaves – will usually appear towards the end of the light cycle. While some stress can be beneficial to plant growth, too much stress can cause harm to your plants and prevent them from reaching maximum growth potential. Giving plants 6 hours of intense light at a time not only puts less stress on the plants, it also spread out the load on your cooling system over a longer period of time. The cooling system works the hardest when lights are on. By turning off the lights for 2 hours at a time throughout the day, your cooling system will get a break between light cycles, allowing the room to be cooled to desired temperatures before the lights come back on. With a properly sized cooling system, this benefit will be minimized as the system will be designed to handle the heat load throughout the entire light cycle. While there are many approaches to Veg light cycles for cannabis, a 6/2 schedule allows for maximum plant growth. A 6/2 schedule allows plants to process more intense light, prevents plants from becoming stressed and puts less stress on your cooling system. It’s a win all around. Give your plants a break every 2 hours and you’ll be amazed at the results. ================================================================================= Day 1 October 1st - 2018 - The 3 Seeds are in germination at the present. The seeds were soaked in reverse osmosis water for 16 Hr. then transferred to a paper towel. DAY 2 October 2nd - 2018 - 2 out of the 3 seeds have germinated. the first 2 will be put into hydrofarm soilless seed starters using Revers Osmosis water and placed under 3 grolux flor 45 watt. Day 2 October 2nd - 2018 1:00 Pm. All 3 seeds planted into hydrofarm soilless seed starters using Revers Osmosis water and placed under 3 grolux flor 45 watt Day 3 October 3rd - 2018 - 9:00 Am. 2 ladies have popped out there little heads. Day 4 October 4th - 2018- 9:30 Am Seedlings are doing fine. All 3 seeds have germinated. Day 5 October 5th - 2018 ROW being installed. 2:30 Pm ROW installed. Day 5 October 5th - 2018 Seedlings are getting first set of single serrated leaves. Day 5 October 5th - 2018 The tent is setup and running R.O.W. Day 5 October 5th - 2018 Washed all Hydroton Clay Pellets in ROW. NO DETERGENTS. Rinse and Rinse again. Using R.O.W. so the medium has a practically no Ph. Day 6 October 6th - 2018 - Transferred the best 2 seedlings to tent under Veg. 1000 Watt L.E.D. Each bucket contains 19 liters of R.O.W. no nutrients added. This will continue for the next 2-3 weeks depending on growth. Day 6 October 6th - 2018 Seedlings put under Light Cycle of 6 On 2 Off Ect. Day 7 October 7th - 2018 - Seedlings looking good. Seems everything is fine on 6 on 2 off light cycle. Day 7 October 7th - 2018 - The 3rd seed germinated is looking very healthy. Transplanted it from the hydro seed starter to a 1 gallon planter with soil. Placed this in between the 2 main plants in the D.W.C. & used R.O.W.
Likes
12
Share
This one is going outside. It's a regular photoperiod seed, I'm hoping it's a female for some long awaited & needed flower. This was the very first strain I ever ran out of several years ago, I'm ready to have this back in stock 💜. I remember it being very relaxing, dissolving my migraine & putting me in a relaxed but great mood.
Likes
15
Share
This week i had to do some supercropping cause some branches was to close of the light! It's seem the plants are not stressed 🤷‍♂️ We will see what's happen in the next weeks
Likes
19
Share
@Budha420
Follow
Day 45: just a quick vid. Been busy soz for posting so little. Day 46: Buds are densing up and mutant is doing mutant things. Lightburn is an issue Day 47: today i tried to fix the mutant problem. Its growing wayy to big for my small 180cm tall tent. Broke one of my light hangers when i tried to tighten it😑 also did some lst but i think the battle might be Lost on this one. Any advice is taken! Other than that, #1 n #2 are doing pretty well. Buds are densing but not at the rate i would want. Might be Bcos my light only draws 200w from wall. Day 48: these ladies are getting frosty swear to god if my light doesnt pull enough watts to dense the nugs, im callbombing spiderfarm till i get new light🌚
Likes
10
Share
@Sundance
Follow
I continue with the same setting. I have 18/6 nice grow and flowering. Plants are healthy. This week I just started with Green sensation additive.
Likes
10
Share
Segunda semana de crecimiento de las red cookies gelato, hasta ahora va todo bien, humedad en 60/65 y temperatura de 22 a 27 de máximas. 9/9 una de ellas anda pocha de forma las hojas son algo raras , la voy a mantener pero podría hacer un reemplazo ya que germine 3 más por si hubiese problemas con alguna. Por lo demás todo perfecto , espero hacer un trasplante la próxima semana , e ir creciendo algo más en la maceta definitiva, seguramente caigan todas en 7l de maceta pero todavía no lo tengo del todo decidido. Buenos humos gente.
Likes
38
Share
Utopia Haze is a rare heavily sativa dominant hybrid (90% sativa/10% indica) strain created through back crossing Brazilian Sativa strains. This tasty little bud took home 1st Place for Best Sativa in the 2008 High Times’ Cannabis Cup and for good reason – with its potent 18-22% average THC level and long lasting cerebral effects, Utopia Haze is one powerhouse smoke. The Utopia Haze high comes on soon after you finish your first toke, hitting you with a strong cerebral lift that infuses you with a sense of hazy relaxation. Type: Feminised/Photoperiod Cultivation: Indoor/Outdoor Flowering Time (days): 70-75 Indoor Yield (g): Up to 650 Feminised Outdoor Harvest Month: October Feminised Outdoor Harvest Month Week: 3rd-4th week Aroma: Citrus, Woody, Pungent, Mint Effect: Cerebral Lift, Hazy Relaxation, Sleepy Welcome Everyone to the Final Entry of my Utopia Haze Grow ! There is so much to discuss ! I have been extremely busy as of late trying to get this Harvest together, but i am happy to have it here for you now ! I Seriously under estimated the amount of time, help from others, and my own necessary skills to pull this off.. and i still kind of screwed it up lol ! But its worth noting i have never actually done this before and trying to document it during....was extremely hard. It is next to impossible to work an iPhone with rubber gloves on ! First I want to discuss everything step by step so before you jump straight into the comments on how the end product is so small in "quantity" Rest assured i am happy with its"quality"...and thats all that matters to me because Life is a journey not a destination! and i have learned so much from this grow that I couldn't be any happy even if i messed some things up :) But at the very least I hope you read through this entry in its entirety with an open mind and focus more on the process, rather than just the outcome! I ran out of Ice & i was only able to wash three times..(normally I've heard you should go sometimes 5-6 washes) Preparation is Key & things will be much better next round :) Photos 1-22 These are pretty self explanatory but for those of you just tuning in now.. this is what happens to a very happy plant when you don't have the necessary tools to monitor key components of growing cannabis.. Ph, as well as EC levels play a very key role in the outcome of your grow lol that being said I was just able to save this plant by purchasing both tools but that doesn't mean the plant didn't suffer because of the prior events.. This was a Huge reason behind me choosing to turn this harvest into what i would consider "Solventless Hash Rosin" from "Ice water extracted Bubble hash". Pictures 23 The idea here is the process of using "fresh Frozen Cannabis" this has been discussed many a time online on such sites as instagram and here on grow diaries as well.. I personally have Never tried the process so i decided to try it out and make a judgement for myself.. Video 24 The Cannabis has now been in the freezer for 72 hours making it very well frozen.. as you can tell i struggled getting it all into the 25u Screen Wash Bag. One thing of note i would do differently is i will de-stem my next batch as i also believe this played a part in the amount of plant matter that escaped through the sieves. Photo/Video's 25-28 The idea here is "ice water Seiving" & especially with the bags that I am using here that are only have screen material on the bottom portion of the bag it is very important to have spaces in-between the screens to allow the water to pass directly through the screens into the bottom bucket with the least amount of resistance.. because the hash is so extremely temperature dependant if it gets warm on the side of the bag.. it will stick there and not make it to the bottom to become use able product.. 29 You do not need to use as much Ice as i used here lol... the idea is to keep everything very cold..i certainly achieved that but at the sacrifice of using so much that i ended up grinding product and producing "contaminants" but in the end they are just plant matter that i would be smoking when i rolled up my joint either way so.. I'm not super disappointed.. But it should be noted that what you want to achieve here is a Layering effect where you have the wash bag between two small layers of ice while the "water current" washes the Trichomes away allowing them to be separated by the screens setup below :) Before Starting the machine you should allow some time (i.e.;10-12minutes pre soak to allow the product to become saturated) before the first cycle. By video 32 I have just ran out of ice lol.. Video 33-34 Here I have a tip for you.. to separate the screens that you sieve through.. cut 5 gallon buckets to stretch them across nice and tight.. it'll make scooping your Bubble that much easier ! i learned this from the many "Frenchy" videos I have watched :) Picture 35 Here in lays the problem for most people.. drying your hash without loosing vast amounts of "Terpenes" whilst also stay ever vigilant against mold ! Thanks to all those videos I've watched on youtube.. id like to think this was one of my most successful parts of this process.. Things to Note; Terpenes start to seriously evaporate at temperatures 68F or 20C you need to stay as cold as possible whilst bringing the Relative Humidity in the space down into the 40-30% to stay away from that nasty mold ! I used my cold storage room in the basement.. with a dehumidifier running to keep the space at 45% RH & staying at a constant 15c. All while spreading the hash as thin as possible across parchment paper, on top of the white screens with a fan moving air across both sides of the paper. Pictures 36-38 These are some macros i took in the middle of my drying session I fell in love with the colour. Yes i know the black spots are plant material but they will get caught when i bag the hash & squish the oil out. Thing to Note; at this stage it is important to ensure you 'micro plane" the hash down as fine as you can whilst staying weary of the temperature... any "chunks" will hold pockets of moisture.. that lead to potential problems..ie; mold ... Picture/Video 39-41 Successfully planed bubble hash ready to be bagged and Squished ! Picture 42 Ive decided to follow Pedro.. from Pedros Grow Room and double bag to be on the safe side so i don't have any blow outs. So thats One 25u bag inside one 160u bag ! :) Pictures 43 This is almost 3 grams of the bubble hash from above, already melting in the bag.. this is where i ran into trouble again lol things started getting to warm in the house and i was only able to get one of the three squish's i did on video :( things started getting sticky. Picture 44 This is basically just a photo of the equipment I'm using; 3x5 LowTemp Cage in the frame I built myself, with a 20Ton bottle jack. Something to note here is this is an older Lowtemp model with only a single heating zone which is which i have it closed here heating Both sides of the press :) As well as the importance of having adequate pressure on your plates.. my rig is very overkill for the size of hash bags..lol Video 45 Here is the lovely press video.. its didn't quite work the way i wanted either lol my directional folding wasn't quite tight enough for a big "drip" :) &the Press was set to 65°c Photo's 46-50 are pretty self explanatory :) I had a blow out.. but still managed to pull an 80% return from the hash once squished...& yes it tasted amazing :) Was it worth it in the end... that could be debated.. for some..i understand..its not your thing, but for those of us that are interested in making our own concentrates.. free from Solvents... I wouldn't make it any other way :) If even ONE of you reading this diary finds it helpful to reference for ANYTHING.....even if its "what not to do" ill consider it a success ! Thanks again for tagging along on this garden adventure.. its been one heck of a journey ! Much Love from B.C. Canada, Until Next time, Cariboo
Likes
3
Share
I love sativa. This is a great freaking plant. Long skinny buds (a little squeezed by me :) and the smell is incredible (strong put in jar open 5 min later my house smells strong) its sweet from the haze but it's got that gassy fuel smell to it also with a tiny bit of earthy after aroma. It's wonderful smokes great gets me higher than any weed at the stores and I never have coughed from it I don't think it's so smooth. Organically grown buds are fckin smooooothh man I never would have understood until I grew organic! This bud is the tits I'm stoned off a mix of blueberry amnesia haze northern ligbt joint as I write this lmao good harvest
Likes
7
Share
Grandaddy Purple- 31 inches tall Colombian Gold- 35 inches tall Alcapulco Gold- 28 inches tall
Likes
13
Share
So, eventful week. Prior to putting my seeds into my system, my light and rdwc system was left on as I was dialling in the growing environment before placing the seeds as a final home. My only issue was I had a light leak BEFORE putting the foil top covers on the clay pebbles. Long story short, I got algae which ended up turning to root rot. I spotted it very swiftly and did a res change adding beneficial bacteria to the system along with the base products of remo nutrients. A few days later new growth and recovery is taking place. Day 16- Fully back on track, new roots shooting out into the water and the growth rate has picked up as it should. Foliar feeding twice a day for a little boost until the root system establishes a bit more. Huge changes in just a day. Can't wait to see what a week's growth looks like. Really loving the sunset/sunrise feature on the trolmaster, something I got to experience watching recently! Watching by closely to make sure everything stays in track. Stay tuned for the next one 😉
Likes
50
Share
@Hou_Stone
Follow
Here are my 3 nori cake that i keep 👶 They look in good shape to me💪🎊 For this grow, I plan to let each plant grow with a large main bud, without topping. Next week I will cut the lower branches closest to the ground. ----------------------------------------------------------- 💧Watering each pot: day 9 : 1L day 12 : 0.5L I use tap water, adjust the ph to around 5.8 and water ------------------------------------------------------------ 🤩Equipment of the week : Light FC3000 Mars hydro. power 80% at 50cm Extractor 6 inch Mars Hydro. power 1/10. ON 24/24h 2 fans to circulate the air inside the tent. Each on for 30 minutes then off for 1 hour. this rhythm repeats itself in a loop Heating mat Romberg 95x95cm. ON 45 minutes. OFF 30minutes. In a loop I am adding anti-midge bird stickers 🐦 ------------------------------------------------------------ Thank you for your visit and your support with the likes, comments. It's always nice to see you!💚 ------------------------------------------------------------ My Instagram 🌱❤️️ : https://www.instagram.com/hou_stone420/
Likes
3
Share
Alright, so we're moving along with the grow but some of these ladies seem to be struggling just a little bit more than others... they're definitely growing at a great pace but the foliage just looks rough. I stopped the alfalfa Ferment thinking it might be a little to potent for them right now... we'll see how they look after another week. I'm sure they'll all grow out of the funk.