Likes
Comments
Share
@squalino
Follow
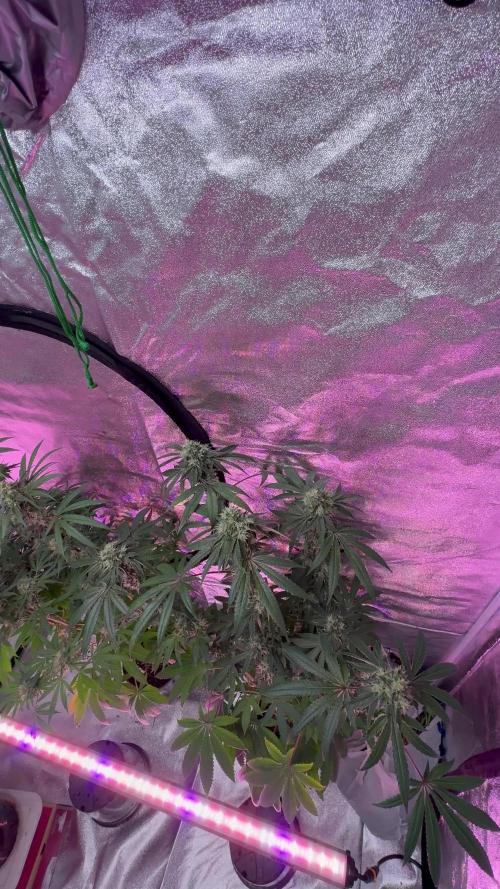
📒 Journal de Culture : Phase de Floraison – Stabilisation & Reprise Progressive 📅 Date du jour : 29 mars 2026 🌱 Âge : J+55 (Semaine 8 avancée) 📏 Taille : 54 cm (stabilisation, fin du stretch confirmée) 🌡️ Rappel des Paramètres (Ajustés) 💡 Éclairage Puissance : à 75% 📏 Distance Lampe-Canopée : 65 cm 💧 Humidité (HR) : 50% 🌡️ Température : 24,5°C ⚠️ État Actuel : Phase de récupération racinaire en cours Observation Générale : La plante montre des signes encourageants de stabilisation après le stress racinaire. Le stretch semble terminé, laissant place au développement des têtes. Les buds commencent à bien se structurer avec une belle formation de pistils et une coloration violette qui s’intensifie progressivement. Cependant, certaines feuilles basses présentent un jaunissement avancé avec des nécroses, signe que la plante puise dans ses réserves suite au blocage d’assimilation précédent. Le feuillage supérieur reste globalement sain, ce qui indique une reprise progressive mais encore fragile. ⚠️ Diagnostic Mis à Jour : Stress racinaire en amélioration Assimilation des nutriments encore partiellement perturbée Début de sénescence localisée sur le bas (réaction normale post-stress) 🌿 Conséquences Visibles : Jaunissement des feuilles inférieures (mobilisation des nutriments) Développement des fleurs en cours, encore léger mais homogène Structure compacte avec une bonne répartition des têtes 🚫 Arrosage contrôlé : Maintien de la stratégie actuelle : apport de 2 ml pk 5-8 avec 0,5 litres d'eau PH 6,3 . maintenant plus d'arrosage tant que le pot ne devient pas très léger afin de garantir un séchage complet du substrat et une réoxygénation optimale des racines. 🌬️ Optimisation de l’environnement : Humidité légèrement abaissée à 50% pour limiter les risques et favoriser la transpiration Distance lampe ajustée à 65 cm pour un bon compromis entre intensité et gestion du stress 🍃 Entretien léger : Suppression progressive des feuilles les plus atteintes si nécessaire, afin d’éviter qu’elles ne deviennent un frein ou un point de faiblesse. 🎯 Objectif : Relancer complètement l’activité racinaire, stabiliser l’absorption des nutriments et accompagner la plante vers une floraison saine et productive.
Likes
17
Share
Week 12 complete and she's starting to fatten up a tad more. Pistils are going brown but she kicks up new white ones every morning. 80-90% clear tricomes still and as I hoped she looks like she's got another week or two to go. Slight clawing of the leaves and some brown spots but they're very few of them. I've raised the LED a couple of inches just in case of light burn. Or it may be she still has a lot of food in the coco as after checking the runoff of tds it was around 1000ppm but as it's living soil she should just take what she needs and stop when she's had enough. And I'm still just feeding her water as I'm 'flushing' her. The Symphylans are still doing their job well from the looks of her!! After researching Symphylans, they are microscopic centipede like insects that are white and they mainly eat seedling roots or decaying organic matter..so they're essentially cleaning the medium..and they stay under the soil away from the light. They can makes holes in roots for pathogens to enter her..but as she's doing so well and as it's only a week or two away from harvest I'm not going to worry about it. If you want to see Symphylans in action check the last video from this week!! Next I'll be doing 2 x photoperiod Chocolopes 🍫 Thanks for stopping by - feel free to comment, give and feedback and follow - and I'll have another update next week!! 🤙
Processing
Likes
17
Share
@greennug
Follow
they are all thriving, growing exactly as i want them to. sucking up everything i give them and they are on daily feeds. some of the autos are starting to flower, but im gonna stretch out veg for atleast another 4/5days for photoperiods. they are ranging in height between 45 and 75cm. west coast OG auto from fastbuds been the tallest at the mo. dinafem cookie strains showing preflowers now and everything going fine. no problems as of yet in the slightest. daily updates.
Likes
14
Share
@Chubbs
Follow
Weekly up date on these gorgeous ladies. They are stacked and swelling amazing going through the flower stage. I really couldn't be happier with how these have grown as it's an easy one not being to temperamental. I've kept the ppm/ec around the same between 900-1100ppms. Still feeding 16oz daily and all in all Happy Growing.
Likes
142
Share
Hey everyone :-). The last plants were also placed in the bloom chamber kammer. Everyone has made great progress this week 🙏🏻. There is not much to say about this week, I think videos and pictures say more like words 🙈😎. I wish you all a good start into the week :-) Stay healthy and let it grow 🙏🏻👍
Likes
9
Share
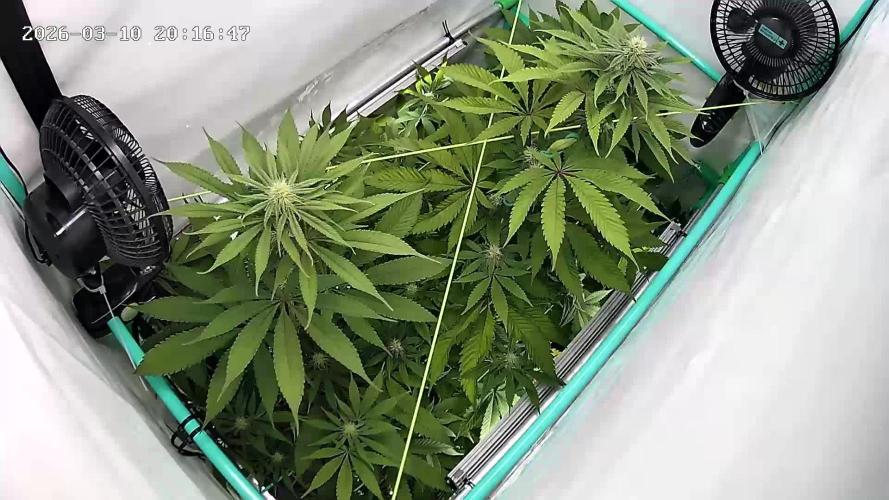
Set up the tent cam to take a picture every 5 minutes during lights on so I can try and make a cool timelapse. I fed them kinda lightly and I think my EC might be a little low and thats why they're so light colored; they're hungry. I also had the light on 3 but now its on 2. Its sitting pretty high above them so I don't think it should be burning them. They show no signs of stretching however so they're definitely not getting too-little light at least.
Likes
20
Share
Grow Report — Nectar Drip GrowDiaries Week 10 (Actual Week ~6–7 from Seed) First things first, a small clarification for anyone following the diary closely. On GrowDiaries this report appears as Week 10, but in reality the plants are around week 6–7 from seed. The reason is simple: the first entry in the diary was created during germination and no photos were uploaded at that moment, so the timeline shifted a little on the platform. So for accuracy: plants are currently around week 6–7 from seed and well into early flower. Now let’s talk about what has been happening. ⸻ Quick Recap For anyone just arriving to the diary, here’s the short version of the journey so far. The goal of this run has always been simple: grow healthy plants, observe them carefully, and share the process honestly. The environment has been kept stable and relatively simple: • 12/12 from seed • balanced feeding schedule • steady environmental control • minimal intervention unless the plants ask for it Up until now we mostly focused on guiding growth and observation, allowing the plants to express themselves naturally while keeping the canopy organized. And they are doing exactly that. ⸻ This Week — The Garden Is Exploding This week the girls are looking absolutely incredible. Structure is strong. Color is perfect. Leaf health is excellent. And the most exciting part: trichomes are already everywhere. Even at this stage the plants are starting to sparkle. Resin production is clearly ramping up and the flowers are stacking beautifully. Height is now roughly around one meter to a little over one meter, creating a very healthy canopy without stretching out of control. Honestly, these are beautiful specimens and a joy to watch develop. ⸻ Defoliation — Why We Did It Now This week we performed a targeted defoliation. This was not done because the plants were struggling or because something was wrong. We did it by choice and by timing. The reasoning is simple: It is often easier and less stressful to remove certain leaves earlier in flower rather than waiting until the canopy becomes dense and airflow becomes restricted. So we removed only what was necessary to: • improve light penetration • increase air movement inside the canopy • reduce future humidity pockets • allow the flowers to develop in a more open environment Nothing aggressive. Nothing excessive. Just removing leaves that were clearly blocking key flower sites. This kind of intervention is always a balance. Different growers prefer different approaches, but in this case it felt like the right moment to open the canopy a bit. Now we observe how the plants respond. ⸻ First Structural Training This week also marks the first time we applied some stronger structural training to these girls. Until now the plants were mostly guided and allowed to develop naturally. At this stage we introduced a bit more direction to the structure so the canopy develops evenly and future flower sites receive better light exposure. Again, nothing extreme. The idea is simply to help the plant organize itself for the next weeks of flowering. The real feedback from this will come in the next report, where we will see how they react. ⸻ Environmental Conditions The room is currently running around: Temperature: ~28°C Relative Humidity: ~68% Outside conditions at the moment are: ~10°C with about 87% humidity Considering the outside environment, we are actually very happy with how stable the room is staying. But one thing worth mentioning: We don’t chase room VPD numbers too aggressively. What really matters is leaf VPD and plant response. Plants tell the truth much better than charts do. Right now the plants look extremely happy: • strong leaves • no stress signals • steady growth • excellent resin development So the environment is clearly working for them. ⸻ Nutrients Feeding remains exactly the same for now. No changes this week. The current nutrient schedule continues to support healthy growth and there is no reason to modify something that is clearly working. Sometimes the best move in the garden is simply: don’t change what isn’t broken. ⸻ Introducing a New Team Member This week we also officially welcomed a new member to the team: Mr. Baggy. He has already been making appearances around the garden and many of you may have spotted him in some of the photos. He’s now officially part of the crew and helping around the studio and garden. Please give him a warm welcome when you see him around the diary. He’s a cool guy and we’re happy to have him with us. ⸻ Gratitude As always, huge appreciation to everyone who takes time to visit this diary. To the: • longtime followers • new visitors • curious growers • supporters • skeptics • lovers • haters Everyone has a space here. If energy crosses paths here, something is being exchanged and that always has value. Special thanks as well to: • the breeders behind these genetics • the GrowDiaries platform • the entire GD community And of course to the sponsors supporting the project. ⸻ What To Expect Next Over the next weeks we will mainly observe how the plants respond to the structural adjustments made this week. Things we’ll be watching closely: • flower stacking • resin development • canopy response after defoliation • structural balance of the plants If everything continues like this, the next weeks should be very exciting. The girls are clearly entering the phase where the flowers start building real weight and character. And we’ll be here documenting every step. 🙏 Thank you for your patience and continued support. FOR DISCOUNT CODES AND MORE JUST FOLLOW THE LINK https://website.beacons.ai/dogdoctorofficial 📲 Don’t forget to Subscribe and follow me on Instagram and YouTube @DogDoctorOfficial for exclusive content, real-time updates, and behind-the-scenes magic. We’ve got so much more coming, including transplanting and all the amazing techniques that go along with it. You won’t want to miss it. GrowDiaries Journal: https://growdiaries.com/grower/dogdoctorofficial Instagram: https://www.instagram.com/dogdoctorofficial/ YouTube: https://www.youtube.com/@dogdoctorofficial Deleted by Youtube Vimeo : https://vimeo.com/dogdoctorofficial Under construction stay tuned ⸻ Explore the Gear that Powers My Grow If you’re curious about the tech I’m using, check out these links: 🔆 Lighting & Environmental Control • Future of Grow — Advanced LED lighting technology https://www.futureofgrow.com/ DISCOUNT CODE: DOG20 • Lumiflora — Under-canopy LED lighting https://lumiflorade.com/ • TrollMaster — Environmental controllers and automation gear (past collaboration) ⸻ Genetics • Zamnesia Seeds — Genetics used in this project https://www.zamnesia.com/ ⸻ 🌱 Soil, Substrates, Boosters & Root Support • Plagron — Substrates, bio mixes, and supportive products https://plagron.com/en/ ⸻ 🎒 Storage, Curing & Preservation • Grove Bags — Curing and storage solutions https://grovebags.com/ ⸻ Straw Baggy Links 🌍 Website https://www.strawbaggy.com/?ref=339 10% discount code for our Community - Dogdoctor10 📸 Instagram https://www.instagram.com/straw_baggy/ ⸻ 📸 Photography Equipment & Tools (Not sponsors, but part of my creative toolkit) • Sony A6700 • Sony full-frame macro lens + few more • Stacking photography workflow - learning • iPhone (for behind-the-scenes shots) We’ve got much more coming as we move through the grow cycles. Trust me, you won’t want to miss the next steps, let’s push the boundaries of indoor horticulture together! As always, this is shared for educational purposes, aiming to spread understanding and appreciation for this plant. Let’s celebrate it responsibly and continue to learn and grow together. With true love comes happiness. Always believe in yourself, and always do things expecting nothing and with an open heart. Be a giver, and the universe will give back in ways you could never imagine. 💚 Growers love to all 💚 📸 P.S. – The Eye Behind the Lens All photos in this diary (for now — except for the ones showing the camera, which I took with an iPhone) are taken with a Sony A6700 paired with a Sony full-frame macro lens and a few more. Photography is part of the story — it’s how we share the fine textures, the glow, and the quiet details that words can’t always capture. I’ve also started experimenting with photo stacking — a technique where multiple images, each taken at a slightly different focus point, are layered together to create one perfectly sharp image from front to back. It’s not digital enhancement or AI; it’s pure photography — a way to reveal the plant’s beauty in microscopic depth, from trichome to petal. You’ll even see a few shots of "ghost me" capturing the shots — camera, lens, setup — because every grow deserves not just to be cultivated, but documented like art. FOR DISCOUNT CODES AND MORE JUST FOLLOW THE LINK https://website.beacons.ai/dogdoctorofficial NEW DISCORD - Official Server Invite Link : https://discord.gg/ksjAkA5T74
Likes
14
Share
@youdan
Follow
Questa settimana si è slanciata veramente molto! Me lo aspettavo già in quanto non è la prima volta che la coltivo, ecco perché ho deciso precedentemente di effettuare 3 topping consecutivi! Ha reagito veramente molto bene ha continuato la sua vegetazione normalmente senza blocchi e durante la 4 settimana si prepara per il fiore! Adoro le genetiche di Fast buds! Ancor di più la FORBIDDEN RUNTZ AUTO! Per questo ciclo di crescita ho voluto fare un cambio radicale nella sua dieta, ho cambiato marca di fertilizzanti passando da plagron (con il quale collaboravo a CANNABOOM!) semplicemente perché ho potuto constatare i loro pregiatissimi prodotti! Dopo un accurato studio si ogni componente ho voluto fare questo cambio....che dire!!! Menomale!!! Raga veramente dopo la seconda applicazione la pianta e praticamente esplosa in ogni suo potenziale ,parli veramente di ogni cosa! Altezza, Internodi , calici sparsi ovunque, si iniziano a intravedere intricominsulle foglie a ventaglio!!!! Le foglie sono grandi quanto la mia mano😂 ho fatto un po' di pulizia fogliare e per adesso la lascerò crescere così togliendo solo qualche foglia qua e la ogni tanto quando ci sarà bisogno... ringrazio molto cannaboom per i loro prodotti che volevo consigliare a tutti voi e vorrei ringraziare anche fast buds per questa genetiche che non finisce mai di sorprendermi! E poi....ci siete tutti voi! Grazie mille ad ognuno di voi! 🌈💥💪🏼🌱
Likes
12
Share
day 42 images are in last week, I can not count XD. bridal is stacking a lot of weight and is constantly shifting/leaning every morning, good things. I would chop any day but I will wait it out. water, tiny bit of humic and folvic to reduce chloromine, chlorine- air stones day 45 took a few nugs off on day 42, dried for 3 days. Tried bridal and blackberry. As a heavy recreational, thc is up there! bridal felt like having a blindfold over your eyes somewhat sativa uplift but heavy weight feelings. Very good. Lasted as good as 30%'s. Dr. Thunder was also very nice, nug was smaller so mixed with blackberry to have a small j. Also feels very good indica. Both trials were chopped on week 6 day 1. Very pleased with the results. I was worried bridal was more sativa; which charasteristica I am not looking for. So I believe this is a very good heavy hitter run with 4 plants. I can chop any day, but I am waiting for pink paradise to finish seeds. day45 took top nugs from bridal party, blackberry oreo bigstuff and dr. thunder. No touching pink paradise!! day 46 can chop anytime just waiting on pink paradise seeds to finish, bridal party leaning more day 47 bridal leaning hard from weight. day 48 stacking, day 48 video
Likes
17
Share
@BLAZED
Follow
W17 (22-5 to 28-5) 22-5 Temperature: 26.2 degrees (lights on) 20.5 degrees (lights off) Humidity: 56% (highest) 46% (lowest) Opened the reservoir for a couple of minutes. 23-5 Temperature: 24.9 degrees (lights on) 20.5 degrees (lights off) Humidity: 52% (highest) 46% (lowest) 24-5 Temperature: 25.7 degrees (lights on) 21 degrees (lights off) Humidity: 58% (highest) 50% (lowest) Watering: Both 1250 ml. No pictures. For now on i will give them water manually, by pooring it into the autopot trays. 25-5 Temperature: 24.9 degrees (lights on) 21.8 degrees (lights off) Humidity: 59% (highest) 50% (lowest) No pictures. 26-5 Temperature: 25.6 degrees (lights on) 20.5 degrees (lights off) Humidity: 57% (highest) 45% (lowest) No pictures. 27-5 Temperature: 24.9 degrees (lights on) 21.5 degrees (lights off) Humidity: 56% (highest) 40% (lowest) Watering: Both 1000 ml. No pictures. 28-5 Temperature: 26.7 degrees (lights on) 21.9 degrees (lights off) Humidity: 57% (highest) 41% (lowest) Watering: Both 1000 ml. PH: 5.8 EC 0.0 They are looking amazing! The #1 has pretty thick and stone hard buds. The #2 is getting more dense, and is covered in crystals! She smells very citrussy aswell!
Likes
10
Share
@CreoWeed
Follow
Here we are in what it will be the final week... I am now at day 61 and I'm considering to cut at the end of this current week... in 2 days basically... I recently bought a scope that allows me to check the trichomes and I can see all milky ones, I also posted some videos of it, please guys let me know your thoughts... Beside this buds are hard like rocks and smell still pretty intense and I cannot wait to taste this short but bulky phenotype. I'll keep you guys posted if I harvest or not this week hoping to read some of your comments. So Stay tuned, stay high! - - - - - - - - - - - - - - Little update at Day 63. I decided to give her few more days, so next week will be chopping her, this mostly cause I watered her last time on Day 61 and now I am basically just waiting for the soil to be dry. I count to put her in the dark for 48 hours at Day 65 and finally chop her at day 67, I cannot wait to update you for the harvesting part. I expect to reach 50/60 grams dry and I really hope to achieve that. Keep you guys posted! Stay tuned, stay high!
Likes
43
Share
~ GG4 SHERBET FAST FLOWER by FastBuds ~ Well fam, here we go again with another epic strain from FastBuds Fast Flowering stable. After having such tremendous success growing their Gorilla Cookies Fast Flower outdoors last year, I've decided to run another of their fast flowering strains outdoors this year... GG4 Sherbet Fast Flower! The best description of this awesome cultivar comes directly from my friends at FastBuds which is as follows: "Bred from extremely potent and flavorful Gorilla Glue and Orange Sherbet genetics, GG4 Sherbet FF (Fast-Flowering) takes all the best traits to the next level, offering a high-yielding strain that can produce up to 600 g/m2 in a 7-week flowering time. This super resilient Indica-leaning hybrid thrives indoors and outdoors, and in all types of climates while producing mouth-watering sweet, fruity, spicy and earthy terps that translate into a delicious sugary hazelnut aroma. Expect an extremely relaxing and overall happy effect that’ll leave you with a huge smile from ear to ear. It’s the perfect strain for growers of all levels of experience seeking low-maintenance yet highly productive photoperiod varieties that deliver quality and quantity without extra effort. GG4 Sherbet FF grows chunky buds with long dark orange hairs and spade-shaped calyxes that get encrusted with trichomes by harvest time, giving them a gorgeous silvery-white appearance. This medium-sized photoperiod can reach up to 200 cm in height and yields up to 650 g/m2 while developing that typical hybrid structure. GG4 Sherbet FF grows with a stocky, bushy appearance, developing one sturdy main cola and fat side branches that support huge yields without much effort. This super-fast variety produces distinctive light-green buds with a high bud-to-leaf ratio, making your trimming sessions a breeze. It’s a top-notch resin producer that doesn’t need much maintenance and will thrive in almost every climate, rewarding growers of all levels with extremely flavorful resin that makes for outstanding hash end extracts." ________________________________________________________________________________________________________________________________________________________________________________________________________________________________________________________________________________________________________________________ The Setup: This is going to be an outdoor grow, but I have started the GG4 Sherbet Fast Flower indoors as our weather is still too cold to put her outside (nighttime temp's dipping regularly into the 30's℉). The plan is simple... let her grow inside under a 19/5 light schedule until the nighttime temperatures stay above the mid 40's℉, at which point she'll be moved outside and transplanted into the soil which I have already setup and inoculated with beneficial microbes, and then let the fun begin!🤪💚 ________________________________________________________________________________________________________________________________________________________________________________________________________________________________________________________________________________________________________________________ Weekly Updates: 5/2- Here we go into the fifth week for the GG4 Sherbet Fast Flower from FastBuds. Our weather is finally beginning to warm up and you can start to see it in the GG4 Sherbet FF as she is beginning to 'wake up'. 5/4- I have yet to see any insects either on top of, or underneath her leaves to determine what's causing the perforations on her leaves. I went ahead and sprayed her down with Neem oil and I'll keep an eye out to try and determine what the culprit is. 5/6- Rain showers today handled the watering duties and all I did was to add some straw to a couple of bare spots on the mound. 5/8- I'm not seeing much in the way of any new damage to the leaves of the FastBuds GG4 Sherbet FF. I will continue with the Neem oil preventative, along with spreading some powdered cayenne pepper around the base of the plant to take care of any slugs that may think of trying a taste of sherbet! Thank you for checking out my diary, your positive comments and support make it all worthwhile! 💚Growers Love!💚😎🙏

Likes
48
Share
Harvest Date: - March 7 @6:45 pm - 128 days from seed to harvest Final Watering: - March 4 - 1.5 gal each 36H of Darkness: - Mar. 5 @7:00am until Mar.7 @6:45pm Mar. 2 - bulked up nice - dehumidifier fills up quickly meaning good transpiration mar. 4 - ph: 7.5 - dry - watered 2.5gal (combined) + 12ml of apple cider vinegar = ph6.5 Mar. 5 - fade has started with yellowing on the smaller older leaves Mar. 7 - ph: 7.8 - dry - trichomes: - clear 10% - cloudy 90% - amber 0.1% - fade is slowly coming along UPDATED: Harvest Date: - March 12 @6:45 pm - 131 days from seed to harvest Final Watering: - March 8 - 1.5 gal each No darkness period, just harvest before the lights come on Mar. 8 - A 5 gal of 6.2 and 6.4 ph water (10gal total / 5 gal each) was given to both plants to flush - 5gal water + 30 ml of “clear” flushing agent + 30ml of blackstrap molasses + 20ml of apple cider vinegar - 3.5 gal of run-off = 6.3 - 2nd 3.5 gal of run-off = 6.2 - plants look really good, this was the last watering so i decided to add a little flushing agent and molasses - once dry I will harvest regardless of trichomes amber % - Estimated day of harvest = Mar. 12 @6:45 Specifications:😎👇 Seeds: - 2x White Widow feminized seeds from Crop King Seed Tent: - 4x4x6 Mammoth Grow tent LED: - 2x Spider Farmer SF1000 LED for veg - 4x Spider Farmer SF1000 LED for flower (190 watts - 50-40-50-50 back left, back right, front left, front right) Pots: - 2x 0.5 L starter pots - 2x 5 gal smart pots after transplant Soil: - Pro-mix containing mycorrhizae and perlite, used for starter pots and mixed at roughly 1:3 ratio with Ocean Forest - Fox Farm Ocean Forest soil, used in the 5 gallon pots and mixed with roughly 3:1 ratio with pro-mix - note: pro mix was mixed thoroughly with ocean forest in the 5 gal pot, then pro-mix was used on the top layer, in and around where the transplant will be to help the early veg stage avoid getting too "hot" via nutrients. Nutrients: - Fox Farm Big Bloom - Fox Farm Big Grow - Fox Farm Tiger Bloom - Wholesome - Blackstrap organic unsulphured molasses Inline Fans: - AC Infinity CLOUDLINE T6 6" (exhaust) - AC infinity CLOUDLINE S6 6" (active intake) - AC infinity 6" ducting Mini fans: - 2x Wind Devil 6" fans Carbon Filter: - 2x iPower Carbon Filter on both inline fans - note: carbon filter on intake fan as basement had mold issues in furnace room far removed but same floor, some mold issue in other room, cat litter in basement, thus, avoiding all risks and sleeping sound at night :) all mold was killed, scrubbed, cleaned, sprayed, painted, and sprayed again before setting up. Humidifier: - TaoTronics Cool Mist Humidifier Dehumidifier: - Frigidaire 30-Pint 3-Speed Dehumidifier Timers: - 2x VIVOSUN dual Digital Timer - 2x Kuman Digital Timer
Likes
44
Share
**Encontrarás la traducción a español al final de la descripción** From/Desde: 10/05/19 || To/Hasta: 16/05/19 From day/Desde día: 78 || To day/Hasta día: 84 You can find the Money Maker Diary here: ** Podéis encontrar el diario de las Money Maker aquí:** https://growdiaries.com/diaries/25667-gorillamakingmoney-gorilla-vs-money-m -----IMAGES & VIDEOS----- 5 - HomeMade Organic & Cheap CO2 generator (more info in week summary) 9, 10, 11 & 12: The bud on the right is a Gorilla one, the buds in the left or/and in the middle are Money Maker ones. 15 - Same Gorilla plant buds, one affected by CO2 in the roots and the other not. -----WEEK SUMMARY----- The smell is more sweet and intense every day, friends that came home turned them eyes into crystals when they see this little babys. The size isn't awesome, but the high ammount of buds full of crystals plus the strong sweet aroma makes them awesome. Buds are growing and fattenning very very well. This week i added a boost of HomeMade CO2, i never measured the results of this invention so i can't give CO2 measurements. This method is widely used in home aquariums and there is where it comes from. For those interested i'm going to write here more detailed instructions. The 4 liters i've made will last for about 2 weeks. ---NEEDINGS--- - 250 ml Bottle - 6~10 l Bottle - 400 g Sugar / l water - 1 Envelope of organic baker's yeast / l water (CHEMICAL WILL NOT WORK) - 3 mid plastic tubes 40~50 cm - 1 short plastic tube 5~6 cm - 4 tube adapters - Hot glue to seal adapters The process of creating CO2 is simple, mix water, organic yeast and sugar in a bottle, and the sugar will free CO2 in the process of fermenting to alcohol due to the yeast. 1. Make a hole in the center of the big bottle cap, insert an adapter and secure it with hot glue 2. Make 3 holes in the small bottle cap and glue the other 3 adapters 3. Link both caps with one of the mid tubes and insert the other tubes on free adapters 4. Insert a short tube in the bottom of the small cap in the adapter that came from the big cap 5. Watch the Video!! -----WATERING CALENDAR----- Plants are beginning to drain the pots a bit faster so from now on i will raise the water ammount on each watering day 0.25 l. 11/05/19 - 1,5 l with All week nutrients -(Nirvana & Blombastic) also Big Bud half dosed @ PH6.4 & 2 E.C. 14/05/19 - 1,5 l with Bud Candy, Big Bud, Nirvana, B52, Bud Factor-X, Sensizym & Blombastic @ PH6.4 & 1.5 E.C. *****ESPAÑOL***** -----IMÁGENES Y VÍDEOS----- 5: Generador de CO2 casero, barato y orgánico (más info en el sumario semanal) 9, 10, 11 & 12: El cogollo que sale a la derecha es de una Gorila, el de la izquierda y/o el de en medio son de una Money Maker 15: Dos cogollos de la misma planta, uno afectado por CO2 en las raíces y el otro no -----SUMARIO SEMANAL----- El olor es más dulce e intenso día a día, los amigos que vienen a casa a verlas se quedan ojipláticos al verlas. El tamaño no es una maravilla, pero la gran cantidad de cogollos llenos de cristales añadido al aroma que entra por las fosas nasales las hacen increíbles. Los cogollos crecen y engordan de maravilla. Esta semana he añadido un boost de CO2 casero, nunca he hecho mediciones de los resultados por lo que no puedo darlas. Este método es ampliamente usado en peceras caseras y de ahí saqué la idea. Para aquellos interesados dejo aquí instrucciones más detalladas. Con los 4 litros de agua que he preparado yo da para unas 2 semanas. ---NECESITAMOS--- - Botella de 250 ml - Botella de 5 a 10 litros - 400 g de azúcar por litro de agua - 1 sobre de levadura de postre orgánica (LA QUÍMICA NO FUNCIONARÁ) - 3 tubos de plástico de tamaño medio 40~50 cm - 1 tubo de plástico de tamaño pequeño 5~6 cm - 4 adaptadores para los tubos - Cola caliente para pegar y sellar los adaptadores El proceso de generar CO2 es simple, mezcla agua, levadura orgánica y azúcar en una botella, y el azúcar liberará CO2 en el proceso de fermentación a alcohol. 1. Haz un agujero en la tapa de la botella grande, inserta un adaptador y séllalo con cola caliente 2. Haz 3 agujeros en el tapón pequeño y haz lo mismo con los otros 3 adaptadores 3. Conecta los 2 tapones con uno de los tubos y conecta los otros 2 tubos a los adaptadores restantes 4. Conecta el tubo pequeño en la parte libre del adaptador del tapón pequeño que viene del tapón grande 5. Mira el vídeo -----CALENDARIO DE RIEGO----- Las platas comienzan a secar los tiestos un poco más rápido, asi que de ahora en adelante incrementaré 250 ml de agua adicionales en cada riego. 11/05/19 - 1,5 l con todos los nutrientes semanales -(Nirvana & Blombastic) BigBud mitad de dosis @ PH6,4 & 2 E.C. 14/05/19 - 1,5 l con Bud Candy, Big Bud, Nirvana, B52, Bud Factor-X, Sensizym y Blombastic @ PH6,4 & 1,5 E.C.
Likes
13
Share
@MrPott
Follow
Finally got the big tent and got the environment dialled in. With the AC in the tent, it's way more stable now; this also means I can close the distance between the light and the plant and she's definitely growing better.
Likes
1
Share
Updated diary. My disco biscuit diary is coming to an end this week so will be back updating this regular. I’ve been quiet on this diary and not updated it as much as my most recent one. Some really good growth and I’m only using a 250w hps, maybe 3-4 days left now before I leave my DB grow in darkness and remove the g3000 and add it to this tent. Hopefully I can get some nice fat buds on this one 👍