


Likes
Comments
Share

@Jabbamo
Follow
_______________________________________________________
Mi. 25.3.
- 3,5 Liter pro Pflanze gegossen (ca. 300ml Drain)
- Rainpoint Bewässerungssystem eingesetzt
- 1L auf 3 Pflanzen Nährlösung per Hand angegossen
- Programm: 3min. ON / 3min. PAUSE / 3min. ON
- 2L pro Zyklus.
- 1L klar spülen zur Systemreinigung
1,2 ml / Liter "Calmag"
1,5 ml / Liter "Bio Grow"
4,0 ml / Liter "Bio Bloom"
4,0 ml / Liter "Top Max"
Ph 6,2 / 790 ppm
_______________________________________________________
So. 29.3.
- 3,2 Liter pro Pflanze gegossen (ca. 200ml Drain)
- 1L Nährlösung per Hand angegossen
- 8L Nährlösung per Gießsystem
- 0,5L klar spülen zur Systemreinigung
1,2 ml / Liter "Calmag"
1,5 ml / Liter "Bio Grow"
4,0 ml / Liter "Bio Bloom"
4,0 ml / Liter "Top Max"
Ph 6,2 / 770 ppm
_______________________________________________________

Likes
2
Share


@sea_grower
Follow
11/março - 283ppfd / 18,3dli / 27ºC / 78% RH
Agua base:
- 5L
- temp 27
- ph 6.9
- ppm 81
Nutrientes:
- 15ml grow a/b (3ml/l)
- 10ml Candy (2ml/l)
- 10ml B52 (2ml/l)
- ppm 1030
- ph 6.1
1,5L por vaso
Runoff:
#1 ph 5.0 e 1002ppm
#2 ph 5.0 e 1035ppm
16/março - 283ppfd / 18,3dli / 27ºC / 78% RH
Agua base:
-5L
- ph 6.2
Nutrientes:
sem
2,5L por vaso
Runoff:
#1 ph 5.2 e 715ppm
#2 ph 5.3 e 738ppm
17/março - fotos + ajuste do ppfd para 500ppfd / 47,8 dli
18/março - início LST #1 e poda top #2 - 737ppfd / 47,8 dli
20/março - 737ppfd / 47,8 dli
Agua base:
- 2x5L
- temp 24
- ph 8.1
- ppm 86
Nutrientes:
- 20ml grow a/b (4ml/l)
- 10ml Candy (2ml/l)
- 10ml B52 (2ml/l)
- ppm 1362
- ph 6.3
5L por vaso
Runoff:
#1 ph 5.0 e 1350ppm
#2 ph 5.1 e 1260ppm

Likes
5
Share


@BombBuds
Follow
Die Milben haben wieder gute Arbeit geleistet. Alles schaut wieder gut aus!
Werde sie jetzt so lang der Stretch noch geht mit Draht und Netz auf einer Höhe halten und ausbreiten. Anfang nächste Woche mache ich ne Defoliation und evt bissl lollipopping.
Und lichtintensität geht nächste Woche auch auf 100%

Likes
10
Share


@Budhunter
Follow
My big baby is here, what a stunning plant, terps and flavors are insanely good.. never imagined it would be growing as tall as it is.. I am in love.. super frosty and super fruity smells.. let’s gonna keep the good job till the harvest..
probably gonna flush it on next watering and wait till the terps gets where I like..
happy growing 🙌🏼

Likes
1
Share


@My_Orbital_Temple
Follow
11/13 Was the last night I kept the dome in the tent, started getting too crowded!
But here on 11/15....lol i got bored and wanted to give it some more nutes! 😏
So I made a gallon up of some warm tap water PH'd down to 6.1, 8ml of FoxFarms Big Bloom, 5ml Boomerang, 5ml Wholly Mackerel, and 2ml of Power Si followed up with a very low dosed foliar spray of Xtreme Gardening's CalCarb before it was lights out.
11/17 I did some topping including the main stem.
In the video (its off my Instagram story @SoilBGood) there's one that I'm not too happy about, the taller one with the stretched out spacing. But I don't doubt that its gonna give me some dank buds 👊
11/20 The plants are looking sharp....I foliar fed them with some Calmag / Power Si and they blew up over night lol
B: Is a shot of the node growth
NOTE: I ALWAYS DEFOLIATE EVEN IF I FORGET TO MENTION IT.
NOTE NOTE: I swear I smell them already :D
Likes
2
Share

@LittleBigTrees
Follow
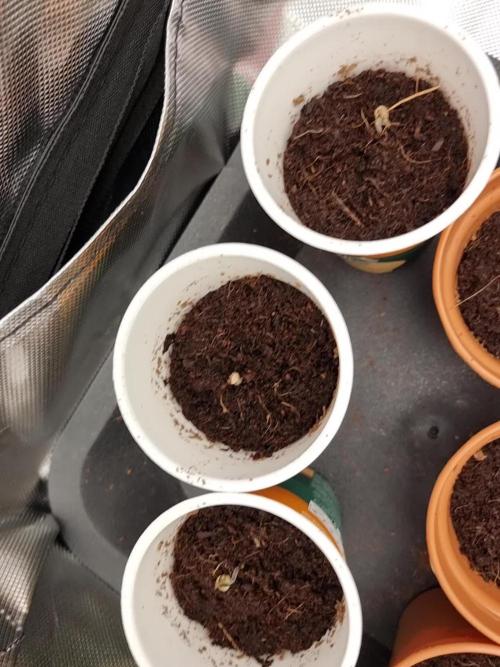
Wet yhe coir and put the seeds about 5-10mm deep.
Took 3/4 days to germinate


Likes
Comments
Share


@MrHazeAmaze
Follow
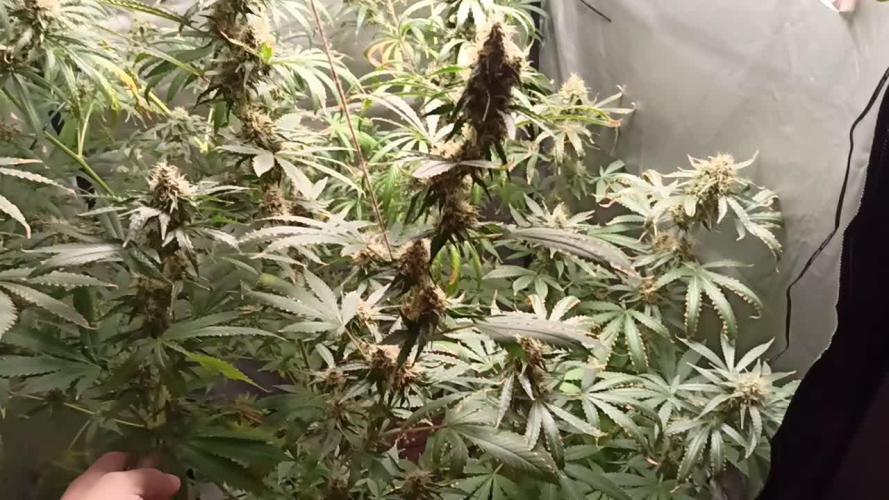
Die Pflanzen wurden nach 9 Tagen im Becher in jeweils einen 19L Stofftopf umgetopft. Nach 14 Tagen wurden beide mit einem Skalpell getoppt.
Bisher fand so gut wie keine zusätzliche Düngung statt. Ab jetzt wird regulär Dünger verabreicht.
Likes
154
Share


@CBD_Sweden
Follow
@FAST_BUDS,
Hi all the happy people here in GrowDiaries.
This is my second cultivation ever and it will be fun to try a bigger space than my closet grow.
First, I'm just going to say I'm done with the construction of my new growroom.
I put some pictures on the construction here in week one.
The room is 2.14 meters by 1.7 meters and has a ceiling height of 2 meters.
It provides a floor area of 3.6 square meters.
I use a 54 Watt Lightwawe T5 for germination and 2 Pcs 400 Watt HPS lamps.
I have a channel fan that replaces the room air about 40 times an hour to get a comfortable environment in the room, the air enters a fresh air intake from the outside.
The air is purified through a carbon filter to then leave the room to the rest of the basement.
Then I use that heat to heat the rest of the basement.
I will use 8 pcs 15 liter Autopots to grow with and a 100 liter water tank that supplies the pots of water and nutrition.
I will grow completely organically in soil and will watercure my buds to get the best possible medicine for me.
But there are no cultivation rooms to be displayed here, so I continue with what is most important.
Today I have put my seeds in my moisture dome and hope the seeds have germinated within a few days.
I am very excited to see how the new growroom will work and how this new secret CBD plant from @FAST_BUDS, will turn out.
..............................................................................................................................................................................................................................................................................................................................................
2017-09-11. Kl 12.00. Week 4 starts. I have cleaned the whole room for the new week and gave the girls water and nutes. Added videos and pics. Girl nr 1 is 27 cm high and girl nr 2 is 22 cm high.
-----------------------------------------------------------------------------------------
2017-09-12. Kl 10.00. New pics and video. Girl Nr1 has grown 5 cm in 23 hours, from 27 to 32 cm.😍
-------------------------------------------------------------------------------------
2017-09-13. Kl 22.00. Everything is looking great in the garden right now. Added new video.
--------------------------------------------------------------------------------------------------
2017-09-15. KL 10.00. New video added. Girls are looking great and they got 3 liters of water and nutes this morning. Girl Nr 1 is 38 cm high and Nr 2 is 28.
-----------------------------------------------------------------------------------------------------------------------------------------------------------------------------
2017-09-16. Kl 10.00. The girls grow like crazy, i have to defoliate about 20 leafs a day. Added 2 liters of water and nutes this morning and 2 new videos.
-------------------------------------------------------------------------------------------------------------
2017-09-17. This is the last day of week 4. Added a time laps from germ to week 4.

Likes
3
Share


@PineappleMuffinMan
Follow
Big thicc buds. Hard to imagine what these will look like at the end in about 3 more weeks. Used twine over the last few weeks to individually tie up about 15-20 branches to the three stakes I put in. A trellis would’ve helped a lot, but she’s sharing a room with plants earlier in flower now, which is why I decided not to use one a few weeks back.

Likes
4
Share


@Dankgrowz786
Follow
Fire 🔥 she smoked nice. Smooth and got a sexy taste. Overall a easy grown and will try again

Likes
11
Share


@Nookandplant42o
Follow
Big resinous and compact buds, strong smell of the tent its elongated stems are the buds on top getting fatter every week I hope to be surprised with this girl her looks are beautiful great coloring and leaves to go where I need to let her gain more weight and the amber colors are necessary in trichomes, feeding well and requiring more water than the others, even without pure water 😚


Likes
13
Share


@EasyGoing420
Follow
Plants are finishing the third week of flower, everything seems to be on path . 5 more weeks to go more or less ! Happy growing everybody !


Likes
Comments
Share

@Ninjabuds
Follow
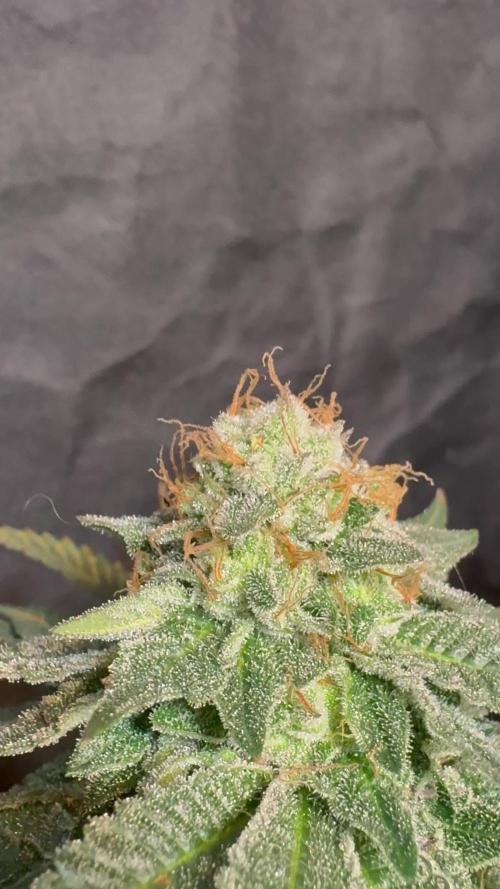
Stacks decent smells really good but a lot of leaves and smaller nugs than I’d like but a decent little plant

Likes
2
Share


@High_Grade_Dadli
Follow
Haven't been keeping up weeks fly by so quickly never the less girls are doing well took some cutting the day before....5 gelato, 15 mcm og, 20
Likes
10
Share


@valiotoro
Follow
Hello everyone 🤩
she grew fast and with a beautiful green colour on the leaves!
She has responded superbly to low stress training and topping & i defoliated her aswell and seems didn't even notice 😎
For the nutrient half grow half bloom and power buds 1ml/L
Spider Farme SE7000 70%
Wish you all a good day and happy growing 😎


Likes
13
Share


@BigDaddyK
Follow
Nearly there on the soil ☝️BioBizz organic nutrients , All Mix soil ( 1st picture )
DWC take a bit longer
Even the bit above the led looks good 👍🏽
Likes
34
Share


@Gruenerfinger85
Follow
Hallo meine Garten Freunde.
Wieder ist eine Woche rum, und die Pflanzen machen den Anschein das sie glücklich sind.
In dieser Woche habe ich das Licht von 15 Std auf 12/12 umgestellt.
In zwei Wochen werden die Blütenkelche anfangen gut sichtbar zu sein, und die Pistels werden langsam anfangen immer mehr zu werden.
Das Topping und entlauben scheint erfolgreich gewesen zu sein.
Es gibt keinerlei Anzeichen für Probleme oder irgendwelche Anzeichen für Nährstoff Mängel.
Aktuell Höhe der Pflanzen am Tag:52
#1)18cm
#2)12.5cm
#3)13cm
Am 52 Tag wurden die Pflanzen ein weiteres Mal entlaubt, es scheint so das die Pflanzen überhaupt nicht beeindruckt davon sind wenn sie entlaubt werden, sie wachsen einfach weiter und produzieren neue Blattmasse.
Das entlauben stecken sie so gut weg, das nicht einmal das Wachstum gestoppt wird oder irgendwelche Anzeichen für Stress zeigt.
Das war es erstmal für diese Woche ich danke dir das du zu Besuch da warst und ein Like da gelassen hast.
Ich würde mich freuen wenn du in der kommenden Woche wieder mit am Start bist.
Verpass nicht wie sich die Pflanzen weiter entwickeln und ihr volles Potenzial entwickeln, in der Zwischenzeit kannst du dir gerne meine anderen Tagebücher anschauen, bestimmt ist was interessantes dabei.
Oder komm mich auf mein Instergram Profil besuchen.
Ich wünsch dir/ euch eine Erfolgreiche Woche und ein ruhiges erholsames Wochenende.✌️🏼
