Likes
Comments
Share
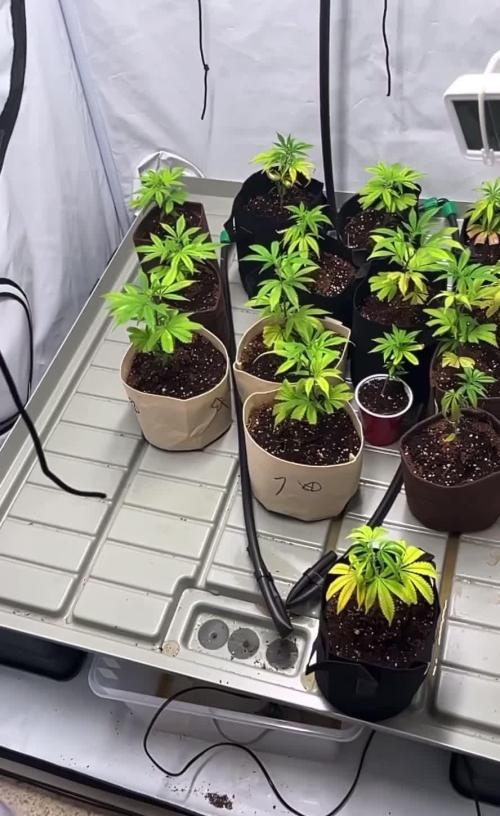
After a weeks that I took the clones from the other solo cups and transplanted from cups to 1 gallons fabric coco and cior, and install the water pipe and the irrigation system and all the systems that control the reservoir
Likes
10
Share
@Jerrza
Follow
Mann writing this it feels like so long ago, anyway this our first grow ever this was back in like january ish right before i started LTS like i said it Is our grow ever i didnt wanna fuck up so i never really thought of transplanting cuz yh first timer but as you guys will see the process ngl proud of myself
Likes
11
Share
Start of week 2 flowering. This girl is hungrier than her round 1 sister. Probably because of the extra veg time, she has developed more root and plant mass that needs more nutrients. The plant itself is growing nicely, stretching out too! Looks good so far!
Likes
84
Share
June, 1st. Totally forgot to update the Bubblegum. What should I say, its awonderful, stunning Plant. Never thought that after i had so Problems to get her to grow in the very early Seedlingsstage So once again... never give up on a Plant and iam having Clones... yaay She has a great Structure, ( LST pays off now) and Buds are stacking up all around lushgreen Happy looking Plant Watering nearly daily ( with the Beneficals) Feedings if needed
Likes
8
Share
@Gram_Solo
Follow
😎 Had to reduce the light to 50% as they are getting too close,.they done a mad stretch but S seem to doing okay no signs of burns, Been rotating the plants so they not getting to cooked in same spot. Took away the bottom 3rd of the plants to concentrate on top buds. Reacted very well to the stress. Supply run this week Smell is slowly rising 👀👃💨💨💨
Likes
21
Share
2024-06-22 Yesterday i had to Harvest them, weather was very bad . The are having tropical Climate in the raintime, very Humid and rainy, sometimes changes to cold and windy so very bad Season until now. They would have needed 7 days more to ripe perfect. But they started to mold. so i harvested them quickly, and sorted out all moldy stuff this is very sad. Buds are more open and supersticky. you can see with eyesight the loooong and dense Trichomes, iam going to add more Pics if they are cured and i add some Pics from the microscope. i give this Strain 8 from 10 Points for Outdoor Growing, because of their tendency to catch mold , despite the fct they were under a Roof, But yeah we had avery cold, rainy and humid Season i really like to grow them again, but indoors!!! because of their Juicyness
Likes
2
Share
Likes
25
Share
@MrJoint
Follow
✨Preflower beginning. ✌️🎃Thank you for checking my cultivation.
Likes
20
Share
Noyce, ok so we on track now but still not see that truly vigorous growth. I'm doing my best to move her under the deck when it rains to not dilute the nutes too much with rain water but i feel something is off a little. the leaves seem a little dark and a like hmmmmm a little to rigid or thick, not that nice lime green the whole way throuhgout you like to see with rapid growth. maybe the ph or mayb a slight nitrogen toxicity or possibly the combination of the two. So today i have her less of the growth nute and upped the cal meg slightly with a higher ph around 6.35 to see if i see some postive effects from this. I'm wondering if anyone has anytips on watering and such for outdoor girls in pots? still optimistic i'll get enough flower to achieve my main goal. to get high affffff watching pineapple express while smoking it. which im sure everyone does hahahha i can see the lady parts just coming out now where as the ones in the tent are about a week into flower
Likes
54
Share
Good week for this lovely lady. Her color has improved immensely and she's almost caught up in size to the Blueberry. Since they're settled in I took away the support hoops and will pack up the row cover. Yet again I think it did a fabulous job reducing stress from transplanting. I also added in some Calendula plants yesterday afternoon as they make good companions. It's gonna be a straight up partay in this garden bed😜 Update 6/26- I totally forgot to add that on Monday the garden got a spraying of horn manure. Horn manure is a biodynamic preparation of cow manure that's been fermented in a buried horn. This results in a material that's teeming with beneficial flora and fauna for the soil. Ideally it would be sprayed prior to planting in the spring as it encourages healthy root growth. I purchased the pre-potenized so that I only had to spend 20 mins stirring rather than an entire hour. That would have been brutal😵 I sprayed it at night when the earth is breathing in and used a spruce bough to sprinkle it over the plants in the garden. The extra icing on the cake was that there was a rain the day before, and another the day after I sprayed so it was well watered in.
Processing
Likes
Comments
Share
@MG2009
Follow
06/01/2020 Time to make the seeds! First my Cookie Cake F1 plant is a 7 star cookies male (Top dawg seeds) X a female Captains cake clone (Captains connection) and will be growing TLO Style. 7 Stars Cookies Strain | Marijuana Strain Reviews 50% Sativa /50% Indica THC: 22% - 27% 7 Stars Cookies is an evenly balanced hybrid strain (50% indica/50% sativa) created through a potent cross of the classic F1 Durban X Girl Scout Cookies strains. This potent bud is infamous among cannabis users for its super high potency and long lasting effects that are perfect for any hybrid lover. The 7 Stars Cookies high starts with a rush of cerebral effects that rush though your mind, lifting your spirits and leaving you blissfully happy and unfocused. As your mind flies higher and higher, your body will begin to slip away into a state of deep relaxation that leaves you totally stoned and out of it. A sharp pang of hunger comes next, leaving you with a ravenous case of the munchies as your mind slips in and out of calming sedation. Thanks to these effects and its super high 22-28% THC level, 7 Star Cookies is often chosen to treat those suffering from conditions such as chronic pain, insomnia, stress, depression, and migraines or headaches. This bud has a sweet citrusy flavor with hints of spicy earthy grape upon exhale. The aroma follows the same profile although with a light pungency to it. 7 Star Cookies buds have fluffy dense popcorn-shaped olive green nugs with bright orange hairs and golden crystal trichomes. Captain's Cake Marijuana Strain Information About Captain's Cake Hailing from the beautiful land of Maine, Captain’s Cake is brought to us by The Captain’s Connection. This indica-dominant strain boasts two pretty incredible parents, Girl Scout Cookies and White Fire Alien OG, making her a bud that offers great effects for both recreational and medical patients. While Captain’s Cake typically acts as a true hybrid, user sensitivity may dictate that your experience comes with the roll of the dice. A fairly potent strain in her own right, Captain’s Cake averages around 21% THC. Rumor has it that CBD levels can vary dramatically, with some reports showing a range between 1% and 15%. While that data remains to be confirmed, you can instead relish in beautiful buds that are bright green, featuring orange pistils and lovely amber trichomes. Oddly enough, flavors and scents do vary a bit with this strain, and you’ll notice it smells much worse than it tastes. A sour and earthy fragrance that includes lemon, nuts, and berries will hit you right away while your mouth enjoys a nutty vanilla cookie experience that’s slightly citrus-like. Captain’s Cake is awesome for those times when you need a boost of energy to get through a particularly trying task. Whether you’re experiencing the three o’clock workday slump or you simply have to clean the house before it gets any worse, this strain is here to help. Users note a euphoric boost that helps you to focus on your tasks while having a huge smile on your face, but keep in mind that this joyful experience can only last so long. Soon the munchies will hit, and after you’ve had your fill of snacks, you’ll be ready to settle in during a sedating comedown. Even if Captain’s Cake doesn’t have an astounding amount of CBD, medical patients still note that she’s a strain that is practically magical. Users find that mental woes are easily dissolved after taking a few hits, making stress and depression a thing of the past. Bodily aches and pains are also treated with a slight feeling of physical sedation, and those who struggle with their appetite will likely turn to this bud time and time again. This plant is an ideal choice for new and experienced growers, and the ability to cultivate inside or out makes her pretty versatile. Said to be a quick flowering strain, you’ll be gifted with a nicely sized yield after 8 to 9 weeks. Plants tend to grow fairly large, so make sure you have enough space dedicated to your crop before you begin. Depending on how you handle marijuana, Captain’s Cake may knock you out for an amazing nap or in some cases may fire you up with tons of energy. Others will experience a nice set of hybrid effects, so it’s best to know yourself before lighting this one up. Red Sky is Description The (paternal P1) father is the legendary Cherry Hemmingway male. A hybrid of a landrace Bhutan, and Rez Dog’s Firecracker (Williams Wonder x NYC Diesel). The female KOS’s own Skyanchor (Bogglegum x PSI) a cross using a prime selected male of BOG’s Bogglegum. A bad ass old-school hybrid made using a Northern Lights #5 (real deal) crossed to a Bubblegum (real deal). The female used to make the Skyanchor was my clone only PSI (Purple Salem Indica) that I was given by my good friend Keith, in Salem, OR, USA. Some kind of crazy old Purple Kush variant; potency is not only severe with this baby, but supernaturally intense. The Cherry Hemmy is well known by me to relate large yields and incredible vigor along with increased resin production, and also usually relates cream soda, vanilla, or cherry-ish terpenes, making exotic and addictive combinations when used as part of any hybrid. So, the Red Sky yields well—very well. Some truly legendary strains involved in this Small Batch Seed run. Great genetics equals great end results. I put video of Red Sky #3's brothers #2, and #4.
Processing
Likes
33
Share
@MUDBUG
Follow
Ok growmies just got back to tend to RAS i got sum work to do on her seems it wasnt clear enough since a gallon of the MUST NEED wasnt used so she ran a few weeks on just bloom nutes alone no big bloom no calmag and appearly no ph checking but u gotta love em i can tell u these buds are rock hard already she will be a nice yielder DR MUDBUG will make sure of it 👌👌👍👍✌️✌️Shes starting to look like a champ again another couple days she should be close to where i want her these buds are a lil leafy but they will be heavy as hell stay tuned 👌👌👍👍✌️✌️Had to move her out the 2x2 to open her up more now she will 💥💥💥💥💥💥💥getting fatter by the day ✍️✍️✍️✍️:golfer:️‍️:golfer:️‍️:golfer:️‍️
Likes
115
Share
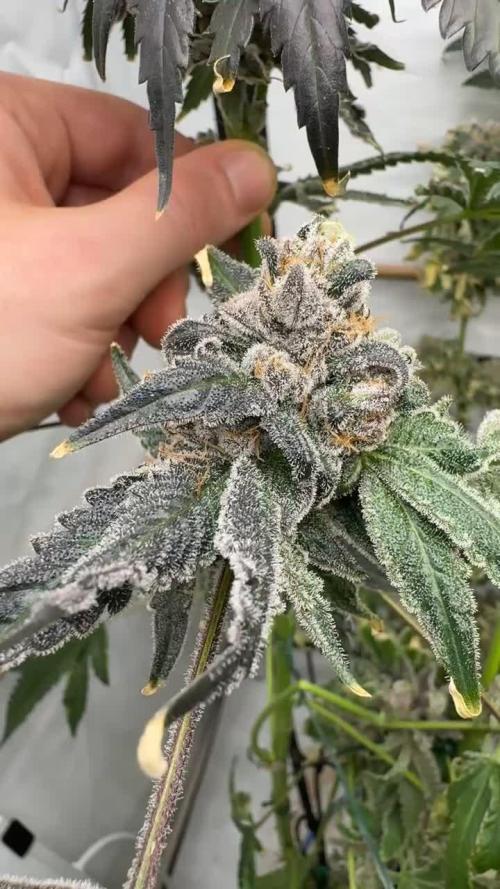
Harvesting the Bounty of Cherry Cola Auto Dear fellow cultivators, we've reached the triumphant culmination of Cherry Cola's journey as we delve into Week 13 – Harvest Time! Join me in celebrating the fruition of our labor and the bountiful rewards awaiting us as we harvest the radiant buds of Cherry Cola Auto. As the sun sets on Week 13, the air is filled with anticipation and excitement. Harvest season has dawned upon us, marking the culmination of Cherry Cola's remarkable journey from seed to harvest-ready beauty. In the heart of the garden, Cherry Cola stands tall, her branches heavy with the weight of abundant buds. Each bud is a testament to her resilience, her vigor, and the care and dedication invested in her growth. With meticulous care and precision, the time has come to harvest Cherry Cola's radiant buds. Each cut is made with reverence, ensuring that only the finest, most pristine flowers make their way into our stash. As the buds are trimmed and cured, an aromatic symphony is unleashed, filling the air with the tantalizing scent of Cherry Cola's terpene-rich profile. It's a sensory experience like no other, a celebration of nature's bounty. As we gather the fruits of our labor, let us take a moment to reflect on the journey that has brought us here. It's been a labor of love, a testament to patience, perseverance, and the boundless wonders of nature. In conclusion, let us raise a toast to Cherry Cola Auto – a true champion of the garden, a symbol of resilience, and a source of boundless joy. May her harvest be plentiful, her flavors unforgettable, and her legacy enduring. Until next time, happy harvesting, fellow enthusiasts! #CherryColaHarvest #BountifulBuds #GrowersPride Nutrition: @aptusholland @aptus_world @aptus_ Love, Care, and Attention: @dogdoctorofficial As always, thank you all for joining me on this journey, for your love, and for it all. My horticultural odyssey would never be the same without you. Your love and support are cherished, and I feel both honored and blessed to have you in my life Friendly reminder all you see here is pure research and for educational purposes only Growers Love To you All 💚 💚 💚
Likes
17
Share
First at all thanks to Mars Hydro Original Sensible Seeds and BTB Grow Supplies Bruce Banner#3 See of green project Featured grow by and exclusive for Original Sensible Seeds,  BTB Grow Supplies & Mars Hydro Day 84 from seed 63 days of flowering time now  06:00 good bey Bruce !!! good morning i just cut off a bud and checked it, it is time the light goes out tonight for 36 hours next pictures will be the harvest. It was very nice mr Bruce banner we will come back to you for sure ... Temp: 24.5 °C Lights: 11/13 Humidity: 45% Ph : 6.1 Water: 35l  23°C CO²: No Mercy Tabs Ppm: 950 Plagron: Terra bloom 00ml Plagron: Green Sensation 00ml Plagron: Sugar Royal 00ml Plagron: Pure Zym 00 ml Plagron: Power Roots 00 ml Light distance: 35-40cm 1x MarsHydro eco 120 220w 1x MarsHydro TS 3000 Air Van: 800m³ Prima Klima   AKF : 800m³ prima klima 3 l water cooling airco Diamant... 3.3l humidifier 1.8l dehumidifier Humidity control: Inkbird IHC-200 Temp control cooler - heater: Inkbird ITC-308 1.5x1.5m² Custom Grow Room All seeds comes out  #originalsensibleseeds so they have 100% of 100% Bruce Banner the 3. hits the ground and i really hope he gets angry as fuck and shows me the green big guy sleeping inside him ...                            S.O.G.              ☠️☠️☠️🌶️🌶️☠️☠️☠️ Thx to Linda Seeds, BTB Grow Supplies, Mars Hydro as our exclusive sponsor of our group The High Community & Zamnesia for supporting this grow. Zamnesia unconsciously because they sent me my seeds 2 times but I'm very grateful for that...
Likes
2
Share
@51sGarden
Follow
Posting this as I’m on the last few days of the 3rd week from germination Great progress, a lot of roots for such a short period but not too much plant growth, will start watering daily instead of watering every 2-3 days Topped the girls today (Day 18 from germ) and starting to do mainline on all the Bubba kush.
Processing
Likes
11
Share
Hey everyone! Hope you're all doing amazing! TickTockCroc is back for another grow! ┏(^0^)┛ Last time, I did a Fastbuds Girl Scout Cookies grow in my closet using a small pot. Yielded 22g dry weight (lol). Didn't do any ph monitoring or temperature control until later. This time... I'm determined to do it better! For this grow I will be doing: 2 x Fastbuds Girl Scout Cookies 2 x Fastbuds Gelato I AM DOING A SEPARATE DIARY FOR EACH STRAIN. THIS DIARY WILL ONLY BE UPDATING PROGRESS WITH THE GIRL SCOUT COOKIES! For this set-up, I decided to get a 1.2m x 1.2m x 2.0m tent and a carbon filter with fan. Also using fabric pots instead of plastic. For lights I'm using my old 600W Viper LED. I love this set-up!! This diary is starting on Day 7 from seed for the GSC. They just got moved to the tent yesterday (had to wait for it in the mail, got excited and germinated seeds too soon lol) and so they were in the closet until then. There has been no fan to circulate air or remove heat, and I think that's why the first set of leaves are curling a bit. Annoyingly, I have to wait for distilled water to arrive in the mail so I can calibrate my PH meter, so have not been able to ph adjust water. It has had one watering of evian water so far, so hopefully thats OK. I am using BioBizz Light Mix soil and using BioBizz nutrients. I will update which specific nutrients when I can. Take care for now, folks! *EDIT* DAY 10 UPDATE: I've uploaded a day 10 video update! So today is day 10 and I fed them their first feed yesterday. I've added the nutrient details to the diary. They seem to be LOVING it. I also noticed some pale spots on some leaves - perhaps exterior nute burn as I splashed the leaves by accident. We'll see.
Likes
12
Share
Buenas noches familia, sorpresa, jueves noche por aquĂ­ , actualizamos las power plant xL. Es la Ăşltima semana antes de nuestra cosecha, el tiempo se nos echĂł encima y las Flores ya estĂĄn echas, se preparĂł un lavado de raĂ­ces y tijeretazo,para sucesivamente colgarlas.( PRIMERA VEZ que se me echa el tiempo encima con la floraciĂłn, jurao) Me habrĂ­a gustado darles algo de estrĂŠs hĂ­drico, pero lo veremos con las lemon kush y las northern light xL. -power plant xL es una cepa con predominancia sativa, con una corta floraciĂłn,es un ejemplar fĂĄcil de cultivar, fuerte, y vigoroso. Estos ejemplares se cultivaron en 7L en sustrato light MIX de plagrOn, controlando en todo momento el PH de nuestras plantas, y dĂĄndoles de comer una gama advanced nutrients bastante bĂĄsica. -PROS: facil cultivar, flores llenas de resina , flores compactas, ramas laterales largas. -CONTRAS: hay que tutorar por el peso de la flor, floraciĂłn demasiado rĂĄpida a mi gusto (no te das ni cuenta). *AquĂ­ ya me despido hasta la cosecha familia.
Processing
Likes
84
Share
SATURDAY: Today I mixed up 5g of nutes for my bloomers and douched them. I'll let them dry completely for 2-3 days, then flush them a bit with a little boomerang and calmag. I ordered a Gorilla lite-Line High CFM kit last week and received it today...fits my tent poles perfectly. This really works to keep the tent walls from collapsing in too far, and I was able to use one pole to rig a shelf to put the fan. That freed up a good bit more floor space. Yesterday, I ordered a 4 x 4 Vivosun tent and inline fan, and a 1500w (5 x 300w COBs)..this tent will be for vegging autos to put into the flowering tent as others are harvested, as well as a place to veg photos that I encounter before they are moved outdoors. I'll probably end up ordering another of the same lights, but for now I have a few supplemental lights I can use...blues and daylights. I'll drop a few WW's or CC's as soon as that stuff arrives so they are big enough to occupy flowering tent space in a few weeks. SUNDAY: I spun everybody around and misted with spring water a couple times throughout the day and formulated my plan for ventilation of the new tent which should be here Tuesday. I plan to hook the exhaust from my 4' x 5' tent as fresh air intake in the top of my 4' x 4'. By doing so, all that good CO2 that is exhausted from the flowering tent will rain down over the veg tent inhabitants before being exhausted from the bottom of the tent. I don't think heat will be a problem in the new tent with so much less light, so I'm optimistic that it will work just fine. I may even route the exhausted veg tent air back into the bottom of the flower tent, giving the girls another shot at the CO2 enriched air....we'll see... MONDAY: Got the room ready for the new tent which will arrive tomorrow, misted, rearranged, and whispered sweet nothings to all the girls. Tried out my new macro lens...need practice.. TUESDAY: Mixed up 7.5 gallons of nutes for the bloomers...ceased open sesame and began beastie bloomz. Assembled my new 4' x 4' Vivosun tent and set up its ventilation and lights. I implemented my idea of exhausting the semi-cool/CO2-rich air from my flowering tent into the top of the veg tent. Only needed 5' of flex duct, so it's got great airflow..no need for another intake fan...yay! Tomorrow I'll get the 6" x 6" x 6" 'Y' duct and connect my 6" booster fan to it. The booster fan will still be sticking into the flower tent, drawing 70 degree a/c air into the tent via direct flex duct connection, but will now be mixed with the exhausted air from the veg tent. I'm probably gonna keep the ventilation in both tents running once I've got a fully closed-loop system. The only reason I was shutting down the ventilation was so that CO2 would build up for 4 hours, but even if it gets exhausted from the flower tent, whatever the veg tent inhabitants don't consume will find it's way back to the flower tent in under a minute...and so on, and so on.. I spent a while putting together a lighting schedule that will allow me to decrease temperatures while still keeping optimal color spectrums and maintaining good light intensity. Had to empty the tent so I could get to everything...what a pain! --------------------------------------------------- FLOWERING TENT Timer #1 --- exhaust, intake (digital timer) on - 6:15am off - 2:15am Timer #2 -- primary blurple light (manual timer) on - 6:30am off - 10:30am on - 11:30am off - 3:30pm on - 4:30pm off - 6:00pm on - 6:30pm off - 8:30pm on - 9:30pm off - 2:00am Timer #3 -- all 4 daylight cobs (manual timer + power strip) on - 6:00am off - 12:00pm on - 12:30pm off - 6:00pm on - 6:30pm off - 2:00am Timer #4 -- all 4 overhead reds, sub-canopy tubes, side strip lights (manual timer + power strip) on - 1:00am off - 6:30am on - 10:30am off - 11:30am on - 3:30pm off - 4:30pm on - 8:30pm off - 9:30pm Timer #5 -- all 4 miracle LED (flowering) in corners, corner, daylight supplemental (manual timer + power strip) on - 6:00am off - 10:30am on - 11:30am off - 3:30pm on - 4:30pm off - 8:30pm on - 9:30pm off - 2:00am ---------------------------------------------- VEGETATIVE TENT Timer #1 --- primary light and exhaust (manual timer + 3-way splitter) on - 6:00am off - 2:00am Timer #2 --- blue supplementals (manual timer + power strip) on - 2:00am off - 6:00am on - 10:00am off - 2:00pm on - 4:00pm off - 8:00pm Watching temps closely.... ------------------------------------------ WEDNESDAY: My new lighting schedule seems to be working..high was 87 today, and it dropped into the upper 70's last night...schweet! I'm pretty confident that when I get my ducting in on Friday and have the closed-loop ventilation for the two tents completed, that it will drop the temp even further and I'll not be wasting so much precious CO2...and then I can ADD MORE LIGHTS and begin with renewed heat mitigation efforts!!! I'm really wanting to pump up the deep reds and maybe far reds during their 4-hour "nighttime" ...maybe more low-wattage sub-canopy tube lights, too. I guess that the girls really loved the Beastie Bloomz...much fattening happening... It was so nice being able to move Kushpialidocious into the new veg tent...more space, better canopy penetration. THURSDAY: Spun everybody around and misted with spring water..soil still moist. Temps held pretty much...86-87 all day..i changed the overhead light timer a bit so it kicks on a half hour earlier and as a result temp climbed to 89-90 for about 15 minutes, but quickly dropped to 85 when the 4 COBs turned off... when the big blurple and 4 miracle leds in the corners ( + the extra 40w daylight supplemental in my darkest corner) turned off 15 minutes later, it quickly dropped to 79.....15 minutes later...74...15 minutes later...72!!! "By Jove, I think he's got it!" I might actually be able to harvest these fuckers with all terpenes intact.👍 On second thought.😎..I'm gonna dial back the reds a half hour again (and maybe the 4 COBs), because I'm going to try switching out the 40w Sansi bulb for my extra 100w Bridgelux/Epistar 3500k COB light. (MORE POWER!) I really don't think it gets very much, if any, hotter than the Sansi 40w. I'm really hoping to keep it below 90 at all times and as close to 70 as possible at night (red zone).. new temperature test will be tomorrow. It will also be the first run with the closed-loop ventilation system in place...all ventilation will remain on at all times in both tents, and based on my rudimentary calculations, my 2 x 6" inline fans and the 6" duct booster can move enough air to circulate through both tents about 240 times per hour. I figured that like this: The 3 fans move 1,010 cfm. The two grow spaces total 252 cu ft (4 x 5 and 4 x 4) There is just over 12 feet of ducting involved in the loop, which is about 6 additional cubic feet. Correct me if I'm wrong...I'm not an HVAC guy.. The A/C kicks on, on average, every 12 minutes, so there will be a regular supply of cool fresh air injected into the mix as well. My hopes are high! (and so am I) One other interesting thing is that the addition of the 4-5 gallons of frozen water in jugs makes the substrate temp stay in the lower 70's all day long..I'm hoping the roots at least get the signal that "Winter is coming." FRIDAY: Well, shit. My closed-loop ventilation system didn't work quite right...evidently, I should have studied up on calculus. Rather than the negative pressure in both tents that I expected, both tents swole up like they were snakebit..(positive pressure?)..and temperatures in both tents started to rise...no pinche bueno. I'm sure it's my math that's off..., for example, I didn't account for the fact that the flowering tent has a carbon filter which decreases the cfm's considerably, and the intermittent flow of central air is a variable that I am also uncertain how to factor. So....I scrapped the idea until I can achieve truly equivalent intake and exhaust in both tents. HOWEVER...I did discover a trick that I will dub a "heat siphon," which is a definite improvement, but only in the veg tent. When I disconnected the flex duct from the 6" inline fan(exhaust) in the veg tent, I had intended to stub it off for now. I noticed that there was considerable "back-flow" caused by the duct booster intake fan in the flowering tent. So, the duct booster draws air from the a/c register, AND from duct which I've placed in the veg tent immediately above the light. I moved the 6" inline fan in the veg tent to to top of the tent and connected a 3' piece of duct to it that is also placed immediately above the one side of the light, so heat from the veg light is ejected into the room and partially drawn into the flower tent where it is mixed with cool a/c air, carbon scrubbed, and sent to the veg tent raining the unused CO2 down over them at about 85 degrees, which is considerably cooler than the normal tent temp. It's still not perfect.. Because the flowering tent is absorbing some of the heat drawn of the veg tent light, I'm up 3-4 degrees on average in the flowering tent, which is not what I was hoping for at all...it's now hitting 92 degrees in the flowering tent at some points during the day, and hovering at 79-80 at night, so I'm gonna have to revise the lighting schedule again..
Likes
5
Share
Welcome to the Week 5 update for the Fast Buds Lemon Pie Autos. I am still recovering from Covid so I’ve missed Weeks 3 & 4 but here’s a quick fill in on the missing time. I am always watering every 4th day like clockwork. In Week 3, I increased the water intake from 1.4 litres to 2.1 litres per watering which equals .52 of a litre per plant per day. I also began feeding with FloraNova Grow at a rate of 1.25 mls per gallon. In Week 4, I increased the water intake again from 2.1 litres to 2.8 litres per watering which equals .70 of a litre per plant per day. I also increased the grow fertilizer to 2.5 mls per gallon. The plants were fed three times with the grow formula before being switched over to the FloraNova Bloom in Week 5. They are currently receiving 3 litres of water every 4th day fertilized with 2.5 mls per gallon and they are thriving! This is a very strong smelling strain with an overwhelming odour of skunky dankness emanating from the tent- even when closed. The bud sites are popping up everywhere and resin production has begun. They have stretched quite nicely but are definitely wider than taller and hopefully these turn out as great as they smell. That’s it for now, until next time- cheers! ☮️
Likes
9
Share
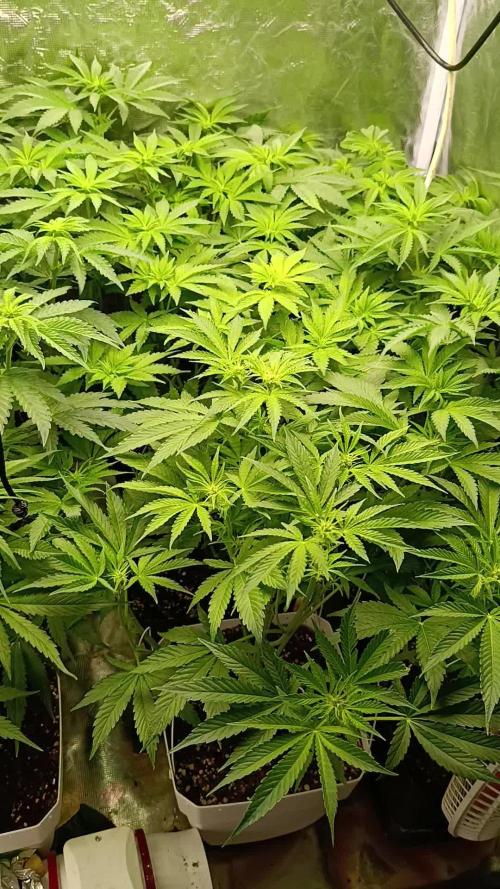
The stretch is slowing down, and the first pistils are appearing across the canopy. The SCROG net is full and the lollipoping has significantly improved airflow.