


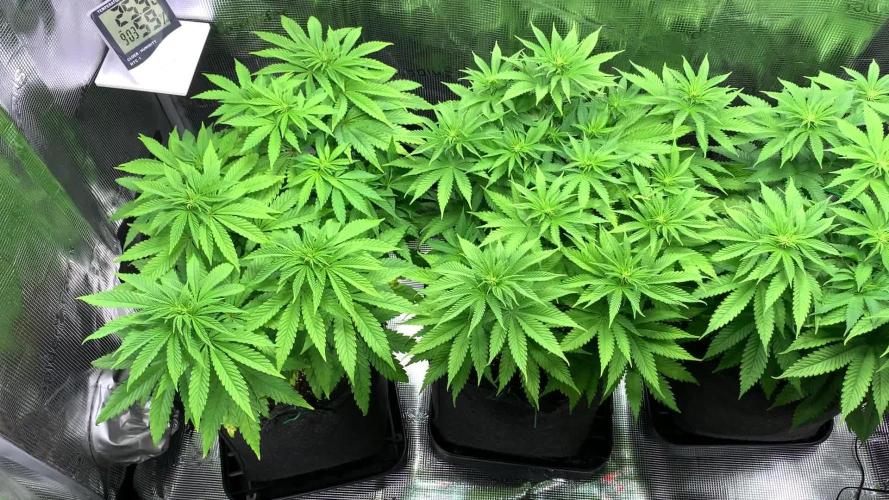


Likes
142
Share


@MadeInGermany
Follow
Hi everyone 🤗
This week it looked more and more astonishing after opening the box a wonderful sweet smell wafts through the room 👍.
A few days ago the Blue Cheese Phenotype 1 was harvested and placed in the dark room :-).
This week both Kosher Tangie Kush phenotypes will be harvested 👍.
Next week the Blue Cheese phenotypes 1 and 2 will be harvested ;-) everyone else needs a while 😀.
I wish you all a nice week, stay healthy 🙏🏻 and let it grow 🌱👍





Likes
7
Share


@Mr_nugs_lover_David
Follow
The first in breaking the shield was the pheno number 2 on this pair of jack orange! Let's see how they keep developing!!
Out of the 2 seeds that I started only one was good and I decided to discard the #1 because of a deformation or a genetic fail. So I just kept #2, hope you like this strain!

Processing
Likes
9
Share


@Luv2Grow
Follow
Day 57 - Starting week 9 and man she is looking good with the dark purples. Just took her out for some pictures and see if she needed a drink. Will probably give her a feeding on Sunday. Got the new AGLEX COB LED hooked up so we’ll see over the next few days how she likes it.
Day 58 - Nothing new happening with this girl today. So far so good with the new light. Soil is still sorta damp so plan in giving her some water tomorrow.
Day 59 - Still chugging along and still not ready for any water and I don’t want to over do it so will hold off another day before giving her some.
Day 60 - Still not ready for water, looks like tomorrow she should be ready and will give her a feeding of the foxfarm trio. Other than that, she’s chugging along and looking gorgeous.
Day 62 - Looking great still and gave her a feeding of the foxfarm trio today. I went ahead and defoliated quite a bit today so hopefully she can focus on some more bud development. I’m gonna start really checking the trichs here in the next couple days. She might be getting close to the end but not sure yet.
Day 63 - Ending week 9 today and almost all trichs are cloudy. Wanting to get about 30-40% amber before chopping plus she’s still got quite a few white pistils so I’ll wait until I stop see those popping up.

Likes
7
Share


@Treesus01
Follow
Used too much bloom nutes and some top leaves were starting to yellow so I flushed and have Been gentle since
Few days later it was t from nutrients it could actually use a little more the lights I have were putting 1700-1800 ppfd on top canopy and was cooking my leaves I lowered the plant so it would get 1200 ppfd on top and it’s back to normal

Likes
17
Share


@AfroBlooming420
Follow
We’re in the home stretch. I’ll start flushing #3 at the end of this week. #1 will get one or two more weeks of feeding before I start it’s flush
#2 is about two weeks behind #1.

Likes
99
Share


@420DeepGrow
Follow
Gracias al equipo de Anesia Seeds y al de MarshHydro, sin ellos no sería posible esta hazaña.
💐 🍁 Purple Boost Highness es una variedad híbrida sativa dominante (70% Sativa / 30% Indica) resultante del cruce de Dankberry y Star Pebbles, dos variedades extremadamente potentes y versátiles. En un proceso de selección de varias etapas, seleccionamos plantas que tienen un valor de THCV particularmente alto y al mismo tiempo un alto contenido de THC. Terminamos desarrollando una cepa que tenía todos los rasgos que queríamos: un nivel de THCV particularmente alto combinado con un sólido nivel de THC y una abundante producción de sabrosos cogollos.
Purple Boost Highness alcanza un nivel medio de THCV extremadamente alto del 5-12% y un nivel medio de THC del 28%. Esto la convierte en una cepa potente y especial que ofrece a los usuarios medicinales y recreativos muchos beneficios y un subidón excitante y versátil. El subidón tiene un componente calmante a la vez que energizante de principio a fin y lleno de claridad cerebral, motivación y concentración.
El subidón comienza en la cabeza con una elevada sensación de felicidad que te envuelve por completo, transportándote a un estado de pura serenidad mental y ligereza trae. Te libera de pensamientos negativos y deja que tu mente vuele cada vez más alto. Te llenarás de dicha y desarrollarás una creatividad desenfrenada. Tu cuerpo está relajado y ligero. A medida que aumenta el subidón te vuelves extremadamente sociable y hablador hasta que los efectos cerebrales se vuelven demasiado fuertes y te pierdes en tu propia mente. Purple Boost Highness es un gran expansor sensorial: los colores, los sonidos y la música adquieren una profundidad y versatilidad totalmente nuevas.
Los cogollos tienen un intenso aroma dulce y afrutado a bayas y uvas con un toque de limón. Los cogollos son extremadamente densos, grandes y cubiertos de una gruesa capa de tricomas cristalinos de color blanco dorado.
🌻 🚀 Consigue aquí tus semillas:
https://anesiaseeds.com/es/product/purple-boost-highness/
💡 Mars Hydro TS 3000, como la lámpara de cultivo LED más grande de la serie TS, ofrece suficiente cobertura para un área de 4 × 4 pies con un precio asequible y rendimientos de calidad; a cambio, se puede aplicar tanto al cultivo doméstico como al cultivo comercial.
Potencia - 450w
Cobertura Vegetal – 5×5 pies
Cobertura de flores - 4 × 4 pies
La opción abrumadora para la mayoría de los productores que la aplican en tiendas de campaña.
Consigue aqui tu lámpara:
https://marshydro.eu/products/mars-hydro-ts-3000-led-grow-light/
📆 Semana 8:
Finalizando la etapa de engorde, esto va que vuela 😍, la resina esta cada vez mas presente ❄️ , los cogollos empiezan a madurar
Esta semana seguirá el TS-3000 de MarshHydro al 100% y 30cm de distancia.
Se estan desarrollando mejor que nunca, con una floracion mucho mas rapida, noto una gran mejoria gracias al Marshydro TS-3000.
Continuo con defoliaciones
Aplico una solución con nutrientes EC 1500 y otra con agua del grifo reposada y PH 6.6

Likes
14
Share


@Momgrowsthechronic
Follow
So here’s Week 2 of the Sweet Seeds Gorilla Girl XL Auto’s grow. All in all an easy week but there has been time spent reinforcing a couple of the seedlings because they are so top heavy. I check in on my seedlings at least once a day (oftentimes 2-3 times daily) just to make sure that all equipment is functioning well and temps are stable. Upon looking into the windows of the tent I discovered that the smallest seedling (the one that lost one of it’s cotyledon leaves) was tipped right over. I gently supported her with a homemade splint (a tent peg/pipe cleaner combo- pictured above) and she’s currently standing on her own again. She’s still smaller than the others but surviving, not thriving for now. I used some fresh additional soil to fill in any gaps and pack down around the bases of the other three plants’ stems. Speaking of stems/stalks- the three healthy seedlings have peeling/stretching stalks and are starting to push out their first sets of branches. Other than that, same routine as always- watering every fourth day at 1.4 litres per watering or 0.35 of a litre per plant per day. I will be increasing the water sometime over week three. That’s it for now.
Mom’s Tip for Week #2- Don’t Over Water! (when growing in soil of course)… When learning to read your plant’s needs, water is a very important factor to consider. I often notice other growers with tiny seedlings sitting in completely saturated pots of soil. Or read that many other growers don’t believe in placing newly sprouted seedlings into their final containers/pots. Both issues being easily resolved by simply paying close attention to your plant’s body language, it’s grow environment and sticking to a schedule. Cannabis truly thrives and benefits from a wet to almost fully dry watering cycle. From my own personal experience with photosensitive strains grown outside in the summer to growing autoflowers indoors through the fall, winter and spring- all of my Cannabis seems to do best when watered every 4th day like clockwork! This schedule is somewhat subjective of course depending on the environment that you are growing in. Here in Canada, much of our year is cool to cold and the humidity is relatively low. Because of this my plants are not always able to take in moisture from the air through their stomas so they suck up more water from what’s readily available in their pots. In other environments (ex. tropical), you may be able to stretch out this cycle- watering every 5-7 days because your plants are pulling so much water directly from the humidity in the air. And how you water your plants matters too. When starting out with newly sprouted seedlings placed into their final containers- less is more. There is no need to completely soak all of the soil in a 5-7 gallon pot. Simply start with a small amount (0.5-1 litre) directing the water to the base of the plant, working your way outwards in a circular pattern. As you increase the amount of water, I try to work my water outwards- making my circle slightly bigger each time I water until eventually I am soaking the soil surface all the way out to the edges of the pot. This process is gradual, stretched over a period of 4-6 weeks. It will encourage the roots to reach for water and allow your plants the time needed to grow into a heavy dose of H2O. Finally, learning to read your plant’s body language will help you to understand when they need and don’t need water as well as food, more/less light, temperature changes, etc. Healthy, well watered plants are generally light green with leaves slightly turned up towards the light/sun. They will be growing/thickening every day and able to support their own weight even in a very breezy environment. Leaves are soft and supple, not dry and brittle and there are usually no marks or discolouration of any kind on the foliage throughout your grow. Water quality is important too but that’s any entirely different tutorial for another time. Bountiful harvests are very possible by simply tweaking your watering schedule to suit your plants’ ultimate needs.


Likes
11
Share


@Yellabeard
Follow
Here we are start of week 6 and the girls have burst into flower .
No problems yet everything seems to be as I would expect .
The #AutoPots make my growing experience so much easier and the plants seem to thrive in this system .
Likes
13
Share


@ButterfliesLittleFarm
Follow
Hello Diary,
Titan F1 looks to be ready for harvest soon.
In my estimation, given the development so far, two more weeks at the most. It's really fast.
The flowers are hard and compact and very sticky to the touch, the smell is incredibly strong.
Titan F1 has reached its maximum height, there is no change since the last measurement.
Watering has become a little more frequent, I have to water every three days because they drink a lot of water.
I continued this week with the addition of nutrients, bio flowering booster and easy bloom tablets.
The conditions inside the grow box are good, the temperature is around 28 degrees and the humidity is around 45%.
Here's a quick recap of the week.
12/06/2023 - Day 44.
Watering.
I prepared 8 liters of water, added all three components from the bio flowering booster, lowered the pH. at 6.0 and with that amount I watered all three plants evenly.
15/06/2023 - Day 47.
Watering.
I prepared 8 liters of water again, inserted one easy bloom tablet, lowered the pH. and again with that amount I watered all three plants on the farm.
17/06/2023 - Day 49.
The end of the seventh week and it's time to take photos.
That's all from me for this week, see you soon.


Processing
Likes
46
Share


@PureMedicin
Follow
2 of my Blueberries were root bound one more than the other.. i transplanted them into soil in a bigger pot. I Have a bunch of strains going on but one vegging mother soon ready to get in under the CFL. Loving the HPS tho wont go back to LED any time soon. Feeding with CANNA terra nute line and using the last Bud candy and big bud from Advanced Nutrients before going full canna. The monster crop was a succes but it took long before shooting. Hope my other clone will do better. I have a very healthy strawberry banana that will be my motherplant as well as a sweet valley kush that are just a seedling now. I am very happy with the HPS from phillips it work wonder in my oppinion :) I started 12/12 as well this week


Likes
4
Share

@Lokalgrower
Follow
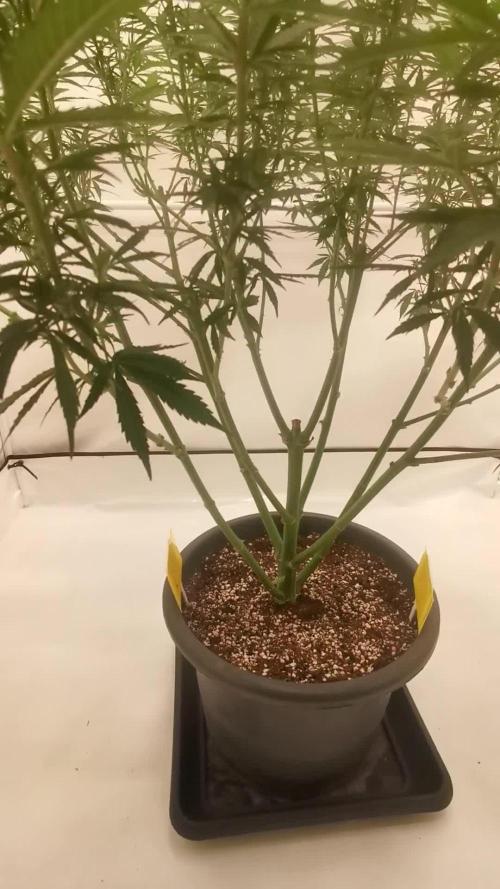
Hi✌️... Kurzes Update: soweit läuft alles ganz gut 🍀🙏🍀... Bis dahin 👋🌱💚
Likes
15
Share


@IsseyBukkake
Follow
We've made it to day 28! - 17/12/20
The girls seem to be happy and healthy today.
I won't be feeding/watering them as the pots are still heavy from yesterdays feed.
A few of the girls have started to show sex & the smell has picked up a little bit(inside the tent), so I'm hoping to see some flowering begin this week sometime.
(I've been using my iPhone as my only DSLR lens is useless for focusing on certain depths, but I hate the colour I get using the iPhone... I may be switching back to DSLR unless I can find a better camera app.)
update - day 29 (18/12/20)
Short update today.
Fed the girls today and will probably be feeding/watering every day from here on out, we'll see though.
veg growth has really taken off by now, I'm hoping to see some flowering this week.
update - day 30 (19/12/20)
I fed the girls today.
I need to find a better way to hand water, the plants are so short and bushy its a pain getting in between all the branches.
I wish i left my drip feed system up and running, I will definitely refine it and use it next run.
Update - day 31 (20/12/20)
Fed the girl's straight water today.
I'm going to purchase the pieces I need tomorrow to reconfigure my drip feed system & hopefully have it running by mid-week!
Update - day 32
I attempted to set up my drip feed system today but the plants are too thick around the base to place the halo around :(
I will have to wait until next season to set it up, oh well, I guess its hand watering for the next 5-10 weeks
Fingers crossed these girls start to flower ASAP.
I fed the girls today, everything is looking good so far.
I also moved the plants around to try to make hand watering easier, I had issues trying to water the whole pot instead of just one spot due to plants/branches being in the way.
Update - Day 34 - 23/12/20
It definitely seems ill be watering the girls every day from here on out.
All the girls look fairly happy and healthy, they're getting a bit big for the 5x5 they're in.
It looks like flowering has begun on 2 of the girls, hoping to see some more progress on the others in the next few days.
Thanks for stopping by! 🙏

Likes
6
Share


@rvabudman
Follow
The plant took off this week. I am relatively new so was working through getting my PH measuring/balancing down. Now that I have established a better method the plant responded well. Put in a scrog to help even the canopy for the future. The other plant I have running is a bubblegum autoflower that is a few weeks older (right).
Personally I really loved the look of the gold leaf at this point, it had a very nice spiral look to it almost like an xmas wreath.

Likes
Comments
Share


