


Likes
99
Share


@TheFoxFarmer
Follow
Week 8 Flower
Flush flush flush 💦🚽💦🚽💦
It's extremely important to flush for at least 14 days when using synthetic nutes, or any bottled nutes in my opinion. The aim is to make her cannibalize (fade) as much as possible before she's chopped. By doing this, she's using up her stored nutrients, causing the leaves to eventually die. The better the flush the cleaner the smoke 👌💨 even when in an organic set up, the plant needs to be nicely faded before being harvested. Otherwise she's still full of nutrients. I still feel I'll be able to get an even better flush when I eventually make the switch to RO water, as my tap water holds a ppm value of approx 150. It's not too much, but 0 is always better.
She was taken down on Day 57 flower, after a 16 Day flush. I didn't want to take her any further as she was quite stressed being so close to the light. So to avoid getting seeds I waited until she had a beautiful fade before giving her the chop ✂️ I always take my girls down about 30mins before the light turns on so there is minimal chlorophyll production in the plant. This is to ensure the best smell, taste and overall burn after drying and curing.
A subtle but very sweet-ish tropical fruit skin kind of smell to her. Her buds are super dense and covered in trichomes. I trimmed off all fan leaves and then each branch was hung in my drying box and placed in a cool area. She was dry after 6 days and ready to be dry trimmed and jarred for curing. I'll post those pics with the harvest update!
Thanks for following and happy growing! 🐺

Likes
18
Share


@TheCannaProphet
Follow
~ FASTBUDS TESTER #2204 ~
Well friends, here we go on another 'canna-venture' together!
The grow room has had a complete remodel and some upgrades done to it including brand spanking new 4x8 and 4x4 tents and a Trolmaster Hydro X controller along with a new Control Panel.
This tester strain is one of six tester strains that FastBuds has graciously provided me with and I'm looking forward to seeing what this girl has to offer when she's grown to her full potential!
One drawback of 'testers' is I have little to no information on it other than its number and that it's an autoflower... 🤪 But, it's ALWAYS a blast growing them for me because not knowing a lot allows me to just concentrate on the essentials: Light, Environment, Water, Nutrients and possibly a bit of LST... not complicated, just basics like keeping a constant temperature and RH in the tent at a level that gives a good VPD, watering when almost dry and maintaining proper light levels according to their stage of growth.
____________________________________________________________________________________________________________________________________________________________________________________________________________________________________________________________________________________________________________________________________________________________________________________________________________________________________________________
~THE SETUP~
~Initially seeds were lightly scuffed, then soaked for 3 hours in 78℉ distilled water after which they were transferred to moist paper towels laid out in a Jiffy Pellet plastic starter tray with lid. Underneath the tray was placed a Vivosun Heat Mat with Controller that was set to 78℉ where they stayed until their tap roots emerged.
~Planted into Jiffy Peat Pellets that were hydrated with distilled water warmed to 78℉ with a 7.0 ph.
~Once roots emerge from the Jiffy Pellet they're transferred to their fabric pots.
~Grown 100% organic in a 4g Gronest fabric pot and a 3g fabric pot by Wraxly filled with Mother Earth 70/30 Coco/Perlite medium and initially amended with Dr. Earth 4-4-4 / Earthworm Castings / Dr. Earth Flower Girl 3-9-4 and Coast of Maine Stonington Blend Organic Plant Food 5-2-4.
~19/5 light cycle for the entire run with supplemental UVA added during flower. Lights are controlled by a Trolmaster Hydro X controller set for a 15min Sunrise/Sunset simulation.
~Top dressing every 3-4 weeks with slow release dry amendments and Earthworm castings.
~Straight water ph'd @ 6.2-6.8 when needed and bi-weekly Compost Tea's.
____________________________________________________________________________________________________________________________________________________________________________________________________________________________________________________________________________________________________________________________________________________________________________________________
Weekly Updates:
1/19- Here we go into Week Three of flower and these testers are finally in flower mode!🧐👍
Both testers are in flower and are ready to eat! Today I gave both girls a top dressing with Down To Earth 4-8-4 Flower Mix at a ratio of 2tbsp/g and Coast of Maine's Stonington Blend 5-2-4 Organic Plant Food at a ratio of 1tbsp/g which I simplified by using 1/3 cup of the 4-8-4 and 1/4 cup of the 5-2-4 in the 4g pot and 3/8 cup of 4-8-4 and 1/8 cup of the 5-2-4 in the 3g pot. After working the amendments into the medium, I watered it in with 1g of straight de-chlorinated water ph'd to 6.6 @ 74℉. It will take a week for the microbes to begin breaking it down and will last for 3 weeks or so. I'll monitor them and decide on whether I'll give them another top dress or let them ride.
I've also increased the power to the HLG 650R's the the Trolmaster Hydro X Controller to 75% which has them pulling 990w at the wall and have them hung 32" above canopy. I also starting adding in 4 hours of UVA during the middle of the light cycle for the remainder of flower. I've been monitoring their leaf temperatures and they're running 71-73℉ which is perfect! I have the AutoPilot APC8200 co2 Controller set to 1100ppm with a 100ppm window and the AC Infinity Cloudline T6 controller set to maintain a 74℉ temperature in the tent while the lights are on.
1/21- I'm watering these thirsty girls daily with straight de-chlorinated water ph'd it to 6.6 @ 74℉ and they're both thriving! The #1 pheno being roughly a week ahead of the #2 is starting to flower nicely. The #2 pheno, while different behind her sister, is finally beginning to get her act together a is making flowers!🧐
1/23- I watered/fed both testers today with 0.5g of de-chlorinated water each with GreenGro's Natures Brix and Granular Myco mixed in, after which I added 1 tsp/g of unsulfured molasses and then ph'd it to 6.6 @ 74℉. They'll be getting only one more feed from here moving forward as they will take a little longer than the other testers in the run that are well into flower now.
1/25- Yesterday I didn't water but continued today with 0.75g for the #1, and 0.5g for the #2, of straight de-chlorinated water ph'd to 6.6 @ 74℉.
They're both looking really healthy and both into flower! I'm really looking forward to Week Four of flower where they should start to reveal how they're going to look after stretching!😍💚
😎💚 Thank you for checking out my passion in life! Please visit as often as you wish and I hope you enjoy this journey as much as I know I will! Grow Strong! 💪😎🤙

Likes
20
Share


@Inhomerhizome
Follow
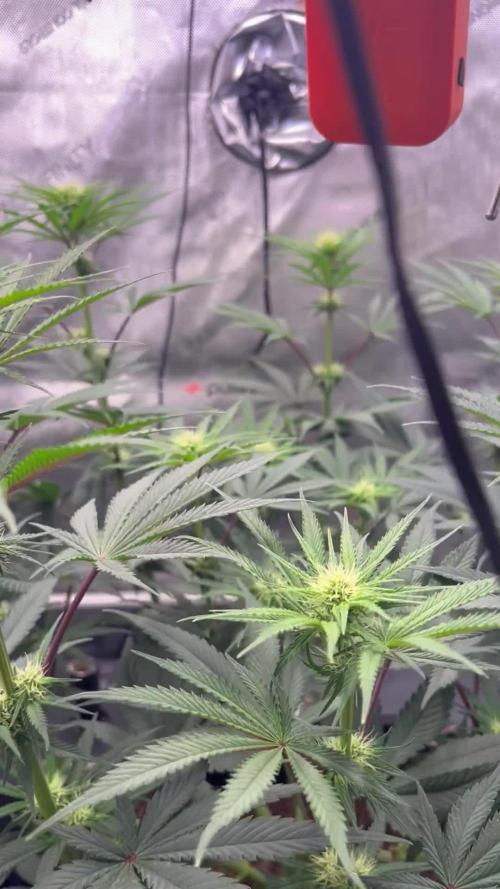
All looking frosty around day 42 of flower!
Just been on water for the whole of flower! Watered with aact as well every other week but real happy with this run!
Likes
10
Share


Likes
10
Share


@HideAndFly420
Follow
Day 76 HARVESTED 💚💚💚🌱🌱🌱 growing this lady has been so easy and fast. Buds are heavy and full, smell has been so strong since the beginning this time.
I get 200 wet gr. From this lady. I hope to get 70 dried as they’re really nice and heavy :)
Will update in some weeks for the most important information :)
Let’s goooooo!!!
Likes
9
Share


@Kushizlez
Follow
Everything is looking good so far. They’re all done stretching and the cheese and black garlic have stretched the most. I adjusted each plant with boxes to create a more even canopy. Buds are swelling up nicely. The two black berry breath plants are looking swollen and fantastic. I don’t like the structure and bud size of the black garlic plants and will not be running them again. Although, they’re getting quite keify and the breeder claims they have a genetic trait that make them put on most of their weight late in flower. So far I’m not too impressed by their size. The seedsman Badazz OG cheese has got good node spacing and structure but has very little trichs and smaller buds. I was just running the cheese to test old European genetics and my bias is starting to confirm my bias. Dutch and Euro genetics are shit. The slurricane #4 is looking fantastic in terms of frost but the buds are lacking a little in size. I’m going to do the 21 day strip today. I should have done most of this defoliation earlier in veg but right now is still fine. Ice cream cake #1 hermed which isn’t at all surprising so I scrapped her. At least it gives me more space to get in and tend to the rest of the plants. I got a pump sprayer to get in a bit closer to the plants as well.

Likes
Comments
Share


@The_Lonely_Farmer
Follow
So I received some fastflowering testers from the amazing fastbuds I cannot wait for these girls too show themselves and start growing 🌱
Thank you so much too the fastbuds team I'm very excited too see what they become 🤞 👀🙏
I have not yet decided which nutrients too use between shogun and aptus but I may use both let's see.
hope you will feel comfortable too advise as I go along any comments are welcome.
Any aptus nutrients users please feel free on giving tips as I think I will be using aptus
Stay blessed growmies 🙏🌱💚


Likes
126
Share


@love_2_grow
Follow
D32 - The first day in the first week of flower.
D34 - I gave her 1.2-liters of compost tea @ pH 6.5. I'm not sure yet, but I suspect that the thrips in my other tent have made it over here. No definite proof, though, so I might just be imagining things.
Yesterday, I turned on the UV on my light. It's a bit early for this girl, but the other girl in the tent is three weeks further along and can use some UV.
D35 - It looks like the thrips have made it into the tent :(
The good news is that there's currently only damage on one leaf, so I removed it. Let's hope the predatory mites do their thing.
D38 - The last day in the first week of flower. Not much to report. She must be stunted, considering how small she is. I have no idea why, as she looked happy and healthy throughout the grow.
Maybe I screwed up when I transplanted her, or maybe there's something with the soil after all.

Likes
5
Share


@Lazuli
Follow
I can smell the frost on the leaves
Its 100% the best strain ive ever smelled such fresh piney smell it comes straight from heaven 💚
She also didnt stretch too crazy
I just defoliated her a bit around week 3 to expose buds and shes perfect.
There is also purple in the flowers but its not vissible yet with the flash on
I reccomend everyone to grow at least one of these , absolute art


Likes
2
Share


@Thebeardserkers
Follow
Semaine 6 – Transition Floraison : Pistils et Défis Nutritionnels
Jour 35–41 (17 avril – 23 mai)
La semaine 6 marque officiellement l’entrée en floraison. Gorilla Cookies a ouvert le bal avec ses premiers pistils la semaine passée, suivie par Toof Decay. Les autres génétiques (Mephisto’s Wedding, Hubbabubbasmelloscope) montrent des signes avant-coureurs de floraison. L’environnement reste stable : 24–25°C, RH 62–64%, VPD 1.17–1.21 kPa, conditions proches de l’idéal.
Nutrition et PPM
Transition vers Bud Ignitor (1 ml/L) et maintien du GMB 1:1:1 à 1.5 ml/L. Cal/Mag augmenté à 2 ml/L. = ~570–610 ppm réels.
Problèmes identifiés
Carence en Cal/Mag sur Hubbabubbasmelloscope et Gorilla Cookies (chlorose interveinal, feuillage jaune). Traitement direct : 2–3 ml/L Cal/Mag appliqué par pot. Réaction positive après 3–4 jours.
Observation critique : les 4 plants en AutoPot (AQUAValve 5.0) montrent 2x moins de vigueur que les 3 plants en bases AC Infinity avec les pots en tissus. Hypothèse : le système AQUAValve maintient le substrat trop humide en continu, tandis que les bases AC Infinity crée une meilleure oxygénation. Aussi, c'est seulement sur les auto pots que j'ai observé des carences, peut-être dû à un blocage nutritionnel. À évaluer pour les futures canopées.
Lumière et PPFD
IF500 (500w) + Mars Hydro 500w maintiennent 660–700 µmol. Pas de stress lumineux, feuillage bien coloré (sauf carence identifiée).
Statut réservoir
47L, 15L pots coco 100%. Consommation d’eau stable. Changement complet prévu mi-floraison.
Prochaine semaine : suivi de la carence corrigée, ajustement graduel du calendrier nutritionnel Advanced Nutrients pour la phase de développement floral.
Tent: 4x8 Gorilla | AC Infinity 69 Pro + Pulse One | 20/4 | 7 plants autoflower | Jour 35
COMPTE RENDU TECHNIQUE — RUN INTÉRIEURE #1 2026
Problème AutoPot et Solution
Date du diagnostic :24 mai 2026 (Jour 37)
Système : AutoPot 4-pot, AQUAValve 5.0, réservoir 47L
Génétiques affectées : Hubbabubbasmelloscope (1), Gorilla Cookies (1)
PROBLÈME IDENTIFIÉ
Symptômes observés
- Décoloration inter-nervures (jaunissement) sur feuilles supérieures
- Diagnostic initial : carence en calcium/magnésium (Cal/Mag)
- Plantes : Hubbabubbasmelloscope #1 & #2, Gorilla Cookies
Prélèvement d’eau au fond des pots AutoPot(jour 37) a révélé :
- pH : 6.8(hors cible 5.8–6.2 pour coco)
- Eau stagnante depuis activation AutoPot (jour 17 = 20 jours)
Analyse de la stagnation
1. Timing AutoPot précoce→ Plantes jeunes, consommation faible
2. Eau restante dans les pots → Contact prolongé avec air dômes
3. Air dômes + coco neuve → Oxydation progressive, dérive pH vers alcalin
5. pH 6.8 en coco→ Blocage d’absorption de Cal/Mg (disponibilité réduite de 40–50%)
Résultat : Symptômes de carence alors que les nutriments étaient présents = blocage nutritionnel, pas déficience réelle
SOLUTION APPLIQUÉE
Étape 1 : Correction immédiate (24 mai)
- Prélèvement eau au fond des 4 pots AutoPot
- Pompage progressif jusqu’à pH 5.8
- Volume pompé : ~1-2 L par pot (estimation)
- Nouveau pH : 5.8 stabilisé
Étape 2 : Traitement localisé (jours 20–24)
- Application directe Cal/Mag : 2–3 ml/Lpar pot (non-réservoir) Top wathering
- Appliqué sur : Hubbabubbasmelloscope Mephisto, Gorilla Cookies Fast Bud
- Méthode : versement manuel aux racines
- Fréquence : 2 applications espacées de 3–4 jours
Étape 3 : Maintenance réservoir
- PPM réservoir principal : maintenu 400–420 ppm (Hanna HI98301, scale 500)
- Note calibration : Vrai PPM = lecture × 1.4 = ~560–588 ppm
- Cal/Mag réservoir : maintenu à 2 ml/L
- pH réservoir : vérification quotidienne post-correction
Étape 4 : Surveillance continue
- Routine hebdomadaire établie : Prélèvement fond pots, vérif pH
- Objectif : Détecter remontée pH avant accumulation
- Seuil intervention : pH 6.2 = pompage correctif
RÉSULTATS & OBSERVATIONS
Court terme (5–7 jours post-correction)
- Pistillage accéléré visible sur Gorilla Cookies (confirmé jour 37)
- Décoloration n’a pas progressé → blocage levé
- Plants Mephisto’s Wedding : vigueur stable (10% affectés)
- Toof Decay : vigueur stable (10% affectés)
Comparaison système
Observation importante : Plants en bases tissu AC Infinity (manual feed via bleed valve) montraient plus de vigueur que plants AutoPot
- Raison probable : Cycle humide/sec régulier vs eau stationnaire
- Implication : AutoPot inadapté pour timing de croissance lente initiale
LEÇONS APPRISES
Sur le système AutoPot
1. Activation tardive recommandée→ Jour 25–30, pas jour 17
1. Monitoring pH hebdo obligatoire → Coco + air dômes = dérive pH naturelle
1. Eau stagnante = problème→ Même avec nutriments corrects, pH alcalin = blocage
Sur la coco neuve
- Nécessite ajustement pH plus fréquent en début
- Se stabilise après 3–4 semaines d’utilisation
- Minéraux s’accumulent lentement → nettoyage hebdo bénéfique
Choix système pour Run #3
AutoPot déclassé pour prochaines runs
- Passage à : 8× bases AC Infinity + 8× flottes automatiques individuelles
- Avantage : drainage régulier, pas de stagnation, PPM/pH plus stables
- Setup réel : coco/Bio-Urbain, 5 gallons, 75L réservoir centralisé
DONNÉES COMPLÈTES
CONCLUSION
Problème :Eau stagnante + pH alcalin = blocage nutritionnel (pas déficience)
Solution : Correction pH + Cal/Mag localisé + routine hebdo de monitoring
Statut : Résolu, plants en rétablissement, early flower progression normale
Impact rendement : Minimal — correction avant dégâts sévères

Likes
11
Share


@Madman2020
Follow
Generative steering
Day 30 sprayed with Jas
Day 31 noticed spider mites



Likes
Comments
Share

@Drehpaper
Follow
Woche 7
Tag 43-49 / Blüte Tag 15-21
Luftfeuchtigkeit 50
Tag 27
Nacht 22
PPFD 800
DLI 34,56
Höhe 55
VPD 1,4
Lampe Abstand 40cm
Lampe auf 60%
Acht Tage nach Umstellung, erste Blüte Anzeichen zu sehen.
Komme leider nicht unter die 50% Luftfeuchtigkeit, wird wohl bis Ende so durchgezogen.
An Blüte Tag 16 wurde sie radikal entlaubt und um einige Triebe erleichtert. Evtl bisl zu Radikal
🙈.
An Tag 21 wurde sie mit 0,5 Liter Komposttee gegossen. Eigenkreation ausm Komposthaufen von Oma 👵.
Temperatur leider auch immer um die 27 grad die ich nicht gesenkt bekomme. Werden hoffentlich nicht zu viele Terpene flöten gehen.
Processing
Likes
20
Share


@Excalibur
Follow
09 October 2018 -
Day 106
Flush run well, Buds have increased and thickened up nicely.
Day 107 -
No more burn and buds are growing.
Day 108 -
Conditions are good.
Day 109 -
Noticed heavy and healthy root growth.
Last day before trim
Day 110 -
Trimmed and Harvested.
** Tent was required **
Day 111 -
Colour and smell has become stronger
Day 112 -
Still drying
Likes
31
Share


@The_Doctor_Green
Follow
Al 09/02/24 se pueden ver a las plantas bastante sanas, no han mostrado ningún síntoma de stress por el transplante.
Esta semana he aumentado la dosis de agua a 3. Litros,
El drenaje del riego me tiro un ph de 5.7 y una ec de 2000.
Likes
13
Share


@Kayotic
Follow
Day 77
Week 4 of flower
#3 is the only one that has any smells
Watering every day, feeding every other


Likes
15
Share


@ThickFreakness
Follow
Coconut oil infusion experiment
Mini crock pot / warm / 2C coconut oil / 24g of Blueberry cupcake / 6hrs stirring one an hour / strained with cheesecloth
Raised the light a couple more inches
