


Likes
Comments
Share

@Enki_Weed
Follow
🌿 Grow Log: AK-47 (Pharaoh Seeds) – DWC Hydro
Phase: Frühe Blüte (Woche 1 nach Umstellung)
Update: 19. März 2026
Aktueller Status & Setup
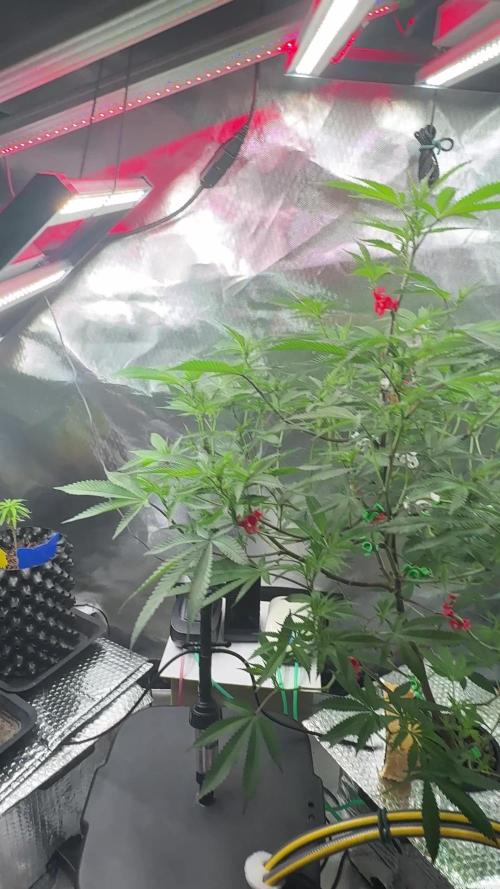
Die AK-47 hat die Umstellung auf die Blüte am 12. März hervorragend gemeistert. Die Pflanze zeigt eine enorme Stoffwechselaktivität, was sich in den letzten 24 Stunden durch einen massiven pH-Abfall von 6,5 auf 5,6 bemerkbar machte. Da die Blätter weich blieben, aber leichte helle Verfärbungen zwischen den Adern zeigten, wurde heute ein kompletter Wasserwechsel durchgeführt, um die Nährstoffbalance perfekt neu zu justieren.
Nährstoffe & Wasserwerte
Das Reservoir wurde frisch mit 30 Litern angesetzt. Dabei wurde das komplette Hesi Hydro-Schema verwendet. Um dem Magnesiumhunger der Pflanze gerecht zu werden, wurden zusätzlich ca. 6g Bittersalz hinzugefügt. Der pH-Wert wurde präzise auf 6,1 eingestellt, um einen Puffer für die hohe Kationen-Aufnahme zu haben. Der EC-Wert liegt bei stabilen 1,8, was für die aktuelle Größe der Pflanze ideal ist. Die Wassertemperatur wird konstant bei optimalen 20°C gehalten.
Beleuchtung & Klima
Das Lichtsetup wurde für die Blütephase optimiert. Neben dem Hauptspektrum kommen jetzt verstärkt Rotlicht zur Förderung der Blütenbildung sowie UV-Licht in stündlichen Intervallen zum Einsatz. Letzteres soll die Harzproduktion und die generelle Widerstandsfähigkeit stärken. Die Luftfeuchtigkeit ist mit 47% im idealen Bereich, um die Transpiration zu fördern und späterem Schimmel vorzubeugen.
Training & Beobachtung
Das Low Stress Training (LST) wird konsequent mit farbigen Clips fortgesetzt. Ziel ist es, das Blätterdach flach zu halten und den massiven Stretch der AK-47 zu bändigen, damit auch die unteren Seitentriebe optimal vom Licht profitieren. Die Pflanze füllt das Zelt mittlerweile fast vollständig aus. In der kommenden Woche wird mit dem Erscheinen der ersten deutlichen weißen Blütenhärchen gerechnet

Likes
18
Share

@TrickzGrowz
Follow
Servus Moin!
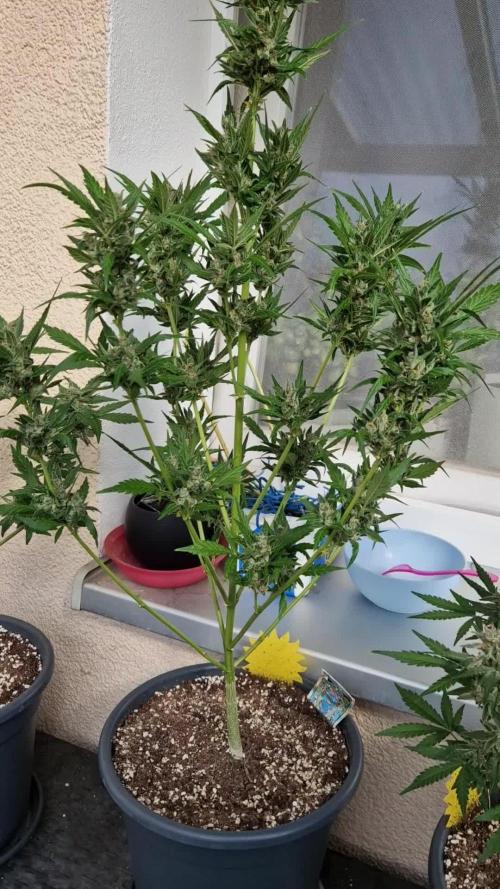
Die Pineapple Slush XL macht sich hervorragend. Die Buds riechen allmählich auch sehr fruchtig.

Likes
16
Share


@Mrg7667
Follow
Major defoliation/ lollipoping that happened this week right on day 20 my main concern was looking for more hermies (due to stem cracks from lst) and also cut out any lower branches that where going to make larfy buds.
I only cut up the branches untill the point that the budsites where at least a nice pistil cluster (10and up ) some branches got a good 6-7 inches shaved off some more like 2-3 just depends on the plant with so much variety. Also my plants are like touching the lights it just wont let me mark less then 4inches i have the ability to raise my light another 2inches so i will definitely be doing that. For now i have the taller branches off to the sides so the can outgrow the light without burning.
Smells finally starting to come in with more gassy earth coming from DD and devine chocolate GG4 smell coming from the mellows
Still see some nitrogen toxicity not sure if should cut all nutes in half considerIng week three biogrow increases to 3ml/L

Likes
5
Share


Likes
11
Share


@CocoLogic
Follow
August 23th: (F6)
Fertigation once a day with same recipe (1150 EC 6.1 PH) watered until 10-20% run-off
August 24th: (F7)
Fertigation once a day with same recipe (1150 EC 6.1 PH) watered until 10-20% run-off
August 25th: (F8)
Fertigation once a day with same recipe (1150 EC 6.2 PH) watered until 10-20% run-off
August 26th: (F9)
Fertigation once a day with same recipe (1150 EC 6.2 PH) watered until 10-20% run-off
August 27th: (F10)
Fertigation once a day with same recipe (1150 EC 6.2 PH) watered until 10-20% run-off
August 28th: (F11)
Fertigation once a day with same recipe (1150 EC 6.2 PH) watered until 10-20% run-off
August 29th: (F12)
Fertigation once a day with same recipe (1150 EC 6.2 PH) watered until 10-20% run-off
Supercropped the 4 taller branches on the PE2 as a test and to get them at same level
Note: The Tut height is at the EXTREME limit had to remove the tray to gain 2 inch, will have to get the light at the roof of the tent and hope it will do it, first run of my life in 48 inch height space will learn from it for the next runs! :)


Likes
Comments
Share


@eldruida_lamota
Follow
Venga familia, cosecha de estas Sagrada Amnesia de Seedstockers, que ganas que tenia ya estaban para darles machete.
Que pinta que tienen estas plantas.
Las flores aparte llevan una capa muy resinos y son prietas, aparte son bien aromáticas huelen bien fuerte afrutada sobre todo, con toques terrosos.
En general es una genética con la que disfruté bastante cultivarla, la genética es un clásico que para cultivos de floración corta media con rangos entre los 20/25 grados en interior, es normalita al cultivarla y bien resistente, es excelente para cultivadores principiantes.
Hasta aquí es todo, agradecer a Mikele, Giorgio de Seedstockers, y al equipo Agrobeta por hacer posible estos proyectos espero que los disfrutéis, buenos humos 💨💨.

Likes
8
Share


@Oldwied
Follow
Day 23
The third week of flowering is complete. Most of the height growth is finished. Time for a radical defoliation.
The girls look great.
Unfortunately, Kush has formed hermaphrodites on the flowers in the shade. I hope that I have removed them all.
The lamp will be raised to 100% output in two stages.

Likes
Comments
Share


@stashio
Follow
Really easy grow, I just followed the manufactures instructions on lights and fertilizer. I did give the Finale a miss to see if I didn't get fox tailing, I didnt so i'll give it a miss when its hot and see the results.
I'm trying the short diary format as I was spending more time filling it in some weeks than looking after my plants but I still like the record to look back on.


Likes
8
Share


@jayizrollin
Follow
Bad news!
TG1 got mold. I harvested immediately as she was the closest to done and to try to save the other plants from the same fate.
Only one bud was moldy, I chopped it and turned it into butter, best decision ever I got so high.
TG2 is looking good, smelling good. Just trying to keep humidity down and finish out this grow strong💪


Likes
18
Share

@ohcibi
Follow
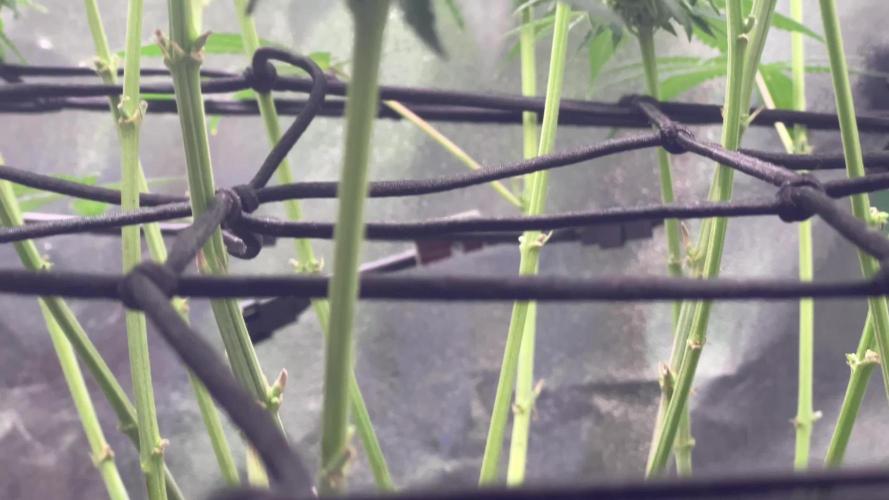
Final week now. I watered with clear water today and it’ll be the last time. Harvest will be on the weekend probably.
Was a nice ride with some hurdles but it should turn out alright. Excited for the next grow already. Will most probably be Dynamite Diesel. Stay tuned for more.

Likes
77
Share


@deFharo
Follow
Bienvenidos amigos, he cumplido 19 semanas de vida, 11 de floración y una como reina del jardín!! 😍... mi nombre creo que es Amnesia, soy algo olvidadiza 😵, mi apellido es Kush y desciendo de antiguos linajes Haze y Kush, soy fruto del mestizaje de plantas emigrantes y reúno en mis genes las mejores sativas de dos continentes...llámame AKU!! 😘 y si te acercas a mi... te regalaré aromas complejos e intensos, a incienso, madera y frutas ácidas que recuerdan a lima y pomelo.
Esta semana he bebido 3247ml de agua de riego, un 4% menos que la semana anterior, pero es que las temperaturas bajaron mucho desde hace 4 días, todas las plantas de la carpa de cultivo nos hemos juntado para darnos calor.
Ahora dedico todas mis energías en hacer crecer mis flores, y poco a poco, las hojas más grandes comienzan a cederme sus nutrientes, y al hacerlo, el bello color verde cambia y se tiñe de amarillo vetado, como las mechas en el cabello de las hembras humanas, ahora también soy, la tigresa del jardín de la alegría 🐯!!... I loved! 😍
24/04/21
La vida de reina es un lujo, todas mis compañeras me admiran y quieren ser como yo! Pero les va a resultar difícil tener unas colas tan gruesas como las mías.
Hoy mi jefe me ha dicho que un día vendrá con unos amigos para que me admiren también... serán raros seguro!! 😁
Mi cultivador me ha hecho una mezcla de riego muy nutritiva, para que siga engordando mis colas y no me falte de nada:
Hidrolato potásico de leonardita con fósforo (Humato PK) al 1,5%, Biol de frutas con Microorganismos Eficientes -EM (MMA, BAL, Vitaminas, Ca, Mg, Fe, Cu...) al 1,5% y melaza. PH: 6.64, EC: 1.30.1400ml... muy rico!!
27/04/21
Hoy me han hecho un riego muy suave, porque he comido mucho últimamente y mi cultivador no quiere que me empache. Una mezcla sólo con agua de montaña y melaza. PH: 6.60, EC: 0,40. 1600ml.
También me han añadido nutrientes y minerales sólidos en el sustrato, para que coma poco a poco cuando lo necesite... I loved! 😍
He estado emocionada todo el día con la visita de los amigos de mi jefe... hasta que han llegado! 😕 traen también a un cantante dicen que nos divertiremos, pero... todos parecen salidos de un funeral! 😲 es extraño, me miran y me dicen que me quieren, que estoy muy guapa y bla, bla, bla... pero creo que son simples saqueadores de marihuana!! 😡
Los conocía a todos, excepto a una niña repelente, siniestra y antipática que se llama Miércoles... creo que ya la odio!! 💀 El resto han estado fumando, y de vez en cuando me miraban y sonreían... me daban miedo, hay uno de ellos, muy grande, al que nadie hace caso o se ríen de él, no le invitan a fumar ni a beber, dicen que lo hacen porque no es feliz... ah que gente tan extraña!! 😟
Y comenzó la actuación, se apagaron las luces y Chet empezó a cantar, triste, todos aplaudían y chillaban... yo lloré!! 😪
"...Almost blue
Almost touching it will almost do
There's a part of me thats always true... always..."
Hasta la próxima semana....
SALUDOS A VUESTRAS PLANTAS!! 👸🐅🌲
================================= 🙄☮️👇🙏👌🤛👍👉👉👉❤️💜❤️👈👈👈🤜👌🙏👇☮️🤩🖐️🏻 =================================



Processing
Likes
8
Share


@weed_gastro
Follow
Day 42, start of flowering week 3: they are growing nicely, had to do a lot of defoliation on each plant, except the one in the 3L pot.
Day 43, I started to discover that the roots are coming out aggressively from the bottom of the pot. I did not move the ones in the back, but I guess same thing.
The one in the 3L pot doesn't have this problem.
Day 45: getting really excited for these guys! I'm trying to keep the temp and humidity low, and I hope I can achieve some of the purple color :P any advice on that?
day46: defoliaton

Likes
12
Share


Likes
1
Share


@FrostyBudZGenetics
Follow
The germination i forgot to take pictures so i just have a video of the first 3 strains i started before the other seeds arrived.
I used the same metod for all of them
24h in the glass of water after that 48h in the cotton pads in the zip lock bag with 3 sprays of water on the cotton pads and 1 spray when inside the zip lock bag is closed untill 80% leaving a small gap for them to breath.
I decided to plant them after that in the final resting pot for this strain in a 5 gallon fabric pot.
I used the following media on the bottom of the fabric pot i used 10% of Goldlabel HydroCorn after filled up with Advanced Nutrients coco cultivator (50% coco 30% perelite 20% pebbles) and i mixed on the media some Azos , Mykos and Great White.
The light schedule for the first 5 days was 24/0 and after that i change for 18/06 schedule.
Just water the plants on the 15/06 i think all my seedlings are stuned because my light is too strong for them and the light is dimed to 25% waiting on my new seedling light the Spider Farmer SF1000EVO LED should arrive just on wednesday. And my light meter for lux is saying i have 8600Lux converted is 148 and my dli on meter from the phone is saying 150 so its 3x times more the recomended i just dont understand if this phone app is working correctly.
Update on the order from spider farmer from Ebay (Order the item on a thursday and the order was not updated on ebay on the following Monday so decided to contact them to understand when i am gonna receive my order i was told true ebay that my item as been shipped and i will receive an update within 1 hour to tell what time the item will be delivered. So never received any message giving my time slot delivery. Never received the item and at 21pm the tracking updeted on Ebay saying delivered so i contected them next day to be told that the courrier actually lost my order and that they will reshippe the order again but was told i need to wait 2 buiness days for the warehouse to processe my order beacuse they are busy what i replied that why should be me the costumer that needs to wait 5 or 6 more days for the order to arrive to me that they should send me the item on the same day and send me with one day delivery. The ansewer was they could not do it so i cancell the order asked for a refund and never more use their products appailing costumer service)

Likes
6
Share

@DimJesus
Follow
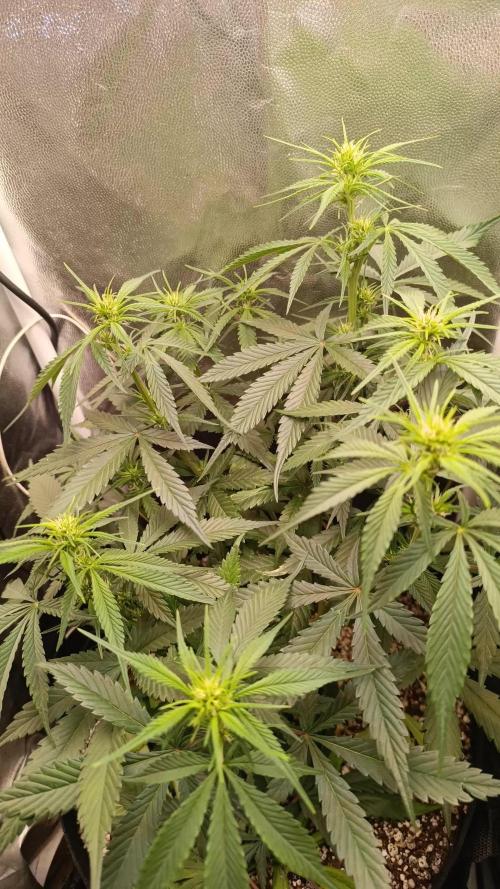
Chegou!!! Começou a flora, ontem fiz a primeira rega com os fertilizantes da flora, elas parecem estar gostando bastante, notei algumas queimaduras nas folhas, não sei o que pode ser mas estou observando ver se evolui ainda não fica claro qual o problema. Esses dias as temperatura tem sido boas, não muito quente não muito frio, acredito que isso tá ajudando muito, o cheiro está começando a ficar mais notável, e o substrato tá secando mais rápido também, já estou pensando em aumentar o volumen de rega mais não tenho certeza.
EC: 1.920
Ppm: 974
PH: 6.02
Tudo bem se eu chegar nos mil ppm da próxima vez?
😁💚🌱