


Likes
Comments
Share

@IIIStonerIII
Follow
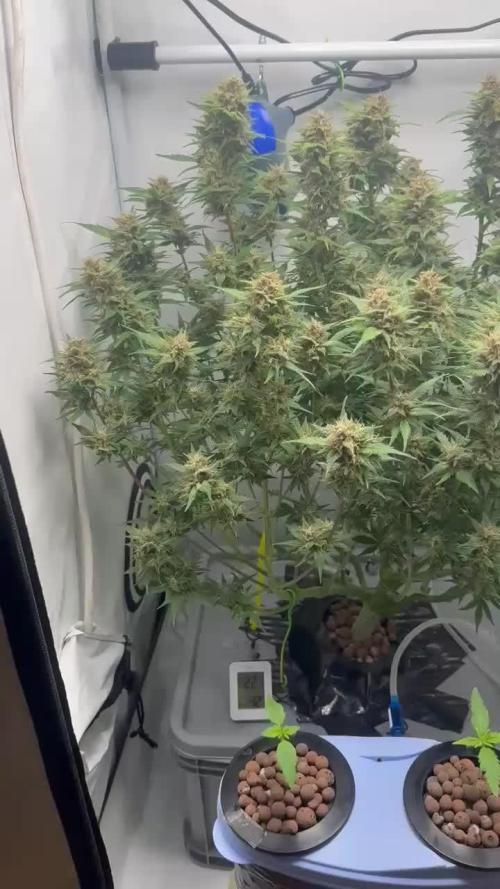
The End. Summary: Extraordinary Performance, Very loud and incredible smell. Loves EC around 1 during early veg. Doesnt like EC above 1.4 during late flower. When i grow it again, ill probably stick with 4 to 8 budsites instead of having like 30. 😅 I'll be back for Dry Weight & Smoke Report. 🍃✌️

Likes
17
Share


@420DeepGrow
Follow
💐🍁 Ztrawberriez:
Ganadora de la AAC 2024, con hasta un 25 % de THC, la Ztrawberriez Auto surge del cruce de dos variedades californianas conocidas por sus extraordinarios perfiles de terpenos y su potencia. Esta variedad no solo produce hasta 600 g/m² de hermosos cogollos duros como rocas en 9-10 semanas, sino que también llevará a tus papilas gustativas en un viaje en montaña rusa por toda la gama de terpenos dulces y afrutados
🚀 Consigue aqui tus semillas:
https://2fast4buds.com/es/seeds/ztrawberriez-auto#description
⛽ XpertNutrients: es una empresa especializada en la producción y comercialización de fertilizantes líquidos 🍶y sustratos🐛, que garantizan los mejores resultados y cosechas de la más alta calidad. A través de una cuidadosa selección de materias primas y un proceso de producción avanzado, sus productos son sinónimo de resultados confiables.
🛒 Consigue aqui tus fertilizantes:
https://xpertnutrients.com/es/sobre-nosotros/#:~:text=Xpert%20Nutrients%20es%20una%20empresa,de%20la%20m%C3%A1s%20alta%20calidad.
📆 Semana 6:
Parece que el temporal por fin se va a pasar esta semana, todo esto le ha afectado y se va a quedar mas pequeña de lo que debía.
Se aprecian las preflores, espero que de un buen estiron estas dos próximas semanas
Voy a aplicar unas enzimas para ver si asi se recupera de todo este estrés.


Likes
25
Share


@Borberad
Follow
Woche 13 ging nur zwei Tage. Für meinen Geschmack war die Pflanzen an Tag 58 ausreichend reif. Zuvor wurden ja schon die Headbuds geerntet, da es kleine Opfer an den Pilz gab. Die letzten Tage verbrachten die Pflanzen bei 48h dauerhafter Beleuchtung und abschließenden 12h Dunkelheit. Ob eines von beiden einen positiven Effekt hatte lässt sich nicht klären aber kaputt gehen, kann davon nicht viel und ich kann Argumente für beides nachvollziehen, von daher kombinieren wir mal beide Varianten. Alles in allem war es jeden Tag eine Freude das Zelt zu öffnen, zu sehen wie die Blümchen sich entwickeln und sich von ihrem Duft betören zu lassen.
Da die Gesetzeslage es so möchte, werden nur 250g für den Konsum im Cannatrol getrocknet und gecured. Somit sollten wir rechnerisch bei 50g Trockengewicht auskommen. Der Rest landet in einem Wurmkomposter, um zumindest die aufgebrachte Energie nicht ganz zu verlieren. Bleibt Sauber! 💚🍀🌍

Likes
9
Share


@pifflestikkz
Follow
Day 8
18/10/24 Friday
I have removed the domes, it was getting a little too humid without having a opening hole.
I gave them all another light watering only using de-chlorinated tap water pH 6. 300ml
Day 9
19/10/24 Saturday
Just a light spray twice a day. De-chlorinated tap water pH 6 with calmag 3ml-5L.
Day 10
20/10/24 Sunday
Started a small feed today, only 1ml of each listed advanced nutrients to 5L.
Feed 300ml.
Noticed that I must have sprayed too early too lights being on as this has burnt her first true leaves 🤦♂️ and stunted this week's growth.
Picture update with video 📸 💚
Day 11
21/10/24 Monday
A light spray de-chlorinated tap water pH 6 only. Done this soon as lights went off.
She already is showing tiny new leaf growth... We back in the game 🙌💚
Likes
18
Share


@Grower_Of_Persia
Follow
my dry and cure style is this:
4 days of hanging upside down to get water activity lower to around 0.6 in 50% humidity and 26 C temp (i know its a little high but we are in a hot summer right now and i cant get it lower even with air conditioner) and then after 4 days of drying i remove leaves and stalks, trim buds and move them to jar for the rest of their life :D . and in the first 4 days of curing i open the jar door and let hem get some fresh air in the jar for about 5 minutes and close the jar door again, after 4 days of curing like that buds are smokable but they will get better as they getting cured about 1 month.
buds are one of the hardest as fucking rocks type of buds! very dense , compact , sticky , smelly , amazing at every aspect
growing stage was 56 days and flowering stage was 75 days total (harvested tops at day 64th)
the total weight of dry buds was : (plant #1 & #3 top buds 56 G + lower buds 22 G ) 78 G + (plant #2 top buds 47 G + lower buds 18 G ) 55 G + (plant #4 top buds 120 G + lower buds 67 G ) 187 G = 367 G


Likes
22
Share


@Fresco
Follow
Hi. Unfortunately, I can't write much, I even left last week without comment, although the plants got stressed on it in the form of a lack of water. I increased the amount of watering. This week, the bushes have already become noticeably cramped, I cannot transfer them to flowering for technical reasons, besides, the clone has not grown enough yet. I very much hope that the bushes will not get another stress from the crowding and I will soon be able to change mode to 12/12

Likes
37
Share


@Smoking_Joe_Frasier
Follow
Week 4: Growth Spurts and New Challenges
Continued Growth and Health
As we move into the fourth week, the plants are showing impressive growth. Their leaves are a lush, vibrant green, and the stems are becoming stronger. The transition to the larger 11-liter fabric pots has clearly paid off, providing the roots with ample space and better aeration.
Adjusting Nutrient Levels
Given their positive response to the nutrients, I decided to continue with 2/3 of Terra Aquatica Tripart feeding schedule, adjusting slightly to meet their increasing demands. Here's the updated feeding plan for this week:
CalMag: 2.5 ml/l (Starting EC before adding nutrients: 0.50 mS/cm)
Grow: 1.5 ml/l
Bloom: 1.0 ml/l
Micro: 0.5 ml/l
EC: 1.2 mS/cm (600 ppm PPM-500/TDS)
pH: 6.0
Each plant is watered with approximately 20% runoff to ensure there's no nutrient buildup in the coco mix. I will maintain this nutrient level until the pre-flowering stage to avoid the risk of nutrient burn due to over-fertilization.
Weather Improvements and Adjustments
The weather has been steadily improving, with temperatures expected to rise to around 25°C starting Wednesday, accompanied by abundant sunshine. This upcoming forecast is excellent news for my plants, as I anticipate a final growth spurt before flowering begins. Every centimeter of growth counts at this stage, and I'm optimistic about maximizing their potential under these favorable conditions.
Strengthening with Wind Exposure
On days with good weather, I move the plants out of the greenhouse to expose them to natural wind. This practice helps strengthen their stems, improving overall stability. Additionally, the wind creates a more challenging environment for pests, helping to keep them at bay.
Smart Watering Strategy
I only water the plants when the pots feel noticeably lighter. This encourages the roots to search for water, promoting the development of a stronger and more extensive root system. This method helps ensure the plants remain healthy and resilient.
Pest Management: Observations and Actions
At the beginning of the third week, I noticed dark discolorations on the undersides of some leaves. A few days later, these spots turned into yellow patches. I am still unsure about the cause of these spots. To prevent a potential insect infestation, I sprayed all the leaf surfaces, both top and bottom, with a mildly dosed neem oil mixture. Since then, the spots have not spread further.
Because these discolorations are only affecting the lower leaves, they are not causing me significant concern at the moment. Regular inspections and preventive measures are crucial to maintaining the health of the plants and ensuring that any issues are caught early.
Decision Against LST
At first I have decided against using LST. But some of your comments made me try some LST on two of my plants. I choose Tangie and Gorilla cookies to try out and learn some stuff. Blue dream and Banana purple punch stay without any training. Thanks guys for your advice 👍
Monitoring and Care
My daily routine involves checking the plants every morning and evening. This includes:
Monitoring the moisture level of the coco mix.
Inspecting the plants for any signs of pests or nutrient deficiencies.
Growth Observations
The plants are responding well to the controlled environment and balanced nutrition. They are growing rapidly, with new leaves appearing almost daily. The stems are thickening, and the overall structure of the plants is robust and healthy.
Looking Ahead
As we head into week 4, I am optimistic about the continued growth and health of my plants. The combination of a stable environment, appropriate nutrient levels, and diligent care is proving successful. I’m excited to see how they progress and adapt as they move closer to the flowering stage.
Seeking Feedback and Tips
Your feedback and tips are valuable to me! If you have any suggestions on how I can improve my growing techniques or insights based on your own experiences, please feel free to share them in the comments below. Let's grow together!
Likes
22
Share


@Chumpkilla
Follow
8/5/23 - Day 54 - Last night, a successful water change took place. I've attached a picture of the bucket at the top for reference. While I currently perform manual water changes, I have plans to automate the process using the available hookups. Unfortunately, the unit was shipped quickly, leaving me no time to set up the automatic system before receiving the LEAF box. However, on my next grow, I'll ensure the drain and water inlet are properly connected.
During this current grow, the bucket you see at the top is always connected to the drain as a precautionary measure. I can activate the draining process through the app, and after two cycles, all the water, including the water collected by the dehumidifier, is efficiently removed.
Following the draining process, I fill the box with RO water, and from there, the LEAF box takes over and automatically dispenses the necessary nutrients. This automated system has made the whole process incredibly easy, eliminating any guesswork. I simply empty and fill the water; everything else is expertly handled by the LEAF box.
The flowering stage is progressing exceptionally well. The plant has ceased growing upward, and the buds are now thriving and reaching new heights each day. I find myself eagerly looking into the box daily, excited to witness the changes, especially around 2 pm when I can observe the growth since the morning. It feels like Christmas morning every day!
As always, I'll keep adding daily pictures to document the incredible journey.
8/9/23 - Day 58 - It's been a few days since I have posted. Thats because Shes growing bud like crazy. You can see the plant has focused on growing the buds because the plant has stopped stretching up and started swelling the buds. We have about 3-4 weeks until harvest. This has been the easiest grow of my life. Basically, I add some water to top it off and that's about it. I have been moving some branches down as they start to get a little to close, but other than that not much input from me.
If you are looking for this experience, check out https://www.getleaf.co/

Likes
4
Share


@Ledros
Follow
Day 15 (2020-05-24): Some more Blumat adjustments. Having trouble getting things perfect. Luckily the plants aren't drinking a lot yet so there is plenty of time to get it right.
Day 16 (2020-05-25): Noticing new growth is light green/yellow. Looks like it might be a Zinc deficiency. Will investigate more tomorrow.
Day 17 (2020-05-26): Opened water reservoir to a nasty smell and white growth all on the bottom. Algae I am guessing? Either way it changed the PH of the water to 6.8 which I think is causing Zinc lockout. I flushed the plants with 5.6 PH and cleaned the reservoir and added new solution at 5.6. I also added a small amount of bleach (.3 ml gallon). I am also going to wrap the reservoir in black duct tape to prevent light.
Day 18 (2020-05-27): Looks like the flushing and water change worked as the plants appear to be recovering. Top growth is noticeably more green, but will continue to monitor. I ended up cutting a box to cover the reservoir to block light to helpfully prevent future algae growth, along with the bleach.
Day 19 (2020-05-28): Both seem to have recovered from the Zinc issue and all growth is nice and dark green again. Will probably look at doing some training tomorrow. Originally was planning on trying ScrOG but I am strting to wonder if it will be effective. The plants are still quite wide and short with not much height, so the net will not currently be very effective. Probably will do some LST for now and maybe some defoliation to expose more shoots to light.
Day 20 (2020-05-29): Did some initial LST and defoliation to open things up a bit.
Day 21 (2020-05-30): Plants appear to be recovering fine from the LST. I am finding some issue with the PH coming into the irrigation system. It is fine in the tank, but by the time it reaches the plants it is higher (around 1 higher). If I flush about a cup through the filter/hoses, then it is fine. So it seems as it sits in the tube the PH is rising. I wouldn't think there would be any algae growing in the tube since it is light proof and would have thought the bleach would had killed it anyway. Will check filter first.
Likes
37
Share


@DogDoctorOfficial
Follow
Grow Diaries: Week 9 Veg - Mentha de Croco Mutants
Hello, Grow Diaries fam! 🌱✨ Week 9 is here, and while our mutants are small, they’re undoubtedly mighty in beauty and character! Each plant continues to showcase its uniqueness, with details in the leaves that are nothing short of art. As always, patience is the key, and these beauties are teaching me that every step of this journey is worth it.
The Flip is Coming!
After much thought, I’ve decided to flip the entire room to a 11/13 light cycle. This means it’s time to identify males and let the females show their true potential. Here’s the plan:
• Why Flip Now?
Despite their smaller size, flipping now allows the plants to reveal their sex while keeping the room’s progress synchronized. This way, I can focus on the keepers and remove the males efficiently.
• Revegging the Favorites:
By flipping and selecting now, I’ll be able to reveg any standout females later. For those unfamiliar, revegging is a technique where, after flowering, you revert the plant back to a vegetative state. This method preserves genetics you love and allows you to grow clones or expand the line further.
👉 Benefits of Flipping and Revegging:
• Speeds up the identification process without needing clones first.
• Lets you preserve special traits in the plants.
• Adds flexibility in managing space and time.
Environment & Nutrition
This week, I’ve maintained a steady environment:
• Temps: 22°C with about 66% RH.
• Nutrients: Continuing with the Aptus Holland lineup—Regulator, Start Booster, and CalMag Boost. The All-in-One Pellets are still providing slow-release nutrition, and the plants seem to love it!
Watering from the bottom remains my go-to, helping keep gnats at bay while ensuring even root hydration.
The Photographer’s Eye
Once again, my Sony A6000 has been in action, capturing the stunning intricacies of these mutants. There’s something magical about zooming in on their delicate details, seeing the interplay of light, and appreciating every curve and serration. Pro tip: The right lens can make all the difference, giving you sharp, breathtaking shots.
Shout Outs & Gratitude
Big love and thanks to:
• Terpyz Mutant Genetics for these incredible seeds!
• Aptus Holland for keeping the nutrients dialed in.
• Pro Mix Soil for giving the roots a cozy home.
• TrolMaster for perfect environmental control.
• Future of Grow for the endless inspiration.
• Grow Diaries for hosting this amazing community.
And, of course, to all the growers, followers, and curious onlookers who make this journey even more special. Your support means the world! 💚
Join the Journey
Let’s connect beyond Grow Diaries! Follow me on Instagram and YouTube to catch exclusive updates, behind-the-scenes moments, and more. Together, let’s grow, learn, and inspire!
Genetics - Mentha De Croco
https://terpyz.eu/products/menta-de-croco-fern-type?_pos=1&_sid=e9237cbcb&_ss=r
DogDoctorOfficial Discount Codes @ terpyz.eu - DOCTOR 15% off
Nutrition - @aptusholland
https://aptus-holland.com/
Led Power @ F.O.G. Future Of Grow
https://www.thefuturofgrow.com/en/online-store/BLACK-SERIES-600-p489093171
Controls @ TrolMaster
https://www.trolmaster.eu/tent-x
As always thank you all for stopping by, for the love and for it all , this journey of mine wold just not be the same without you guys, the love and support is very much appreciloved and i fell honored with you all in my life
With true love comes happiness Always believe in your self and always do things expecting nothing and with an open heart , be a giver and the universe will give back to you in ways you could not even imagine so
As always, this is shared for educational purposes, aiming to spread understanding and appreciation for this plant. The journey with nature is one of discovery, creativity, and respect. Let’s celebrate it responsibly and continue to learn and grow together!
Growers Love To you All 💚


Likes
27
Share


@Stealthman
Follow
The plant of course is much more smaller with the restricted root zone causing a bonsai effect. However, she performed really well under the circumstances with a relatively large yield all things considered. I usually smoke high CBD but was very impressed with this high. Let's see how it goes after spending more time under the influence.
Review...
Growing in the solo cup sized container proved to be much more challenging than a regular grow. The plant soon became stressed dealing with the tiny root zone making everything hyper sensitive. The first issue was showing as tip burn even though the ppm was kept in the 650-850 range. Then the leaves showed a general yellowing overall specially showing at the bottom fan leaves. At this point I was changing the nutrient solution every 2-3 days trying different nutrient brands and concentrations seemingly without much success. It was a nerve wracking period which ultimately lead me back to General Hydroponics with amendments. I did learn that the plant can weather the storm even with less than perfect vegetative leaves while she focuses all her energies into calyx production. It’s was upsetting to see less than stellar health but eventually all the leaves drop and the flowers power on seemingly without issue.
The cascading diamond structure developed as a result of a couple broken branches that occurred during the training process in an effort broaden the plant profile with wider lateral spacing. Although initially upset when the fractured branches that withered after being bandaged up and . After removal of said branches it was exciting to see the new possibilities. The cascade formation called for additional side lighting to maintain uniform bud size all the way down the front lower end of the plant. I was looking to create a stadium like effect.
The experience of operating the visual hydroponic unit called for a number of practical adjustments along the way. Although initially, very excited with the system concept as an integrated design with nutrient solution supply and gravity drain through the pump, with the air supply inside the pipe with the air bubbler acting as the drain/root filter... in hindsight, obviously, it would not work as the root mass became denser and denser. The first issue, as the path of least resistance, the air was forced back down the nutrient supply pipe. This prevented the pump from priming itself and subsequently no nutrient solution delivery was even possible. As a result, the original air stone was left in place to prevent the roots from entering the nutrient tank and a new bubbler stone simply added to the tank itself.
Although the original idea was for the air to be continuously pumping directly through the roots, the flood and drain would actually be just as good when drawing the fresh air in and out with each pump/drain of nutrient solution. The ON cycle was initially set to 10 seconds which eventually became 30 seconds as the roots mass grew denser. This proved to be too unreliable as the fill level was no longer consistent which required constant monitoring to be sure that there was no flooding over and above the container lid. It which case, a simple feeder tube to the top of the root zone was the best option. The ON cycle was set to 5 seconds with a 15 minute OFF interval. Overall the biggest concern was the timer itself, which had several bad reviews for malfunctions with growers losing their plants. However, I have no choice as this was one of the few timers that was capable of cycling down to the second but it all workout fine in that regard… no problem.
Was it a perfect grow?... no, definitely not. However, as a relative beginner, it was definitely a great learning experience. Mostly, I need to work on the nutrient blend and concentration. For more control, a backup tank with float valve delivery to maintain the water level for this particular system would be a good idea as well.


Likes
7
Share


@Budking420
Follow
This lady is getting massive. Her buds are swelling to the max. I set her on a self watering base from ac infinity about 3 days ago and I can already tell its adding to the swell. Check back next week to see just how fast these buds grow & remember its 4:20 somewhere!
Likes
25
Share

@Hazeberg
Follow
Day 29: New week, new development. Let's find out, if I can manage the "star" of 4 branches at the top. For now, it looks like the activated the 2 other branches and I decided today, to get all the branches to the same height to achieve an even canopy.
Day 30: She doing really good now. Look at her development since yesterday! I watered her today with 1 L with nutrients mentioned above and rotated her by 90° so that every branch gets the best amount of light. Nothing else to do today. I plan to start the AutoPot and the AirDome tomorrow or the day after. Let's grow!
Day 31: She looks very healthy and is starting to grow really fast now. I adjusted the LST strings, etc. and tucked some leafs. I started the AutoPot System incl. the AirDome and air pump today.
Day 32: Not much to do today. I adjusted the LST string again and tucked some leafs. She seems to like the bottom feeding and this will show his effect in about 2 days. I expect her to "explode" then. I think, I will defoliate her tomorrow a bit, also to get a better understanding of the structure I want to build and to increase the airflow.
Day 33: I defoliated her today. Nothing else has been done. Let's find out, how she likes this in the next days.
Day 34: Nothing to do today. I let her do her thing.
Day 35: I was wondering, why she starts to build flowers when I run 18/6. Now I checked the seed packaging and see, that Zamnesia sent me the wrong seeds. This is an auto and not a photo. And I ordered feminized seeds, not the auto feminized for the eternity grow cup 😒 I double checked this in my order history and did not when I received the package and also not, when I started the run, as I did trust on that 🙈 I don't want to blame anyone. I just want to make clear, that this run is not what I was aiming for 🙈 It's kind of bad and my plans are "destroyed", that's for sure. Let's adapt and see, what I can get out of this run now.
--------------------------------------------------------------
🙏 Thanks for visiting and follow for daily updates 🌱


Likes
5
Share


@Samsemilla
Follow
Gute letze Woche.
Ich bin mit dem Ergebnis im großen und ganzen sehr zufrieden.
Ich habe einiges für zukünftige grows gelernt.
In Zukunft werde ich mich auf weniger Triebe und einen sauberen unteren Bereich konzentrieren.
Dann könnte ich sie eventuell auch noch ein paar Tage länger stehen lassen.
Likes
6
Share


@Lowkeynotbad
Follow
At this point I’m not doing anything to the plant besides making sure it gets nutrients