


Likes
Comments
Share

@burnout
Follow
Day 35 chugging along. Adding 2 gallons of water to reservoir mid week with 1 teaspoon coconut powder per gallon. Top watering weekly with one gallon water mixed with 1 teaspoon build a bloom, 1/2 teaspoon recharge, 2 oz peach ferment.

Likes
17
Share


@Northerngrowers
Follow
A pesar de los contratiempos en las primeras fases de crecimiento las plantas han conseguido exprimir todo su potencial y hemos obtenido unas flores de primera calidad repletas de tricomas y un alto porcentaje en thc.
Flores con tonos morados y negros hacen que su aspecto sea mas impresionante todavía.
Un sabor muy sutil, diferente pero muy agradable digno de paladares expertos. Efecto relajante, placentero, sensación de felicidad, apto para cualquier hora del día.
Una gran genética.
Totalmente recomendable.

Likes
20
Share


@MrIssa3x3
Follow
Chopped on day 80, hanging in 65F and 62 H. Hoping to slow this dry down to 10 days so wish me luck.

Likes
125
Share


@Regenwurm
Follow
Die 10 Blütewoche ist erfolgreich abgeschlossen!
Tage der Wachstumsphase = 32 Tage.
Tage der Blütephase = 70 Tage
Wachstum h in Blütewoche 9= 0 cm
Blütenbildung: Hoch
Die Blütenkelche beginnen mit der Produktion
Der Wasserbedarf der Pflanze reduziert sich etwas.
Diese Woche 3 Tage die Pflanze austrocknen lassen.
Mutation 1= strähnige Blüten (wie bei der Dr. Greenspoon öfter mal vorkommt)
Mutation 2 = Gigantismus (doppelt so viele DNA Ketten wie regulär)
2 mal in dieser Woche mit Purolyt Mischung 1:25 besprüht
Lichtstärke: 90 %
Lichtabstand: 36 cm
Std Tag/Nacht: 12/12
Temperatur Tag: 25-26,5 Grad
RLF Tag: 55-61%
Temperatur Nacht: 20-21 grad
RLF Nacht: 50-55 %
VPD Wert: ca. 0,90-1,1
PH Wert Wasser/Düngelösung: 6,3
EC Wert: 1,5
Ventilator Oszillation: Stufe 2
Befeuchter: aus
Entfeuchter: mit Steuerung an
Zusätzlicher Entfeuchter: 1 Stk außerhalb vom Zelt im Raum
Bewässerung: 1* Wasser PH 6,6 EC 0,1/ 2 * bewässert mit Dünger mit den o.g. Mengen
Purolyt Besprühung: 2 mal
Controlling: Grow Control
Dünger: Greenbuzz Nutrients
Licht: Pro Emit Vollspektrum
Abluft: EC Carbon Active 750 m3 gesteuert/PrimaKlima 480m3
https://greenbuzznutrients.com/de/
Danke an Greenbuzz
Ihr bekommt 25 % Rabatt bei der Nutzung des Codes auf der GB Homepage
https://greenbuzzliquids.com/de/shop/
Code: GD42025
(Mindestbestellwert 75€)


Likes
406
Share


@LegacyMarketFarm
Follow
MAY 26TH 2024 - The gen 1 & gen 2 mom's have recently been cut back & lights have been dialed down to 35% to slow the growth down on the mom's until they are needed for cloning in a couple months. We have gotten it down to a science now with how to manicure them & cut them back then have them re-grow out again. I am VERY proud of myself as this is my first attempt at growing out mothers myself. I have always vegged out seeds & flowered from seeds with my own previous smaller ACMPR grows, Then managing other peoples grows they usually bought clones in I never had the opportunity to learn this aspect of cultivation, Until now & I feel we are doing very good ! These things are monsters and are super healthy and strong.
With that said I would love any input or advice for growing out mother plants that we could use to improve even further ! I am always open to learning more. @seedsman The RUDE BOI OG seed has to be at least 5-6 years of age & it germinated no problem, I burned it with the bar LED's too close to them when they first germinated and it looked touch and go for awhile but I did not give up on her now she is going to be one of THE best moms, Wait and see ! Also, BE WARNED if you use these fabric pots that are supposed to air prune the roots for you & allow you to keep the plants in them indefinitely. The ORIGINAL set of them worked great on our first batch of mom's, BUT we almost lost the generation 2 mothers because of them failing and the roots grew right out the bottoms of the bags into the run off's from the feeds and almost messed up the generation 2 mother plant's luckily we spotted it, Transplanted them out into different fabric bags & resolved the issue.
These ladies are almost 6 months old & going strong !
DO YOU want to grow mother plants LIKE THESE ? Then grab some LIGHTS, TENTS, SEEDS & NUTRIENTS FROM OUR SPONSORS !!
PROMO CODE GREEN PLANET : LEGACY
PROMO CODE MARS HYDRO : LEGACY
PROMO CODE SEEDSMAN : LEGACY10
MAKE SURE TO FOLLOW OUR SOCIALS & JOIN OUR GREAT COMMUNITIES !
TWITTER : https://x.com/LegacyMrketFarm
YOUTUBE : www.youtube.com/channel/UCR89iF2Iqy3zlHZhFfU2MMg
YOUTUBE GAMING : www.youtube.com/channel/UCw8-qCFg-PUf00waTO5JOGw

Strawberry Cookies · Super Sativa Seed Club

Exotic Animal · Exotic Seed

Jungle Lava · Original Sensible Seeds

GG4 Sherbet FF · Fast Buds
Stinkin' Bishop · Original Sensible Seeds

Lamb Chops · Thug Pug Genetics

Purple Ghost Candy · Seedsman
Fuel DOG · Seedsman
Peyote Zkittlez · Seedsman
RudeBoi OG L.E. · Seedsman
Banana Jealousy · Seedsman

Sugar Cane · In House Genetics
Likes
54
Share


@RastaGrow
Follow
Ужэ 17 день активнова цветения , 2 недели без изменения всё идёт нормально жду середины 3 недели чтоб провести лёгкую дефоляцию . С удовольствием жду вашы коментарии , советы , вапросы и дажэ критику ;)

Likes
24
Share


@AutoCrazy
Follow
Week 5
Another week full of lots of new growth. I am up to four tops now so it’s just a matter of waiting a little longer and I will be up to the magic number 8. I really like the open structure of this plant. She seems perky and very healthy up to now.
Cooler internals:
6.2 pH
0.4 EC
65 F solution temp.
Onward 😎🍻
Likes
8
Share
@squalino
Follow
frost banger
la plante m'a surpris. je pensais à vue d'œil recevoir dans les 250 grammes .
mais les tête sont dense et lourde .
donc resultat final 370 grammes humide . le nombre de trichome visible et impressionnant super plante à première vue . plus que le séchage et la dégustation
la deuxième plante est plus grosses.
donc 1er conclusion
elle a l'air d'être exceptionnelle attendre la suite
Likes
5
Share


@Ninjabuds
Follow
Both parents of this cross were super gas very weak start. Plants were not strong enough to push the seeds off so I had todo surgery. I really wander if it has something todo with how long you dry the seeds these were almost fresh seeds maybe 13days after harvest then I popped them. 3 of them going so far
Likes
4
Share

@Growfather2
Follow
Hello everyone,
Another week has passed a very hot week to be precise.
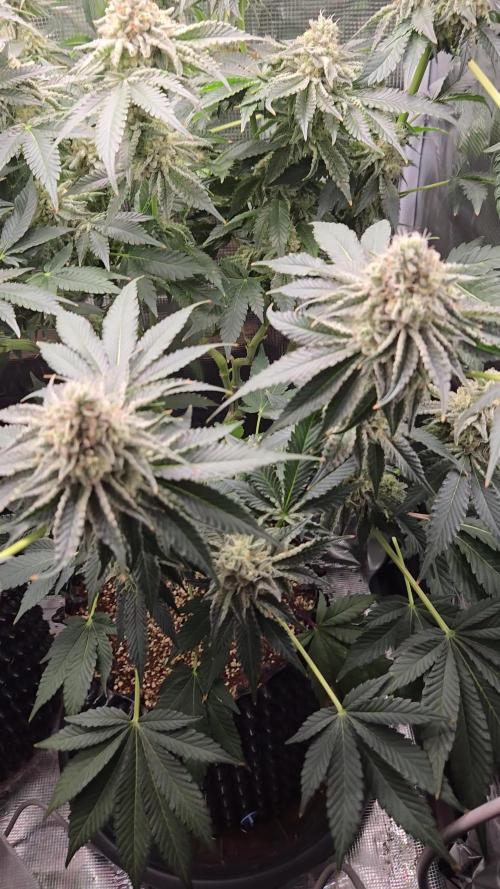
The buds look thinner than the previous peyote cookies plants i have grown.
Next week i will flush the salts out of the soil.
Thanks for stopping by and have a nice day.
Best regards,
Growfather

Likes
7
Share


@Hazeberg
Follow
Day 72 Jungle Jimmy 70 cm / Day 73 Pink Cookies 102 cm: They had some time on their own and I was surprised, how they liked it. Look at their development during the last 3 days 😍
Day 73 Jungle Jimmy 70 cm / Day 74 Pink Cookies 102 cm: I removed some fan leafs. Nothing else to do today.
Day 74 Jungle Jimmy 70 cm / Day 75 Pink Cookies 102 cm: Nothing to do today.
--------------------------------------------------------------
🙏 Thanks for visiting and follow for daily updates 🌱
Likes
7
Share

@DogDoctorOfficial
Follow
Week 3 Flower – Gelonade Run (Week 7 from Seed)
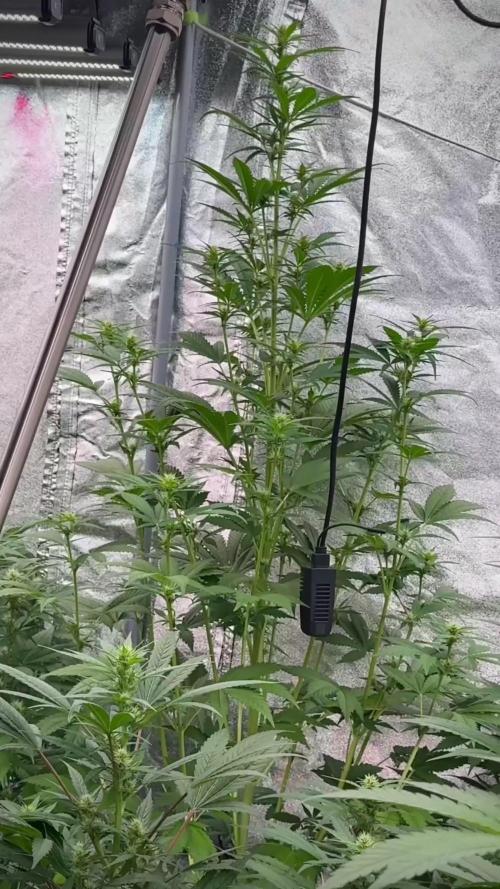
The Gelonade girls are entering full flower mode, and both phenos are thriving beautifully. Stretch is nearly complete, pistils are bursting everywhere, and structure is stacking just as expected. Both are now standing proudly at around 80 cm tall and enjoying their rhythm.
Growth & Flower Development
White hairs crown every top, a sure sign of transition into proper bloom. The stretch has given them elegant structure, spacing out their nodes, and now they are setting the stage for bud building over the next weeks.
Pheno #1 is strong, symmetrical, and classic Gelonade – exactly what you’d hope for from this lineage.
Pheno #2, though… she’s the unicorn. Her leaf mutation continues to be one of the most fascinating traits I’ve ever seen. The way her leaves open like layered fingers, folding and unfolding in unexpected ways, is pure art. It’s as if nature decided to write a little love poem in her leaves. Different, unique, and unforgettable. She carries her own beauty, a reminder that not everything perfect is uniform.
Environmental Conditions
Still running a little hot in the room (peaks up to 31–32°C), but airflow and extraction keep them happy. Humidity is stabilizing better now, averaging around 50–60%, and VPD is gradually coming closer to target. The TrolMaster sensors continue to keep me on track with moisture, EC, and conditions, making sure the girls stay balanced.
Nutrient Program
The recipe remains steady this week:
• Aptus Regulator
• CalMag Boost
• Aptus Top Booster
• Plagron Trio (Power Buds, Sugar Royal, Green Sensation) at 1 ml/L
Pellets in the soil are still covering the NPK foundation, so we keep EC around 0.6 with a pH of 6.1. The girls are feeding well, drinking consistently, and showing no signs of stress or deficiencies.
Gratitude & Reflections
This run has been pure joy so far — both phenos shining in their own way, the environment evolving, and the grow showing its potential. To everyone following along: thank you for the love, the time, and for sharing this passion for the plant. These Gelonades are a reminder that every run brings something new to learn and something beautiful to admire.
⸻
Plant Stats – Week 3 Flower / Week 7 from Seed
• Height: ~80 cm
• Temperature: 28–32°C
• Humidity: 50–60%
• VPD: ~1.8–2.0 kPa
• EC: 0.6
• pH: 6.1
• Nutrients: Regulator, CalMag Boost, Top Booster, Power Buds, Sugar Royal, Green Sensation
⸻
✨ Both phenos are thriving, but this week belongs to Pheno #2 — the unicorn with her extraordinary leaves. She’s a reminder that beauty often lies in the details, in the unexpected.
📲 Don’t forget to Subscribe and follow me on Instagram and YouTube @DogDoctorOfficial for exclusive content, real-time updates, and behind-the-scenes magic. We’ve got so much more coming, including transplanting and all the amazing techniques that go along with it. You won’t want to miss it.
• GrowDiaries Journal: https://growdiaries.com/grower/dogdoctorofficial
• Instagram: https://www.instagram.com/dogdoctorofficial/
• YouTube: https://www.youtube.com/@dogdoctorofficial
⸻
Explore the Gear that Powers My Grow
If you’re curious about the tech I’m using, check out these links:
• Genetics, gear, nutrients, and more – Zamnesia: https://www.zamnesia.com/
• Environmental control & automation – TrolMaster: https://www.trolmaster.eu/
• Advanced LED lighting – Future of Grow: https://www.futureofgrow.com/
• Root and growth nutrition – Aptus Holland: https://aptus-holland.com/
• Nutrient systems & boosters – Plagron: https://plagron.com/en/
• Soil & substrate excellence – PRO-MIX BX: https://www.pthorticulture.com/en-us/products/pro-mix-bx-mycorrhizae
• Curing and storage – Grove Bags: https://grovebags.com/
⸻
We’ve got much more coming as we move through the grow cycles. Trust me, you won’t want to miss the next steps, let’s push the boundaries of indoor horticulture together!
As always, this is shared for educational purposes, aiming to spread understanding and appreciation for this plant. Let’s celebrate it responsibly and continue to learn and grow together.
With true love comes happiness. Always believe in yourself, and always do things expecting nothing and with an open heart. Be a giver, and the universe will give back in ways you could never imagine.
💚 Growers love to all 💚


Likes
26
Share


@Nistnov
Follow
I left the honey cream outside in a dark place, which turned out to be a big mistake.
None of the branches that I trimmed and dried directly had bud rot but around 6 buds that were left outside had bud rot.
The mass of this plant really put me to the test took a whole lot of time to trim every branch. In fact I still have a bunch of branches that I'm too lazy to trim right now so I'll do a dry trim someday.
Although this grow had some problems it was an absolute pleasure to watch these plants grow and to now having this harvest is absolutely beautiful, a perfect strain mix.
I won't ever let them grow this big again since I really don't need that much weed and I think I'll going to have more fun with some extreme LST or something like it and I guess I'll look for strains that will flower earlier and not for ones that flower fast.

Likes
13
Share


@CaptainKurryKush
Follow
Hello everyone, what's growing on?
So lads, this week I'll add some Big Bud Coco in their nutrition.
Day 43 - The plants were defoliated and removed some of the bottom buds that weren't developing well, so to avoid waste of energy and nutrients. I hope this help the main colas in their grow.
Day 46 - They are doing great and I already can sense from the flowers. The plant 1 is spreading well and with an even canopy, while the plant 2 is getting very dense and bushy. Both of them are being trained daily. Because of the hot days we had, they got 500mL a day before light time.
Likes
18
Share


@Bread_n_Buds
Follow
Our little Do Si Dos has started to flower, the main lining has given it a very nice bonsai look, there are a good number of buds that are coming up.
The plant is an exemplary with a very short internodal distance, the mini brunches were growing and becoming lignified quickly.
It probably won't produce a lot of grass but it will be very beautiful to look at, full of resin and flower quality for sure.
I deal with the image of cannabis and the eye also wants its part, what can I say.
We are still using soil, feeding and all the recommended additives from Plagron 100% organic. We have moved on to the flowering start schedule that keeps the same Power Roots additives - Sugar Royal, Pure Zym and adds the flowering stimulant dear in my house for obvious reasons of Biscotti. Of course the basic fertilizer is now Alga Bloom.
The Green Sensation when the flowers are already a bit swollen, do not start immediately. The Power Buds must immediately stimulate the start and development of the buds.
---- Decide on the right soil and calculate your fertilizer schedule based on the soil on the official website.
-- www.plagron.com
Try a seed of this strain that drives us crazy..
---- https://www.zamnesia.io/en/10664-zamnesia-seeds-do-si-dos-f1-automatic.html
Zamnesia Description // From the team at Zamnesia Seeds comes Do-Si-Dos F1 Automatic. Using consistent and reliable F1 genetics, this strain is not only incredibly easy to grow, but also offers potent and delicious buds. The plants remain small and offer a reliable growing experience that everyone will enjoy.
All the best that mother nature can offer is on ---- www.zamnesia.com
Likes
21
Share


@Fullmeltalchemist
Follow
Alright I've updated this postmortem and cure just to give an idea of what I was up to during the dry and cure weeks. This grow was a ton of work and I'm very please with the results. I learned a ton about soil and environment control and really feel like I'm gaining confidence and coming into my own as a cultivator.
I've been playing a lot with ice water hash and rosin and have set some neat goals for the future like hunting ice water hash cultivars, going perpetual and expanding the amount of canopy I can work with by building a network of remote-operated satellite flower tents in friends' and family's abodes . I'm not sure I'll go through all this effort of documentation here again, but please follow along on my instagram, stay in touch and chill out with me sometime @Fullmeltalchemist.00
All in all, I was running 1000w of quantum board across three tents and pulled just over 1100 grams, which was a big goal of mine.
Thanks for all the advice and love growmies! And thanks growdiaries for the platform. It's been coo.


Likes
1
Share


@hinterhofgrower
Follow
.
📹 : Full Video on YouTube @hinterhofgrower
🌱 : Day 1 after 142h
💧 : 250ml + Neem day 1, 250ml day 3, 500ml day 5, 500ml day 7
💡 : Dli: 10 mol/m²/d
🤔 :
Likes
31
Share


@MadeInGermany
Follow
Info:
Unfortunately, I had to find out that my account is used for fake pages in social media.
I am only active here on growdiaries.
I am not on facebook instagram twitter etc All accounts except this one are fake.
Have fun with the update.
Hey everyone :-)
The growth this week is very nice :-)
This week I will give her some time with training to recover and then I will continue next week 👍.
Otherwise, as always, the tent was cleaned and the humidifier refilled.
Have fun and stay healthy 🙏🏻👍
You can buy this Strain at :
www.Zamnesia.com
Type:
Runtz
☝️🏼
Genetics:
Zkittlez x Gelato
👍
Vega lamp: 2 x Todogrow Led
Quantum Board 100 W
💡
Bloom Lamp : 2 x Todogrow Led
Cxb 3590 COB 3500 K 205 W
💡💡☝️🏼
Soil : Bio Bizz Coco
☝️🏼
Nutrients : Green House Seeds Company Powder Feeding Bio
☝️🏼🌱
Water: Osmosis water mixed with normal water (24 hours stale that the chlorine evaporates) to 0.2 EC. Add Cal / Mag to 0.4 Ec Ph with Organic Ph - to 5.8
Likes
21
Share


@Bluemels
Follow
Die "Kleine" ist enorm nach dem umtopfen enorm gewachsen 😍
So sehr das ich den Haupstamm von 35cm auf 21 cm runtergebogen habe. Noch ist sie sehr schön biegsam.
Schon am 29 Tag konnte ich mit dem scroggen beginnen, dafür habe ich alle Sonnensegel am Hauptstamm entfernt.