


Likes
Comments
Share

@MaltedMadness02
Follow
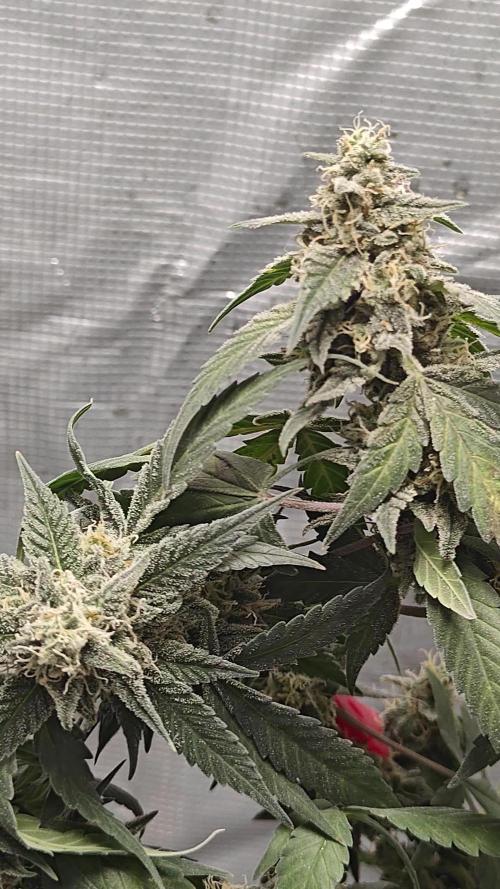
Starting to fade hardcore, not pushing anything but pH'ed tap water. She was really under watered in the video so ignore that. She has perked back up, just still the yellowing and fading. I do believe I will be harvesting here in the next few days. She has had a wonderful ride :)

Likes
14
Share


@ParadiseGrower
Follow
HELLO!
Plant still grow very well, good for me haha😃😉
LST is very very light i want see the result using this method🎉
I'm waterig only when i see the soil dry🤞
Likes
25
Share


@pifflestikkz
Follow
Day 29
01/08/24 Thursday
Another feed today using de-chlorinated tap water pH 6, there now taking 300ml every evening.
Day 32
04/08/24 Sunday
300ml De-chlorinated tap water pH 6 today again with Plagron PK13-14 and power buds.
All plants doing really well!
Had an infestation of leaf minors this week, no idea how, but they are treated and I'll check every 48 hrs on progress of pets.
All of them have shot up this week 💚
Day 34
06/08/24 Tuesday
De-chlorinated tap water pH 6 today with calmag only.
Pre flower stretch initiated, pre flower female sex pistils forming 😍
All happy and healthy!


Likes
4
Share

@MindFlowers68
Follow
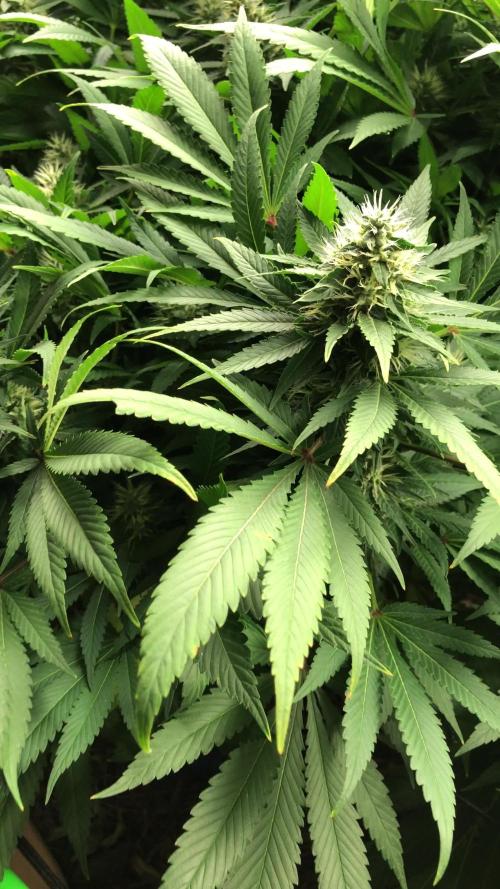
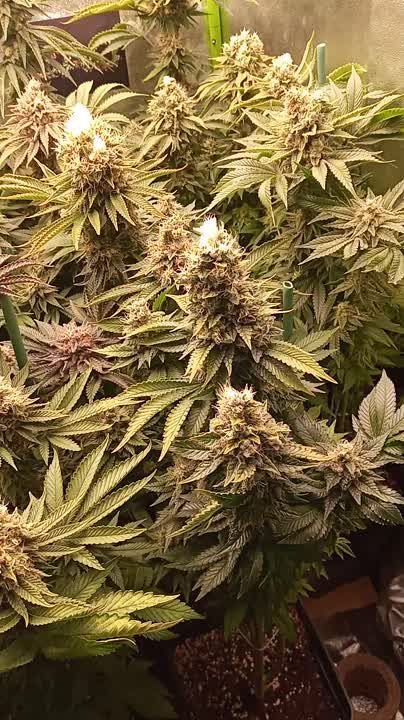
She was hiding he buds at first but they are all reaching for the sky and stacking high. Some beautiful looking cone shape tops on the colas that are fattening out all the way down the depth of the canopy.
I switched the lights to turn off 30 minutes sooner at the beginning of the week to help them transition. So 11.5/12.5 schedule this week. Following week is going to be dropped another 30 minutes to 11/13. I also want to start getting the temperatures a considerable amount lower than what they have been so that I do not off-gas my terpenes and negatively affect the potency and flavor. I been battling the humidity, with the plants drinking 6-8 gallons ever 2-3 days. I'm hoping reducing the light intensity as well as the duration will get them to drink a little less, and I can keep my vdp better in check.

Likes
17
Share


@BlumenBot
Follow
This is the first week with the first hand crafted BlumenBot dual zone grow cabinet! Excited to see what we have put together for the indoor grow arena. Things are looking very good from an environmental perspective.
Check out www.blumenbot.com for more! Or follow along on Instagram: www.instagram.com/bumenbot


Likes
3
Share


@AustinRon
Follow
Week 15 - Flower Week 11
Lemon Jeffrey by IRIE Genetics (14 Starts for 8 Finishers)
63-70 Days Flower (9 - 10 Weeks)
Weeks Observations:
- Our light leak on July 6th through July 31 ‘cost’ us ~ 21 Days. Extending Harvest to account for 21 day light leak. New Harvest Date 12 Sep 2023, Plant Day 121, Flower Day 86
Seeds Wet: Monday 14 May 2023
Harvest Date Range: [ 2023-08-11, 2024-08-21]
Start of week:
- Dates: [2023-08-27: LJ2Q 106:F:11:1,
2023-09-03: LJ2Q 112:F:11:7 ]
End of Week:
- Plant Height Range: [46, in]
- Water/Day/Plant: [935, ml]
EnvironmentalCurrent:
- Scotoperiod: [ 11, hrs] # 1900 - 0600 + 24
- LightIntensityPeak: [ 1000, µMol/m2/s ]
- DailyLightIntegral: [ 42.1, Mol/m2] # Target: < [ 40, Mol/m2/day]
- LightDistance: [ 6, in] # 3.5” LESS than Optimal for SP3000
- TempAvg: [79.1 , °F]
- RH: [ 68, %]
- VPD: [ 1.10, kPa]
- 230*4*11/8
- FeedwaterPerPlantPerDay: [ 1265, ml]
- Feedwater: [ 10.12, l]
- EC: [ 2.0, mS]
Environment NOTES:
- RULE
- CLOSE Room Airflow during LOW TEMP periods(2030 - 0700)
- OPEN during HIGH TEMP Period (0700 - 2030)
SOP:
- WEAR CLEAN GLOVES FOR ALL SEED OPERATIONS
- CLEAN All Instruments before use
- Light Strengthvegetation := 100 + (#nodes * 100)
- Light Strengthflower := [ 1000, 600, µMol/m2/s]
- Scotoperiodvegetation := [ 1300, 1900, 6, hr]
- Scotoperiodflower := [ 0600-1900, 13, hr]
Environment
- Late Flower (Week 10-14) (F5-F10)
- Temp: 78-80°F
- VPD: 1.2 ± 0.2
- Photoperiod: 11/13
- Light Strength: [930, 850, µMol/m2/s]
- EC: 2.3 # Week F5-F8
- EC: 1.8 # Week F9
- EC: 1.1 # Week F10
- Finish (Week 14) ( F10)
- Temp: 78°F
- VPD: 1.3 ± 0.2
PPFD: 750 peak
- Resin Bloom ONLY
- EC: 0.8
_______________________
Base Application for 10 Gal:
- [x] Primer A: [ 100, ml]
- [x] Primer B: [ 100, ml]
- [x] Silica Skin: [ 35, mll] # Reduce to reduce/eliminate Sediment
- [x] SLF-100 (Enzymatic Root Cleaner): [ 50, ml]
- [x] King Crab (Biology): [ 5, ml]
__________________________________________
- @ EC: 1.7 Supplement: [ Application Rate], [ Total Delivery for 2 Gal Solution]
- [ ] Primer A: [ 10, ml, gal], [ 12.5, ml]
- [ ] Primer B: [ 10, ml, gal], [ 12.5, ml]
- [ ] Silica Skin: [ 4, ml, gal], [ 5, ml]
- [ ] CalMag Fuel: [ 4, ml, gal], [ 5, ml]
- [ ] Peak Bloom: [ 4, ml, gal], [ 5, ml]
- [ ] Resin Bloom: [ 4, ml, gal], [ 5, ml]
- [ ] SLF-100: [ 5, ml, gal], [ 10, ml]
- [ ] King Crab: [ 0.5, ml, gal], [ 1, ml]
- [ ] EC: [ 1.7, mS]
85 ml/plant X 11, : 935 ml/plant/day, 2.4x of field capacity
Meaning ALL Fertigation through pot is Refreshed 2.4 times per day with this schedule.
____________________________________
Mon 28 Aug 2023 # End of Harvest ORIGINAL Window , before discovering light leak
LJ2Q 106:F:11:1
- [x] Will scope trichomes by hand, and set a chop date today.
- Some are ready today, Some look to need 10 - 14 days.
This has been an interesting grow - the extra stretch munged the SOG Strategy - with severe Chiropractics I still have >±12” of height per plant. We should be harvesting today . . .
- We could conceivably take the grow as far as Day 139, if we calculate a 4 week light leak forward. That would make LATEST DATE 24 SEPTEMBER -
- IF We go more than this week
- Week 15 Nutes (Mixed Daily)
- Mon - Wed: ONE SHOT, EC: 1.7
- Thus - Sun: ONE SHOT, EC: 1.4
- NEXT WEEK
- Mon: Resin Bloom: EC: 1.1
- Tuesday - Harvest: Resin Bloom: EC: 0.8
- ELSE if we take them down next Sunday:
- [ ] Been feeding The Rooted Leaf Hydro schedule, Base Nutes plus Silicon. Need to move to harvest nutes, potassium (+Resin Bloom/+Peak Bloom) at
- [ ] Monday:+Resin Bloom/+Peak Bloom: EC: 1.7
- [ ] Tuesday: EC: 1.4, (+Resin Bloom)
- [ ] Wednesday: EC: 1.1, (+Resin Bloom)
- [ ] Thursday EC: 0.8 (Resin Bloom Only)
- [ ] Friday EC: 0.8 (Resin Bloom Only)
- [ ] Saturday EC: 0.8 (Resin Bloom Only)
- [ ] Sunday - Harvest
Growtek Mod
- 170 ml/event per emitter -> 2 Gallons Input
-
___
EC: [ 2.0, mS]
Tue 29 Aug 2023
LJ2Q 107:F:11:2
EC 1.6+
- Defoliated (final) blocking and unviable fans. Looks better - clearer airflow
Wed 30 Aug 2023
LJ2Q 108:F:11:3
EC: 1.6
For 2 Gal (ml’s) RLA Minerals
14.0 Primer A
14.0 Primer B
7.0 Silica Skin
10.5 Peak Bloom
South Cascade Organics
- [x] SLF-100: [ 5, ml, gal], [ 10, ml]
___
Plant Success (Beneficial Bacteria, Crab ‘Frass’)
- [ ] Sunday - Harvest?
- [x] King Crab: [ 0.5, ml, gal], [ 1, ml]
Thu 31 Aug 2023
LJ2Q 109:F:11:4
EC 1.4
For 2 Gal (ml’s) RLA Minerals
12.3 Primer A
12.3 Primer B
9.2 Peak Bloom
Required 1 qt to bring down from 1.6 to 1.4
Friday 01 Sep Jul 2023
LJ2Q 110:F:11:5
EC 1.1
For 2 Gal (ml’s) RLA Minerals
7.6 Primer A
7.6 Primer B
5.7 Peak Bloom
Sat 02 Sep 2023
LJ2Q 111:F:11:6
EC: 1.4
Peak Bloom as Needed for Dilution
- [ ] Scope Trichomes Last Time
With a 21 day light leak, we’ll extend harvest to Day 118, Flower Day 90 - or 69 Unleaked Light Days . . .
Through End of Harvest, Daily
Daily Feed through Harvest Day -2
Per TWO Gallons: EC 1.4
- [x] Primer A: [ 12, ml, gal]
- [x] Primer B: [ 12, ml, gal]
- [x] CalMag Fuel: [ 4, ml, gal]
- [x] Silica Skin: [ 4, ml, gal]
- [x] Peak Bloom: [ 4, ml, gal]
- [x] Resin Bloom: [ 8, ml, gal]
- [x] King Crab: [ 0.5, ml, gal]
- [ ] SLF-100: [ 5, ml, gal]
- [ ] Reduce to EC 1.1 on Harvest Day -2
- [ ] Reduce to Resin Bloom Only, EC: 0.8 Pre Harvest Day
DECISION - We’ll take the girls down Flower Day 83, Nominal Day 62 assuming 21 Day push for light leak. It’s not in practice3 that long - we should be good, if not - latest day 90 (Nominal 69)
____
Sun 03 Sep 2023 # Flower Day 77
LJ2Q 112:F:11:7
EC 1.4
- [x] Dismantle And Clean Res, Pump, Chiller, Lines
- [x] Clean Res
- [x] Clean Pump
- [x] Load Res with a a gallon of HOT tap water, a cup of 30% Vinegar
- [x] Run Pump for :30
- [x] After 30: Reverse Lines
- [x] Run Pump for :30
- [x] Stop pump
- [x] remove tubing from pump and chiller
- [x] Remove pump, reclean
- [x] Clean Chiller Tubes
- [x] Rinse with 30% Vinegar
- [x] When Dry: Reassemble & Replace

Likes
13
Share

@masterofsmeagol
Follow
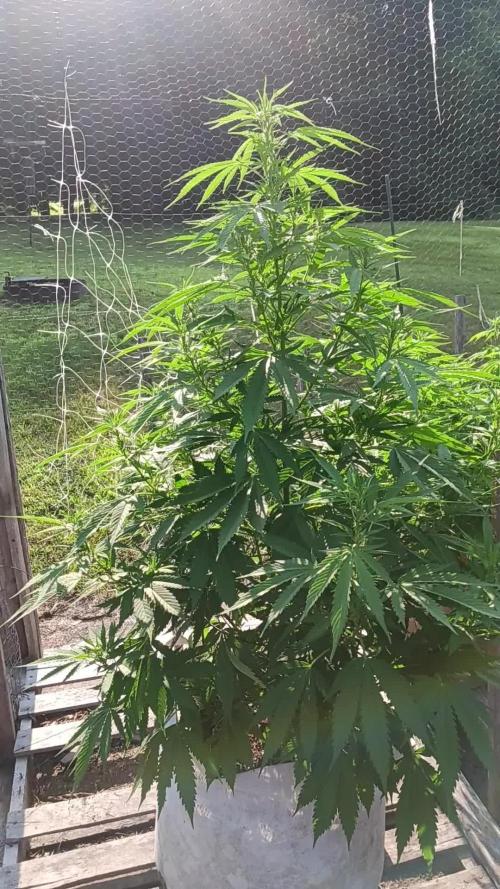
7/13 It's maine-ing out. Overcast and misting. I guess it rained last night but not much. Today is my watering day although I think they could've made it until tomorrow. These drastic temp changes makes it hard to get a STEADY routine in place. I watered everything in the 20's a gallon the 10's 1/2 gallon. The 10th planet in the front was still heavy so I didn't water it. I'll keep an eye on it. Temps are much milder. I noticed a few more septoria leaves on the 10th planet which I promptly defoliated. This pheno is flowering. I could've put this week as flowering as several plants have started. I also saw ONE leaf on my chem dog that had septoria on it. ONE f-ing leaf! I was planning on treating this early anyway so I mixed one gallon of plant doctor 3 tsp gallon/gallon which was the recommendation. I'll monitor this plant and continue treating it the next two weeks. I may do foliar too but the mixture is different. It's a systemic so I don't think that matters as much. Considering getting mulch to protect from spores on the soil. My plants look GORGEOUS. I Hate to use such a nice plant as a guennie pig but I'm not going to sit here and watch it progress. I'm lucky it's really not that bad and that it's on a reveg. There's so many leaves that I would be forced to prune anyway. I'm seeing two MAYBE three leaves a morning but I want to get this under control. Last year u let a plant with septoria go and it finished but went to extracts. I've got a pretty good feeling about this plant doctor. I've used it before with good results. Only time will tell though.🤞
EDIT: WENT OVER AT ABOUT 1PM. ITS 2 NOW AND BLUE SKIES AND SUNNY. IM SUPER GLAD I WATERED AND EVEN MORE SO THAT I APPLIED THE PLANT DOCTOR HOW I DID. THE GIRLS ALL LOOKED AMAZING. THE TENTH PLANET I TREATED WITH PLANT DOCTOR LOOKS THE BEST IVE EVER SEEN IT. I FOUND ON LEAVE DEEP ON THE INTERIOR WITJ A SMALL SPOT BUT ITS SOMETHING IM SURE I MISSED THIS MORNING. IF THIS WORKS THIS GOOD ILL BE APPLYING IT TO EVERYTHING EVEN IF ITS JUST PREVENTATIVE.
7/14 Rained last night andcwas still sprinkling when I went over. Amazingly the 10th planet that I treated with the plant doctorcmix had ZERO visible signs of septoria. I did find one leaf on Mt chem dog and two on my mk ultra with the big leaves. It could've been calcium deficiency but I really doubt it because I think I saw THAT as well. I'm going to wait a day or two and if there are still no negative results and the plant is still looking good I'm going to treat AT LEAST the two others that MAY be infected. It's a systemic and can be used proactively and supposably breaks down into p and k after stimulating immune response. I'll monitor a little longer but as it stands I think I'm going to treat the other two just in case. I also need to start feeding. I've watered a lot more than I normally do so obviously the soil won't last as long. This has been some tricky weather but I'm happy with how things are progressing. I probably should've changed this to the first week of flower as several plants are popping pistols everywhere.
EDIT: WENT OVER AROUND NOON AND MIXED UP TEO GALLONS OF PLANT DOCTOR PLANNING TO TREAT THE TWO PLANTS BESIDE THE 10TH PLANET. EVERYTHING LOOKED SO PERFECT AND TOMORROW IS MY WATER DAY SO I DECIDED TO HOLD OFF AND APPLY IT WHEN IT NEEDS WATER ANYWAY. I DID NOTICE THAT PLANTS SEEM TO BE FLOWERING MORE AGGREWWIVELY THAN BEFORE. THINGS ARE GETTING INTERESTING.
7/15 It was water day. The girls looked great this morning. I watered everything at least a gallon and 1.5 for the thirstier plants. I treated my big fan leaf mk ultra and my chem dog #4 with the same Plant Doctor mix as i did tge 10th planet beside it. I havent seen ANY septoria on that plant since application and it looks better than ever. I watered them with a half gallon of phed water before doing a soul drench with the gallon of Plant Doctor @ 3tsp/gal. I'm not seeing much septoria but plants are starting flower and I want to nip it in the bud. This product can be used preventatively and I went by the guidelines for medical marijuana. It was 70 earlier this morning. I'll update as I go forward.
EDIT: WENT BACK OVER AT 3 AS THE TENPS WERE PIST 90 AND HAD BEEN ALL DAY. I POSTED A SHORT VIDEO BUT EVERYTHING IS LOOKING GREAT. THE PLANT DOCTOR SEEMS TO HAVE HELPED SUBSTANTIALLY. DIDNT FIND ONE SEPTORIA LEAF. STILL IT WILL TAKE A WHILE TO WORK FULLY BUT IM GLAD I DIDNT CHICKEN OUT AND I APPLIED THE RIGHT AMOUNT. IM GOING TO KEEP AN EYE ON THINGS BUT I MIGHT JUST TREAT EVERYTHING PREVENTATIVELY WHICH IS JUST HALF A TSP A GALLON I THINK. IT DEF TRIGGERS A RESPONSE IN THE PLANT. I LOVE IT WHEN SHIT JUST WORKS OYT AND YOU END UP PLEASANTLY SURPRISED. NEXT WATERING ILL PROBABLY DO NUTES. IM DEBATING WHETBER TO TRELLUS OR JUST USE STAKES AND STRINGS ACROSS THE CAGE AS NEEDED. OH WELL. OVER 90 IS TO MUCH FOR ME TO BE OUTSIDE FOR TOO LONG.
7/16 Plant Doctor is doimg its job. I saw a couple septoria leaves on chem dog but it was interior amd I could've missed it. It takes a little bit to get going. I think I'm going to treat the rest of the garden with at least the preventative dose of 1tsp per gallon. I'll wait and see if this keeps it from popping back up. It almost got to 100 yesterday. It was 80 early this morning. I mixed up two gallons of water and gave the thistiest/lightest a half gallon. I'm hoping that will hold everything over until tomorrow which is water day. I'll have to check but I think it might be time to feed too. I def should make sure to treat tjis septoria before focusing on nutes. It says you can mix it with nutes but I'm leary of doing so. I'd rather apply them at seperate times. I'll watch the garden and of I NEED to water I will. I'm hoping what I did will be enough.
EDIT: WENT OVER AROUND ONE. IT WAS 93° WITH SUPER HIGH HUMIDITY. IM GLAD I SPLIT THAT TWO GALLONS WITH THOSE FOUR PLANTS THATS FOR SURE! THEY'D PROBABLY BE DROOPED IF I DIDNT. EVERYTHING WAD PRAYING TO THE SUN GODS. WELL, EVERYTHING EXCEPT THE MK ULTRA IN THE 30 AND THE 10TH PLANET. THEY ARENT DROOPING THEY JUST LOOK NORMAL. THEY ARENT "PRAYING" LIKE THE OTHERS. THEY ARE DEFINATELY A LITTLE LIGHT AND ARE LOOKING FORWARD TO THEIR WATERING. AND THEIR FEEDING. THATS FOR SURE. I WAS SUPER HAPPY WITH WHAT I SAW GOING OVER AND THE GIRLS WILL BE ABLE TO HOLD OUT UNTIL THE MORNING. ONE IN SPECIAL KUSH (WHICH GROW AMAZING AND LARGE HERE) IS IN A 10 AND I EVEN GAVE IT A LITTLE WATER THIS MORNING BUT ITS DROOPY. I COULD STILL FEEL A LITTLE BIT OF MOUSTURE EVEN THOUGH IT WAS LIGHT. IT CAN WAIT UNTIL THE MORNING WITH THE REST. IF IT WAS DROOPING BAD I WOULDA WATERED IT. I DONT GET WHY IM HAVING PROBLEMS FINISHING PLANTS IN 10GAL SMART POTS. YEARS AGO I COULD FINISH SOMETHING IN A 5GAL BUCKET! BUT NOW ITS LIKE THE PLANTS I GROW GET FAR TO BIG TO FINISH FLOWERING ON THESE TINY BAGS. ILL MONITER. HOPFULLY IT WILL BE FINE. IF I HAVE TO I SUPPOSE I COULD CUT THE BOTTOM OFF AND PUT THEM IN THE GROUND OR MORE SUBSTRATE BUT THATS NOT SOMETHING I REALLY WANT TO DO. I CANT WAIT TO SEE YOU THESE GIRLS TURN OUT.


Likes
20
Share


@CityFarmer
Follow
Hello everyone,
Been busy but I shoot a little video for yall to see, also if growing is something you guys intended to do, I suggest you guys get yourselves a Digital Microscope or a jewlers loop.
I just got myself a Digital Microscope for under $20.00 on Walmart.com, I got me a cheap one to start with so I can learn how to use it properly. But for under $20.00 this one brings 8 led lights, a adjustable mount, comes with 3 different connection choices build in, magnifies from 50-1000x, can take pictures and also videos and my favorite part, it connects right to my mobile device, you download and install a Google app and your ready to go, ill work with it and add pictures next week...
See you guys soon 👊👊👊

Likes
35
Share


@Canadian
Follow
This girl has been just cruising through looking beautiful and being easy to raise and take care of is a really nice exotic genetic to have in your garden thank you for reading I will continue to update a happy grow.

Likes
5
Share


@Kushyz
Follow
Défoliation il y a quelque jours , meilleurs circulation de l'air et cela va favoriser la croissance des buds. Tasty terpènes de advanced nutrient en organics . M

Likes
10
Share

@Prilyfe13
Follow
11/25/2025
New week and new water. I can't figure out why my pH is so messy. Always swinging super wide. This morning for example was 4.6 pH on both plants. The mix concentration went up to 1000 ppm on both as well.
The big difference I'm seeing is what's in the water. Papaya Cookies has clean nutrient water while Lemon Cherry Cookies has root debris in it. No clue why it's happening. Hell I don't even know if this is a thing. But it's happening. Hopefully with the water swap, it'll go away.
Maybe I'll have to dunk the roots in a different bucket to try and clear the stuff off. It's too bad I can't bring the whole plant to the sink. Lol.
I could spray the roots down. As it is, that's never gonna happen. So aside from having my cousin come over and hold the plant up while I clean out the roots, I think I'm stuck with this and have no idea what it is or how to fix it.
Personally I think the roots are self pruning. Why? Maybe the concentration is too high and it's eating away at the roots. I doubt it, or it could be not enough oxygen. Don't know how to fix that. My air stone is bad ass. But it's the same air stone and setup in Papaya Cookies, but no debris or old roots. Could it be because the size of the root ball? The one in Lemon Cherry Cookies is massive while the other one is big, but not massive like this one. Could that be it? Who knows. All I know is I need to figure it out. Any ideas anyone?
Other than that, it's a new week and a new bucket of water. I think I'm gonna cut the nutes back a little bit from last week. Maybe they will actually show issues if there are any. I'm only cutting back a little bit. Just the bloom nutes. Instead of 1.25 teaspoons per gallon, I'm gonna cut it back to 1 teaspoon. If it shows signs of deficiency, I'll add a little bit more. But I have a feeling they will be happier with a lighter dose.
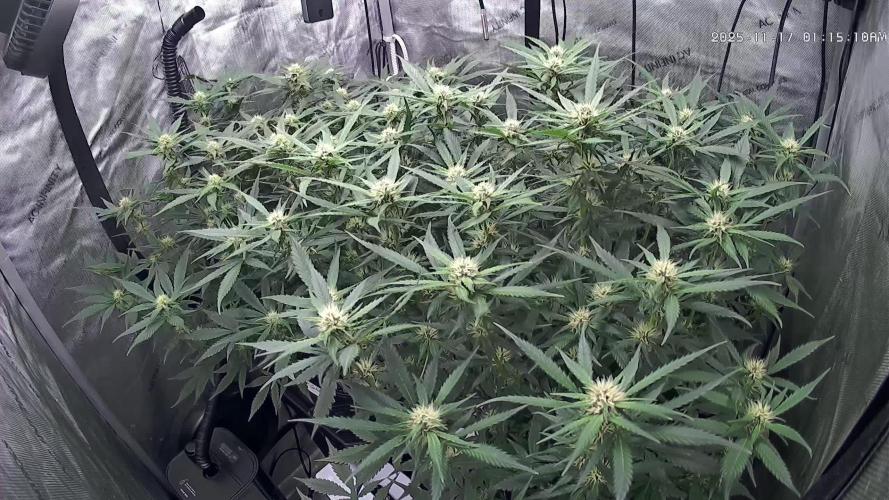
Now I can't tell when these ladies will be done. I'm saying another 2 weeks. I said the same thing last week, but I'm not so sure now. They still have tons of white pistils. Especially Lemon Cherry Cookies which is odd. That's the one who should be done first. However, Papaya Cookies has more orange pistils and denser nugs. I really hope both plants come out masterfully. And I really hope they finish at the same time. I'm using this tent for drying. I don't have space for my 2x2 anywhere. Small apartment. Anyway, so yah, drying on the 3x3.
Speaking of 3x3 tents. I'm pretty sure either one of these plants would have filled this tent out. They both filled out wide and deep. Luckily they aren't too deep where I can't access the back, but one of these would have filled out the tent. Especially with the training I could have done with that much room. I think they stopped growing where they stopped because of the size of the space. I bet if they were in a 4x4, they would be much bigger. Because they grow to fit the space. Or at least that's what I'm discovering.
Of course there's the one off that grows to be a beast, but that was a one time thing. And I'm pretty sure the seeding had something to do with it.
Anyway, I'm getting. A 4x4 eventually and will find out if my theory is correct. At least with autoflowers, that is.
Photoperiods may be a whole different story. Actually based on how they grow, it's a completely different story. We can manipulate photos in how they grow and even when they get switched to flower. It would make perfect sense that a photo grow as big as they can in in a smaller space with manipulation.
Anyway, rambling over.
Alright everyone. I have changed the water and this reads. 5.85 pH for both.
Papaya Cookies has an EC of 1.458 and TDS 725 ppm
Lemon Cherry Cookies EC 1.65 and TDS 809 ppm
We'll see what it's at in the morning. Don't really know why the mix is higher in Lemon Cherry Cookies, it's still low enough though. I have a feeling I should dunk both of them in plain water just to get the rest of the debris off. And maybe some of the nutrient buildup off. At least I think that might be the problem.
11/26/2025
2 days over the deadline, but whatever. I'm gonna get some damned good bud if I can fix this issue I'm having.
Specs:
Papaya Cookies:
EC: 1.701
TDS: 838
pH: 5.5 pHed to 5.85 2 hours ago now it's 6.1 (ummmmmm?)
Lemon Cherry Cookies:
EC: 1.765
TDS: 885 ppm
pH: 6.1
Well that's not good. I changed out the water and cleaned the buckets out. It has to be the roots. How the hell do I clean the roots? Or well, rinse the dead stuff off? I changed the water. I made sure the water they went into was clean as well. I have questions. Questions that need answers. To the forums! Hopefully I find a solution.
Good morning. Afternoon for us.
Lemon Cherry Cookies:
PH: 6.05
EC: 1.77
TDS: 885
After pH: 5.8
EC: 1.80
TDS: 888
Papaya Cookies:
pH: 6.44
EC: 1688
TDS: 837 ppm
After pH: 5.8
EC: 1.70
TDS: 848 ppm
11/27/2025
Papaya Cookies:
Before:
pH: 6.35
EC: 1.955
TDS: 977 ppm
After:
pH: 5.75
EC: 1.634
TDS: 829
Lemon Cherry Cookies:
Before:
pH: 6.5
EC: 1946
TDS: 967
After:
pH: 5.85
EC: 1.693
TDS: 843 ppm
Lost power last night while the lights were on. 11 hours of no light and now it's lights out, so another 4 hours of dark. Not too sure what I should do. Should I turn the lights on? Or should I leave them in the dark until lights on? I feel like turning the lights on now when it's not lights on time would really mess with the light schedule and possibly cause some issues. I'm gonna leave them off.
As we can see above, the concentration of the mix is still rising. But the plants aren't showing any signs of real stress. Or at least stress that could be seen. Still not sure what to do. I'm hoping the top off of plain water will help. But I think I need to dunk them both in a bucket of clean water a few times to get all the excess salts off the roots. That's what I think is causing the problem. The roots somehow have buildup in them and it's releasing it in the water. Or something like that. Maybe? I dunno. I think I figured out the debris in the buckets. It's from handling the roots when I remove the plant for pHing. Only Lemon Cherry Cookies though, her root ball is so large I have to lift half of it out of the bucket to put it in the reserve tank. Maybe the oils on my hands are causing issues? Maybe?
So the two issues combined today with the power outage and the water mix still out of whack, I'm afraid there will be some sort of stress that we can see when the lights turn on. Let's hope it's mild.
The environment was also pretty bad this morning. It was 56° in the house this morning. Apparently I lost heat and power last night. So it was cold and without the fan on, it was really humid too. Like 74% humid. But I think it was cold enough for nothing to start to grow. At least that's what I hope.
I might have to change Lemon Cherry Cookies water though. There's a subtle smell about the water. I might change it today. We'll see how it turns out when lights come on. If I'm having the same issue with the increased EC and TDS I'm swapping out the water. I might have to buy some hydrogaurd or something. Maybe that will help clear out whatever is going on. I was thinking peroxide, but I'd rather use things that are designed for Hydroponics.
I might change Papaya Cookies water as well, there's nothing funky about it, but the concentration is still rising. I'll pump a gallon out and replace it with plain water... Again. Maybe I'm just giving them to much to start. It's about 20% lower than the regular dose. Now that I think about it, that's pretty high. And these plants aren't big. Maybe I still need to drop the bloom down. Maybe the boost as well? I dunno. I'm gonna drop the Bloom nutes to 0.75 teaspoons per gallon. Should be 3 teaspoons for the 4 gallons of water. Let's see if I can get it to drop below 800 ppm and stays under there.
11/28/2025
AM readings.
Papaya Cookies:
Before:
pH: 4.9
EC: 1.857
TDS: 945 ppm
After:
pH: 5.8
EC: 1.816
TDS: 934 ppm
Lemon Cherry Cookies:
Before:
pH: 6.35
EC: 1.865
TDS: 934
After:
Didn't do anything. Will top off with pHed water this afternoon.
I want to see if they will do their thing with the higher concentration. Still, I know it's not good, but I really don't want to keep pulling Lemon Cherry Cookies out and mess up the roots. Btw, I've decided the issue with the debris in the water is because of me handling the roots when I pull the plant out of the bucket. I have to left about 2/3 of the roots by hand. So if I leave it alone in the bucket, and pH with top offs, I should be fine for the rest of the week. If the mix reads any higher, this afternoon, after lights out, I'll pull a gallon and replace it. But that means I have to handle the roots. I guess we'll see.
11/29/2025
I forgot to record today's measurements before I adjusted. Papaya Cookies had plummeted pH. 4.6. the EC and TDS were actually not too far off.
Lemon Cherry Cookies on the other hand swung super high, guzzled a ton of water and spiked both the EC and TDS. We are talking a TDS of 1200. How?! I dumped a gallon of plain water in. It fixed it for the most part. This thing is taking in like zero nutrients. I've been advised that the issue with the pH swing is probably the size of the roots compared to the bucket. They said it is most likely shedding roots due to the size. I assumed that is based on a ratio.
Ok, done. Lights turned off before I could get to Lemon Cherry Cookies. However I did dump the gallon of water in. Should be fine. 3 more days and we can change out the water and do a much lighter dose. Here's the afternoon specs.
Lemon Cherry Cookies:
pH: 6.5 (high)
EC: 1.794
TDS: 882 ppm.
Papaya Cookies:
pH: 6.3? (Apparently I did not do my measurements right.)
EC: 1.644
TDS: 820 ppm
So that was just after lights out. So I couldn't take them out and adjust the pH again. But, Papaya Cookies keeps crashing, so this should at least get through all the nutrients she needs.
Lemon Cherry Cookies on the other hand has been swinging up. With her pH up at 6.5, it's gonna spike even more. Maybe not though. I did add that gallon of plain pHed water. I need a bigger bucket. Lol.
Anyway, the environment has been pretty good these past few days. Very happy with that. I've been following the VPD for the most part. So far it's right on the money beteeen 1.49 kPa and 1.59 kPa. While lights out hangs out around 1.30 kPa. Temp is 68° and humidity is 44% for a perfect environment.
Day temp is 75° and the humidity at 45%.
11/30/2025
Morning Readings:
Papaya Cookies:
pH: 4.68
EC: 1746
TDS: 866
Lemon Cherry Cookies:
pH: 6.49
EC: 1904
TDS: 950
Adjusted:
Papaya Cookies:
pH: 5.6
EC: 1519
TDS: 760
Lemon Cherry Cookies:
pH: 6.2
EC: 1753
TDS: 876
So let me explain the way I did things today. Plain water for each. I left the water completely alone for Papaya Cookies and added that with its pH of 8.0. That mixed in pretty nicely. Not good enough, but close. After lights out, I'll probably pull both plants and pH them properly. But I'm trying to avoid lifting, moving or agitating the roots of both plants in any way. Obviously I'll have to pH properly at some point today or tomorrow.
12/01/2025
Measurements this morning were off. This time though, Lemon Cherry Cookies pH swung down to 5.6. That's new. But of course her EC and TDS were high again. So still not taking in nutrients. But she drank a gallon of water. Something is going on. I only lifted her a little bit to see where the air stone was.
Papaya Cookies had a super low pH as per usual. Which is really bad. Her leaves are starting to show signs of serious deficiency or pH damage. I don't know the difference yet. But I do know there's definitely an issue. Anyway, her EC and TDS weren't that far off. So I dumped half a gallon of pH rich water to bring the lower pH mix up. Spot on at 5.8. it also lowered the EC and TDS. Not much though. Unfortunately, my water pump is too big for the access panel. I need to get a smaller one. Then I could pump the water out, pH and pump it back in. Oh well. Next time.
Environment is good.
Likes
26
Share


@BillMonroe
Follow
Cool plant. Strong stems. Big trichomes.
I reset the clone, and it rooted in 5 days... the speed of this plant is really unbelievable!

Likes
37
Share


@NewbieLearner
Follow
This was a beautiful strain to grow. With her flowers getting big towards the end of harvest as well as the purple colours! I would definitely recommend that you try grow this strain. The buds are super dense and very well formed. An absolute treat to smoke and look at.


Processing
Likes
15
Share


@DudeGrowsWeed
Follow
July 13, 2020 update.
The outdoor girls are smaller, but starting to put out much more trichome development. The indoor girls are larger and have more nodes and bud sites, but not as much trichome development, although the bud sites look super healthy. You will also notice some bug damage on the outdoor ladies. I posted a question here on GD and liked the advice I received from @Nor_Cal_Kannabliss and have ordered some Doctor Zymes Eliminator to see if that helps. I did previously spray with Safer End-All and do notice the damage getting worse since then. By the way, Doctor Zymes Eliminator is supposed to be effective against spider mites and spider mite eggs (wish I knew about this stuff a few months ago).
Still feeding at 75% strength from the Fox Farm schedule. Also, I defoliated this week to allow better light penetration.
Likes
10
Share


@ButterfliesLittleFarm
Follow
Hello Diary,
It's the end of the first week of vegetation on my little farm. I'm a little late in updating the diary, but I'll try to change that in the future.
After the plants got 4 leaves, including Purple Lemonade, the vegetation phase officially begins.
For Purple Lemonade, it's 9 days since I planted the seed in the ground, or 5 days since the plant sprouted.
As you can see from the photos, Purple Lemonade has been making great progress since day one.
You can see a drastic difference every day, I put photos on the 1st day of vegetation and the 7th day of vegetation and the difference is obvious in those seven days.
Purple Lemonade - Day 1. - 3 cm
Purple Lemonade - Day 7. - 6 cm
Conditions on the farm are not ideal.
The summer heat is still unbearable, affecting the temperature in the apartment.
When I add Migro Aray 4 to that, the temperature sometimes reaches 32 degrees.
I don't see for now that it has a bad effect on the plants, but I would like it if the temperature were lower.
The lights are now set at 35 cm from the plants and are dimmed at 40% of their power.
Watering is every three days.
I prepare about 4 liters of water, add 1 ml/L Calcium and Magnesium supplement and this week I started adding Bio Grow Fertilizer, a new product from RQS.
After all, I lower the pH to 6.0. and with that amount I water all three plants on the farm.
Here's a quick recap of the week.
25/07/2024 - Day 1.
The official start of the vegetation.
After photographing the plants, I watered them.
I still put the seed booster in there, also a new product from the RQS organic fertilizer collection.
28/07/2024 - Day 4.
Watering.
I prepared 4 liters of water again, added Calcium and magnesium supplement, Bio Grow Fertilizer and finally lowered the pH. with Lemon Kick.
31/07/2024 - Day 7.
End of the first week of vegetation.
Taking photos and after that I watered all three plants on the farm.
Purple Lemonade - Day 7. - 6 cm.
That's all from me for this week, thank you all for your well wishes. See you soon.

Likes
30
Share


@The_Apprentice
Follow
It’s been a strange week this week, few ups and downs, happy with the leaf development and general health of the girls but i think they might be lacking a bit of height and length between the nodes so I’ve been advised to not increase my wattage just yet and to increase the distance from light. I’ve also in the last couple of days moved them to the outer side of the tent, not like I’m lacking the space lol, in hope that this will encourage them to stretch up and out in search for more light; fingers crossed its a winning combo.
Still only feeding water when soils dried up.
Will deffo put a couple more plants in next time.
Likes
2
Share


@nijuana
Follow
Everything is ok
I transplant the sluricane to the greenhouse with the sleepy Joe :)

Likes
34
Share


@gottagrowsometime
Follow
Welcome to my ganja runtz diary. Drop a like or whatever so I can visit your grows. Either way, thanks for dropping by my diary.
1/7 Wk 9. FD30. 57 days in the ground. Vegged out just nearing the 4 week period.
Had a heatwave so rigged up a few things 10 inch 800m3 intake to draw in cold air from the outside.
The buds are big, idk how dense it is. But tight and big all the same. Lots of growth that if I had to go back I'd of removed it, (lollipopped). Time to remove a few choice leafs to allow light into bud. She is really nice. Very pungent, hard to put my finger on the smell atm but she does smell of something sweet. But again, idk yet. I'm sure as I get more grows under my belt I'll know what's what. I have a fair understanding off quality of weed and what's good and what's not but my plate is far off from where it needs to be to give solid reviews. After the cure or even a few hits on a bong and a few raw weed joints and I'll lock it down, no doubt. If I had to guess, I'd be happy saying she'll give 50+g dry. Dunno about the quality as of yet. She is stacking on trichomes and resin atm. She's getting really sticky and a very pungent earthy/sweet smell of sorts, (yet to be figured out).
4/7 So, had a good luck over this lady. Riddled with pet hair, (but that can be pult on the trim. I'm not going to disturb the trichomes twice, as I'll have to do so on the trim, so I'll do both at once)....Delighted to say, she is on her last few days. She's done with feed. I'm going to just give water and let her finish up feeding on that. She got her last dose of triton today and I'll finish her up on water and some calmag to keep photosynthesis going mixed in with the triton (overdrive). But she is 95% cloudy with a few white pistils, very few. This lady is done. Even the lower growth got a decent grow in. Some whiter hairs below at the very end but all trichomes are in the harvest window. There won't be anything left to add as what I'll be doing is all stated above. Water with calmag and I'll cut calmag during the week and let her finish up eating what she has left.
Thanks for reading my diary and look forward to putting up a smoke report what a joy to grow guys, 30 days into flowering and she done. That is amazing. And some pretty darn good bud too. Very frosty and hopefully she'll start to push in the last few days.
7/7 still eating been on a light diet a few days now. Light was raised to 40cm away to protect the trichomes
Thanks ganja farmer seeds.

Likes
56
Share


@PEAKYPLANTERS
Follow
Hi everyone, brothers of the Weed.
Welcome back to the enchanted gardens of Peaky!
Excellent departure for these beautiful females that develop strong roots that enjoy excellent health!
Two other girls were added to the roadway who were late compared to the sisters ...
We are ready to take off ..... and you?