Likes
Comments
Share
@Centollo
Follow
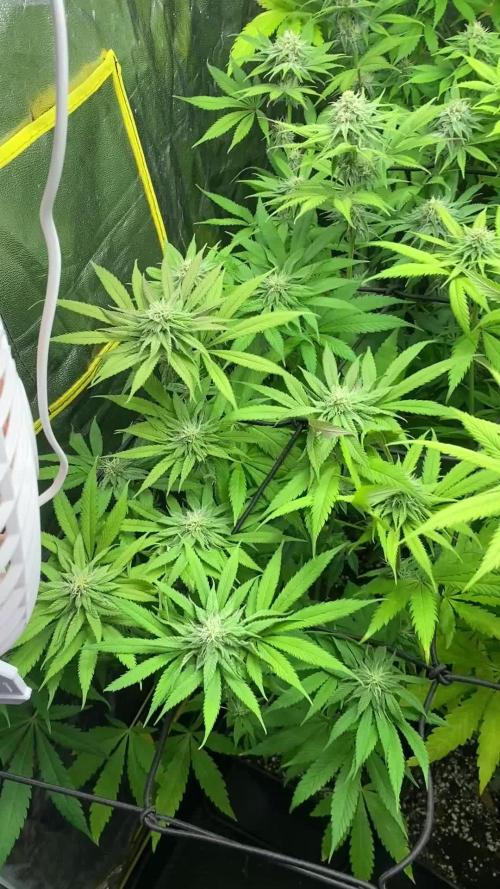
Día 28 de floración. La cosa se pone seria. La auto rainbow mints huele de locos y sigue engordando. El resto, empieza a coger forma seriamente. Las Oreoz se están empezando a poner moraditas. Pinta de maravilla.
Likes
1
Share
@Jaschkoo0
Follow
On Dez 25 I flew to Thailand so my father had to gave the planst nutriens and water I Wrote him a what and how much he should give .
Likes
48
Share
Info: Unfortunately, I had to find out that my account is used for fake pages in social media. I am only active here on growdiaries. I am not on facebook instagram twitter etc All accounts except this one are fake. Flowering day 76 since time change to 12/12 h. Hey everyone :-) Today the Kosher Tangie Kush was harvested in the Aero System :-). Before that, as always, she was in complete darkness for 48 hours. After cutting it was put in the drying box where it is now at 62% humidity for the next 7-13 days before it is then put into jars with 62% boveda packs to ferment. After the fermentation comes the last update :-). Until then, I wish you lots of fun and stay healthy 🙏🏻 You can buy this Strain at https://www.amsterdamgenetics.com/product/kosher-tangie-kush/ Type: Kosher Tangie Kush ☝️🏼 Genetics: Kosher Kush X Tangie 👍 Vega lamp: 2 x Todogrow LED CXB3590 COB 55 W 1 x Sanlight S2W 62 W 💡 Flower lamp : 2 x Todogrow LED CXB3590 COB 55 W 1 x Sanlight S2W 62 W 💡 ☝️ Grow Aero System : Growtool 0.8 ☝️ Fertilizer: Canna Aqua Vega A + B , Canna Aqua Flores A + B , Rizotonic, Cannazym, CANNA Boost, Pk 13/14, Canna Cal / Mag, Canna Ph - Grow, Canna Ph-Bloom ☝️🌱 Water: Osmosis water mixed with normal water (24 hours stale that the chlorine evaporates) to 0.2 EG. Add Cal / Mag to 0.4 Ec Ph with ph- to 5.2 - 5.8 💦 💧
Likes
22
Share
We are getting a nice quick start just like always from fastbuds. I'm starting this week now with a video of our 5 gallon home. I will add more pics through out the week. Please come back to follow along! I'm so excited about this grow! It's been a few days but I wanted to update you all. The #1 plant got eaten by something. I threw that soil out and started over again. The # 2 plant has a tap root showing and is in the pot as of today May 30th. I'm keeping a close eye on the bug situation. May 31st- the replacement seed for plant 1 has cracked open has a tail and will be popping up any time now! I do have fungus gnats, I did a soil drench with sns 709 and put out stick yellow traps. Hopefully this will do.
Likes
17
Share
Week 6 of my Runtz Fem Green Sensation test with/without using Plagron soil. The mother will be raised on Xpert Nutrients. And then when I take clones in the next week or 10 days. I'll be growing them as close as possible using Terra line from plagron. Days 35-40 Plant is really starting to push. Making sure to not the soil dry up. I only topped yesterday, so I'm hoping the nodes will start growing now. Giving me 4 sets. 1 row ( 2 sets/4 clones) will be taken. And from those 4 the 2 best rooted will be grown very similar to this using Plagron & of course Green Sensation with & without. I'll be using separate 9L pots once rooted to give them a good few weeks of veg without any need to uppot to bigger veg pots delaying the veg. Xpert Nutrients continues its amazing job. Seeing real growth now pushing it on. I won't bother doing any major fan leave removal until their nodes develop a bit more. Nutrients have been kept low. As its only been put in fresh grow mix a few weeks back. Mainly my focus is on roots, calmag & silica for stress. As you can see. I'm getting a very nice pheno for cloning. Day 41-42 She's moving along at a much quicker pace since topping 3 days ago. I think I'll have to remove fan leaves. As it continues focusing on growing leaves. I gather this is, was it been rootbound. But, she's moving now. Shout out to Zamnesia & Plagron for the gear. & also for Xpert Nutrients whose Nutrients are powering the mother. DISCOUNT CODES BELOW 20% off Zamnesias entire catalogue with code: ZAMMIGROW2024 20% off XPERT NUTRIENTS & KANNABIA with code: GGST 20% off Oringal Sensible Seeds with code:
Likes
9
Share
Que pasa familia, volvemos con la 4 y última semana de crecimiento de estas Kritical de grow barato, y es que han cogido un ritmo las jodidas, tienen un color verde intenso y un tallo grueso. Están muy bien de veras , ni comparación al anterior proyecto, esto si va como a mi me gusta. Agrobeta: https://www.agrobeta.com/agrobetatiendaonline/36-abonos-canamo Mars hydro: Code discount: EL420 https://www.mars-hydro.com/ Bueno las maximas de temperatura no superan los 25 grados y las mínimas no bajan 19, así que no me puedo quejar. Los niveles de humedad también son los correctos van entre 50%/60% de humedad relativa. Por supuesto el Ph lo estamos dejando alrededor de 6. Hasta aquí es todo poco más la verdad ya con ganas de empezar la floración , buenos humos 💨💨💨
Likes
5
Share
She looks very good and healthy,however she started flower with a very small size,I thought she was gonna be a little bigger at least but regardless of that,she's such a beauty and smelling very good so far,I'm excited about this strain. Let's see how she performs guys!
Likes
107
Share
ALRIGHTY THEN GROWMIES 😎 REMINDER I DO 2 UPDATES PER WEEK 👉WEEKLYROUNDUP👈👉MIDWEEKLY UPDATE👈 We just hit week 9 and all is well , have to admit she's just killing it super happy with how shes coming along 😃 ....... 👉Had to bring out the Bamboo sticks as she's putting on the weight 👈 I'm still training her with LST and it's looking good 👌 And she's filling out the pot perfectly👌 Lots of tops 👈 , rain water to be used entire growth Lights being readjusted and chart updated .........👍 I GOT MULTIPLE DIARIES ON THE GO 😱 please check them out 😎 THANKS FOR TAKING THE TIME TO GO OVER MY DIARIES 👍 👉IF ANYONE IS LOOKING FOR A PLACE TO HANGOUT VIA GROWDIARIES AND TALK GROWING AND JUST CHILL AND WHATEVER .....👈 👉I CREATED GROWDIARIES DISCORD SERVER !!!!!!!!!!!👈 LINK IS 👉 https://discord.gg/zQmTHkbejs AND SEE HOW IT PLAYS OUT !!!!!!!
Processing
Likes
13
Share
Lowered the nutes -- didn't feed every 3 days like I previously did, just watered today. Overall looking good. I'm gonna have to move some of the plants to the tub because the bigger auto is getting so bushy. Let me know what you think in the comments, please!
Likes
6
Share
@Nordgrow
Follow
Die Pflanzen bekommen so langsam Farbe in Violetten bis Rosa Tönen. Alle sind jetzt übermäßig harzig und die Blüten werden immer dicker. Die Meringue hat schon jetzt steinharte Blüten. Bisher ist noch kein Zeichen zu erkennen daß die Pflanzen ausreifen. Heißt es kann fröhlich weiter gehen mit dem Blüten bilden
Likes
37
Share
Day 29! Will slowly start incorporating some nutes or maybe on week 6 Day 30! And day 28’s The leaves are getting really sticky .... -There’s little light burn on a few leaves due to turning up my wattage on my grow lights way to high. 🤦‍♂️🏼dimmed my lights and all good now.🌱🌱🌱☺️ Day 31! Started to do lst all of them with a simple technique. Just a piece of tape... Day 32! Not much to say other than they are loving life Day33! Improved the lst by giving the bottom of the stem some support. I also added my first video 🌱🌱🌱 this strain it’s average height is 3 ~feet Day 34! The low stress training has made them so happy and grow faster. The other 2 are at day 32 Day 35! She is fkn awesome with her two young’s
Likes
19
Share
Vamos familia quinta semana de floración de estás apollo black cherry de SeedStockers. Que ganas tengo de ver el progreso de esta variedad, las plantas están sanas, se ven con buen color. La cantidad de agua cada 48h entre riegos. Esta semana añadimos nutrientes de la gama Agrobeta. Las plantas están bastante bien subió algo la temperatura esta semana pero por el momento no les afectó, a ver si consigo bajar un poco la temperatura estas próximas semanas y acabamos todo bien. Me pasé de mano con la comida pero solucionaré con agua destilada en un riego. Estas próximas semanas veremos como avanzan y como engordan las flores. Mars hydro: Code discount: EL420 https://www.mars-hydro.com/ Agrobeta: https://www.agrobeta.com/agrobetatiendaonline/36-abonos-canamo Hasta aquí todo, Buenos humos 💨💨
Likes
4
Share
Fire 🔥 she smoked nice. Smooth and got a sexy taste. Overall a easy grown and will try again
Likes
27
Share
Always dry trim. The leaves come off more easily when dry and it preserves more THC with the longer drying time. Will weigh up in 7-10 days. Smoke report. Tastes like strong grape juice when you hit it. Very smooth and easy on the throat. Pretty much gave me instant relaxation and relief from my depression. Seems like a good morning smoke which I love. Thanks fastbuds! Weighed up to 2.5 Oz. Could've claimed 3+ but didn't count ANY larf.
Likes
3
Share
Starting to get close to the end the tall buds are packing on the weight very large plant very frosty will have a great yield from this plant
Likes
25
Share
Stretch 10 centimètres Jour52 légère defolliation et arrosage avec deux litres d'eau ph6.3 Petit rappel sur le meilleur cycle de lumière pour les autofloraisons QUEL EST LE PLANNING LUMINEUX OPTIMAL ? Le cannabis à autofloraison peut survivre avec à peine 5 heures de lumière du soleil par jour. Mais si vous voulez que vos plants s’épanouissent, atteignent le pic de leur puissance et produisent une lourde récolte, ils ont besoin d’au moins 18 heures de lumière par jour. Le planning optimal de lumière pour la culture en intérieur du cannabis à autofloraison est un 20-4 constant pendant tout le cycle de vie. Bien entendu, des plannings de 18-6, 20-2 et 24 heures non-stop ont tous leurs avantages, mais nous avons obtenu les meilleurs résultats avec le planning 20-4. Les cultivateurs en extérieur peuvent potentiellement lancer la culture dès le printemps. Cependant, nous recommandons toujours de faire germer les graines et de cultiver les jeunes pousses en intérieur sous des lampes artificielles pendant une semaine ou deux pour obtenir les meilleurs résultats. Nous parlerons des options en extérieur plus en détail un peu plus bas. LE CYCLE DE VIE DU CANNABIS À AUTOFLORAISON La plus grande différence entre le cannabis à photopériode et à autofloraison est que l’horloge tourne pour une auto dès le moment où la coque de la graine s’ouvre. Le cycle de vie post-germination de la grande majorité des variétés à autofloraison modernes est de 8-12 semaines au total. Au contraire des variétés à photopériode, les autos n’ont pas besoin du planning lumineux courant 12-12 pour faire la transition vers la floraison. Une variété à autofloraison progressera dans son cycle de vie indifféremment du cycle jour-nuit. CROISSANCE VÉGÉTATIVE ACCÉLÉRÉE Il est presque impossible de délimiter la phase de la jeune pousse de la croissance végétale avec les variétés à autofloraison de nos jours. De plus, en 30 jours, la plupart exploseront soudainement en phase de floraison. Donner aux autos un bon départ, solide et sain est un facteur critique pour une culture réussie. Beaucoup de choses peuvent se passer pendant une semaine avec un hybride à autofloraison vigoureux en culture. Il n’y a pas non plus beaucoup de temps pour la transplantation. Nous recommandons d’utiliser notre kit de germination ou de planter directement dans les premiers et derniers récipients dès le début. Des pots/récipients en plastique de 10-20 L avec de nombreux trous de drainage au fond sont parfaits. Les Air-Pots sont encore mieux. Beaucoup de cultivateur découvrent à leurs dépens que les petits pots ne sont pas durables pour les hybrides autos modernes plus grands. Préparez-vous à devoir ajuster quotidiennement votre lampe de culture pour éviter de brûler le feuillage. De plus, tout comme les variétés à photopériode, les conditions environnementales optimales pour les jeunes plants à autofloraison sont des températures entre 20 et 25 °C et une HR dans une fourchette de 50-70 %. En outre, les besoins en nutriments seront considérablement plus faibles que les variétés à photopériode. Il n’y a donc aucune bonne raison de ne pas cultiver bio. Généralement, les autos préfèrent avoir un milieu de culture légèrement fertilisé et bien aéré. Les terreaux légers et/ou le coco sont des substrats fortement recommandés. La plupart des cultivateurs préfèrent des lampes CFL blanc chaud, LED et MH pour la courte période végétative. Cependant, les lampes HPS à double spectre sont tout aussi efficaces et probablement plus pratiques à utiliser. FLORAISON RAPIDE ET FÉROCE Dès que vous pouvez voir les pistils pousser à partir des premières fleurs, vous pouvez vous dire qu’en 45-60 jours, les plants finiront le cycle de floraison et seront prêts à la récolte. Que vous soyez prêt ou non. Mais vous serez prêt, car vous aurez fait les ajustements nécessaires en temps et en heure. Les apports en engrais de croissance végétative à un dosage faible à moyen seront remplacés par des nutriments pour la floraison et des doses appropriés de compléments et boosters de floraison. Une fois de plus, un régime alimentaire spartiate est recommandé. Pas besoin de changer le planning des lampes, car vous allez suivre votre planning originel jusqu’à la récolte. Mais il faudra vous assurer que les températures ne dépassent pas les 28 °C et vous devez réduire votre HR vers une fourchette plus basse de 40-60 %. Les plants vont s’étirer à des degrés divers. Quoi qu’il en soit, vous devez faire attention et toujours maintenir une distance optimale entre la lampe et la canopée. Un ensemble de cordages ou de crochets réglables rendront la tâche bien plus aisée. Ne vous imaginez pas que toutes les autos développeront une structure courte de buisson, à moins que le sélectionneur ne donne des données qui le suggèrent. Naturellement, les deux dernières semaines de floraison devraient être réservées à un rinçage en profondeur du milieu. De l’eau pure, ou une solution de rinçage légère fonctionneront très bien. Quand la majorité des poils ou pistils sur les fleurs auront changé du blanc à l’orange/rouge, vous devriez passer au rinçage. Ne sautez pas cette étape finale critique. Vous méritez les fleurs les plus savoureuses, sans contamination. COMMENT LES AUTOS RÉPONDRONT AUX TECHNIQUES DE TAILLE ET DE PALISSAGE ? La réponse courte : très bien ! La plupart des variétés à autofloraison de nouvelle génération répondront très positivement au LST. Et tant que vous taillez tôt, l’étêtage et le fimming peuvent multiplier les tiges de têtes et en plus booster les rendements. De plus, la méthode ScrOG peut être combinée avec toutes ces techniques pour un rendement maximum. Cependant, la culture à grand volume utilisant la méthode SOG est probablement le style de culture le plus populaire à présent. Un nombre croissant de cultivateurs d’autos expérimentent avec les mêmes pratiques courantes de taille et de palissage à haut rendement que les cultivateurs de cannabis à photopériode utilisent. Les cultivateurs débutants ne devraient probablement pas se lancer dans une taille ou un palissage intensif ou excessif avant d’avoir de l’expérience. Cependant, plier un peu les pointes de croissance pour créer une canopée plus plate ne peut pas nuire aux rendements. De même, une défoliation minimale pour augmenter la pénétration lumineuse ne stressera probablement pas des plants en bonne santé, tant que vous vous limitez à l’élimination des grosses feuilles nourricières qui font de l’ombre aux sites de floraison. May the force be with you 💪
Likes
49
Share
6/15. Glad I listened to my intuition and held off watering. IT Rained andctheb again last night. Plants seem to be doingvreal well. Slight burn on lower leaves where it was before from being in the garage and I found on spot that LOOKED like it could've been caused by a pillar but it's right on a burn. I sefoliated one leaf. This is minor stuff. Next watering I'll be adding silica. I'm not giving nutes until the plants tell the need them. The 3 gallon ones may receive nutes first as they'll run out. I'll update as I progress. Went back over at 8:30. It's just overcast with showers. Plants seemed to like it. They all look good. Noticed a chunk out of a leaf and a POSSIBLE pillar spot. I'm going to have to get the BT out and and give the girls an application. I'm waiting until they settle in a bit more though. I need to start LST as well AND the light dep. Unfortunately "life" has made things difficult. I'll get back over there today though and I'll start the light dep. Kinda makes me wonder though. The 1pth planet I wanted to light deo is tge same size as the others in the much bigger containers. The thought came that maybe I should just hold on to them as extras in case something happens. I also am going to start silica next watering but it will be a few weeks before any nutes are given. UPDATE: WENT BACK OVER AT FIVE AND TOOK ACSHOT TON OF PICTURES. IM TRYING TO UOLOAD NOW. THINGS ARE POPPING OFF AND IM GETTING A NICE SWEET SKUNKY ODOR. WHILE I WASCTHERE WE GOT A QUICK SHOWER. DIDNT LAST MORE THAN TEN MINUTES BUT IT RAINED HARD. I FOUND A TEMPORARY SPOT TO LIGHT DEP THE TWO PURPLE PUNCH AND THE ONE TENTH PLANET. I DONT SEE ANY LIGHT LEALS AND ITS SURE AS HELL DARKER THAN IT IS AT NIGHT. I'LL SEE HOW IT GOES LEQVING THE COVER ON ALL NIGHT. IF IT DOESNT WORK I MAY JEED TO ADD A FAN OR CHANCECTHE SPACE. I ALMOST DIDNT WANT TO DO THIS AS THE 10TH PLANET IS KEEPING PACE WITH ITS SISTERS, DESPITE THE SMALLER POT. OH WELL I WANT TO GIVE IT A SHOT AND I DONT WANT MY CAGE OVER CROWDED. I'M LOOKONG TO DO A 6:30 TO 6:30 SCHEDULE. 6/16 First night of light dep for the three little ones. I won't be able to call them that soon. I'm currently trying to upload a video. My grow buddy mentioned the droopiness of a couple of my plants in this video and how I hadn't been watering. This kinda scared me so I ran over and checked the too few inches on the two that had a little droop and came out dry. I had some water already phed ready to go (I'm hoping that the ph doesn't change if it's stored a day or two) and used the gallon to moisten the dry topsoil. Looking back over my diary we have had nothing but rain. I then tried the "lift the pot method" and came to the conclusion that these bags were indeed still holding moisture. I assumed they would be considering the thunderstorms we've had. I held off on fullt watering because the weather said the next dry day is going to be Monday. Today is Friday so thats two solid days of rain. Three if you count today through the night. I concentrated my watering of the one gallon on the couple plants that appeared to droop. If it doesn't rain like they say it will I will need to water. I need to set up a decent watering schedule but I need it to hold off raining long enough to do so. UPDATE: I WENT BACK OVER AND PUT THE 3 GALS IN FOR BED AND CHECKED OUT THE REST OF THE GARDEN. I WATERED THE 3 GAL GIRLS A LITTLE MORE SINCE THEY WONT BE OUTSIDE. THE BIT OF WATER I GAVE SEEMED TO HELP LIFT SOME OF THE GIRLS. AT LEAST I THINK IT DID. THE RAIN SHOULDVE COME ALREADY. I WOULDVE WATERED MORE HAD THE BAGS NOT BEEN SO HEAVY. 6/17 Rained all night which is good. Brought the three transplants out but left them under the overhang so they. Dont get soaked. So far light depoing is going good. Well its only been two nights but we'll see. I'll update as I go. Not feeling well today. Went back over and checked on the plants and did a video. Probably won't get uploaded until tomorrow. I'm giving it a shot. It's raining in good shape. Plants looked fine when I was there. I need to get my supports and my trellis in place. Video won't upload. No suprise. I'll get it tomorrow. 6/18 Uploaded videos if they fuck up from me editing I'm gonna be pissed. Anyway it's still pouring with high winds. I added a couple supports where it looked like it needed it. I need to put my trellis up. I've been able to keep up with the light dep and those plants haven't been used and abused. They stay in the building facing the sun when the weather is this bad. I think they're looking great. I may start a new diary just for them. Sun came out around four. Trying to upload a couple videos but doesn't look like it's going to happen. Tucked the three little ones in at six. It had stopped raining and the wind died down some. If adverse conditions create good plants then I'm on the way to a great harvest. Minor bleaching and burns on a few lower fan leaves and some wrinkling on some from wind burn other than that plants seem to be acclimated. Did a video but will have to wait until tomorrow to upload 6/19 It's not raining! We got four inches this past storm lol. Having the bags raised on pollens I believe has greatly helped. As did the high winds that help dry the soil in the bag. Had to add a few temporary supports. Light dep is going good. Adjusted amd found a better spot. I'm considering getting "pool noodles" or some other thing like a Hulu hoops or pvc pipe and making either a frame on the roof for the entire cage or on top of each individual plants posts so I could roll clear plastic over it when it rains. I'm thinking about later on in the fall when this could really help. I found a roll of plastic. Also thought about putting that up on the back wall but I didn't. What I'm doing right now is working. I just need to keep up with it. I also need a solid watering schedule to stick too. It's hard when each plants needs are different. Oh well. I'm just happy to be growing again. I pray to the cannabis gods and the Lord above himself that I'm not plagued with the problems of last year. 6/20. I'm sick as fuck but I got the little girls out in the sun. Light dep is going good. Plants look great. I'll update when I feel better and if I do anything. Still feel like shit. Luckily I looked up just in time to get to the grow and put the little ones to bed. They were thirsty (especially the bushy 10th planet so I gave them about 3/4 of a gallon of water. Got lots of run off from 10th planet. Didn't notice as much from the others but I was hurrying. I'll upload later. Still sick. 6/21 Plants seem to be doing great. I removed some lower growth on a few just to see how they respond. I'm going to do some defoliation down low and I want to see how the plants respond. I'm planning my first full watering Thursday as we have a real good stretch of weather after that. Grow bags are still heavy as hell so they have sufficient water. I'll be adding silica nextcl watering. Not time for nutes but I think it would be okay to start the silica and in another week I might start small doses of nutes. The light dep on the little girls is go8ng great! It's cool I'll get to sample some of these strains before fall. I'll update after I do something. Tucked the girls in at 6. I might need to think about transplanting that 10th planet in the 3 gallon. I watered until runoff yesterday and it's light as hell today. Plus I fimked it and it's bushy as hell. I've Bern turning it si it gets all angles of the sun. I have a bag of 707 left and a 5 gallon bucket with holes drilled all over it like an air pot and a ten gallon grow bag. This will take some thought. Hot af today. I wad able to lift the grow bags so I decided tomorrow will be the girls first real watering. I think I'll be adding silica and possibly kelp me kelp you due to the heat stress I've been noticing. Nothing bad just a few tacoed leaves. I've had several people that have seen my grow in person tell me that this is by far the healthiest (not biggest I've had bigger) but by farcthe healthies5 crop I've grown. They believe I'll have my best year ever this year. I hope they are right. Vid won't be uploaded until tomorrow. 6/22 WATERED TODAY. I'm still a little gun shy with watering. That fusarium last year pretty much traumatized me. I left the container plants alone. I gave them a little water but not enough to do much. I used a pump sprayer on a mist setting and went one by one and back around gently watering the entire medium. This took forever and I'll be finding a different way to water. I hope this was enough water. I'll check later on and if they look like they want more I give it to them. I started LST on the light dep 10th planet and tucked some branches of a another under the tomato cage. I had missed that earlier. I also went around and cleaned up the bottoms on most. Getting rid of things that will amount to nothing. I noticed what looked like thrip damage on ONE leaf on ONE plant. I also saw a chunk missing from a grasshopper bite and a finger of a fan leaf petiol was broken so I'm going to need to get my ipm up and running. I'm unsure whether I'll be using chemicals or predators. Probably BT and spinosad. That's what I've had the best luck with. I also noticed bottom leaves dying off on the bottom of a couple plants. It was where the burns were though so I'm almost 100% its just related to the light burns they got when i first put them up. I'll be updating the diary as I do more stuff.
Likes
5
Share
@Jaschkoo0
Follow
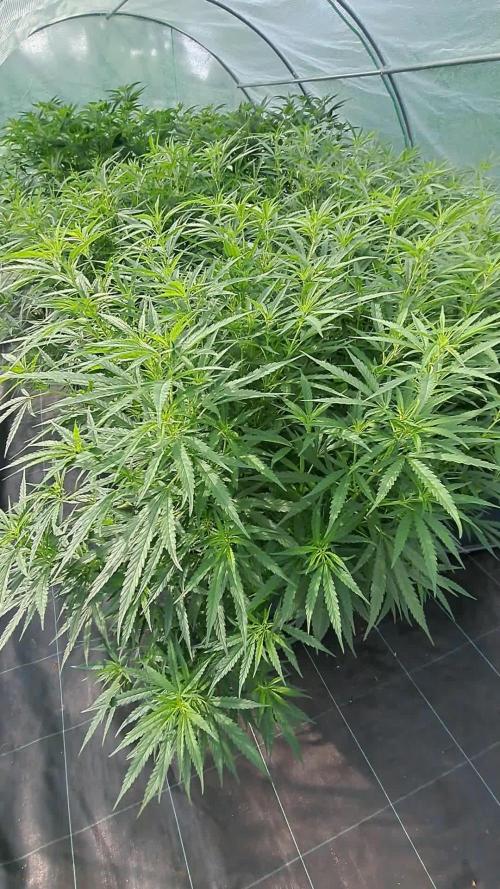
When i came back from vacaitions the had over g the greenhouse.