Likes
Comments
Share
She's filled out really nicely in these final weeks. The leaves are maturing and turning amber, I hope to cut the plant here soon, I don't want too much amber in the buds, as I'm aiming for a more cerebral head high. She's got really nice citrusy diesel tones. Very similar to my first grow with notable different tones. Make sure to check back again soon as I will add more pictures throughout the week! Thank you for checking in!
Likes
11
Share
@MaxwellSH
Follow
Week 14 Day 50 flower Man she's smelling and swelling. Trichrome's looking awesome, I will be flushing soon. I really cant wait 😁 The Polyploid is looking good too. Temps and humidity have been spot on. Peace, and thanks for looking✌️
Likes
17
Share
🎩🌈🍧🍨🍬 No trainin no toppin just test Run Terps on her is insane str8 candy fruity ice cream can’t wait till run her again in full sun ☀️+ toppin and trainin!! This a winter test grow outdoor ❄️ so the buds won’t be that big but We will see 🤭
Likes
2
Share
@AgueJuana
Follow
罐子里是之前最顶端的芽,被我烤焦了……
Likes
31
Share
Pretty satisfied with this week as it was a very easy one. Not too hard to just balance some h2o and give the girls a drink. I’ve noticed they are slowing down a little bit on water though. Still about 80% trichomes are cloudy. About 40-50% of the hairs have gone brown. I gotta say these girls haven’t produced a lot of stigmas and I’m perfectly ok with that. The terpenes and THC coverage is perfect for what I’m looking for out of this strain. Think I might pay for the bud to be tested lol
Likes
2
Share
Ya estamos en plena floración y con las luminarias a max potencia... Evidentemente el aire acondicionado también está trabajando durante la fase de encendido. Flowa-Bloom es la estrella de los nutrientes a incorporar, pero todos son importantes... Así que sigo la tabla de fertilización de JUJU Royal al pie de la letra. Eso si, primero humedezco bien el sustrato con agua, para aprovechar bien la solución con los nutrientes y que no filtre por las macetas textiles. Riego cada cuatro días.
Processing
Likes
4
Share
Well I loved this girl since day one she has been a fighter and just thrived for so long ... The fault was my own I didn't use cal mag at all and then did some high stress training with a temperature change as well . The results were cauos and the girls were looking deathly for a bit ... Now things have turned around and temperature are stable again so here's to the future wish me luck ...cheers friend and family
Likes
3
Share
Barneys Farm is a hit for me. Gorilla Glue Gelato is gonna be fire. About. 7 weeks till harvest.
Processing
Likes
15
Share
@MG2009
Follow
08/26/2020 2nd week of flowering and temps are down in soil to 68° going to be 56 tonight. Put a video of her sister plant. These girls should go another 8-9weeks but our first frost date is around the 10th of October hope for a warm and dry fall. 08/29/2020 got her tied down, snapped the center branch so I tied her stem upright. Gonna give her one last dose of blood meal (12-0-0)before week 3 starts that should be good for the next 4weeks, and 2 tbls of (4-9-3) so my last feeding will be (16-9-3) for the stretching fingers are crossed🙏
Likes
35
Share
Health to everyone! 👋 🌿1 week has passed since the big defoliation and switching the timer to 12/12 mode. -Pre-flowering stage, stigmas have not yet appeared. We are waiting for the flowering to begin. -Very thick stems. -Appetite was restored by watering 5 liters per day (water 2 times a week). -No problems or shortages were found. -Every 3-4 days I remove several large burdocks (no more than 5), which greatly block the light. -Added Bud Ignitor and Bud Factor X to the diet. 🤙In general, a strong and large plant with good resistance, which is pleasing to the eye.
Likes
Comments
Share
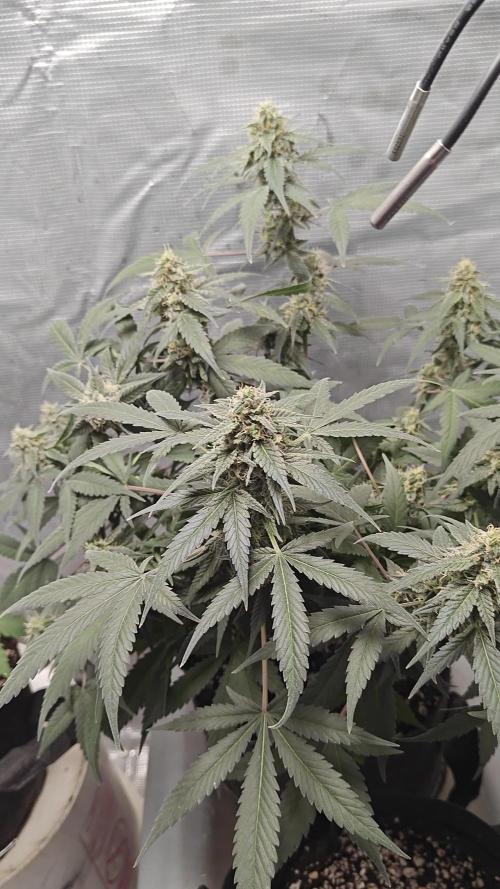
The third week of flowering has come to an end, marking the conclusion of the plants' stretch phase. Watering and feeding practices remained consistent throughout the week, and the garden continues to respond well to the established routine. Toward the end of the week, I carried out the final round of lollipopping along with a thorough defoliation. The goal was to improve airflow through the canopy and ensure that all developing bud sites receive strong, even light. With the structural work now complete, the plants are well prepared to focus their energy on flower production. I also noticed that the taller plants were beginning to show slight signs of light stress, with some leaves starting to yellow. To address this, I increased the distance between the canopy and the light to approximately 55 cm, allowing for a more balanced light intensity across the entire canopy. From this point forward, most of the hands-on work is complete. The weeks ahead will be far less demanding, with the focus shifting primarily to watering, maintaining the feeding schedule, and carrying out only light defoliation when necessary. For me, this is the most rewarding stage of the entire grow. Over the coming weeks, the flowers will begin to reveal their unique characteristics, gradually expressing their structure, colors, resin production, and aromas. Watching each cultivar develop its own personality—and experiencing their evolving fragrance day by day—is one of the most enjoyable parts of the journey. Now it's simply a matter of patience until those aromas eventually become the flavors of the final harvest.
Likes
119
Share
Hi growers, Harvest is here ✂️ Big thanks to everyone who supported this diary throughout the run, I really appreciate it. Special thanks to HombreCZ for all the advice and support along the way. The whole grow was a lot of fun and creating F2 seeds was successful, which makes me really happy. I’m looking forward to running Ridgelion F2 in the future and using it in my own projects. The name of the diary “Learning with Ridgelion” turned out to be very accurate, I’ve learned a lot during this run. That’s exactly why I love growing cannabis, and I’m glad I have a place to share it like GrowDiaries. See you in the next projects 👊 ------------------------------------------------------------------------------------------------------------------------------------------------ A je tu sklizeň ✂️ Velké díky všem, kteří tenhle deník sledovali a podporovali mě během celého runu, moc si toho vážím. Velké díky také HombreCZ za všechny rady a podporu. Celé pěstování mě neskutečně bavilo a podařilo se vytvořit F2 semena, z čehož mám velkou radost. Do budoucna se těším na pěstování Ridgelion F2 a jeho využití ve vlastních projektech. Název deníku „Learning with Ridgelion“ se nakonec ukázal jako trefný, protože jsem se toho během tohoto runu opravdu hodně naučil. Právě proto miluji pěstování cannabis a jsem rád, že to mám s kým sdílet tady na GrowDiaries. Uvidíme se u dalších projektů 👊 Peace and happy growing ✌️
Likes
6
Share
After you found some good sector and clone it you let the mycelium grow and fill almost all the petri dish like I did last week. So now you're ready to move forward. Making grain spawn!🍄🍄 For grain you can use Organic Rye Berries, but you can also get away with wheat berries, or brown rice or even corn kernels(which I used myself) ! And you'll need some mason jars or honestly I used some jars that I had home just clean them very well and sterilise before using Making a grain spawn can be broken down into 6 easy steps. 🍄Hydrate Grain By Soaking 🍄Make Specialized Lids 🍄Simmer, Drain and Dry The Grain 🍄Sterilize 🍄Put your agar in the jar 🍄Colonize 🍄Soak the grain by placing it in a bucket, covering in water, and leaving it for 12 -24 hours. Easy. 🍄Drill 1 hole on top of the lid. Right in the center and cover with a small dab of high temperature silicone sealant, and leave it overnight to dry. And your jars are done. There other diff types for different methods like liquid culture etc. But I'm just going roughly through what Ive done. 🍄The next step is to simmer the grains on the stove. This will thoroughly hydrate the grains, and will soften them to make them easier for the mushroom mycelium to consume. Cook soaked grain on the stove for about 15 minutes. You don’t want to cook it too long, because eventually all the grain will crack and you’ll get some mushy grain spawn. We don't want that. 🧐After the grains have simmered on a low boil, you’ll need to drain them off. What I did is I drop them in the sink with the drain cover on. The grains will drain over an hour or so, after which you can go ahead and fill your jars. 🍄Once your jars are filled, they need to be sterilised.This kills off all the other nasty contaminants in the grain cover the lids in tinfoil (to prevent water dripping into the lid) and then just pressure sterilise them for about 90 minutes at 15 psi. 🍄After that let them cool down. Get your SAB, wipe down the walls with some alcohol wipes and place the jars inside. And wait untill they will be warm to the touch... not hot and painful 😤patience is key. Bring in your plates that had been stored by you in a dark place. And what u have to do is sterilise your scalpel and just accurately and efficiently decide your mycelium into about 10 pieces and quickly place them in your jar. And complete for every jar u make. You have to be very quick. The more you keep you're jar and your agar plates lids open the more cans they will get contaminated. There certain technics you can see online.. 🍄Ones you're done close all your jars lids tight and Jake your jar so the mycelium pieces will mix around the jar and place them in the dark place to colonize. And just keep waiting... 😅 Untill the mycelium will conquer your grain. Keep your eyes on the jars, any weird smells or colour during the waiting time.. because that would mean you got a contamination going on. Oh yeah and when about 55% of your jar is filled with mycilium shake the sh*t out of it so it will break the mycilium inside and make spread more faster.
Likes
3
Share
Faded super nicely now off to drying and then make me high as fuck massive flowers as u can see
Likes
22
Share
@EhJay
Follow
Buds are coming along nicely, they started off with a not so appealing smell but eventually started to smell very sweet. Increased dosage for increased blooming and ripening. Missed update for day 49 but vids from previous day makes up for it. Side note, I created a homemade Co2 bag with ingredients that is easily available and affordable. I don't think I let is have an effect on my buds but it sure did smell awful. After the 5th day, I got rid of it.
Likes
24
Share
What is up you sexy displays of humanness? It's week something lol.. 9 I think. I always forget if a week is passed then counted or vice versa lol. The plants look waaaaay better from the first time I flowered. I think the environmental controls like the AC and the light distance are finally all getting locked in. I could be messing up nutrients but based on what I see I'm not burning or underfeeding to my knowledge. I'm praying for that last fattening week for these things to bulk up because I'm pretty sure they have maybeeeeee 2 weeks then a 3-day flush. Yall are the experts though so feel free to weigh in. Especially with the plants looking all over the place. Ill bust out the electronic microscope for some trichome pics next week closer towards harvest time. I keep reading it's a long flower and they still have a lot of white pistons. Plants are hella icier though compared to the first run, they look stickier, and overall I'm feeling more accomplished. I can't tell if I'm leagues away from pulling 1 lb per plant. Now the right light...... ugh.. idk why but I was trying to get my damn BN link dual timer programmed bc I have the closet in there still vegging and once I plugged everything in that right light had half the board go out again. This happened a while back and after I've checked all the connections it just randomly came back on one day and I have not questioned it over the months. Kinda pissed I cant have 1 smooth day but that's life I guess haha. oh weird question but my rooms are completely sealed. they don't really have ducting or new air pumping in. Could the plants be suffocating themselves getting that big and flowering in a closed room? I've heard the air you breathe is more than enough most time and I don't want to burn unnecessary money but If they are logically just not getting enough Co2 to transpire then.. ya.. you get my point lol. Oh and I scratched the pk 13/14 bc i felt like I was pushing my luck with it only recommended for 1 week and also it's about the end of my knowledge so I figured cutting something extra was the safe bet. the leaves are all dark too
Likes
6
Share
Next week gunna chop! 48 hours darkness and then bam! Water only for flush!! Will update as necessary thanks!!!
Processing
Likes
3
Share
First sign of mold formed. I cut the branch, remove moldy bit and drying it. I needed to get her inside as soon as possible, so this made me harvest the Peach Puree CBD faster as she was using the lights, I brought the church in and put her next the peach for her final night, you can see her in the 3rd picture. I needed to do some super cropping to get a more even canopy so that the light gets as many buds as possible. Was still not happy with how the lower branches are getting barely any lights so I did some foliation and tied the lower branches so they are higher (you can see some side ways branches in the video, that is because I pulled them in). Had to some reflective material lying around, so I wrapped that around her and she is looking very comfortable in her new home now. I've put some hay which I had laying around on the soil with some leaves I cut to act as some mulch which could be why she is drinking very little water, haven't had to water her since I brought her in 3 days ago (mind you she was under a lot of rain before that).