


Likes
Comments
Share

@PapaTerps
Follow
Wizard Fuel - Wizard Trees
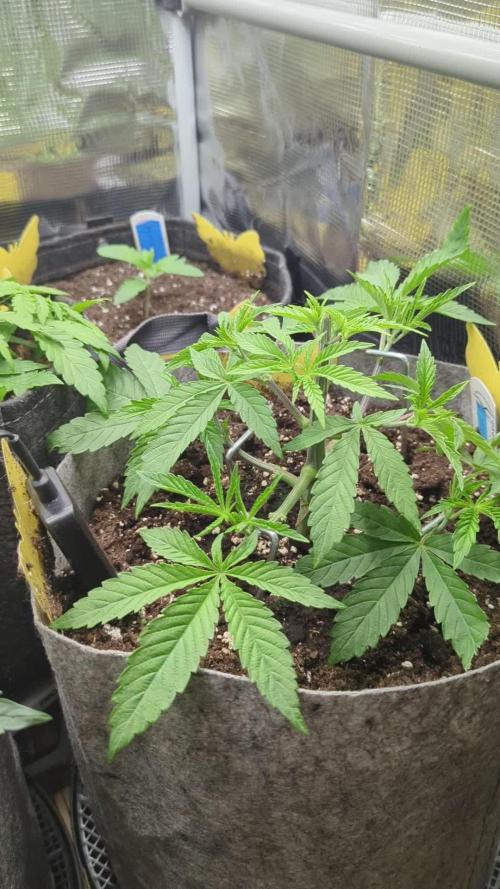
Day 34 - I've watered her with 1.5L of RO tap water with nutrients, mixed in order and pH'd to 6.3. This is her last week of veg, which has gone really well and now it's time to prepare her for bloom! I wanted a nice even canopy to work with, so I've decided to top her main stem, to force her to grow more uniform. I've also removed all of her inward facing fan leaves and her lowest most nodes, as they just won't progress when she starts to stretch - kinda like the main-lining technique, but I don't remove the main stem 👍🏻

Likes
11
Share

@AestheticGenetix
Follow
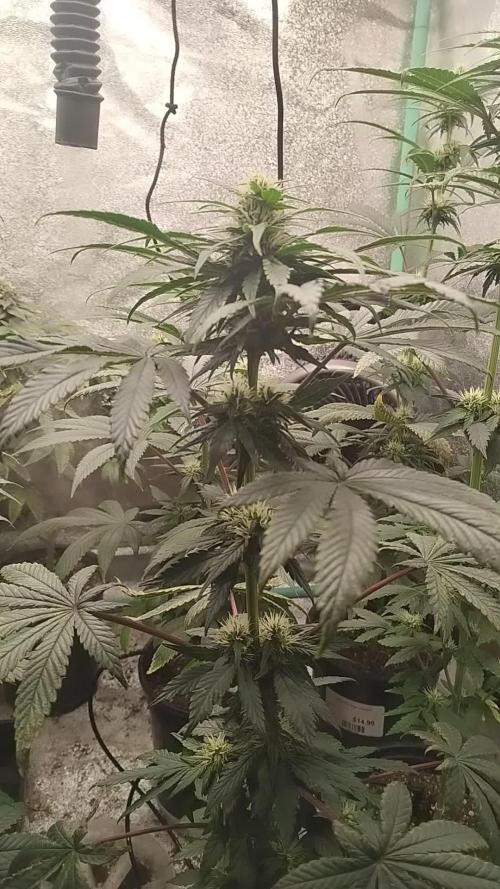
Looking good. Trying to get over the leaf necrosis. I probably over fed them. It seems the shorter stalkier, indica style plants are handling everything a little bit better than the taller more stretched out ones.
Maybe it's just a genetic sensitivity to overfeeding?
Likes
12
Share


@Jays_Not_Here_Man
Follow
Week 8, and my custom fit SCROG has been installed! ❤️
At Day 50 I separated my 7 gallon girls and my 5 gallon girl. Once done, I began the very easy process of adding my “floating” SCROG. I use ratchet straps, just like the ones that come with lights to secure the four corners of the screen to the top of my tent.
This allows me to adjust the screen height as necessary when 1) first installing and 2) once the full stretch of flower has occurred, I can tweak it a bit to balance the canopy as best as possible. It’s not 100%, I still get some over achievers, but I find it useful as another option.
I like to do a major defoliation before I set the ladies in. Typically till this time, I have done almost no defoliation, just LST and some HST techniques. I adjusted the ladies placement to allow growth out all sides of the screen, set the screen height and began tucking and bending. The defoliation and bending allows light to penetrate all those side shoots that would have amounted to nothing, and they become top shoots as they grow up and form an even canopy.
I don’t like to weave, it can damage the new shoots and cause growth problems, but the goal is to get as even a coverage as you can while allowing for plant growth in all directions.
Once complete, I will give the girls about a week to recover and grow those new shoots. I like to have about 80% coverage of the screen, before I change my light cycles to flower 12/12… and if they are healthy and strong. I’ll decide this weekend if it is time ❤️👊🇨🇦😎 Happy Gardening!

Likes
25
Share


@Master_weeda
Follow
Bonjour à tous les padawans et les maîtres jedis
Pour cette semaine 4 au jour 23 ma plante fais 17 centimètres et son sixième noeud apparaît je décide donc de pratiquer un LST sur ma plante.
Pour ce j'utilise du fil de fer galvanisé que je plante directement dans le substrat en faisant attention de ne pas endommagé les racines car n'oublions pas que ce qui pousse dessus pousse aussi dessous.
Jour 17 je pulvérise du une solution composé d'une cuillère à café de savon noir mou dilué dans un litre d'eau en prévention d'éventuels nuisibles.
Je corrige mon LST suivant la pousse de ma plante ...
Pour ma par c'est la manière dont je procède mais petit rappel de la technique du LST:
Quand commencer à appliquer la technique LST
De nombreux cultivateurs commencent la manipulation dés que les plantes possèdent entre 3 et 6 nœuds ou une paire de feuilles. Durant cette première étape de la croissance, le tronc encore flexible est pliable sans risque qu’il ne se casse, même si au fur et à mesure du développement de la plante il sera de plus en plus difficile de le plier. Nous pouvons continuer à guider la croissance des branches durant toute la culture, même durant la floraison, ce qui pour cette étape représente un grand avantage face à la taille, qui n’est pas du tout recommandé une fois que la formation des têtes commence, cela stressera en effet la plante, ce qui aura pour effet de retarder la récolte.
Comment appliquer la technique de guidage LST
Si nous sommes prudents, la flexibilité naturelle des fibres du cannabis permet de plier leur tronc et branches avec une relative facilitée, même durant la floraison des plantes.
En utilisant une corde fine, nous pouvons accrocher la pointe de la plante à la base du pot par exemple ou à un tuteur que nous aurons planté dans le substrat. Nous plierons le tronc avec précaution et nous le fixerons avec la corde, à partir de là, nous pouvons augmenter progressivement la tension de la corde, chaque jour un peu plus, jusqu’à obtenir la position souhaitée. Soyez attentif à la réaction de la plante, essayez de ne pas appliquer trop de pression sur la corde et rappelez-vous que la flexibilité des branches peut varier d’une plante à l’autre.
Pour obtenir de meilleurs résultats, il suffit de suivre quelques règles simples. Pour commencer, nous devons choisir une corde fine mais pas trop pour ne pas blesser les troncs au fur et à mesure qu’ils grandissent et qu’ils deviennent plus gros.
Nous pouvons utiliser des crochets en plastique souple ou de n’importe quelle autre matière flexible pour éviter d’endommager les plantes. Spécialement en intérieur, utiliser des cordons en plastique de couleur (voir les diaries de @Silky) est très pratique pour voir facilement les accroches et faciliter le travail au milieu du réseau formés par les cordes, les tuteurs, les mailles ou les supports que nous aurons dans la culture. Bien entendu, en culture extérieure et surtout en guerilla nous ferons juste le contraire et nous utiliserons des matériaux de couleur qui n’attirent pas l’attention pour que notre jardin reste discret.
Pour stresser les plantes au minimum, la mieux est de réaliser ces manipulations le soir ou juste après que les lampes en intérieur s’éteignent, ce qui leur permettra de se remettre durant la nuit. Normalement, le jour suivant nous pourrons observer comme les pointes des branches que nous avons pliées se dressent de nouveau vers le haut à la recherche d’une source de lumière.
Je combine un pincage d'Apex au LST cela me permettra d'avoir une canopé plus homogène donc une meilleure pénétration lumineuse et par conséquent un meilleur rendement.
Que la force soit avec vous💪

Likes
37
Share


@Smoking_Joe_Frasier
Follow
Week 4: Growth Spurts and New Challenges
Continued Growth and Health
As we move into the fourth week, the plants are showing impressive growth. Their leaves are a lush, vibrant green, and the stems are becoming stronger. The transition to the larger 11-liter fabric pots has clearly paid off, providing the roots with ample space and better aeration.
Adjusting Nutrient Levels
Given their positive response to the nutrients, I decided to continue with 2/3 of Terra Aquatica Tripart feeding schedule, adjusting slightly to meet their increasing demands. Here's the updated feeding plan for this week:
CalMag: 2.5 ml/l (Starting EC before adding nutrients: 0.50 mS/cm)
Grow: 1.5 ml/l
Bloom: 1.0 ml/l
Micro: 0.5 ml/l
EC: 1.2 mS/cm (600 ppm PPM-500/TDS)
pH: 6.0
Each plant is watered with approximately 20% runoff to ensure there's no nutrient buildup in the coco mix. I will maintain this nutrient level until the pre-flowering stage to avoid the risk of nutrient burn due to over-fertilization.
Weather Improvements and Adjustments
The weather has been steadily improving, with temperatures expected to rise to around 25°C starting Wednesday, accompanied by abundant sunshine. This upcoming forecast is excellent news for my plants, as I anticipate a final growth spurt before flowering begins. Every centimeter of growth counts at this stage, and I'm optimistic about maximizing their potential under these favorable conditions.
Strengthening with Wind Exposure
On days with good weather, I move the plants out of the greenhouse to expose them to natural wind. This practice helps strengthen their stems, improving overall stability. Additionally, the wind creates a more challenging environment for pests, helping to keep them at bay.
Smart Watering Strategy
I only water the plants when the pots feel noticeably lighter. This encourages the roots to search for water, promoting the development of a stronger and more extensive root system. This method helps ensure the plants remain healthy and resilient.
Pest Management: Observations and Actions
At the beginning of the third week, I noticed dark discolorations on the undersides of some leaves. A few days later, these spots turned into yellow patches. I am still unsure about the cause of these spots. To prevent a potential insect infestation, I sprayed all the leaf surfaces, both top and bottom, with a mildly dosed neem oil mixture. Since then, the spots have not spread further.
Because these discolorations are only affecting the lower leaves, they are not causing me significant concern at the moment. Regular inspections and preventive measures are crucial to maintaining the health of the plants and ensuring that any issues are caught early.
Decision Against LST
At first I have decided against using LST. But some of your comments made me try some LST on two of my plants. I choose Tangie and Gorilla cookies to try out and learn some stuff. Blue dream and Banana purple punch stay without any training. Thanks guys for your advice 👍
Monitoring and Care
My daily routine involves checking the plants every morning and evening. This includes:
Monitoring the moisture level of the coco mix.
Inspecting the plants for any signs of pests or nutrient deficiencies.
Growth Observations
The plants are responding well to the controlled environment and balanced nutrition. They are growing rapidly, with new leaves appearing almost daily. The stems are thickening, and the overall structure of the plants is robust and healthy.
Looking Ahead
As we head into week 4, I am optimistic about the continued growth and health of my plants. The combination of a stable environment, appropriate nutrient levels, and diligent care is proving successful. I’m excited to see how they progress and adapt as they move closer to the flowering stage.
Seeking Feedback and Tips
Your feedback and tips are valuable to me! If you have any suggestions on how I can improve my growing techniques or insights based on your own experiences, please feel free to share them in the comments below. Let's grow together!

Likes
33
Share

@Hashy
Follow
********************************************
📋 Comments
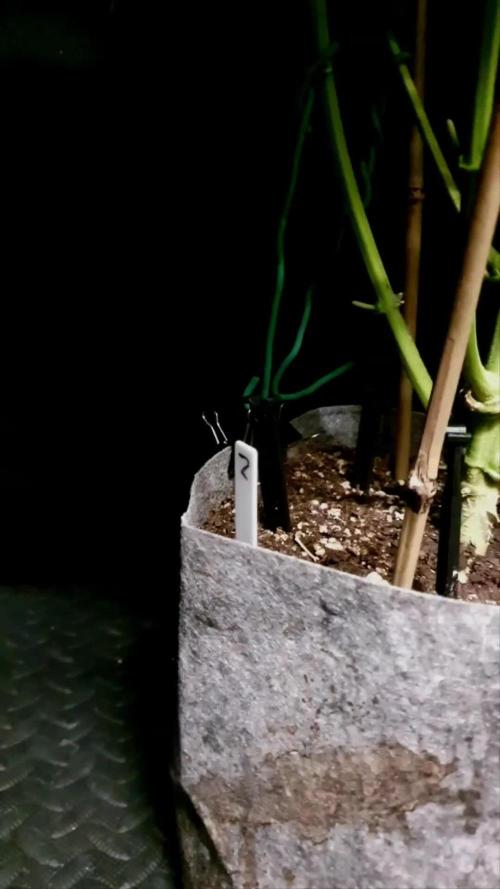
I really like the structure of this plant, and I'm tempted to do another just because she looks awesome.
📋 Data
Seed to havest=114 days.
Veg time=28 days.
Flower time=86 days.
Wet weight=805g
Dry weight=86g
📋 Smoke report
This smoke is nice, slight skunk taste with a bit of a sour lemon after taste. Strength wise I'd guess she'd be around the 25% THC mark.
📋Grow stats for GDG 23
#1 Runtz=50g
#2 Fat Bastard=86g
Total=136g
Lights on.
20hrs×7days=140hrs
18hrs×21days=378hrs
12hrs×86days=1032hrs
Total hours=1550hrs
Light power=159.09Kw
Rad power=105.69Kw
Extractor=39.93Kw
4 gang=50.91Kw
Top fan=21.36Kw
Total electricity=376 98KW
Electricity cost @£0.25/Kw=£94.25
Average light power a day=1.4Kw
Average watt per hour=102w
g/watt=(136÷102)=1.33g/w
£/g=£0.73/g
📋Final word.
Trimed on the 14/6/25. Trimming was quite easy, not to long in trim jail. 86g of solid nugs and 7g of nugs I couldn't be bothered trying to trim, they can go with the trim for hash. I would highly recommend growing this strain.
Back soon.
Take it easy.
********************************************

Likes
12
Share


@chrisss
Follow
Day 57) nothing
Day 58 ) Fed ph”d recharged water, half a gallon
Day 59) nothing
Day 60) Fed calmag and bloom , lotta calmag cuz I see cal def
Day 61) nothing
Day 62) flush with 2 gallons of phd water
Day 63)

Processing
Likes
13
Share


@smokeycropping
Follow
las cepas de royalqueenseeds van creciendo muy bien !!
impecable hasta ahora todo funciona excelente se notan sanas y muy pequeñas para tantos nudos ,
esto se ve esperanzador seguimos aprendiendo y si definitivamente el living soil es lomejor ! solo vean esas nenas como están de felices ,
natural, organico, barato y reciclable
Likes
11
Share


@Chuckwaggon420
Follow
This has been an amazing growth once again and I got to do the compound genetics like been wanting to for a year. This stuff is so decked out


Likes
29
Share


@CANNASIM
Follow
---GENERAL COMMENT---
Girls are at day 4 technically, but i like to update Sunday always, so keep that in mind, is 1/2 a week now.
From germination to soil emerging took 3-4 days, no issues at all. 100% germination rate from multiple breeders till now.
I will try my best to do a stress free grow again, so will grow mainly naturally.
---RQS QUICK ONE---
She is tiny, tiny, tiny. The smallest seedling i ever have worked with. Hope she takes off soon!
---DAY 10 UPDATE---
over some days she got volume, just started to use RECHARGE, and wow, that thing works, 48H you could tell something is different, since watering with it the stem is thicker and is growing more vigorous, lets see how it will impact overall!
---DAY 14 UPDATE---
This is the last day of this week and this girl is showing some kind of wired markings since the beginning in the first sets of leaves, will do her anyways... She grew a lot, showing already the intension of shooting up more stems like her cousin. She will be on plain water and recharge till i stabilise and figure what is going on with her, at least for a week.
This strains tend to be easy and do well with low nutes, light and etc, really basic, i like to pay to see so i never give up from a pheno, but is not fun to have issues... No worries though there is always a crop after the other 😎👍. Lets see what happens next.
Likes
37
Share


@NewbieLearner
Follow
This was a beautiful strain to grow. With her flowers getting big towards the end of harvest as well as the purple colours! I would definitely recommend that you try grow this strain. The buds are super dense and very well formed. An absolute treat to smoke and look at.


Likes
45
Share


@Gruenerfinger85
Follow
So meine Pflanzen Freunde es ist soweit dieses ist mein letzter Eintrag für diesen Strain.
Die Blüten haben sich sehr gut entwickelt manche Buds sind in der Struktur rund, fest und dicht andere wiederum sind nicht so dicht bewachsen sondern ein bisschen fluffig.
Die #1 und #4 waren von allen als erstes fertig, hier habe ich darauf geachtet das die Trichome schön wolkig sind ich wollte die Pflanzen auf dem Höchsten THC Stand ernten.
Anschließend kam die #2 und die #3 hat von allen am längsten gedauert.
#1, #2 und #4 wurden am Tag:74 gehackt,
#3 hat am längsten gebraucht ganze 7 Tage am Tag:81 wurde diese außergewöhnliche Schönheit gehackt sie hat auch die meisten Knospen getragen.
In der letzten Woche ist alles ruhig verlaufen als nächstes kommt der Smoke Bericht und das endgültige Wieg Ergebnis , leider habe ich doofi vergessen das nass Gewicht zu notieren zum Glück habe ich ein zwei nass Ergebnisse somit kann ich um den Daumen peilen was raus kommt.


Likes
23
Share


@Growshh
Follow
The girls are happy! Pistils are long and the calayxs are developing nicely. Starting to stack and swell!
Kinda turned into a jungle since the defoliation and now it's so much leaves...I removed a dozen or so but I dont like defoliating at this stage so I just tucked them to expose more light.
Some unexpected stretch from the watermelon wedding cake and zkittlez.
Really happy with this one!


Likes
6
Share


@Wishar_Garden
Follow
Week 8 (20/01 - 26/01)
24/01
She is bulking up and drinking lots of water
Nothing much to do but feeding her


Likes
9
Share


@Mrs_Larimar
Follow
HOW TO:
Excellent Papaya Zoap Cultivation
Yield: 3 plants
Time: Approximately 10 weeks from seed to harvest
Ingredients:
- 3 Papaya Zoap seeds
- Terra Preta MJ mix soil
- Water
- PK Booster (for late flowering stage)
Instructions:
1. Planting:
- Plant 3 Papaya Zoap seeds in Terra Preta MJ mix soil.
2. Seedling care:
- Provide daily watering to the seedlings.
- Maintain a consistent watering schedule as they grow.
3. Vegetative stage:
- Allow plants to grow vigorously in the nutrient-rich Terra Preta MJ mix.
- Continue regular watering as needed.
4. Flowering stage:
- When plants enter late flowering, apply PK Booster as needed.
- Maintain water schedule, adjusting as necessary.
5. Harvest (after approximately 10 weeks):
- Plants should display a well-structured, symmetric "chandelier" appearance.
- Look for dense, conical-shaped buds with attractive purple and blue hues.
Notes:
- This strain grows quickly, reaching maturity in about 10 weeks from seed.
- The Terra Preta MJ mix provides sufficient nutrients for most of the growing cycle.
- Minimal intervention is required beyond regular watering and late-stage PK boosting.
Result:
Enjoy your symmetrical, vigorous Papaya Zoap plants with dense, colorful buds. The minimal-fuss growing process yields impressive results in a relatively short time frame.
Likes
Comments
Share

@420DeepGrow
Follow
📆 Semana 2
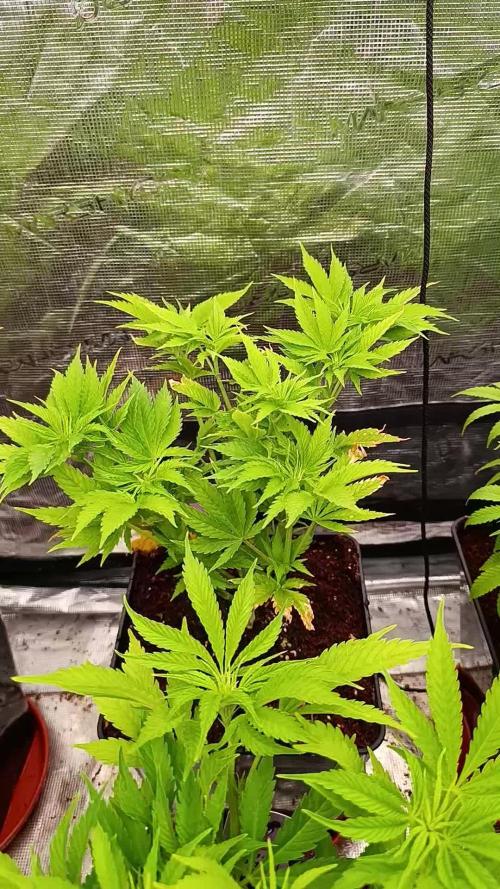
Con la planta ya adaptada al fotoperiodo 12/12, se completa el ajuste de EC y pH mediante lavado, eliminando las sales acumuladas del coco. La raíz queda limpia y activa, mejorando la absorción y estabilizando el crecimiento.
El estiramiento continúa controlado, con hojas verde lima y buena turgencia. La estructura se refuerza y las ramas laterales responden bien, preparando el escenario para el inicio real de la floración.
Semana de limpieza y equilibrio.
Próximo paso: formación visible de cogollos.
Seguimos creciendo fuerte 💪!
Likes
25
Share


@Kakui
Follow
Veg15, han crecido como 2 centímetros desde el transplante, aún no necesitan riego, desde ahora regaré cada 3~4 días, cuando el sustrato este un 80~90% seco, han estirado un poco desde que subí la distancia del LED y bajé su intensidad, mañana haré Main Lining.
Veg16, hoy se torturaron las plantas con Main Lining, se cortó arriba del segundo nodo y se cortaron también las hojas de un dedo bajo el primer nodo, las plantas que tenían suficiente crecimiento de les hizo LST también, cuando se apague la luz se efectuará un spray foliar con B-52, y mañana un nuevo riego.
Veg17, riego con 5.5 pH y EC 1.8~1.9, se regaron con 1.5 litros y no se obtuvo drenaje, próximo riego tendrá que ser con más cantidad de agua para obtener drenaje, el agua se calentó a 23 grados y se oxigenó antes de regar, mañana se ajustará el LST ya que siguen creciendo muy bien.
Veg18, hoy solo se ajusto el LST, siguen creciendo bien.
Veg19, ajuste de LST, nada más que anotar.
Veg20, siguen creciendo, talvez hay que ajustar la cantidad de luz DLI.
Veg21, tuve que poner una estufa para aumentar la temperatura en el indoor y bajar la intensidad del LED a un 50% para alcanzar un DLI óptimo. Hoy haré ajuste de LST y revisar la humedad del sustrato.
