Likes
Comments
Share
@Tower84
Follow
Es sieht alles sehr gut aus, ich habe mich dafür entschieden noch ein paar Tage zu warten bis auch bei den unteren Buds die Trichome größtenteils milchig sind - da ist jetzt etwas Geduld gefragt, aber ich denke in den nächsten Tage dürfte es soweit sein. Die Buds sind sehr kompakt gewachsen und wirken sehr frostig. Unter der Lupe sind man einen dichten Besatz an Trichomen und manche Stile der Trichome sind schön lila gefärbt. Bin super gespannt auf das Endergebnis und ich versuche die letzten Tage die Raumtemperatur zu reduzieren (18 Grad). Die Lichtintensität habe ich abermals reduziert auf Stufe 7 der Sanlight ( max. 1000 PPFD / 43 DLI mittig Headbud / Durchschnitt 780 / DLI 34 mittig).
Processing
Likes
26
Share
Bffff familia, esta cepa me tiene atónito zambezaseeds a vuelto hacer de las suyas y lograron una variedad con una floración bastante rápida, y unos cogollos bastante compactos, formación indica en el aspecto de las hojas y su morfología. Controlamos los parámetros por encima de 20 grados y por debajo de 27,5 grados y no dejamos subir la humedad por encima de 45%. Contando por supuesto con un sistema anti olores no solo en la extracción si no trabajando con ozono en la puerta de salida se la habitación.
Likes
20
Share
@Speezy
Follow
Update 1: Got some great advice in the comments about seedling care from @Frigault and decided to hold off on nutrients for next watering. I've read before that nutrients should be introduced as soon as a seedling is above ground but it does make sense to wait especially since I've fried a seedling before (a full grown plant dose at that). The youngster hot a little taller on last check and her first set of real leaves are open. I didn't get around to soaking the Amnesia Auto yet. I knock that out tonight. Cana-Cheese is finally above ground so I've begun a 18/6 light schedule. She's looking pretty good too! I watered with a 1 teaspoon of CaliMagic and next I'll start with a super low dose of GH's trio with a low dose of Armor-Si. I'm a bit unsure if I need to let the Armor-Si sit for a while after adding like I've seen done with the powder so I think I'll play it safe and wait unless I find out otherwise. Also, I'm a bit afraid of her stretching so I'll lower the lights a few inches to see what happens. A moment of silence for Dark Devil Auto. After a 24hr soak, the seed never popped (with the cute little root that sometimes looks like a goldfish tail). Just floated like her sisters did up to plant heaven. I'm torn between taking a chance with my last one or trying a different strain. I did manage to get a Banana Blaze all the way to flower until she bit the dust. Going by advice gone bad, I fed her too high a dose of nutrients and she never recovered. When they say "listen to your plant", do it. Lesson learned.
Likes
10
Share
@Thibaut
Follow
i am a straight newbie first summer grow. but this strains are absolutely the most beautiful i have seen the colors are out of this world i lost 2 girls on the road, but i am totally fine with the outcome they stood in a homemade grow house only feed them tap water once in a while, they stood in a storm by accident but is all good fam! when its dry i will take some nice bud pics , thanks Sweet Seeds for this amazing seed 🙏 see you all next summer
Likes
9
Share
Primera semana de las nenas, van cada día mejor. Los riegos han sido poco pero frecuentes (Dia x medio) con bacterias (colectivo cientifico) más otros tipo de microorganismos, a dEmas de enraizante y base.
Likes
4
Share
Nach dem Umtopfen ging es direkt weiter mit einem ordentlichen Wachstumsschub – richtig schön anzusehen! Die Pflanzen haben den Wechsel super weggesteckt und legen jetzt ordentlich zu. Alles verläuft bisher nach Plan, ohne nennenswerte Komplikationen. Die Symptome des Calciummangels sind komplett verschwunden – die neuen Blätter sehen gesund und kräftig aus. Offensichtlich zeigt die angepasste Düngung Wirkung. Auch die Thripse scheinen erfolgreich bekämpft worden zu sein. Ich konnte bisher keine neuen Spuren entdecken – hoffentlich bleibt das so. Heute stand noch ein wenig Entlaubung auf dem Programm, um Licht und Luft besser ins Innere der Pflanze zu bringen und die Schimmelgefahr weiter zu minimieren.
Processing
Likes
10
Share
Start of week 6! Week 5 went well, the girls are all very sticky and smell incredible! The super lemon haze continues to need extra feeding, she's a hungry lady! Both blueberry plants are packing on a lot of weight as the branches are bending and twisting, I tried them up to give them extra support.
Likes
1
Share
@yun23
Follow
Harvest is at the end of this month All looks great!!!
Likes
18
Share
Ok guys week two went fast and easy on this Bruce banner auto from monster genetics. It's starting to show it's second set. I gave her her first dose of worm tea to the soil aswell as a foliar feed to prevent disease. Started incremental light increase this week this strain is very quick to respond to the light intensity it told me with her leaves very quickly right where she wanted that light and found her max without causing harm. Did have to back it down a hair though. Started pushing her around a little flexing her stem and giving light quick flicks as a result her stem is already gaining strength. She is all around healthy and happy and there are no early signs of deficiency. It's looking good and so far I'm really liking what I see. If you like auto grows or this strain in particular or if your interested in organic/living soil growing hit the follow button and watch her grow with me! Thank you for reading about my grow and all questions or comments are welcome happy growing
Likes
7
Share
@Snipes420
Follow
She is almost finished. About 45% cloudy on trichomes others are mostly clear except the brown hairs those have some amber on big main bud sites. She does still make new pistols with white hair but not so many white hair pistols left (only lower canopy) I will be checking if she starts drinking less water and nugs stop fattening up. Plant has a strong tangy smell and is very sticky on budsites and sugar leaves. Her leavs do show some sort of problem/stress. The yellowing is either a nutrient problem/ph problem or yellowing due to age but i assume first one. Shes only getting water atm no nutrients
Likes
5
Share
These are last week photo. I forgot to update her. She’s so healthy. Her buds look dense and bigger every day.😍
Likes
6
Share
Likes
13
Share
We have now reached the first day of August and it is time to make new crops. The Zkittlez that has completed its vital coclo under the LED lamp has become a fantastic plant and will be collected tomorrow along with the Purple Glam Kush. In the last few days I have received my new Focus V Carta concentrator vaporizer and I really recommend it to anyone who loves to concentrate. I'm using it for my BHO and Rosin and it's really cool. I also recently discovered how to dissolve my concentrates to create e-liquids from smoking with electronic cigarettes and I will soon make a video about it. Meanwhile I made a second video that you can see on my DHO extraction method using only freshly picked buds. As you can see from the images all the plants are in good health and the queen of my garden is currently the LSD-25 of FastBuds. A beautiful, very fragrant and very productive plant that certainly becomes part of the varieties that I will continue to grow every month. Even the plant that has just begun to bloom shows all its purple shades. If the effect once smoked is as reported in the producers' description (it should have psychedelic properties) it will surely become my favorite strain for this year 😋 August 4 Nice Updates: I'm really studying a lot these days and I'm improving my skills in creating concentrates. In the coming weeks I will also show you my attempt to decompose and reassemble cannabis at will. I will use my DHO for THC, derivatives and terpenes, buy a ready-made wax containing 70% CBD and isolated crystals of CBD at 99.9% and additional extracts of marijuana terpens for flavor. Everything will be dissolved with a few drops of a PEG solution similar to products like Wax Liquidizer or the Shatter Batter you have in the USA, but as I wrote I will show you in the coming weeks. As far as my girls are concerned, in the last few days I have collected the Purple Glam Kush and the beautiful Zkittlez that bloomed under the LED lamp. I also posted new images of the beautiful LSD-25. Since I decided to create new concentrates at each harvest I will divide the buds into three categories. I will smoke the medium and large buds and I will use the smaller ones and the first quality scraps to make my concentrates. With all the other scraps I will instead make hashish with the ice-olator method. I take this opportunity to wish you all happy summer holidays! 😎 August 7: I was uploading the results images when I realized something must have gone wrong when I uploaded my last video and it was still in conversion, I reupladed it. Results: with about 40 grams of top quality scraps I obtained 4.5 grams of DHO and with second quality scraps mixed with 17.5 grams of cleaned hashish I got 7.1 grams of DHO. We both lack small amounts that I have smoked these days, say about half a gram of one and a half gram of the other. Despite having used different materials both have similar color and texture. The taste of hashish feels very little and gives a note of freshness to the concentrate. Obviously both have a very powerful effect. As for the plants collected, I obtained 122 grams from the Purple Glam Kush and 157 from the Zkittlez 😉
Likes
12
Share
White Widow looks realy good. I expect that I can harvest her in august. Northern Lights looks good too, but seems to be flowering much slower then White Widow. Blueberry Ghost OG (it is HUGE already) and Kali AK still won't start flowering and I don't know why.
Likes
52
Share
@Ogchemst
Follow
Quick kush is called quick for a reason 👌, nice big indica leaves starting to grow and stretch pretty fast, i had to re pot one of the girls so one of them might look a bit sad but she will get better (its the salts) Flushing and Buffering- I am personally using Canna Coco Coir,mix with one brick of plagron coco coir(had one left). 1. Why you Should buffer your Coco. Lets get to reading! (Its Worth it for those that dont know about it) There are cation exchange sites in coco that will interfere with nutrition until they are buffered. The cation exchange sites in coco naturally come loaded with sodium (Na) and potassium (K) cations. However, the Na and the K are only weakly held to the exchange sites. In the presence of calcium (Ca) or magnesium (Mg), the sites will release their Na or K cations and lock onto the Ca or Mg. These processes are known as “cation exchanges”. Buffering coco is accomplished by soaking it in Ca and Mg. This allows the cation exchanges to take place prior to adding plants. Simply soak your coco in a solution of Cal/Mag water and the exchange sites will release their K and Na cations and lock onto the Ca and Mg. When the cation exchange sites bond with Ca and Mg rather than Na and K, it is “buffered”. The bonds that hold the Ca and Mg to the sites are very strong and cation exchange will largely stop. This means that all of the nutrients that you add to the water will be available to the plant at the ratios that you provide them. 2. Alot of growers Grow in Unbuffered coco coir and its a big mistake guys, I myself was a "victim"😬of unbuffered coco and it does cause alot of problems... now i am going to try and fix them! -----GROWING IN UNBUFFERED COCO--- Many growers are unaware of the need to buffer the coco and they try to grow plants in unbuffered coco. In unbuffered coco, the cation exchange sites will strip the nutrient solution of the Ca and Mg and replace those cations with Na and K. This creates a sub-optimal Nutrient Element Ratio (NER) and renders Ca and Mg unavailable to the plant. Failing to buffer the coco is why so many growers suffer calcium deficiencies in coco grows. Manufacturers of prepared coco products try to exploit these problems and convince growers that only their proprietary products are suitable for growing. However, it is actually very simple to properly buffer your coco yourself. This tutorial walks you through the process and provides all the information you need to turn even the cheapest brick of dehydrated coco into a superior growing medium. I hope i Helped out someone who didnt know about this link on how to Buffer your Coco Coir is Here https://www.youtube.com/watch?v=OQi8AMMIyyA&t=18s 14/02/2019- I Decided tp raise up the amout of nutes and im giving them 1,5 ml per L so 15 ml's for 10 L / 2 Gallons of water
Likes
28
Share
The Info: Unfortunately, I had to find out that my account is being used for fake social media sites. I am only active on growdiaries here. I'm not on Facebook Instagram Twitter etc. All accounts except this one are fake. Have fun with the update. Flowering day 61 change from time to 12/12 h. Hello everyone ☺️. Today the time has finally come and the penultimate week of flowering has begun 😍. She looks beautiful and her buds smell very tasty 👍. The trichomes are 60% milky, 30% amber and 10% clear. The lady comes in total darkness for 48 hours before the harvest. Of course, as always, there will be a small interim update of the crop before the last big update. Until then, I wish you all a lot of fun and stay healthy 👍🙏🏻 You can buy this Strain at : https://www.royalqueenseeds.de/feminisierte-hanfsamen/115-amnesia-haze.html Type: Amnesia Haze ☝️🏼 Genetics: Original Amnesia Haze 👍 Vega lamp: 2 x Todogrow Led Quantum Board 100 W 💡 Bloom Lamp : 2 x Todogrow Led Cxb 3590 COB 3500 K 205W 💡💡☝️🏼 Soil : Canna Coco Professional + ☝️🏼 Fertilizer: Green House Powder Feeding ☝️🏼🌱 Water: Osmosis water mixed with normal water (24 hours stale that the chlorine evaporates) to 0.2 EC. Add Cal / Mag to 0.4 Ec Ph with Organic Ph - to 5.5 - 5.8 .
Likes
Comments
Share
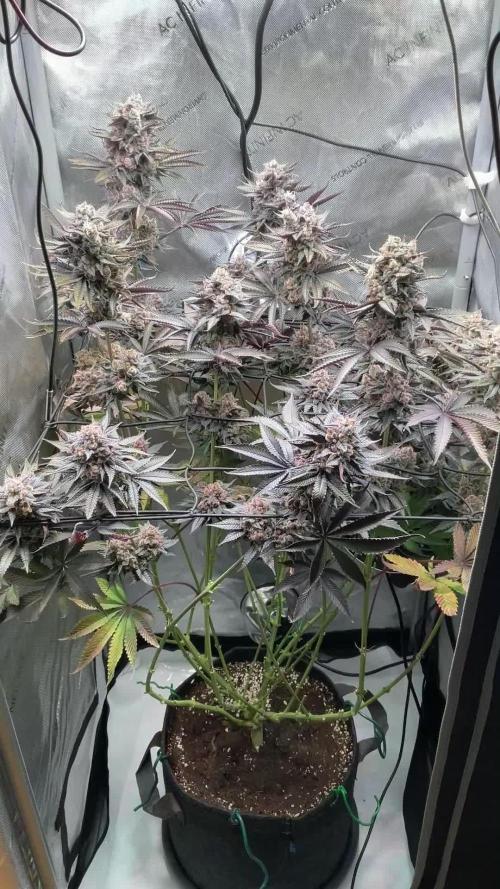
Strain: Chocolate Haze (Royal Queen Seeds) Medium: Coco bricks (Action budget bricks – hell yeah 💰) Light cycle: 12/12 from seed Grow Style: No training, no stress – just flow Grow Medium Prep: 500L of coco – never again in one go 😅 The Kickoff 🚀 This run started off wild and direct – no veg time, straight into 12/12 with Chocolate Haze. I wanted a quick turnaround and thought, hey, why wait? I germinated 14 seeds, hoping for at least 9 strong ladies. Ended up with 11 survivors – not bad! First few weeks were a bit chaotic: stretching due to low light (I tucked the seedlings under mature plants, which I do not recommend 😆), and the coco prep took way longer than expected. But hey, that's the game. Early Veg/Bloom — Lessons Learned pH: Started a bit high; some light green leaves at first EC: Too low at 1.3 — they weren't having it. Upped to 1.7 and then to 2.1 later Environment: New extractor dropped temps way down (25°C vs my usual 30°C). Thought it would help, but growth felt slower Coco quirks: They looked overwatered at times, but coco is tricky like that. Eventually, roots hit the bottom and they took off Around mid-March (3 weeks in), pistils showed up – officially the start of flower. I topped them once just before full bloom kicked in. Always a strange move, cutting healthy plants... but they bounced back beautifully. Nice and bushy now. Week 2–5 Flowering 🌸 These ladies are small but mighty. Not tall, but full of energy. The canopy is tight and even (except for one shorty), and they've been stretching like crazy — classic sativa move. Had to raise the lights twice in two days. I’ll probably do some defoliation soon to slow things down a bit. Environment is now dialed in: Temp: 30°C with lights on RH: Holding nicely in that humid sweet spot CO₂: Set to 500ppm (passive mostly, no full-on enrichment) Feeding is now solid, color has recovered beautifully, and the buds are starting to form nice stacks. I’ve kept it low-stress — no nets, no heavy training, just letting them do their thing. Observations & Setup Tweaks 🔧 Ventilation: Running the fan at just 30% now. Tent takes 18 seconds to vacuum seal, which tells me airflow is minimal – less CO₂ loss. CO₂ System: Minimal usage at 500 ppm. I’m not going all-out with gas bottles; it’s just there as a buffer. Structure: These Chocolate Haze plants don’t get tall, but they do fill out nicely. Perfect for a space where height is limited. Auto side note: One of the autos in the same tent is way taller, but less dense. Makes me appreciate the Chocolate Haze structure even more. Current Status (April 17) 📆 We’re deep into flower now — week 5, and it shows. Buds are swelling and resin production is kicking in. Nothing major to report (which is kind of the point of this grow — set and forget). Just a slight dry issue with one auto, which I adjusted on the Blumats. Besides that? Happy plants, happy grower. 🌞 Check the latest pics — they speak for themselves. Final Thoughts (So Far) 💭 This Chocolate Haze grow has been chill, efficient, and surprisingly hands-off. The direct 12/12 schedule really works when you're going for a fast cycle with minimal hassle. And even though I’m usually more into hybrids, this sativa-dominant lady is winning me over — the structure, the vigor, the smell… mmm. Now we wait for the real magic — the last few weeks of flower. Trichomes incoming. 🍫✨ Stay tuned for harvest updates — it’s gonna be sweet. Feel free to drop any questions or thoughts. Always happy to share the love for the plant. 💚 Peace