


Likes
Comments
Share

@burnout
Follow
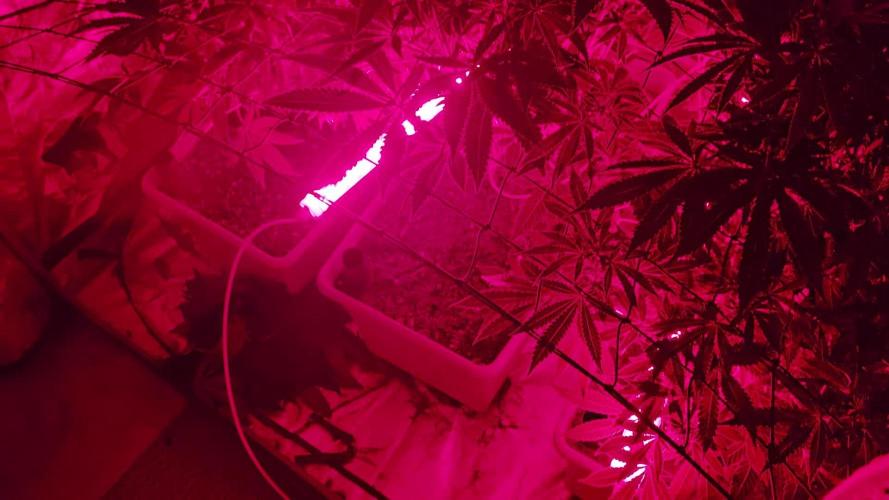
Start of day 14 of flower. Still stretching and plants are happy. Next week will be doing major defoliation and taking cuts.
Picked up spider farmer GlowR 80, these are at 40 watts each at 650nm red light . I remember reading about side and under lighting way back in the early 90s in Ed Rosenthal's grow book but never attempted it. These are very bright and torched my bare eyes when I glanced at them. Don't have room on the sides in this tent so I'll put them under the canopy once I give the plants haircuts in a few days, hopefully that will add a little bump to the popcorn.

Likes
2
Share


@bbs42
Follow
Plant is chugging away. Starting cut back on nutes now. Lady buy is a beneficial insect.

Likes
6
Share


@DANKSTER_THEE_KIDD_420
Follow
This week unfortunately I accidentally snapped a branch off but other than that mess up she's been having allot of vigorous growth and looks like she's loving her low stress training I'm applying.. looking forward to the flower sites forming and her to fully bloom

Likes
17
Share

@nonick123
Follow
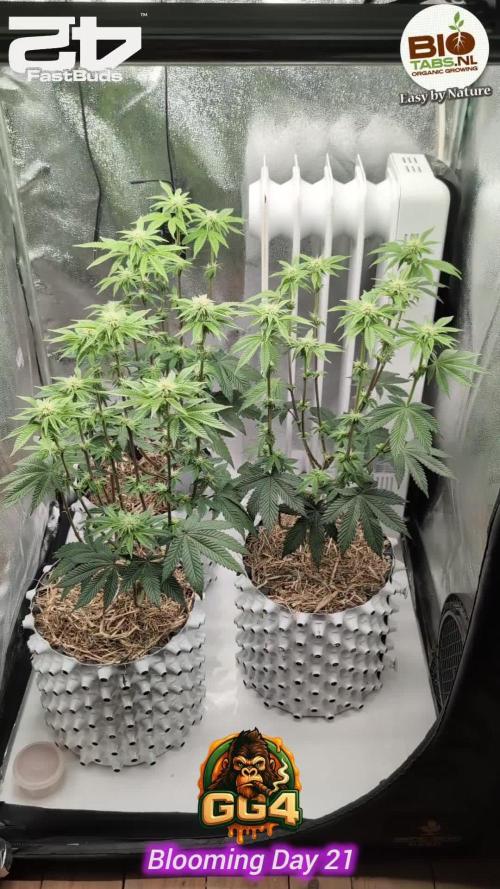
Día 50 / 15 (17/11) N/A
Día 51 / 16 (18/11) N/A
Día 52 / 17 (19/11) N/A
Día 53 / 18 (20/11) N/A
Día 54 / 19 (21/11) N/A
Día 55 / 20 (22/11) Preparación del PK Booster Compost Tea by BIOTABS!
Día 56 / 21 (23/11) Riego cada planta con 0,5 litros de PK Booster Compost Tea by BIOTABS! 💪 🚀 🎉
🚀 FastBuds 15% DISCOUNT code "NONICK" fastbuds.com
💦 Nutrients BioTabs 15% DISCOUNT code "GDBT420" biotabs.nl/en/shop/
🌱Substrate PRO-MIX HP BACILLUS + MYCORRHIZAE - www.pthorticulture.com/en-us/products/pro-mix-hp-biofungicide-plus-mycorrhizae




Likes
9
Share


@Mr_nugs_lover_David
Follow
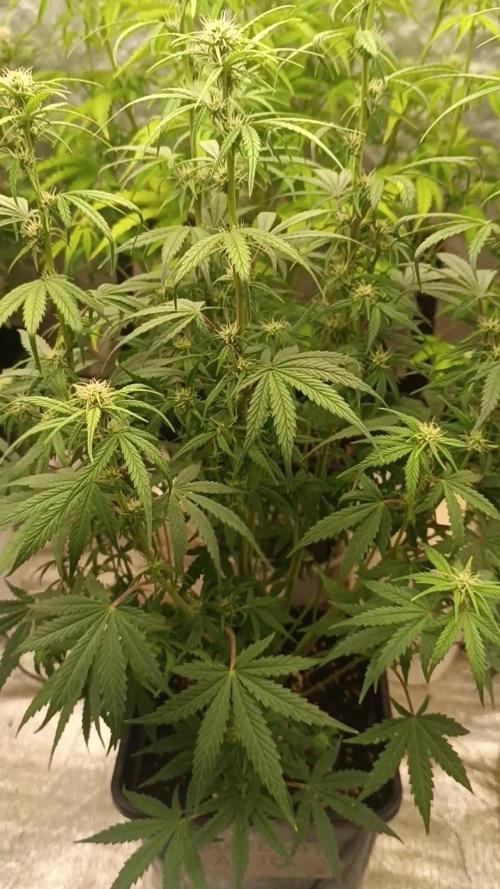
She has performed very good with the lst method, nice plant, fast growth, quality flowers, it's a very good choice for everyone who's looking for a good quality strain at affordable prices. Very nice genetic, this phenotype concretely has a very sweet and floral terps. You can check the other 2 phenos of ak420 here at my page

Likes
2
Share


It was a nice experience, It helped me with some things that I didn't know before. It was hard at the beginning because the plant was on a bad situation. But thanks to some fertilizers everything changed, also with love and patience. Good production but it could have been more. Next times will be better, now we have to be thankful and ready to continue😜

Likes
6
Share


@SuiXideGhXsT
Follow
From now on I will count the weeks as bloom.The plant keeps growing. I'm excited to see what happens. We're currently down to 390W, not 200W.
I'm currently using the Voodoo Juice Plus tablets from Advanced Nutrients. I have the 0.1g version and have now given her half a tablet for flowering.
Be curious what awaits us
Likes
92
Share


@DogDoctorOfficial
Follow
Harvest Notes ✂️
• Harvest Timing: Papaya Zoap was harvested at day 63, with select buds taken earlier at day 56 due to mold concerns.
• Drying: After careful trimming, the buds were dried for 12 days. The quality and aroma during drying hinted at the stellar smoke to come.
• Density & Yield: Buds were rock-solid, delivering an excellent yield with perfect density for storage and enjoyment.
Terpene Profile & Aromas 🍋
• Primary Aromas: A tropical explosion with sweet papaya upfront, complemented by creamy, soapy undertones that make her truly unique.
• Complexity: As the buds cure, a hint of citrus zest and exotic fruit emerges, creating a full-bodied terpene profile that’s simply irresistible.
Cultivation Experience 💡
• Highlights: Her uniform growth, heavy trichome production, and response to super cropping made her a delight to grow. She thrived under careful spectrum adjustments and defoliation, showcasing her adaptability and vigor.
• Challenges: The dense bud structure made her more prone to mold, especially in a high-humidity environment. However, proactive monitoring and swift action mitigated the spread.
Verdict: 🌟🌟🌟🌟🌟🌟🌟🌟🌟🌟 (9.8/10)
Papaya Zoap is a strain that commands attention with her beauty, aroma, and unstoppable growth. While her susceptibility to mold required extra care, her overall performance, yield, and quality were nothing short of exceptional. A grower’s dream and a frosty masterpiece!
Stay tuned for their individual harvest reports, smoke reviews, and more as we wrap up this epic series!
Discount Codes so you can save big on your next check out 💚💚💚
Kannabia - DOGDOCTOR 30% off
SeedsmanSeeds - DOGDOCTOR 10% off
CannaKan- DOGDOCTOR 15% off
terpyz.eu - DOCTOR 15% off
The Neutralizer - PORKIT5-DOG 15% off
Fast Buds - DOGDOCT 15% off
As always thank you all for stopping by, for the love and for it all , this journey of mine wold just not be the same without you guys, the love and support is very much appreciated and i fell honored and so joyful with you all in my life 🙏
With true love comes happiness 💚🙏 Always believe in your self and always do things expecting nothing and with an open heart , be a giver and the universe will give back to you in ways you could not even imagine so 💚
Friendly reminder all you see here is pure research and for educational purposes only
Growers Love to you all 💚💚💚




Likes
2
Share

Likes
4
Share


@JeyGanesha
Follow
Cresce cresce sta bella piantina anche lei la farò crescere fuori in balcone, poi appena tirerò via le auto dal box, le metterò a fiorire a12/12 indoor. ....... spero venga Buona la mia terapia 💪💚💛

Likes
35
Share


@SantaStone
Follow
🎅 So, as for the smoke after 30 days of harvest day. Biscotti Mints have a high concentration of THC, definitely above 25%, you can feel it.
Beginners should exercise caution.
-The taste, I wouldn't exactly call it mint. It's similar to peppermint, but it doesn't taste like mint, it tastes like flowers. Bottom line, the taste is similar to pepper flowers.
-The effect is only evening, not daytime. It will be good for an evening relaxation or in the company of friends.
-The appearance is something beautiful. Everyone who saw him liked him. Dense, stone buds, green-violet color.

Likes
43
Share


@TheCannaProphet
Follow
~ GG4 SHERBET FAST FLOWER by FastBuds ~
Well fam, here we go again with another epic strain from FastBuds Fast Flowering stable. After having such tremendous success growing their Gorilla Cookies Fast Flower outdoors last year, I've decided to run another of their fast flowering strains outdoors this year... GG4 Sherbet Fast Flower!
The best description of this awesome cultivar comes directly from my friends at FastBuds which is as follows:
"Bred from extremely potent and flavorful Gorilla Glue and Orange Sherbet genetics, GG4 Sherbet FF (Fast-Flowering) takes all the best traits to the next level, offering a high-yielding strain that can produce up to 600 g/m2 in a 7-week flowering time. This super resilient Indica-leaning hybrid thrives indoors and outdoors, and in all types of climates while producing mouth-watering sweet, fruity, spicy and earthy terps that translate into a delicious sugary hazelnut aroma. Expect an extremely relaxing and overall happy effect that’ll leave you with a huge smile from ear to ear. It’s the perfect strain for growers of all levels of experience seeking low-maintenance yet highly productive photoperiod varieties that deliver quality and quantity without extra effort.
GG4 Sherbet FF grows chunky buds with long dark orange hairs and spade-shaped calyxes that get encrusted with trichomes by harvest time, giving them a gorgeous silvery-white appearance. This medium-sized photoperiod can reach up to 200 cm in height and yields up to 650 g/m2 while developing that typical hybrid structure. GG4 Sherbet FF grows with a stocky, bushy appearance, developing one sturdy main cola and fat side branches that support huge yields without much effort. This super-fast variety produces distinctive light-green buds with a high bud-to-leaf ratio, making your trimming sessions a breeze. It’s a top-notch resin producer that doesn’t need much maintenance and will thrive in almost every climate, rewarding growers of all levels with extremely flavorful resin that makes for outstanding hash end extracts."
________________________________________________________________________________________________________________________________________________________________________________________________________________________________________________________________________________________________________________________
The Setup:
This is going to be an outdoor grow, but I have started the GG4 Sherbet Fast Flower indoors as our weather is still too cold to put her outside (nighttime temp's dipping regularly into the 30's℉).
The plan is simple... let her grow inside under a 19/5 light schedule until the nighttime temperatures stay above the mid 40's℉, at which point she'll be moved outside and transplanted into the soil which I have already setup and inoculated with beneficial microbes, and then let the fun begin!🤪💚
________________________________________________________________________________________________________________________________________________________________________________________________________________________________________________________________________________________________________________________
Weekly Updates:
7/9- Week FOURTEEN from seed and all I can say is... WOW!😍 I'm in 💞 with FastBuds GG4 Sherbet Fast Flower! This big girl, and I mean BIG, is approaching seven feet in height now and I'm hoping that she'll begin to transition into flower in the near future!
Our summer weather continues to be hot, although we do get a break from the heat when we're lucky enough to get some rain which also helps mitigate the daily watering of the GG4 Sherbet FF.
7/11- Today my daily watering of the FastBuds GG4 Sherbet FF continues with 10g of straight well water from the garden hose. She continues to exhibit excellent vigor and resistance to pests. I have not used any Neem Oil on her for weeks now and even though I see a few leaf hoppers here and there, I see little to no damage from them.🤩👍
7/13- Today watering the GG4 Sherbet FF was postponed as it rained the better part of the day, which provided over an inch of much needed rain.
7/15- Our weather continues to be really hot with daytime temp's in the upper 90's Fahrenheit. If it does not rain I am watering everyday with 10g of well water. I will also be top dressing the FastBuds GG4 Sherbet Fast Flower next week in anticipation of her transitioning into flower!
Thank you for checking out my diary, your positive comments and support make it all worthwhile! 💚Growers Love!💚😎🙏
Likes
58
Share


@Wastent91
Follow
So are you guys okay? You know so much to me! My situation as a grower is growing and many possibilities are opening up for me for new fantastic projects, to which the first thing for me is the mega-passion that I have for these girls, who at the same time give me fun, well-being, social life, introspection, meditation, high if necessary, I would really do everything for her if I lived in a country where this is legal, but unfortunately I can't and you don't know how much I envy people in America who can freely grow and show their results on Instagram and many other social networks that I hate but in So if people follow you you can even survive this, this can't be done in Italy, I can only live on the sidelines and I'll be happy in my only experience of myself producing the best possible weed on the planet where I am! Apart from this rant, I wanted to say that the new grow box is the intelligent ventilation system that regulates the air in relation to the humidity and temperature in the box, I must say that for me it is a huge leap in quality that I am sure will also be reflected on my girls! Thanks for everything Mars Hydro you are my source of pride and happiness for trusting me that I can have the same professional home tools as anyone else on this planet who wants good and natural weeda! Mars hydro = excellent quality in everything! For now, the light is set to 50 x one hundred, we'll see later how the girls develop and we'll make some adjustments, thanks to Barney 's farm for the opportunity to test yuor seeds! I love yuo GD i love yuo all! Buon 420 a tutti! 😼😋😽😻💖🧑🌾🌱🌿🌲💨😝

Likes
4
Share

@eldruida_lamota
Follow
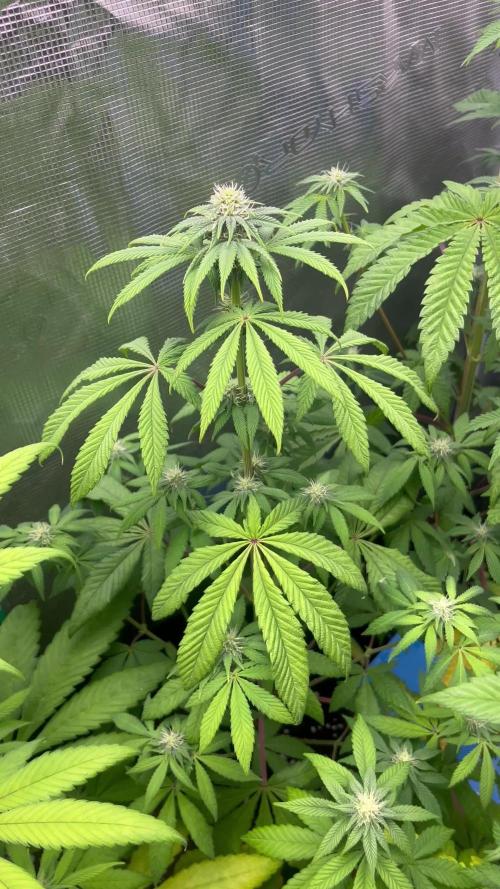
Que pasa familia, vamos con la tercera semana de floración de estas Drizl Pickl feminizadas de Seedstockers.
Vamos al lío ,se trasplantaron en macetas de 7 litros definitivamente.
El ph se controla en 6.0 , la temperatura la tenemos entre 24/20 grados y la humedad ronda el 50%.
El ciclo de floración puse 12h de luz, el foco está al 80% de potencia.
De momento van creciendo a buen ritmo y tienen un buen color.
Agradecer Agrobeta por el envío del kit gold series para esta temporada, son unos jefes 🙏
- os dejo por aquí un CÓDIGO: Eldruida
Descuento para la tienda de MARS HYDRO.
https://www.mars-hydro.com
Hasta aquí todo, Buenos humos 💨💨💨
Likes
2
Share

@PapaTerps
Follow
ZkyzcraperZ - N.Y.Ceeds
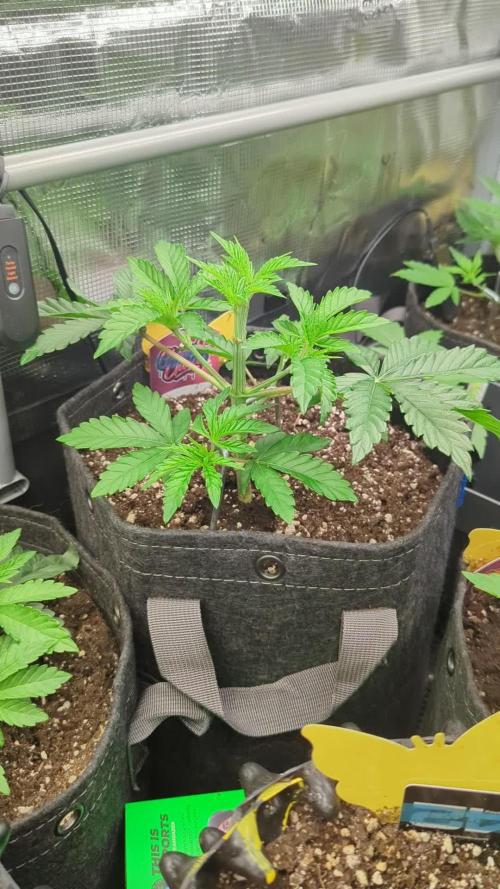
Day 34 - watered with 1.5L of RO tap water with defined nutrients mixed in order and then pH'd to 6.3. She has made great progress and has developed 9 budsites, so I decided to top her reducing her to an optimal 8 stems 👌🏻 I've also removed some of her fan leaves to improve airflow and light penetration 👍🏻 she'll be left to grow now for a few more days before we start to prepare her for bloom 🙌🏻. I'm really impressed with her veg so far, for an unknown breeder, she has totally outperformed the more expensive brands so far and already looks set for bloom! I'm excited for this ones journey 🙏🏻
Likes
4
Share


@Cajungas
Follow
Soaked and cup of water for about 18 hours and then took out putting my paper towel and bag and put in dark spot until sprouted sprouted approximately 18 hours after was put in bag mix bucket of soil inoculated and planted so seed and put dome on it and put in grow area doing 18 and 6 for the whole grow but will be utilizing outdoor sunlight and the rest of the time will be in the grow tent trying something new
Likes
78
Share


@Hou_Stone
Follow
My 4 plants are still there, with the banana as a smile 🍌😁
I continue the defoliation, I wonder if I'm not doing a little too much sometimes.. We will soon see the result
🌗Switching to flowering this week, I reduced the length of the day by 1 hour each day until reaching 12 hours night time / 12 hours daylight on the 33rd day!🌞
🌺On the 33rd day I apply a layer of organic nutrients mixed with a little soil that I add to the top of each pot.
I added 35 grams of BioBloom to each of my pots🌺
(Pot of 7 Liters / 2 gallons)
------------------------------------------------------------
💧Watering
I water all my pots the same day but with more or less water.
Simply by lifting them;
A light pot is a dry pot and will need more water,
A heavy pot is a wet pot and will need less water.
On average I water each pot with:
Day 29 : 0.5 L
Day 33 : 1 L with 0.8 grams of bio enhancer/L
I use tap water, adjust the ph to around 6 and water
------------------------------------------------------------
🔥❄️Temperature of the week :
Day : 19-23°C (Humidity : 65-80%)
Night : 14-17°C (Humidity : 75-85%)
Outside the tent it is around 16°C with 70% humidity
The humidity is a little too high, I hope it will drop a little 🙏
------------------------------------------------------------
🚀Equipment of the week ⭐️ :
Light FC3000 Mars hydro. power 95% at 50cm
Extractor 6 inch Mars Hydro. power 1/10. ON 24/24h
2 fans to circulate the air inside the tent. Each on for 30 minutes then off for 1 hour. this rhythm repeats itself in a loop
I'm removing my heat mat this week.
------------------------------------------------------------
📜Links :
🌱Banana Krumble seeds : 👇
https://shop.greenhouseseeds.nl/feminised-cannabis-seeds/usa-genetics/banana-krumble/
Mars Hydro : 5% off with my discount code "houstone5" 💪
https://www.mars-hydro.com/?acc=hou-stone
👨🚀My Instagram❤️️:
https://www.instagram.com/hou_stone420/
------------------------------------------------------------
Thanks for your visit😀💚


