
Likes
Comments
Share


@TechDCo
Follow
05/02/2026
Lite defoll of inner fan leaves and supercropped the outter branches
06/02/2026
Shes getting bigger!
Light increased to 75% -513watts wall draw.
Lite defoll of the inner fan leaves again. Trying to keep her centre thinned for the new budsites. Once we switch to flower I can let it bush a little as it stretches
06/02/2026
Thinning of the tops again and folding her main stems ouwards via supercropping!
Chuck Norris enters the chat
09/02/2026
08/02/2026
Thining of the tops again while keeping the surrounding fan leaves.
Should be ready to switch to flower next week!
10/02/2026
Supercropped cropped a litte two hard and snapped two stems but she's managed to recover just fine.
The canopy is still nice and even.
11/02/2026
Thinned out #Back to the Future
Was very bushy; thinned her right out to reveal the baby nodes!
Likes
31
Share


@Hempface86
Follow
Well today is day 84 and she's just about done.. I flushed her with 3 gallons of water twice in the last week and now I'm just feeding water to a little runoff for another day or two.. I want to point out that this plant smells exactly like blueberry Pop-Tarts.. that is not an exaggeration it is literally the same smell.. I really really hope that that doesn't go away and stays throughout the cure.. hopefully this weather cools down so I can dry it at an appropriate temperature and not lose these precious terpenes that smell so good.. this is my second fast buds grow the first was kosher cake and that was awesome I tried the Afghan Kush but I ended up getting rid of her because of too many mutations and I didn't have the room for plant that wasn't going to grow right.. so two out of three so far have been great I know this flower is going to be awesome.. hope everyone is doing well and happy growing ✌️😎

Likes
4
Share


@nanaboham
Follow
Final week before we start harvesting. Im currently flushing right now. Gonna start trimming also this week

Likes
16
Share


@GYOweed
Follow
This was the fastest photoperiod i had and most fruitiest. Not most frost.

Likes
18
Share


@Cortez_The_Konqueror
Follow
These are starting to get me excited, I'm glad now that I did not cull the 3rd cultivar that was behind, she filled out nicely and is still a bit behind just starting to hit preflower.. however she may end up being the biggest out of the 3 in the long run do to the added veg time.. only thing I don't like about that pheno is she was quite leafy and the bottoms grew a bit wild, however I did the required defoliation and now have her scrogged out in bamboo steaks ✌️
Likes
14
Share


@JUNGLE_B4RNS
Follow
The Sensi Seeds Research breeding project has created eleven cannabis seed varieties.
How? By combining new cannabis cultivars with a selection of strains from their long-established cannabis gene bank. For the first time in thirty-six years, they are opening the doors of the Sensi Seeds Research and Development Department.
Week #10
Week #1 of Flowering, plants have filled up the trellis. After 1 week of 12 hours of dark period, the stretch is going to start now. This is where you must keep using your Veg nootz and where you must increase slightly the Nitrogen, to avoid any die back situation where your plants turns yellow from the bottom to the top, during week 3 or 4 of flowering due to a lack of Nitrogen...
( does this tip deserve a hit on the like button ? ) 😊👍
I definitely recommend Mars-Hydro , the plants under the SP250 are developing some spectacular structures of side branches and tops, it’s a bit like growing under natural sunlight 😎
Canopy is almost at the same level, I have put some few crazy tops under the second layer of the trellis to put everyone at the same size.
Stay tuned folks ! The serious part of the game is coming, this is where it starts to get interesting to grow Marijuana 😉
(I’m looking for a job in the Cannabis industry as Master Grower, Mineralogist, Quality Control)

Likes
15
Share


@AdamCajda
Follow
Decided to chop one girl early. If I'm honest I was very worried about the yield, because for the fort half of the flowering it didn't look very promissing but holy cow, just the first plant had 70g on it. I accidentally snapped two main colas in early stage so it would be probably more. However 3 girls are still running for at least a week or two so it looks like I will achieve 200g and probably well over which is awesome.
Most importanltly, buds are super dense. Finally! I can't wait to finish with proper flush and curing.
Humidity is now at constant 60% and can't really do much about it. Weather outside is also a bit humid, but i'm running 3 fans inside with pretty good extractor fan so hopefully no mould issues this time. I feel like the strain also help a lot.
I will probably chop one girl in few days or a week and then the last monster looks like it will be ready little bit later than the rest so I will give it some extra time.

Likes
18
Share


@ganjameister
Follow
The buds are bulking every day. A slight defoliation was done to expose the inner buds.
From next week onwards, Nitrogen will be cut and the first phase of flushing will begin. Harvest in approx 2 weeks!

Likes
1
Share

@Ninjabuds
Follow
Growace.com air cube discount code NINJABUDS
ELUFAH.com and amazon Elufah products discount code NINJABUDS
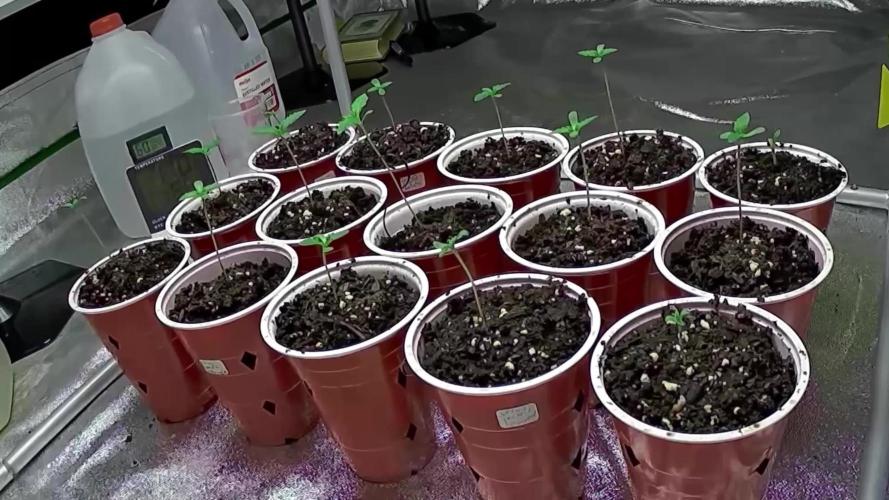
I finally choose witch 6 plants I am going to keep and I transplanted them into the air cubes
Wedding gelato was a hard one to choose both of the seedlings were both healthy and strong
Also I set up the grow pro’s under canopy lights getting them ready for when the plants are ready for those to kick on

Likes
7
Share


@HeavyHead
Follow
Starting to flower this week,
Dropped my lights closer to canopy and started giving full strength nutes + big bud and bud candy from here out :)

Likes
7
Share


@HIAZ_urbanbudfarmer
Follow
All has gone good this week topped #2, #3, #4 , for the 2nd time, continuing training.forming good flat canopy, switching them over to flower as it's the end of week

Likes
21
Share


@Mosquito_Haarlem
Follow
Het is een mooie week geweest voor haar.
Ze voelt zich prettig onder het led licht en de bloemen worden steeds dikker en de bladeren hebben een prachtige groene kleur.
Dit wordt de laatste week dat ze de power roots en pure zyme krijgt, vanaf volgende week zal ik deze vervangen voor de green sensation.
Ik zal gedurende de week foto's updaten.
Dag 49: de bloemen worden dikker en 1 zijtak heeft de hoofd cola in lengte ingehaald. Zie filmpje
Morgen start week 8 😁👌🏼
To be continued...

Likes
3
Share


@CaptonianMoneymaker
Follow
Buds r slowly rippening mostly cloudy trichomes no amber yet checking daily split stems for final stress decrease in light hours extended dark for aiding ripening
Likes
42
Share


@rhodes68
Follow
Four plants in all eventually
1/31 First of the Bond harvests, Pussy Galore first of the FFT-7s, two more follow.
Pussy Dry weight 312 grams
3/5 Holly 665 grams wet into dry - dry 98 grams
Two more F7s to go
3/25
Pussy-1 clone yields 1107 grams wet in dry --- dry yield 181 grams
One FFT-7 Remains Pussy-2 buds look a bit larger
3/28 Pussy-2 wet weight 1295 grams in dry. 242 grams dry. This concludes the FFT-7 harvests


Processing
Likes
7
Share


@xX_The_Chef_Xx
Follow
Not much changed this week. The plants are getting bushy and didnt have much of a stretch yet. Still trying to do a little light stress training to fill in empty spots in the canopy. Bud sites are definitely starting to develop and they're starting to stink just a little more.

Likes
10
Share


@valiotoro
Follow
Hello everyone week 1 has passed for this Purple Lemonade auto from Fast Buds 😎
this plant is doing very well growing at fast pace and with a beautiful green colour on the leaves.
Spider Farmer SE-7000 50%
wish you all happy growing!


Likes
10
Share


@MadeInGermany
Follow
Info:
Unfortunately, I had to find out that my account is used for fake pages in social media.
I am only active here on growdiaries.
I am not on facebook instagram twitter etc All accounts except this one are fake.
Have fun with the update.
Flowering day 26
since time change
to 12/12.
Hey everyone 😃.
Another great week goes by.
Last week, instead of 2 g of GHSC Powder Feeding, I only gave 1.5 g p l of substrate so that I can give you another 1 g per l of substrate next week so that it lasts until the end :-).
It is developing very well and the buds are starting to grow :-).
The week was poured 3 times with 1.1 l each time. once of them GHSC Enhancer was added :-).
The bottom shoots have now also been removed :-).
As always, the humidifier was refilled every day and the lady was checked for her health.
I hope you enjoy the update.
Stay healthy and let it grow 😊🍀.
You can buy this Strain at :
https://www.zamnesia.com/de/5165-zamnesia-seeds-kalini-asia-feminisiert.html
Type:
Kalini Asia
☝️🏼
Genetics:
Black Domina x Purple Kush
👍
Vega lamp:
2 x Todogrow Led
Quantum Board 100 W
💡
Bloom Lamp :
2 x Todogrow Led
Cxb 3590 COB 3500 K 205W
💡💡☝️🏼
Soil :
Canna Coco Professional +
☝️🏼
Fertilizer:
Green House Powder Feeding
☝️🏼🌱
Water:
Osmosis water mixed with normal water (24 hours stale that the chlorine evaporates) to 0.2 EC. Add Cal / Mag to 0.4 Ec Ph with Organic Ph - to 5.5 - 5.8 .

Likes
241
Share


@Tropicannibis_Todd
Follow
💩Holy Crap We Are Back At It And Loving It💩
Growmies we are at DAY 42 and she's just killing💀it👌
👉We are in full on flowering , gotta say the pink to redish hairs look amazing , not to mention the frost 👈 even the stems and branches are sticky icky 👈
OMG I LOVE THE PINK PISTOLS 👈
So Shit , I gave them just a tad to much nutes on the first few feeding 👈 But I have since fixed it
So I'm still doing some low stress training 🙃 and some defolation 😳
Lights being readjusted and chart updated .........👍rain water to be used entire growth👈
👉I used NutriNPK for nutrients for my grows and welcome anyone to give them a try .👈
👉 www.nutrinpk.com 👈
NutriNPK Cal MAG 14-0-14
NutriNPK Grow 28-14-14
NutriNPK Bloom 8-20-30
NutriNPK Bloom Booster 0-52-34
I GOT MULTIPLE DIARIES ON THE GO 😱 please check them out 😎
👉THANKS FOR TAKING THE TIME TO GO OVER MY DIARIES 👈

