


Likes
Comments
Share

@DogDoctorOfficial
Follow
🍋🍒 Lemon Cherry Gelato — Week 6 From Seed
(Week 2 Flower · 12/12 From Seed)
Hello everyone 👋
Quick recap and a warm welcome to anyone joining the diary now, here’s where we are and how we got here.
🌱 From Seed to Now, Quick Context
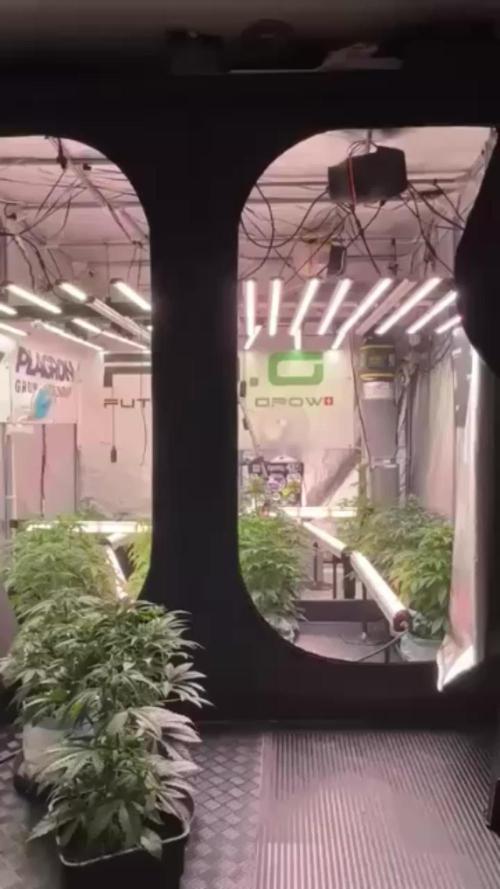
These Lemon Cherry Gelato girls have been grown 12/12 from seed, and we are now entering what we consider Week 2 of flower / transition.
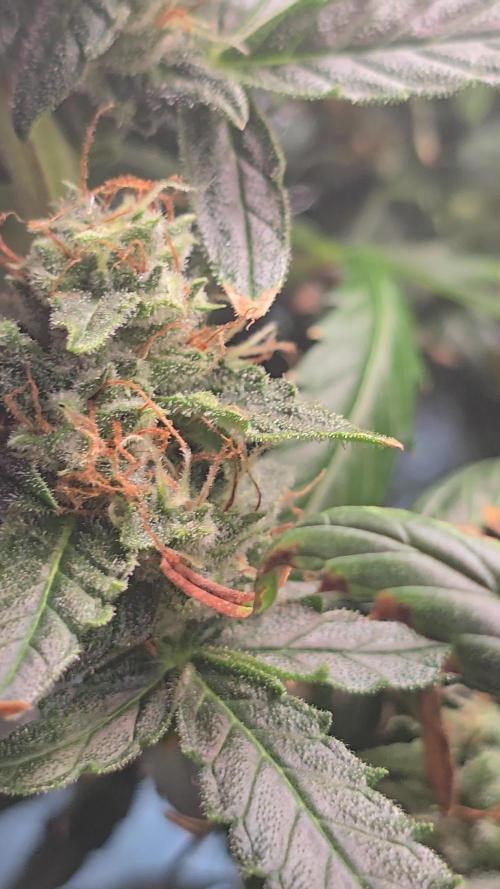
Pre-flowers are clearly visible, stacking has begun, and the stretch is now turning into early bulk.
They are in that beautiful in-between phase where they still look slightly vegetative, but their behavior is unmistakably flowering.
⸻
🌡️ Environment Update
• Day temperature: ~28°C (successfully raised)
• Humidity: ~65%
It’s still a bit cold outside, but as plant mass increases, lighting intensity goes up, and under-canopy lighting is added, the tent itself has become a stronger heat source.
This allowed us to stabilize conditions without forcing anything, exactly how we like it.
• PPFD: ~600–850 (depending on plant size and position)
• CO₂: ~900 ppm
• Airflow: unchanged
• vortex extraction
• cross-winds with multiple fans
• constant, gentle movement across the canopy
⸻
💧 Feeding & Nutrition Strategy
This week marks an important nutritional transition.
• EC: 2.4
• pH: 6.5
From this point forward, all feedings will be pH 6.0 and above.
The reason is simple: as flowering progresses, plants shift their nutrient uptake priorities, and slightly higher pH improves availability of key elements needed for bloom development.
Nutrient Change
• Introduced: Terra Bloom — 5 ml / L
• Removed: Terra Grow
This change is happening now, not earlier, because the plants have clearly entered the flowering transition.
There’s no rush, no shock, just following the plant’s signals.
The current recipe (our “Plagron” approach) continues to perform exceptionally well, and plant response has been outstanding so far.
⸻
🌿 Training & Plant Handling
We are continuing with a very minimal-stress approach:
• No topping
• No aggressive defoliation
• Only leaf bending and leaf tucking
This method keeps the structure open, exposes bud sites naturally, and avoids recovery downtime.
Simple, effective, and extremely practical, sometimes simplicity isn’t laziness, it’s efficiency.
The results speak for themselves:
• strong branching
• compact “ball” formations
• clean stacking
• healthy color fade beginning naturally
⸻
📸 Visual Progress
This update includes a large set of photos (studio + tent shots) to clearly show:
• the transition phase
• stretch turning into bulk
• visible growth differences over just one week
Every time the tent doors open, growth is noticeable, and comparing earlier photos to the latest ones makes that even clearer.
⸻
🔮 What to Expect Next
Over the coming weeks:
• stretch will gradually slow
• bulk and stacking will take over
• plant handling will be reduced even further
• stability becomes the priority
What not to expect:
• heavy pruning
• forced corrections
• unnecessary interventions
At this stage, the goal is to let the plants do what they already know how to do.
⸻
🙏 Thanks
Big thank you to:
• everyone following along
• newcomers and long-time readers
• supporters, critics, observers, all welcome
• the Grow Diaries Team and platform
• and all sponsors backing the journey
This is a key week in the run, and we’re excited to document it properly and share the learning with the community.
As always — we’re here to observe, guide gently, and let the plants express themselves 🌿💚
FOR DISCOUNT CODES AND MORE JUST FOLLOW THE LINK https://website.beacons.ai/dogdoctorofficial
📲 Don’t forget to Subscribe and follow me on Instagram and YouTube @DogDoctorOfficial for exclusive content, real-time updates, and behind-the-scenes magic. We’ve got so much more coming, including transplanting and all the amazing techniques that go along with it. You won’t want to miss it.GrowDiaries Journal: https://growdiaries.com/grower/dogdoctorofficial
Instagram: https://www.instagram.com/dogdoctorofficial/
YouTube: https://www.youtube.com/@dogdoctorofficial
⸻
Explore the Gear that Powers My Grow
If you’re curious about the tech I’m using, check out these links:
🔆 Lighting & Environmental Control
• Future of Grow — Advanced LED lighting technology
https://www.futureofgrow.com/
DISCOUNT CODE: DOG20
• Lumiflora — Under-canopy LED lighting
https://lumiflorade.com/
• TrollMaster — Environmental controllers and automation gear (past collaboration)
⸻
Genetics
• Zamnesia Seeds — Genetics used in this project
https://www.zamnesia.com/
⸻
🌱 Soil, Substrates, Boosters & Root Support
• Plagron — Substrates, bio mixes, and supportive products
https://plagron.com/en/
⸻
🎒 Storage, Curing & Preservation
• Grove Bags — Curing and storage solutions
https://grovebags.com/
⸻
📸 Photography Equipment & Tools
(Not sponsors, but part of my creative toolkit)
• Sony A6700
• Sony full-frame macro lens + few more
• Stacking photography workflow - learning
• iPhone (for behind-the-scenes shots)
We’ve got much more coming as we move through the grow cycles. Trust me, you won’t want to miss the next steps, let’s push the boundaries of indoor horticulture together!
As always, this is shared for educational purposes, aiming to spread understanding and appreciation for this plant. Let’s celebrate it responsibly and continue to learn and grow together.
With true love comes happiness. Always believe in yourself, and always do things expecting nothing and with an open heart. Be a giver, and the universe will give back in ways you could never imagine.
💚 Growers love to all 💚
📸 P.S. – The Eye Behind the Lens
All photos in this diary (for now — except for the ones showing the camera, which I took with an iPhone) are taken with a Sony A6700 paired with a Sony full-frame macro lens and a few more.
Photography is part of the story — it’s how we share the fine textures, the glow, and the quiet details that words can’t always capture.
I’ve also started experimenting with photo stacking — a technique where multiple images, each taken at a slightly different focus point, are layered together to create one perfectly sharp image from front to back.
It’s not digital enhancement or AI; it’s pure photography — a way to reveal the plant’s beauty in microscopic depth, from trichome to petal.
You’ll even see a few shots of "ghost me" capturing the shots — camera, lens, setup — because every grow deserves not just to be cultivated, but documented like art.
FOR DISCOUNT CODES AND MORE JUST FOLLOW THE LINK https://website.beacons.ai/dogdoctorofficial
NEW DISCORD - Official Server Invite Link : https://discord.gg/ksjAkA5T74




Likes
3
Share

@Greybeardbud
Follow
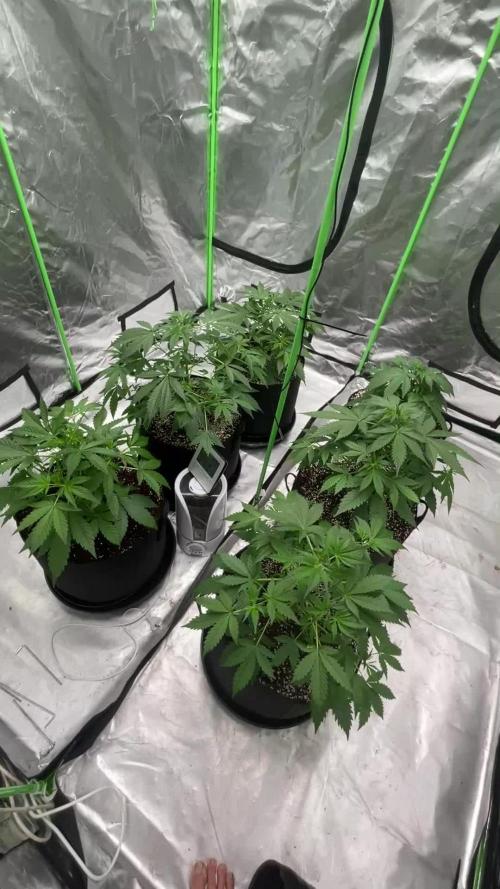
Another week of autopilot, the girls have almost all doubled in size in a week, still looking good. Now feeding 2.2 ec still doing 5L /48 hr and still on 24/0 light. Veg channel 55% bloom 25%. Will increase bloom once pistils appear and transition to bloom nutrients, until then will stay on their current feed schedule and potentially increasing to daily feeds instead of every other day. Will not be topping or fimming these ladies, and will resist the urge to defoliate as much as possible. By start of week 5 Scrog will be installed at 50cm, with a second layer planned for around 90cm.
Plant sizing from start week 3 to start week 4
Pm1 16cm - 30cm
Pm2 21cm - 40cm
Gc1 16cm - 30cm
Gc2 14cm - 27cm
Gc3 22cm - 38cm
Gc4 20cm - 37cm
Edit - had a look, pistils are there so have started a transition to flowering and reducing super n+ cal/mag

Likes
21
Share


@Jays_Not_Here_Man
Follow
A-Day 60, B&C Day 56
A is fattening up! She never did stretch, but then again I had her tied and splayed pretty far out. She has been thirsty, I have been feeding a dose close to 1000 ppm every other feed which has been every other day for her. During the lower feeds, ppm has been around 400. Her tricomes are mostly clear, with some cloudy starting to show. She still has a couple of weeks to go.
B- is going to be a producer! She has so many tips and they are all fattening and developing at about the same rate, she is going to be a beast! Did a defoliation on her, she is appreciating the extra light penetration 😎💨
C- Has stretched up and out! If she stacks as tight as the other two, she will probably be the one with the most weight. Her branches are the tallest and reaching up at least 4-6 inches past both her sisters. I tied her down lightly to allow light to get through, we’ll see how she goes.


Likes
14
Share


@BoboLacetti
Follow
The plants have stopped stretching. The Ph value keeps falling so I add PH + every time I pour and water with a PH value of 8 xD. I'm thinking about buying a small 100 watt LED panel. The light distribution is very uneven


Likes
4
Share


@planttracker
Follow
Yeah this strain finished in 9 weeks just like the guidelines say, tons of golf ball sized nugs. I could have got a better yield if I topped her earlier but I'm really happy with this grow. $20 investment and a quarter pound of weed in return. Outdoor plants really require very little to no maintenance, so if constantly pruning and training isn't something your interested in then go outdoors mate. In terms of how I grew this girl I just used a bit of cal-mag and amended the soil with organic nutrients before flowering. The organic notes saved my ass for flower. The yield may not be as much as many outdoor plant but again my first outdoor grow. I'm happy with the quality over quantity too. Thanks for all for stopping by!

Likes
6
Share


@XanHalen
Follow
Officially week 7
Dec 31:
Came back a week later to very heavy pots, needed 36 hour drying period, not happy, smaller plant has tips of leaves curling down, some like taco, dryed out the pots and went back to normal conservative feeding, need to fine tune the auto irrigation setup before I use it again for sure. All in all, nothing crazy happened. Really cool to see a plant be small, but way bigger after a week of vacation. First grow seems to be going pretty good!
PS: I think my hygrometer is broken, saying 85-100% RA even when I significantly improve airflow and it doesn't seem anywhere near that. Gonna do the salt paste test on the hygrometer
.
Jan 1:
I recalibrated my hygrometer and it’s working great, weird leaf curling of smaller plant still happening but seems to be improving, big plant is frosty and fat for week 7, seems to be at same stage in development as smaller plant but the pheno is beautiful.

Processing
Likes
13
Share


@RussianGrower
Follow
Всем тем, кто следит за мной здоровья и удачи, надеюсь вы в безопасности. Наступило время вновь обновить «HiFi 4G» от «Dutch Passion» в далёких генах которого есть Fire OG. Уже четвёртая неделя от прорастания семечек. Прогресс на лицо. Я планирую выращивать клонов с нижних веток, именно поэтому я сделал дефолиацию на ранней стадии и не стал формировать крону, так как нижние ветки растения будут клонированы. Дефолиация полезна не только тем, что открывает свет боковым веткам, но также огромные листьев не забирают важные гормоны роста. В этот раз не стал добавлять какие-либо удобрения, а пролил обычной водой с пониженным PH. Так же я подключил дополнительное освещенье полный спектр LED по 27W. Теперь я оставлю растение в покое и буду ждать, когда отрастут ветки на клонирование.
-----------------------------------------------------------------------------------------------------------------------------------------------------------------------------------
To all those who follow me health and good luck, I hope you are safe. It's time to re-update "HiFi 4G" from "Dutch Passion" in the distant genes of which there is Fire OG. It is already the fourth week from the germination of seeds. Progress on the face. I plan to grow clones from the lower branches, which is why I did defoliation at an early stage and did not form a crown, since the lower branches of the plant will be cloned. Defoliation is useful not only because it opens the light to the side branches, but also because the leaves do not take away important growth hormones. This time I did not add any fertilizers, but spilled it with ordinary water with a low PH. I also connected additional lighting with a full range of 27W LED. Now I will leave the plant alone and wait for the branches to grow for cloning.
Likes
17
Share


@Red_i_jedi
Follow
26/02/19
It's now been a week since my 3 plants sprouted into this life, the seedlings are going very well apart from 2 seedlings toppling, hopefully I've saved them from digging them in deeper. One seems to have stunted though.
Have fed them their first grow feed which was 0.5ml of Kalong Grow and 0.1ml of Rootbastic mixed into 1l of leached tapwater then divided into 3 parts each per pot.
I'll do a mid-week update, nothing like the long read I wrote for the 1st week.
Awesome shit, loving each day!
*******
03/03/19
Did a feed today as the top soil was looking a little dry, it's been 5 days since their last feed with nutrients
0.5ml Guanokalong Grow
0.1ml Rootbastic


Likes
34
Share


@rhodes68
Follow
5/3 Week 6
Last day for Grow nuets looks like stretch is stopping. Will confirm in the AM.
Also be ending the round of PK tomorrow.
Lights at full power and set to @16 inches to start.
Leaving the MH bulb in place a couple of weeks
Very light defoliation just to keep middle of the plants open, this strain does not need much at all.
5/4
Ending Grow nuets as stretch is playing out so no further need of the Nitrogen, lot in the pot still.
Last day for the PK on this go round.
Next time we grow this strain going to look at alternate methods of training, FIM is the likely candidate.
5/5 Back down to just Bloom A/B nuets
Stretch slowing down as Baba and Sally reach the same height as Athena that started first.
Everybody seems happy even the little one
5/6
Moved up the lights, was seeing some light stress on the girls, leaf praying.
Bumping up the Bloom nuets for now see how it goes, getting close to next round of PK booster waiting for the cotton balls to develop sufficiently.
Gave all a shot of Fish Sh!T this morning 4ml/gal.
Pretty much all of it
5/7
Pics
Raised lights further still have some praying leaves.
Tomorrow should be PK day as the cotton balls should be formed by then.
5/8
Looks like the last the stretch has finally ended on Baba, thought she was going to be a good kind of problem but didnt have to raise the lights today so there is that.
Have to be careful with these lights and watch for light stress more diligently than I have so far.
HID at 600w is 17 inches above the rear plants, TS at 150W is 18 inches above the tallest front plant(Sally), seems to be working.
Added KoolBloom back into the feed, 2ml/gal, the buds have become little cotton balls so its time.
Cleaned up the lower end of the plants, was getting snaky down there.
5/9
pics
Ending the week by doing a little bending on the tallest branches on Baba, they were a full two inches higher than any other.
She is still growing a little but nothing to really notice.
Likes
11
Share

@MedicaL
Follow
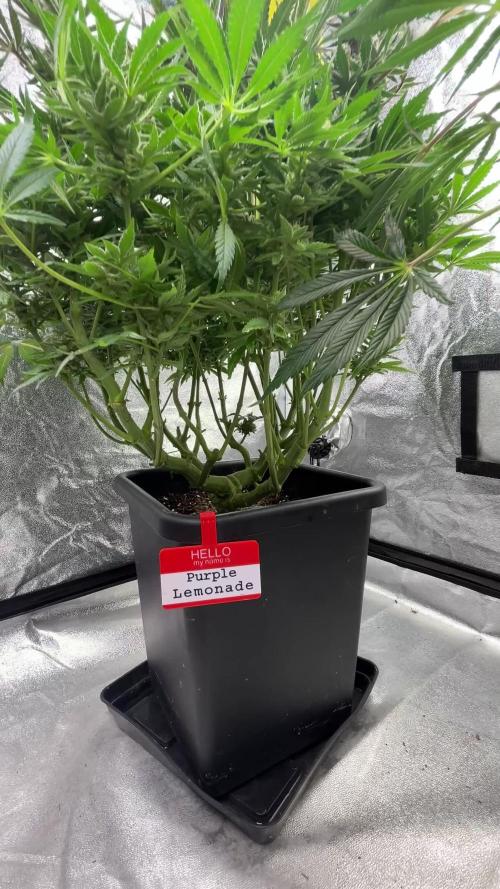
49 den od přepnutí
GG4 Sherbet krásně sype
:)
Purple Lemonade začíná házet barvy 👍🏻
Jinak spokojenost 🍀
Likes
25
Share


@DrGanj
Follow
Some mild defoliation this week. Budding up nicely and starting to frost. This girl was having a foliar feed of algae last week but this week she's getting light foliar sprays of the Lacalva stress treatment from madame grow on top of her other feed. I'll do this every 2/3 mornings and I'll only lightly mist the top. I'll concentrate most of my foliar feed on the lower growth and undersides, away from the buds. This is the main reason I kept so many lower fan leaves this time.
Likes
1
Share


@Paul_on
Follow
I am really happy with how this Sweet Mandarin Zkittlez is after doing , also their Papaya Zoap grew very well ,both with thick branching and stems that produce thick fat buds that smell gorgeous, sweet n fruity with some gassy aromas there too ,I will grow these strains again,
Thanks @Sweetseeds.com for another great one 👍 🙏 Sincerely: Paul_on 😶🌫️😉
Likes
20
Share


@LaGrassaFarm
Follow
¿Cómo se encuentran esta semana? Por aquí por mi zona no para de llover, y la verdad que me beneficia, ya que así reduzco la potencia del humidificador, y aprovecho la humedad del ambiente.
Que la seguimos manteniendo en 70% HR. Bueno lo mas destacable:
El primer día de la semana le apliqué una poda apical a la mayoría, y una poca FIM a dos de ellas (1 Zkit Kandy y 1 Super OG Kush)
Lo que se hace cuando aplicas la poda apical, es corta el ápice principal de la planta, por lo que, los demás brotes, lucharán por el poder de ser el ápice principal, resultando unas cuentas cabezas principales, y ensanchamiento de la planta. Y en la poda FIM, se corta un 70% aproximadamente, del ápice principal, la planta, actuará de manera parecida a la poda apical, pero no pierdes el verdadero ápice principal.
Les fue muy bien esta poda, en mitad de semana, ya se ven los brotes más estirados, comenzó la carrera!
Y a finales de semana, no se si en ese momento era buena idea o no, pero lo hice, les corté todas las hojas de abanico de la planta😵 con el objetivo, de eliminar las sombras de éstas, dadas sus dimensiones, abarcaban mucho territorio. Resultó ser bueno, al siguiente día se puede apreciar en el video, la estructura que están formado mis pequeñas💪
Muchas gracias, si te has molestado en leer mi pequeño diario de cultivo!
Dejen un comentario, si les gustó o si no, jajaja, espero que si, también se pueden consultar dudas y por supuesto, consejos.
Buena semana tengáis, paz.🙌


Likes
9
Share


@Posse
Follow
Everything looks good, even better than my gorilla glue, not very happy about the size of the buds, so making plans for a small hydroponics setup.
Likes
10
Share


@STAYINGONMYMAINCBATORUNTWO
Follow
Loved it all from the start! Could see from the rqs pot it thrived and the organic nutrients made it so much more alive! I mean I had little effort in her just had to water and add boost and I did that every fortnight! I’m so for organic now may try a one part solution next! Glad of the weights had so many nice dense buds on her and the initial taste was sweet and fruity and that’s before a full cure! Royal queen seeds deserve there place on the map 1 million percent