
Likes
Comments
Share


Likes
32
Share


@Sadhus
Follow
Bon le ph descend en flèche tout les jours, l' ec lui monte en flèche tout les jours, tout conseil est bien a prendre , quelque feuille brûlé sur les bords , et les pointes des feuilles qui se tortille

Likes
59
Share


@AsNoriu
Follow
Day 50. Took one more bottom set away .
Gave 150 ml of 6.3 water. Thinking to add some mono potassium with next.
All goes well for those conditions;))))
Day 55. 150 ml 6.3 pH water in. Decided to go with no food for as long as she is happy.
Happy Growing !!!

Likes
6
Share

@k0nz1
Follow
The Lemon Oranges are biests. 100% healthy and good looking/smelling and already full of trichomes. They are the fastest Ladies and a good week ahead in comparison to the other plants.
The Blueberry Pankaces are showing some nitrogen deficencies because the bottom fan leaves turning yellow, but nothing serious. Maybe they are Just heavy feeder. The terps on the BBP are very sweet and fruity.
The radical Juice ist the smallest due to little space and smaller pot size. But really nice aroma already.
The buds are getting bigger everyday. PK 13/14 this week.
19-26 Celsius
55-65 RH
Lights 100%


Likes
16
Share


@Reddgrower
Follow
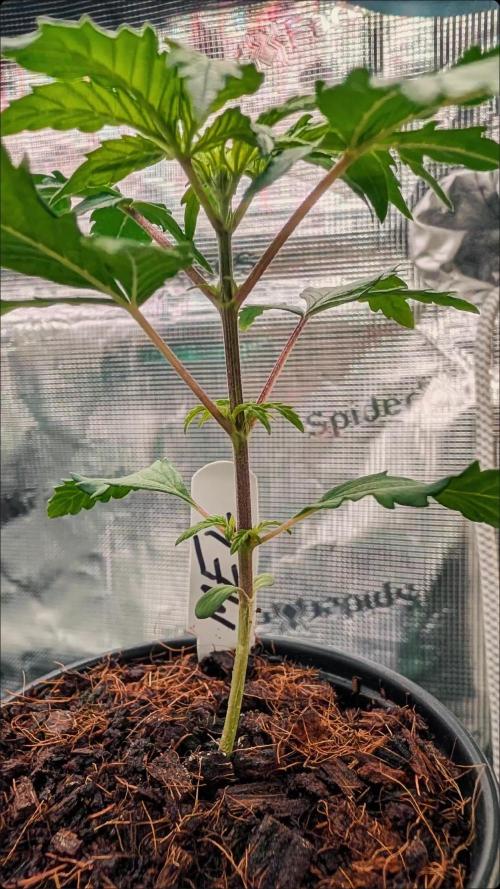
Veg week 2
Day 36 from seed
Topped 11/17/23
LST coming up
Microbial tea end of week
Likes
26
Share


@BatGuano
Follow
D54 - She is growing just fine. However it is a bit slower than my previous growth, and I think that this strain might grow a bit slower. I keep plucking one pair of stems and leaving the next one. I also LST new growing stems.
Beast - Cats are rally attracted to this plant and mine is always asking for it.
Likes
Comments
Share

@Inside_growlab
Follow
This was for real a crazy ride. After the other one did nothing in the first 4 weeks gave this lady the double power and goes full send. This white widow produces so massive big buds that all 3 dryferm bags are fully loaded! More than hyped to show you the final results 💪 🙌
Likes
2
Share

@MrLahey
Follow
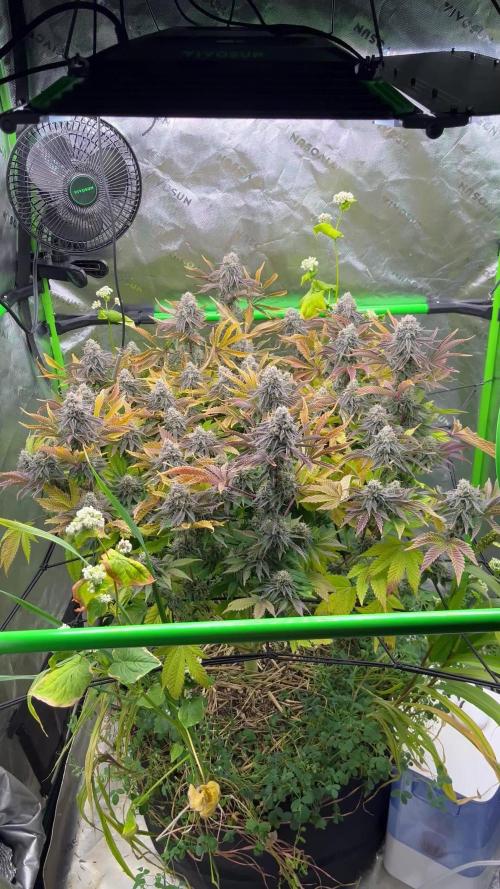
Day 53 - ripening up! She’s reduced her water intake down to one or less than one liter per day. Smell is phenomenal and strong - like spicy bubblegum almost although I have a post covid sinus infection so my nose is pretty stuffy still.
I’m thinking 2-3 weeks MAX until I chop her. She seems ahead of or right on track for “estimated harvest time” from the breeder. Top colas are primarily cloudy trichomes and some clear and amber. Lower bud sites are cloudy/clear trichs. I think I’ve a tendency to harvest a little early so we will see how long I can push her before I feel it’s chop time. I suspect that will be dependent obviously on the trichomes, pistils and bract size but also overall health of fan and sugar leaves which seem to be fading due to senescence, improper ph maybe and cold night temps.
Ordered an apera gs1 ph pen as I’m pretty sure my current pen hasn’t been accurate the past month or so. Also ordered a blumat watering system for next grow (chicken n waffles from Humboldt seed company).
My vcure arrives this week so I’m really excited for when I chop this plant and dry/cure her in it.


Likes
16
Share

@Cooky_420L
Follow
3' semaine de floraison c'est super bien passé, le stretch est fini, pas d hermaphrodite.
Bon Développement général des 2 plantes.
J'ai fait une petite defoliation dans la semaine et augmenté ma lampe et ces réglages resteront jusqu'au rinçage.
Full 75% IR/UV 100%
HR 45/55%
PPFD 781
Bonne semaine à vous les p'tites ✋️ vertes 🌱🌞🌱


Likes
12
Share


@Ctbest2023
Follow
Week went good some are further along then others but they all looking beautiful fan leaves starting to yellow and purple and such on some then others they just stretching still they won’t all finish at same time I don’t think but it’s ok

Likes
307
Share


@Ju_Bps
Follow
Hello growmies 👩🌾👨🌾🌲🌲,
👋 The 2 High Mars Keep Growing, look doing good 😁
💪 Started, topping, defoliation, training.
💧 Give water each 2/3 day
And vaporise plant with water + Plagron Roots (1ml/l)
0.5 l Water + Roots + Grow + Zym (1 + 4 + 1 ml/l)
0.5 l Water + Roots + Grow + Zym (1 + 4 + 1 ml/l)
💡Mars Hydro - FC 3000
50% 60 cm.
Mars Hydro Fan kit
Setting 7
Have a good week and see you next week 👋
Thanks community for follow, likes, comments, always a pleasure 👩🌾👨🌾❤️🌲
Mars Hydro - Smart FC3000 300W Samsung LM301B LED Grow Light💡💡
https://www.mars-hydro.com/fc-3000-samsung-lm301b-led-grow-light
Mars Hydro - 6 Inch Inline Fan And Carbon Filter Combo With Thermostat Controller 💨💨
https://www.mars-hydro.com/6-inch-inline-duct-fan-and-carbon-filter-combo-with-thermostat-controller
Anesia Seeds - High Mars 36% THC🌲🌲
https://anesiaseeds.com/product/high-mars/


Processing
Likes
27
Share


@Rap_a_cap
Follow
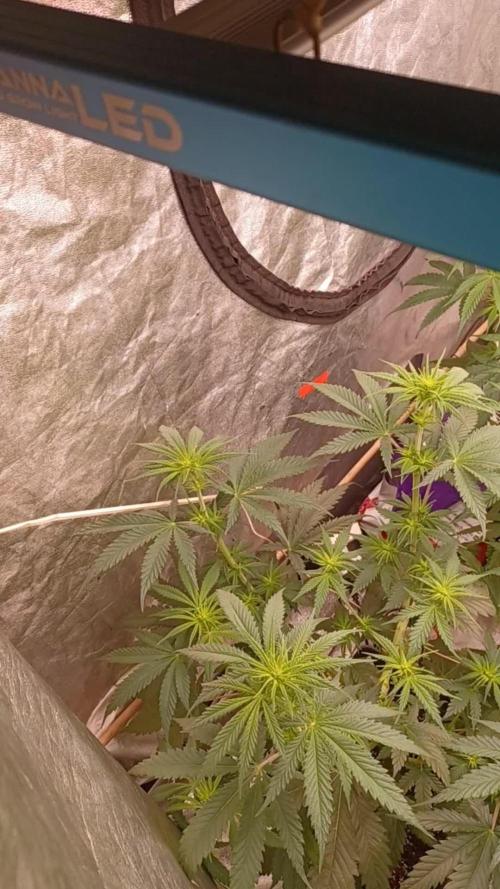
Entering pre-flowering. Calix and pistils appear, beginning of alternating growth, very stretchy. RG has grown a lot and well, the training made her very bushy, as I wanted it to be. Lots of beautiful branches now have space to form beautiful buds.
From now on I will let the main cola grow and stop to bend the main stem. Still no need 4 feed. 🤙👋
Likes
23
Share

@FatnastyzBudz
Follow
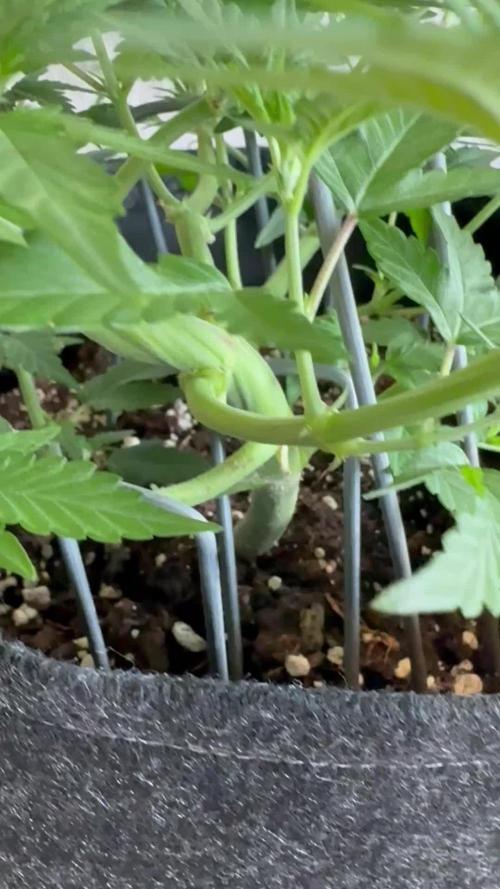
Fresh haircut, bigger home, and a few days to settle in. She's looking a little scruffy now, but the comeback has already started. 💚


Likes
33
Share

@DE_BW
Follow
Week 6 veg for the Guava Runtz. She’s right on the edge of full flower transition now, showing strong branching and a very even canopy across the plant. LST went smoothly, structure is set, and training is mostly finished from here unless the stretch demands minor adjustments.
Likes
7
Share


@agustinnnv
Follow
Buenos dias a todos. Es la primera vez que cultivo, en este caso es una Sour Compassion CBD. Esta planta fue un esqueje que me regaló un amigo. Cuando me lo dio estaba espigado en un vaso de plástico con 1 mes de vida. La pase a una maceta "Mad Rocket" de 16L. La hice vegetar 2 meses y luego la pase a florar el 8 de Marzo. Tuvo 111 días de vida y 71 días de floración. Con respecto a la fertilización que aparece, hace referencia a toda la vida de la planta. Saludos cannabicos
Likes
24
Share


@Alpha_Green
Follow
… I had 1 Sour Jealousy left over from the summer grow and still had plenty of promotion seeds from Sweet Seeds preserved in my seed bank. So I thought I'd let your favorite varieties compete against each other. As an autumnal challenge. At the same time, I upgraded my sphere of action properly and so I thought, let the last grow in my Secret Jardin HS 80 start a tricky experiment.
Done, done!
I couldn't look that fast, so incredibly fast did Sour Jealousy see the light of day - lots of auxins!
I had to give birth to all three Sweet Seeds. Remove the peel and peel off the seminal vesicle. I love this act. Filigree precision. All 4 were born in Root it - Rooting Gel.
And off to the fabric shoes - as always 17.5 liters for everyone. Super Soil reprocessed with:
- Perlite,
- Startrex,
- Pre Mix,
- some peat-free potting soil
- Mycotrex
- Dynomyco
- 1 Biotabs per shoe
- before fermented Orgatrex/Bactrex vaccination at the end of the 1st week
Likes
6
Share


@Flex1
Follow
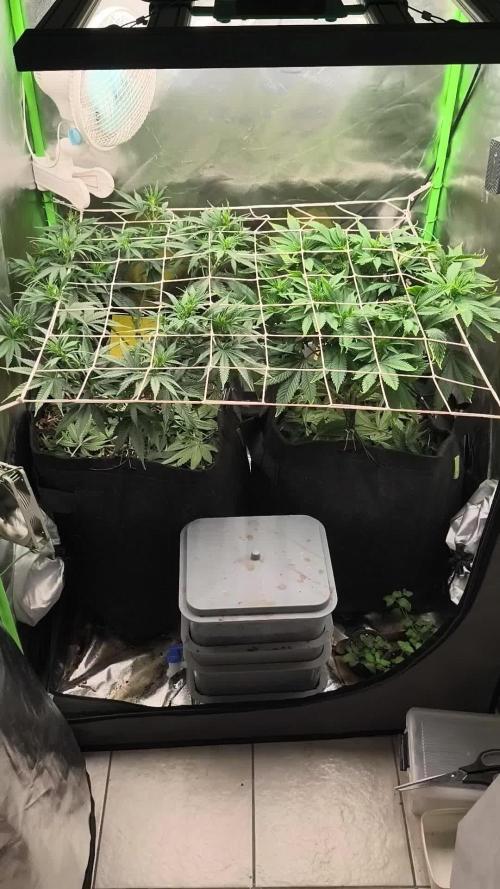
Day 40 from sprout: The watering helped the 30gal out after 1 day.
3/30 and 4/1 i topped each plant and continue to tuck leaves. Some defoliation on the lower fan leaves that were touching the medium a bit. I will defoliate a little more this week. Scrog will come out in another week or so.
I am seeing some canoeing at the very top of each plant. Could be a pH thing or from heat but chances are its a pH thing. I'll keep an eye on it and lower the water pH i am giving it if it persists.
Gave the 2L pot some water (a little top and mostly bottom water) on 4/1. Medium was looking very dry on top but wasnt showing signs of needing water so i didnt give it much.
