
Likes
Comments
Share

@Chrisandweed
Follow
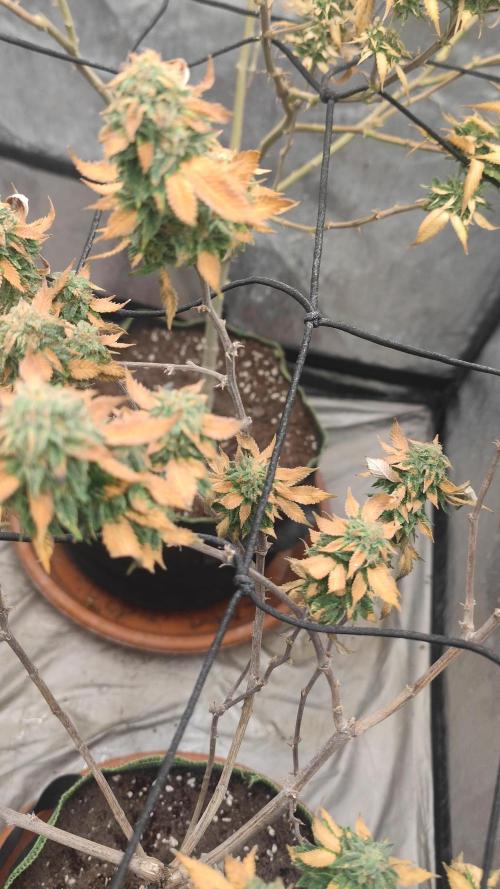
Pues la catastrofe pasó. Usé una bomba de descarga (un spray de esos que apretad y tira todo) que en teoria es compatible con las plantas dentro.... Se lío, ya se ve en las fotos y video que muuuuuchas hojas han reaccionado, fitotoxicidad y capúm. En fin, el cultivo lo voy a terminar, se salva mucha cosecha, en principio, pero eso.

Likes
33
Share


@Ema26
Follow
Hey guys! I chopped all the top half of the plant on 6/4 21:30 and the bottom half on 7/4 23:00. It’s now the 9/4 at 11:30 all of it sits in jars. Dried quicker than I wanted it to but all the buds were very dry too touch so I jarred them. I figured it was easier to remove moisture from the jars than it is to put moisture back into them so hopefully this plan works out🤞 she has a hay smell to her and I’m hoping this goes while curing her. All the nugs look great and some are mega dense and others are very airy. The more airy ones being from lower down I just didn’t have time to keep her going. She weighed in at 110+ grams wet, But I didn’t weigh any of the lower nugs. Dry weight all combined is 35.8 grams. 9.2g from the bottom half and 26.6g from the top half. I’ll re weigh it once I’m done curing. Very happy with this first grow I wasn’t expecting to have this good of a finish even if it isn’t the best💪 both jars are around 21c, the jar with smaller nugs has been sat at 55%-65% and the bigger nugs are getting up to %70 so I’ve been opening the big ones letting the humidity go back down again. I don’t expect to get the drying and curing done %100 but that’s what the first grow is all about. Roll on to my next 3 plants harvest day😎 I smoked all the material that went through the sieve while trimming and damnnn.. tasted like something out of Amsterdam. If the flowers end up like that I’ll be very happy😁 I’ll be adding a smoke report once she’s ready, really looking forward to it🤣
Id like to give a huge thanks to everyone who has helped and advised me on this journey! I’m taking all the info onto my next grow a lot more confident. My next 3 plants are doing brilliantly so far I’d appreciate it if you’d check them out! Onwards and upwards, stay safe and happy growing everyone!
With thanks Ema26😎🍁🌱

Likes
4
Share


@TheGreenGroomer
Follow
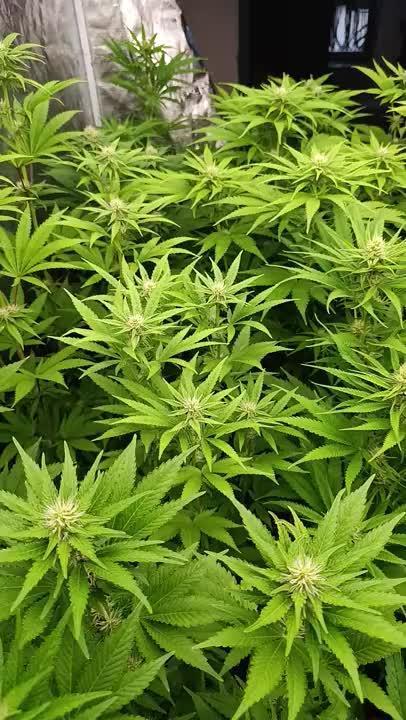
Today marks the start of Week 6, Day 2 for the grow, and I’ve got a few updates. The PPMS aren’t quite where I want them after the last couple of feeds, so I’ll be continuing with higher feeds to bring those levels back up. It’s a bit of a balancing act, but I’m staying on top of it.
I also made the decision to flip the light schedule from 16/8 to 12/12 today to initiate the flowering phase. I’m excited to see the plants start stretching and showing their full potential. It’s a big step, and I’m feeling good about the direction things are heading.
Happy growing! 🌱💡🌿
Likes
11
Share

@420DeepGrow
Follow
📆 Semana 5
El engorde entra en su fase más intensa. Los cogollos aumentan rápidamente de tamaño, los cálices se apilan y la producción de resina se acelera, mientras la planta alcanza uno de los mayores consumos de agua y nutrientes de todo el cultivo.
⚡ EC: 1.7 - 1.8
💧 pH:6.2 – 6.5
🌡️ Agua:21°C
🌫️ Humedad: 55–60%
💡 Intensidad: 1000–1100 PPFD
🔥 Nota de cultivo: La estabilidad en el riego, la nutrición y el ambiente será clave para conseguir cogollos más densos y resinosos.
Seguimos creciendo fuerte 💪!


Processing
Likes
7
Share


@420keef
Follow
So i had to take all my plants inside because i found bud rot on 2 of them & the weather wasn’t going to get any better, had to transform my bedroom into a grow room😂 & i have 2 more plants which i am going to finish next to a window.. The smaller plant to the right is a Northern light by zamnesiaseeds that has a seperate diary if you are interested! I really hope the bud rot doesn’t spread anymore & if anyone has any tips or tricks for that they are always welcome!
Likes
5
Share


@CannabisCultivate
Follow
Well, what can I say... Opium has done much more then our Montreal and we are pleased, they are strong girls to say the least. The Montreal will be a much enjoyed joint and hopefully doesn’t break the scale!

Likes
16
Share


@CannaTrope
Follow
I was selected to test some of Fastbuds new genetics. Seeds germinated in 48hrs and 6 days later it broke ground and hasent slowed down.
This grow is in my 4x4ft grow space located in an uninsulated shed. Each plant has a dedicated 150-200w LED from Viparspectra or Mars. Winter Temps in my area spike to -15C or more in Jan and Feb, so this will be an interesting and challenging grow. The grow room is 20-30C above ambient temperature, so there is a little manual and auto manipulation of grow Temps. See my video
Lights 50-75%, 30 inches, 75-120w per plant
Soil temp: 21-25C
Light cycle: 5:1
Air temp: 18-27C

Likes
45
Share


@chapadux420r
Follow
5 week have already passed since the start of the flowering stage. The stunned auto is healed and growing happily and strong with 40cm
Both green poison are already really sticky and with lots of the good sugar. The smell is getting really strong too and the buds are going big and fat. Plant height: 40cm
The critical + 2.0 are the ones with the strongest smell, but the shortest too with 35cm. The good thing about them is the 14/16 tops they have
Finally the skunk 47 wich was an offer and at the beginning, the slowest growing but became the tallest with 45cm. Strong, fruity smell and long and dense buds.
Just did the last defoliation on every girls, nothing too heavy and introduced the Plagron Green Sensations.
Tell me what you think guys! See you next week 😎


Likes
3
Share

@Adriano420
Follow
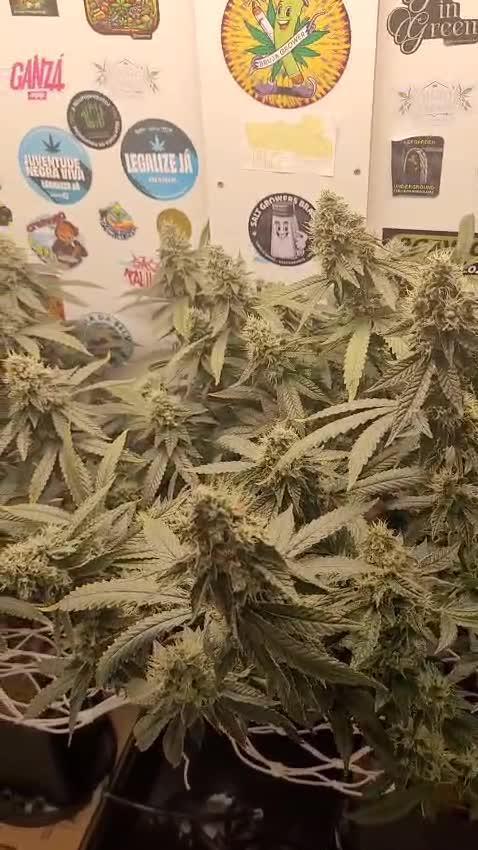
Parece que as plantas da direita chegaram no seu máximo, impressionante como engordaram os buds nos últimos dias
Likes
39
Share


@J_diaz420
Follow
Nuevamente se realizó una pequeña defoliación a hojas que tapen alguna flor 👍👨🌾🍀


Likes
470
Share


@PurpleWorship
Follow
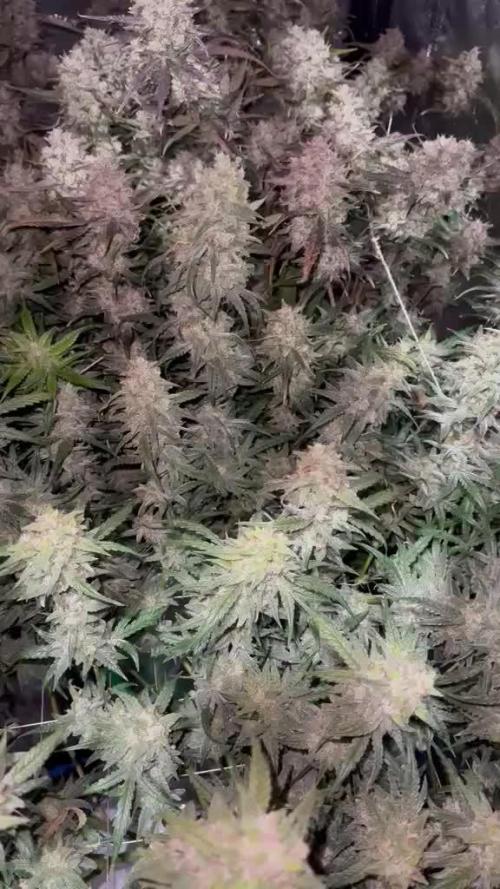
This plant is my 3th attempt, trying to find a specific taste I'm searching since I started to grow, in 2020.
Plant just been harvested. Now it gonna need some more weeks of drying and curing, before I can finally evaluate the taste 😍
So, for now, I can only talk about the grow, and I'll edit my diary later.
10 weeks of flowering (total 20 weeks), this was a long run!
Royal Queen Seeds say that strain usually take 7 to 9 weeks of flowering.
Mine took a bit longer.
She was absolutely the easiest plant I ever grown.
She never shown big sign of deficiencies. She germinated fast (seed direct to the pot).
I applied main-lining method (Nebula's / Topping at node 3, then node 3 again) and performed LST during the growth.
She perfectly dealt with it, never slowed by the toppings. I remember that she took less than 10 hours to recover from second topping, and re-allign every branchs to the light, after LST.
This was insane to me.
I did some mistakes during the grow :
1) Excess of Biobizz - Fishmix during grow, until early flowering. This been fixed by following the advices from @AsNoriu who suggested to transplant the Queen to a new pot.
So she moved from a 16L to a 30L during 2nd week of flowering. This was risky, it's not really recommended to transplant during flowering.... But the risk at to be taken.
And she totally did good. One week later, she was looking way more healthy. 2 weeks later, she was on fire!!!
2) I brook the main cola, same week than the transplant. I was trying to apply the LST again. A bit too much of tension, and Crack!
Quickly fixed. The plant don't even realized. She don't slowed bad signs, and continued to grow perfectly.
She spent some weeks outdoor during Veg.
And this is how i got some thrips problem during end of veg. I sprayed black soap, then water, and then Biobizz - Leafcoat.
This got rid of mainly all thrips. I was still seeing one or two begining of flowering, so I continued to use water and biobizz - Leafcoat.
But as she was flowering, she started to get totally covered of trichomes, even on fan leaves, and under the leaves. Thrips had no chance there.
So the plant ended this problem by herself, and I don't had to spray anything during flowering, and never saw thrips again ^^
Likes
13
Share


@LockDownGrow
Follow
Coming along lovely this blaze ,
I hope she fattens up from tip too base,
Smells lovely 😍

Processing
Likes
5
Share


@Mrg7667
Follow
Starting to smell so strong! Like chem candies for sure. Cant wait to see how it changes these last couple weeks, still been somewhat smokey as you can tell from the ash on her! Sun is red is certain pics. Its starting to get colder here at night for sure lows 50s going to get into 40s next week!
Just started top max excited to see how that affects growth also noticed a little burn on some leaves from yhe fish mix did a week 6 leaf trim for light penetration. Just so little light on my pourch gotta utalize it well!
Also did one more preventative spray with the growsafe

Likes
12
Share


@PedroAndHisPlants
Follow
Day 43 (Second Grow, Flowering Phase):
Hey everyone!
We’re well into day 43 of our second grow and deep into the flowering phase. 🌸 The transition has been amazing to witness, with our plants showing significant bud development. The plants are producing beautiful, dense buds, and it’s incredible to see the daily changes and the rapid development.
We’ve been maintaining the humidity between 50-60%, but we’re keeping a close eye on it to prevent any issues. We’re considering whether to get a dehumidifier to bring it down to the ideal 40-50%. The SCROG net continues to work wonders, ensuring even light distribution and supporting the heavy buds. Our Timor shield mantis is still patrolling the garden, keeping pests at bay naturally. She’s become quite the guardian!
The plants are looking healthy and vibrant. We're excited to see how they continue to develop over the coming weeks. Any tips or advice for optimizing this stage? Let us know in the comments!


Likes
4
Share


@Ninjabuds
Follow
My Rainbow Melon plant is still one of the biggest in the tent, and it's definitely the smelliest so far. The only thing I'm not crazy about is how big the leaves are getting.
It's been a challenging week with the constant rain and ridiculously high humidity. Keeping things dry indoors has been a real struggle. Despite the weather, I managed to flip all my feminized photoperiod plants to flower this week. I'm hoping the switch will go smoothly, but with this humidity, it's going to be tough.