


Likes
21
Share


@Insaniac_0
Follow
3/11 to 3/17 Veg Days 22 to 28
Week 3
Transferred to Auto pot base and continue to top feed for another week before setting up and turning it on. Began node strength training by simply pressing down on the branches to encourage water way repairs into the branches since these are the main arms of my mainlines. They more than doubled in size in just 4 days.
Feed this week was 3 cups of 6.3ph RO water once using 100ppm of Veg Mix (recipe Week 2) However, I also added 1ml/gal of CaliMagic (General Hydroponics 1-0-0). Then about 4 days later when I transferred to the auto pot, I added .5gal of plain RO water to top feed over the new soil.
Feed plan next week will be to start using the reservoir and autopot base feed by the end of the week. I expect to use another .5 top feed prior to that tho.

Likes
60
Share


@BOMbolenath
Follow
The plant is ready to flower. I covered the soil with inputs and did a little defoliation. It is developing well.


Likes
15
Share


@Lonelygrass
Follow
Strain veramente paura, ho commesso pochi pochi errori e ho gestito tutto molto bene!!!!
Ha un odore allucinante
Barneys farm siete i migliori!
Complimenti!

Likes
7
Share


@Suchy329
Follow
was soll ich sagen die Woche war gut Blüten sind gut gekommen hoffe geht weiter so

Likes
54
Share


@Benzels
Follow
Well its another update from down under.. and things are getting better with the Caramelo. She got badly burnt from my mistake of using too strong lime sulfur spray to treat spider mites and mold issues before they could take hold. And its kinda worked. lols...the mites are still there but reduced alot in number but I was almost ready to chop her after I saw how badly burnt all her new shoots were.
But Im glad I decided to wait a bit as she has recovered faster than expected and while im sure she still has issue at the root level from the rain drenching her for near on a week- she basically stunted after that and never showed much stretch at all when switching to flower-she grew maybe 15cms in height total after that so Im assuming some kind of root rot has her and any harvest will be a bonus. In saying that Im still not going to be suprised if she suddenly dies or gets badly infected with bud rot out of the blue as Im nursing her hard just to get her to this stage and in my experience a nursed plant may produce a yield but it will be weaker than its meant to be and reduced by around 50% of the yield you should have got. if she was indoor id have ripped her out after the sighs she was stunted presented and started over with a new plant. But out doors I dont have that luxury so I will nurse her thru and hope for the best but expect less than average results.
Zkittles though is loving life and just LOOK at her!! When you realize she was the same size as the Caramelo when the rain hit and now look at the difference- thats why i say when you see obvious signs of stunting-rip the plant if you can and start over, it may recover but if it was serious then the plant will never show its true potential and you may think those genetics are shit. Ive never grown the Caramelo before now so if i judge it on this result I will say the genetics are shit when the plant likely had root rot from 3 weeks before even switching to flower. And the BC buds hash plant is FINALLY flowering too now. For a 90% indica it sure is taking the longest to flower. I wonder if its the old school genetics at play here-This strain been around since the 70's while the ZkittleZ is a modern hybrid so maybe the newer genetics really are all they are cracked up to be. Thats why I love doing side by side grows out doors with diff genetics and see what they can really do. You should see my mates BC hashys- lmao, he said he wanted bigger plants than last year as he got "bonsai" plants from someone else. Now he has to tie down trees that are growing over his 6ft fence!! And they only just went into flower last week.
But on that note- Will update more now as things progress towards harvest. Cheers for stopping by and if your still reading this-nice work, most pple cant read shit these days so double points for making it this far.
Likes
4
Share


@Skillgrower
Follow
Começamos a 3° semana no domingo está agora com 18 dias a correr bem, vou dar continuidade ao lst ate à 5 ou 6 semana e mudar o ciclo pra floração
As mais pequenas no vídeo uma tem agora 12 dias e a outra está com 15 no fim da segunda semana começou hj o lst

Likes
3
Share


@iorabiadopo
Follow
Letting her grow without any major cables.
The photo from the question section is not referred to this plant.


Likes
4
Share


@Finsfan
Follow
Finally in full flower mode. Ready to start putting on some serious size. I turned the lights up to 80% a couple days ago and they both are taking it well. No light burn yet that I notice.
I'm not sure if I should start bringing the lights closer at 80% or keep the distance but instead
Increase power to 90%. Going to feel it out as we go. Happy so far for sure.
Update: increased light to 100% . No lead burns or weird looking leaves yet.. Just bulking up and very thirsty!
Doing a nutrient/nutrient/water feeding schedule now.

Likes
13
Share


@GrandmasBoy2021
Follow
Week 10,
Week 10 has been fun. The buds are becoming denser and starting to almost look like a finished product. I am planning on harvesting the plant the first week of next month, so three weeks or so and counting!
I am adjusting the tie downs twice a week trying to get the buds as much sunlight as possible.
I am watering every 3 days with 6.0 ph water. I have been putting a teaspoon of FloraNova in the water with a tablespoon of molasses mixed in but it appears she received a little nutrient burn. I'm not to worried about it because I wanted to make sure the flower sites received enough nutrients to make some dense dank buds. It isn't a huge burn but a little. As a result I started mixing only half a teaspoon of FloraNova in the water to make sure any future burn doesn't happen.
I am excited about the plant, she is starting to look like a thiccy ha I am probably going to starting flushing in three weeks.
Let me know if you have any questions/concerns/comments. Happy growing Growmies 🙌
Likes
Comments
Share


Likes
2
Share


@Mr_nugs_lover_David
Follow
The nuggets are very sticky and compact, they are frosty as hell and the aroma is very strong already. I loved this strain. She's such an amazing autoflowering strain. Very powerful.
Likes
Comments
Share

@HOME_GROWBOOK
Follow
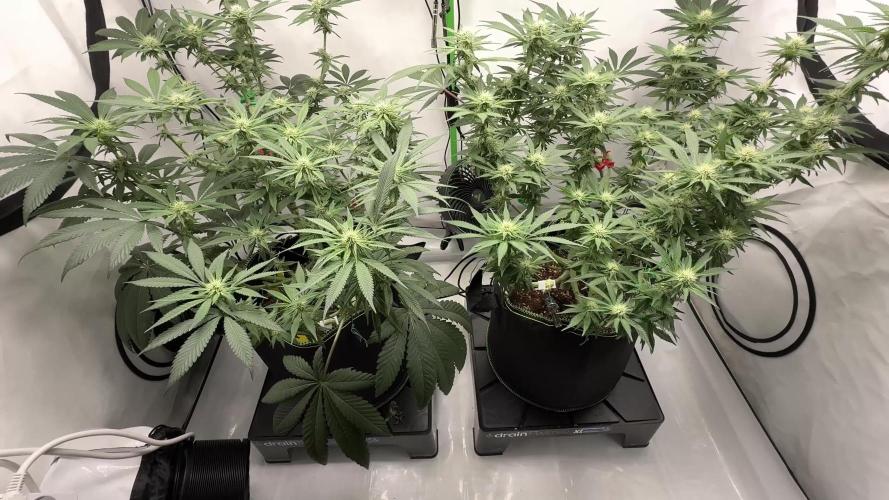
Der Stretch neigt sich dem Ende zu und das Netz wurde entfernt – beide Pflanzen stehen jetzt stabil und frei im Raum.
Nach dem Lösen des ScroG zeigt sich deutlich, wie kräftig die Struktur aufgebaut wurde:
dicke Stämme, starke Seitentriebe und ein gleichmäßiges, volles Blätterdach.
24K Gold reagiert mit einem beeindruckenden Stretch-Finish. Ihre Haupttriebe sind kräftig und leicht über dem Restniveau, perfekt verteilt für maximale Lichtausbeute. Die ersten Blütenansätze sind klar zu erkennen – kleine weiße Härchen schießen an allen Spitzen hervor.
Gelato 33 bleibt etwas gedrungener, aber sehr kompakt und buschig. Ihre Top-Sites sind gleichmäßig verteilt und zeigen ebenfalls die ersten Pistillen. Das entfernte Netz hat ihr Raum gegeben, sich frei nach oben zu entfalten.
Eine gezielte Entlaubung wurde vorgenommen, um die unteren Bereiche zu öffnen und die Luftzirkulation zu optimieren. Das Laub ist tiefgrün und gesund – keine Mängel oder Verbrennungen sichtbar.
Düngung & Werte:
• 💧 Canna Coco A + B → 6 ml/l
• 📈 EC: 1.6 pH: 5.8
• 🌡️ Temperatur: 25–26 °C
• 💧 Luftfeuchtigkeit: 50–55 %
• 💨 Umluft: stark & konstant
• 💦 Tropfbewässerung mit kontrolliertem Drain
Der Fokus liegt nun voll auf Blütenbildung – die Pflanzen stehen stabil, haben den Stretch abgeschlossen und beginnen mit sichtbarem Blütenaufbau.
Ein sehr kräftiger Start in die Hauptblütephase!

Likes
9
Share


@Unnamed
Follow
This is the start of my second grow and also second Northern Light Auto from RQS, the goal is to hit #1 in g/plant for that Strain.
I didn't take as many notes as in the last grow but there are timelapses, some photos and metrics from probes.
Started with 3 Seeds and then picked the 2 strongest.
The System is a NFT System but due to the size of the tube and root growths the solution with submerge the roots ~70% later on.
To combat that I use 3 small 1.5w air pumps, these are super silent, if one dies I got 2 more running and to be honest air pumps used in DWC systems are often oversized and rely on Broscience.
In my Salad/Herb NFT Systems I don't use any air pumps and the plants are just fine and grow great.
This time I added sprinklers to humidify the air inside the tube, slightly moisturize the Rockwool and speed up root growths.
Spoiler: Was a great success :)
The ratios for the fertilizers are not accurate in the following weeks, I have a 120l Reservoir that is filled 90-110l I top it up once or twice a week to sustain PH and EC, if you want to copy it just go by the EC and use the B (Calcinit) and A (Kristalon Blue/Orange) 50/50.
I mix the solution myself with dry salts that I bought in bulk 25kg bags.
4l Water(distilled/RO preferably, tap water is OK) + 1kg salts mixes just fine, keep the solution dark and cool and it will stay stable for months.
Dry salts don't expire if kept cool and dry so only mix what you need and keep the rest stored as dry salts.
40ml A + 40ml B is about 2EC and 6PH with my tap water, very similar to Canna, Plagron etc. isn't it? just with the twist that I pay ~20% of the known brands.
P2O5, K2O, MgO etc. are always the same as long as they are produced by a good manufacturer, Yara is a world leader in fertilizer production just not to be found in you general hydroponics or hardware store.
Any other known manufacturer is fine as well, pick the cheapest.
Check Hoocho on Youtube to see a guide on how to mix your own solutions, it ain't that difficult trust me.
From week 5 onwards I also use Oxygen granulate (KMPS, CAS-70693-62-8, 2KHSO₅ * KHSO₄ * K₂SO₄) if you want to use this check pool supply stores and buy the cheapest.
Keep this one dry, cool and dark.
I used a old pill bottle to keep some ready to go because it came in a 1kg container and I only need 2-4g per serving + the bottle has a silica pack in the cap.
From week 6 onwards I used Haifa Grow Clean for Details check week 6, I use this one as dry salts and add it directly to the tank, it does not interact in a bad way with the solution.
For meassurements I use a generic 8in1 Meter "PH-W218" branded by many companies, as usual, check stores and buy the cheapest. (Check week 1 for an image of it)
I got mine from Aliexpress for ~70€ it uses the Tuya app so you can always check your metrics and export them aswell.
The PH and EC probe are accurate and are giving me stable results for almost 1 year now, I re calibrate the PH probe once in a while and it is tops 0.15 off after a month, always double check your results with PH drops/paper.
Bluelab is... A LOT more expensive for less value.
For the timelapses I use 2 Tappo C210 2k Cameras, these have the ability to make the stream available trough RTSP so that you can access it trough a link in a browser and that way I snap a Screenshot with a raspberry pi :) after that I just render it with blender to a timelapse.
Sadly they seem to have trouble with the bright lights and I get image trouble over the course of the day, if you have a recommendation hit me up :)
The script I use to take the Images:
#!/bin/bash
##########################################################################################################################################
##### A script to save images from a rtsp capeable IP cam, Tapo C210 (2k image quality) for example in my case.
##### Images are saved in a directory named "2024_01_01" for example, it uses the "date" command within the system it is running on.
##### You can then render the images to a timelapse, I use blender for that.
##########################################################################################################################################
RTSP_URL_LEFT="rtsp://:@:/stream1" #sets the variable for cam LEFT access
RTSP_URL_RIGHT="rtsp://:@:/stream1" #sets the variable for cam RIGHT access
while true; do
TIMESTAMP=$(date +"%Y_%m_%d_%H_%M_%S") #sets the timestamp variable
DIRECTORYLEFT=/$(date +"%Y_%m_%d") #sets the directory variable with current day for LEFT
DIRECTORYRIGHT=/$(date +"%Y_%m_%d") #sets the directory variable with current day for RIGHT
mkdir -p "${DIRECTORYLEFT}" #makes a directory for each day if it doesn't exist for LEFT
mkdir -p "${DIRECTORYRIGHT}" #makes a directory for each day if it doesn't exist for RIGHT
ffmpeg -y -i "${RTSP_URL_LEFT}" -frames:v 1 -vf "format=yuvj420p" "${DIRECTORYLEFT}/${TIMESTAMP}.jpg" #captures a frame from the RTSP stream and save it as a JPEG image for LEFT
ffmpeg -y -i "${RTSP_URL_RIGHT}" -frames:v 1 -vf "format=yuvj420p" "${DIRECTORYRIGHT}/${TIMESTAMP}.jpg" #captures a frame from the RTSP stream and save it as a JPEG image for RIGHT
################################################################################################################################
##### Waits for 180 seconds, change that depending on how precise you want the timelapse to be, less waiting = more images
################################################################################################################################
sleep 180
done
Hope you like my diary, leave a comment and a like if you like it :)
Likes
13
Share


@clik2121
Follow
new tent coming soon the auto northern lights stretched double size the color of the leaf i think its light burn or it needs feeding.
Likes
1
Share


@Olduffybastard88
Follow
You can see the girls on week 4 right at the end of video aprry didn't get much time with plants this week will update more in the coming days the ones flowering are on day 5 the rest will veg untill there finshed


Likes
16
Share

@420DeepGrow
Follow
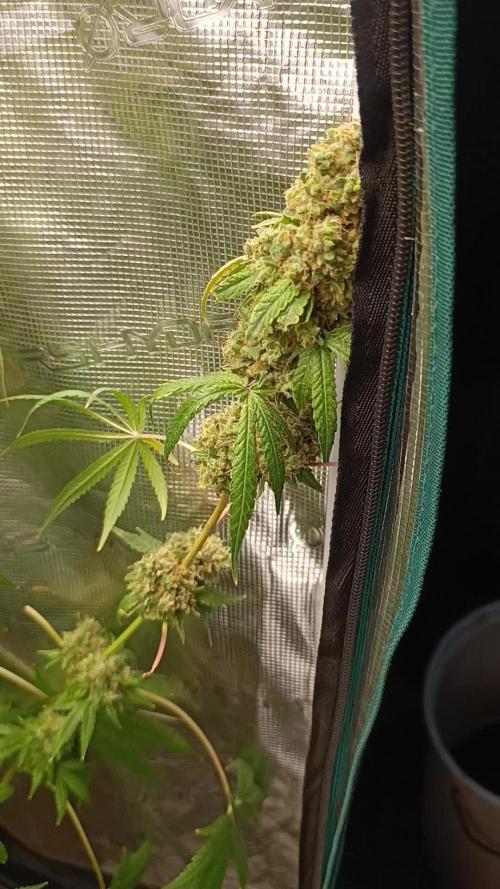
📆 Semana 12
Las flores continúan en su fase final de maduración, ganando densidad y terminando de desarrollar su producción de resina. Los pistilos siguen oscureciéndose y retrayéndose progresivamente, mientras los cogollos presentan un aspecto cada vez más compacto y maduro.
Entrando ya en la recta final, cambio la nutrición habitual por Master Piece, comenzando la fase de lavado de raíces y preparando las plantas para la cosecha. Mantengo unas condiciones estables para que puedan completar tranquilamente su maduración durante estos últimos días.
💧 Master Piece: fase de lavado de raíces
💧 pH: 6.2–6.4
🌡️ Agua: 19–21°C
🌫️ Humedad: 40–45%
💡 Luz: PPFD 900–1000
🔥 Nota: Última etapa antes de la cosecha. A partir de ahora, el objetivo es acompañar la planta durante su maduración final y dejar que las flores terminen de expresar todo su potencial antes del corte.
¡Seguimos creciendo fuerte! 💪
