


Likes
Comments
Share

@420abbybox
Follow
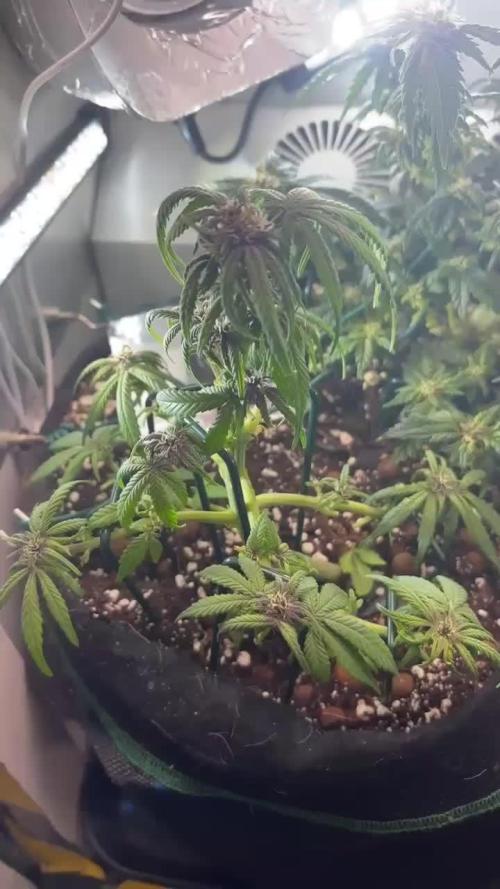
The autoflowers development is coming along well first 2 in the video are lemon cherry cookies auto and last one is frozen face auto the Lemmon cherry cookies have a purple streaks but the first more purple than the second and frozen face auto is bulking up slowly but surely


Likes
10
Share


@cezario
Follow
So from this point I had lost hope. the plants weren't looking to good. But with some help we went to town on the plants and did some LST'ing and hoped this would help the plants.

Likes
3
Share

@SkullRipper
Follow
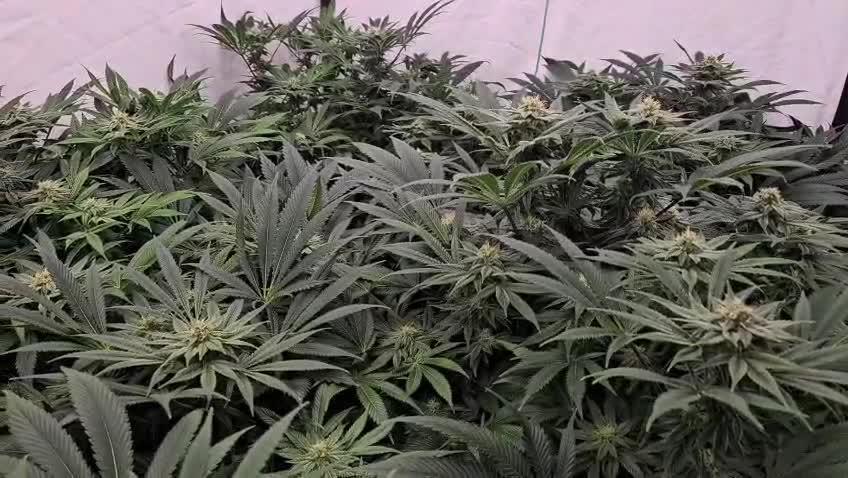
Day 32 of 5th week of Flowering,
This week I have not been able to run the C02 due to the low temps I am having ATM,(not even the 1.5 kw heater is up to the job!)
Normally at this point I would be swapping the L.E.D. lights out with a pair of 600w Hps, However been there b4 and did exactly that but the bud just is not as good and of less strength/dense.
First notice of some pistols turning brown.
All the plants have been removed and defoliation has been strong, They is also a notable difference in smell this week rising a bit over low but still easily managed.( If smells becomes a problem then I will be adding UNA gel to the air out ducting after the fans and filter! )
Ttfn Skully.


Likes
23
Share


@Piorkeed
Follow
Week 11 started
I think that the plant is near to the end, maybe a couple of weeks or less. During this week I will start to check trichomes, my objective is to have 50-50 milky and amber. This will be the last week with nutrients.
D71: changed the water to the pot, added 30ml bloom, 15ml micro, 10ml pH-.
D73: first trichomes check today: 40 crystal, 50 milky, 10 amber. Added four liters of tap water.
D74: added 3 liters of tap water with 5ml of pH-
D75: added 3 liters of tap water.
Processing
Likes
7
Share


@Stonesgrowing
Follow
So im a bit too late with this week. Had a busy weekend. My Plant, called Marie, is in flower day 3 now and my god I never had a plant stretching so intense. In her 3 days of 12/12 she stretched about 10 cm. She's kinda tall and i f*cking love her structure. She had trouble with too much nutrients (my fault)but she recover nicely after pure water feeding for about a week. Lets start to see her fatten' up🍁🙏
Processing
Likes
26
Share


@APOLLO
Follow
a week or so and you could never tell there were two plants in the tent ! she has taken over the entire space now.
Increased all the good stuff up a notch because she has never got any burnt tips or anything, she just drinks and drinks. Every 24 hours, 4 litres of nute water (with about 400ml runoff). I mean I never thought a plant would drink that much ??? I am questioning the feeding method, this is very binding... an irrigation system perhaps?
Meanwhile off she goes, no fucks given

Likes
57
Share


@Kmikaz420
Follow
Alors aujourd'hui je fais du BHO et pour vous remercier de votre fidélité je vais vous montrer ma méthode (que j utilisé dans le passé (j ai depuis acheter du matériel un peut plus professionnel ;)
Alors pour tous sa il vous faudra
=1..2 seringue de 300ml ou plus dispo sur mamazon
= des filtres à café (NON BLANCHIE !!!)
=des colier de serrage pour fixer les filtres.
= et bien sûr du gaz (butane et en général je prend du gaz filtrer 12x pour éviter les saleté qu il peut y avoir dans certain gaz .
=et enfin il vous faudra un bol pour récupérer tous le nectar^^
(J UTILISE DES MOULES A GÂTEAUX EN SILICONE (rien qui accroche)
Mais si vous utilisez un extracteur en plastique et ou un moule en silicone il faudra absolument prendre du butane et non pas DME =CAR LE DME ENMENE DES PARTICULES DE SILICONES EY DE PLASTIQUE LORS DU GAZAGE
Voilà voilà je vais commencer et prendre des vidéo au fur et à mesure que je vais poster pour vous montrer .
Après 1heure de dégazage vous aurez une fine couche ai fond qu il va falloir travailler pour y faire rentrer de l air (ne t inquiète pas j vais poster une vidéo se soir ou tu pourra voir comment faire..)
Le crumble est je pense la seul sorte de bho que l on peut faire sans trop d équipement (pour le reste il faudrais evaporatrice rotative ou autre etc )
Avec le crumble c est votre main qui fais le travail = l objectif est que l air touche toute les partie de la patte comme sa le gaz sort et l air oxyde les trichome etc etc
Likes
13
Share

@TrickzGrowz
Follow
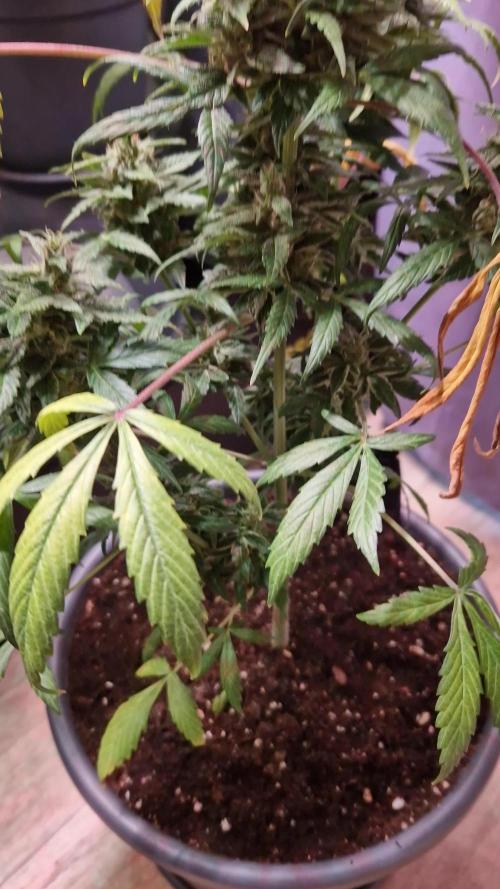
Sie hätte sicher noch 2 Wochen gekonnt. Aber Heute ist schon Ernte bei den anderen Ladys.
Dafür das Sie eigentlich nur 12/12h Licht bekommen hat, bin ich sehr zufrieden mit der Pflanze. Ein echt hübscher Pheno und der Geruch ist einfach übertrieben intensiv! Die werde ich sicher noch einmal anbauen!
Likes
Comments
Share


@Wizardgreen317
Follow
It’s a okay but one hermied on me but this is not something I wouldnt grow again


Likes
19
Share


@Captensmokey
Follow
I participate in the dutch passion master grower with this 3x auto duck dutch So vote for me. And follow this crazy breeding of the autos duck🦆🍀💯


Likes
28
Share


@SooSan
Follow
Dans l'ordre :
Blueberry
Dutch Passion
Blueberry
00 Seed
Blueberry
PEV Seed
Blueberry
Bulk Seed
Animal Cookies x Blue Monkey
Exotic Seed
Red Hot Cookies
Sweet Seed
DoSiDos x Purple Punch
PEV Seed
Purple Shot
Exotic Seed


Likes
19
Share


@Master_weeda
Follow
Bonjour à tous les padawans et maîtres jedis
Tout d'abord merci à James de Royal queen seeds de me permettre de faire cette culture
Je rappelle je n'utilise que le strict minimum du matériel nécessaire à une culture correcte au prix le plus bas possible
MATÉRIEL CONFIGURATION
Box 80×80×160
Lampe led greenception GC4 250WATTS
Ventilateur à pince 15 watts
Xiaomi Deerma humidificateurs 5L
Hygrometre thermomètre
Extracteur PROFAN 107 m3/h - 100
Prise programmable électronique ×2
1 pot geotextile noir 10 litres (RQS)
RQS feeding easy boost organic
RQS easy combo tablets
Substrat cellmax bio ligthmix
Fil de fer et pince coupante
Microscope
Petite balance de précision
CULTURE ÉTAPE PAR ÉTAPE
J'ai tout dabord fais germé ma graine avec le easy start de Royal queen seed et je suis agréablement surpris car franchement le taux de réussite est très élevé (9 graines sur 10) simple d'utilisation et très efficace.
Une fois la plantule sortie et d'une hauteur de 2 ou 3 centimètres je la prend délicatement et la place directement dans son pot définitif. Je préconise des pots allant entre 10 litres et 15 litres pour des autofloraisons cultivées en intérieur.
Le pot aura été préalablement préparé (video dans diarie) avec 50 grammes d'engrais RQS easy boost organic, soit l'équivalent de à peu près 5 grammes par litre de substrat.
Je dépose donc la plantule dans son pot définitif je recouvre un peu de avec de terre je tasse légèrement et j'arrose pour garder le substrat humide pas plus
Je place ma lampe led 300watts à environ 90 centimètres de la plantule avec un cycle de lumière de 24/24 pendant une semaine. Au début de la semaine 2 le cycle de lumière passera en 20/4 grace a un programmateur car c'est pour moi le cycle de lumière qui offre le meilleur rendement pour une autofloraison.
Jour1: léger arrosage
Jour2: léger arrosage
Jour5: préparation de 3 litres d'eau ph6.3 à laquelle j'ajoute une tablette grow easy combo RQS ensuite arrosage avec 1,5 litre d'eau ph6.3
Likes
99
Share


@Sativagrad
Follow
I have already said everything, in principle, I advise everyone to grow this variety, I got an amazing tree half purple with giant cones and a large harvest, I am delighted!

Likes
2
Share


@Travislynn21
Follow
Very satisfied so far. This is the second week if you don't count the first week from seed to poping up! Only watered it twice in two weeks. My mix drains well but holds the right moisture for growth. Next week will be the real proof of genetic quality!


Likes
4
Share


@eldruida_lamota
Follow
Que hay familia, vamos con la octava semana de floración de estas Runtz de Zamnesia y empezamos con riegos intercalados cada 48 horas controlando siempre el Ph, que ahora mismo lo dejamos en 6.5 .
Temperatura y humedad dentro de los parámetros correctos.
Seleccioné de las 5 plantas, 3, tienen un buen color, se ven bien sanas, todo normal hasta ahora, van madurando y están produciendo una tricomada bastante seria, están increíbles, ya entramos en la recta final, aunque no me de tiempo acabarlo para el concurso, acabar acabaremos el diario, esta semana ya están solo agua, y puede que las aguante una semana más.
Hasta aquí todo, buenos humos 💨💨💨.

Likes
2
Share

@Stoney_Stark
Follow
Sticky Mango Auto — Week 4 Update
Grower: Stoney Stark / Little Lilly Farms
Stage: Late Veg → Early Flower Transition
⸻
Growth Overview
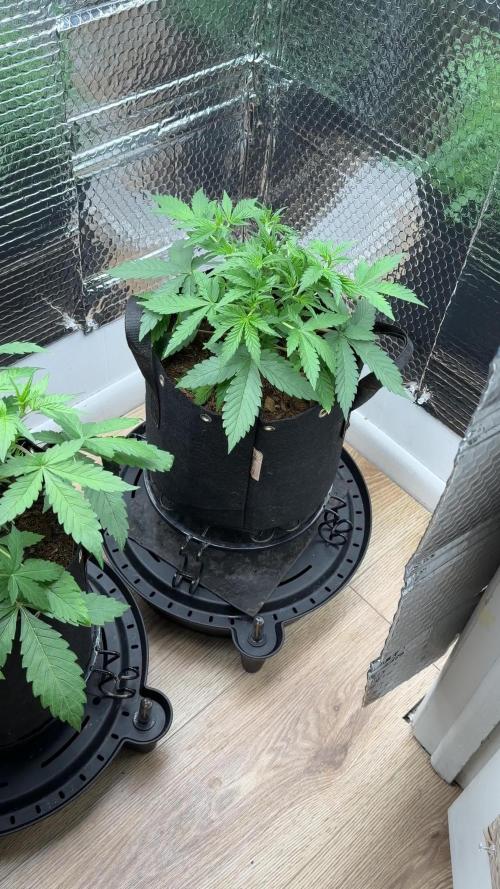
By Week 4, a noticeable size difference has developed between the two plants. One plant is nearly double the size of the other, while the smaller plant has entered early flower first, showing visible white pistils. This staggered development is not uncommon in autoflowers and appears to be influenced by early root-zone moisture differences.
The larger plant remains in late vegetative growth, while the smaller plant is clearly transitioning into flower.
⸻
Moisture Management & Wicking Adjustments
2/1
Signs of overwatering observed. Pots were placed on stands to remove them from the wicking rope and mat. The absorbent pad was removed from the pot showing more stress, while the healthier plant remained on the mat.
After ~11 hours, both plants were returned to their wicking material.
2/2
Plants continued to show signs of excess moisture. Both were again placed on stands to fully disconnect from the wicking ropes.
2/3
Decided to extend dry-back by another 24 hours to allow the root zone to re-oxygenate.
These adjustments helped slow water uptake and encouraged healthier root respiration before flower onset.
⸻
Flower Initiation
2/5
First signs of flower observed — white pistil hairs visible.
2/6
Smaller plant clearly showing pistils. Both plants were low-stress trained by tying down branches to open structure and manage height differences.
⸻
Feeding Log — 2/6
• Total volume: 1 gallon (split evenly)
• Amount: ½ gallon per plant
• PPM: 877
• pH: 5.9
Nutrients (per gallon):
• Armor Si — 1 ml
• Micro — 5 ml
• Grow — 2 ml
• Bloom — 4 ml
• CaliMagic — 1.5 ml
• Floralicious Plus — 1 ml
⸻
Nutrient Strategy & Purpose (Week 4 Transition)
Armor Si (Silica)
Used to strengthen cell walls and improve stress resistance. Especially important here due to recent moisture stress, training, and the upcoming stretch phase.
Micro
Provides essential micronutrients (iron, manganese, zinc, copper) that support chlorophyll production and enzyme activity. Keeps growth balanced as the plant shifts metabolic focus toward flowering.
Grow (Reduced)
Nitrogen is still needed, but at a lowered rate. This supports continued leaf function without pushing excess vegetative growth, which can be counterproductive once flowering begins—especially for the smaller plant already showing pistils.
Bloom (Increased)
Phosphorus and potassium are ramped up to support flower initiation, root signaling, and early bud site development. This helps both plants transition smoothly despite their size difference.
CaliMagic
Calcium supports cell division and structural growth, while magnesium is essential for chlorophyll production. Critical in coco, especially during stretch and early flower when demand increases.
Floralicious Plus
Provides organic acids and bioactive compounds that enhance nutrient uptake, improve root efficiency, and help buffer stress from training and environmental adjustments.
⸻
Notes Going Forward
With one plant entering flower ahead of the other, feeding will remain balanced but conservative on nitrogen while continuing to support early bloom development. Moisture management will stay a priority to prevent further root stress and ensure a smooth transition into full flower.
