





Likes
5
Share

@Pot_Portraits
Follow
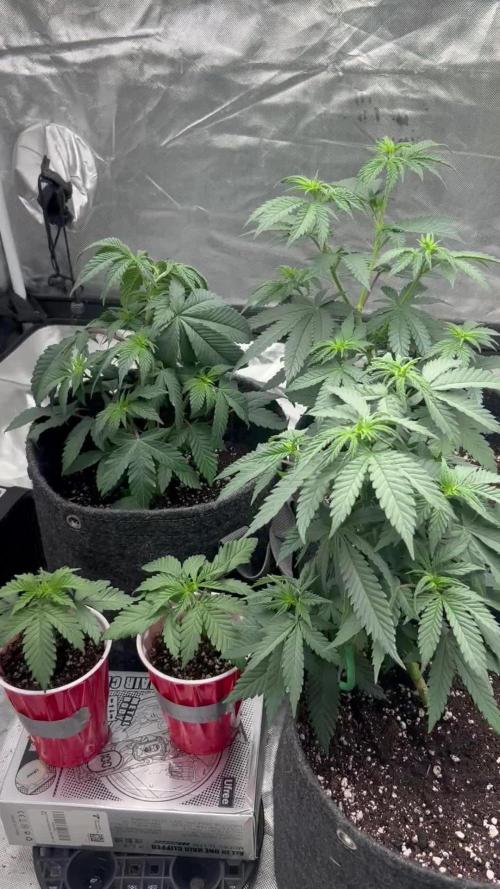
Flower week 2 ! She is doing amazing, tallest plant in the tent, she is much happier now with lower water moisture levels.
She is growing super fast, every day she puts in weight !
Very happy with this one !
Likes
37
Share


@D33jW
Follow
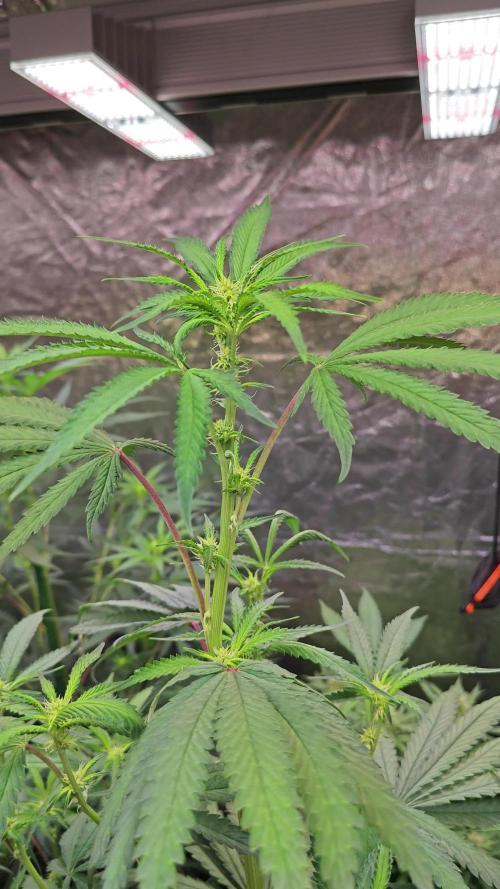
FLOWEEK: 8 - 57FLO
Light: 11/13
RH: max 55%
TEMP: 24C
PPFD: 750
RH maximum 55% target is 45%
Cold in night just 17C
Last week to harvest I will make some flush..


Likes
10
Share


@GaiaG
Follow
This week seemed to go by very slow. The plants are growing at a slow rate. It’s my first grow abs I was unsure of when to turn the lights on. I had some plants still as seeds and some has germinated. I turned the lights on a day or 2 late I believe so some of my plants began stretching.

Likes
94
Share


@Ganja4Show
Follow
This is going to be my very first grow.
very excited :D
As soil I'm using Biobizz light mix mixed with 20% Cocos Brickx from Plagron.
No nutrients in this stage just water.
Light schedule 18/6
Day 5 - 4 out of 5 seeds have sprouted. still have a little bit of hope for the last one. let's wait a little bit more.
Day 6 - Seed # 5 I assume is dead. it was still completely intact decided to try a revive on it by putting it in paper towels (wet) but that didn't do it. the worst thing is that I had my time lapse camera on this seed 😭.
The other lady's doing well growing at the same pace. let's do 1 more night before we hop on to the next week of this story.
Happy days friends 😀

Likes
12
Share


@BudXs
Follow
Not saying a word about these. Fuck, too late
Pretty good so far. Bangdangbuds (Hawkbo) did them much better tho
Likes
27
Share


Likes
8
Share

@Jardin33ro
Follow
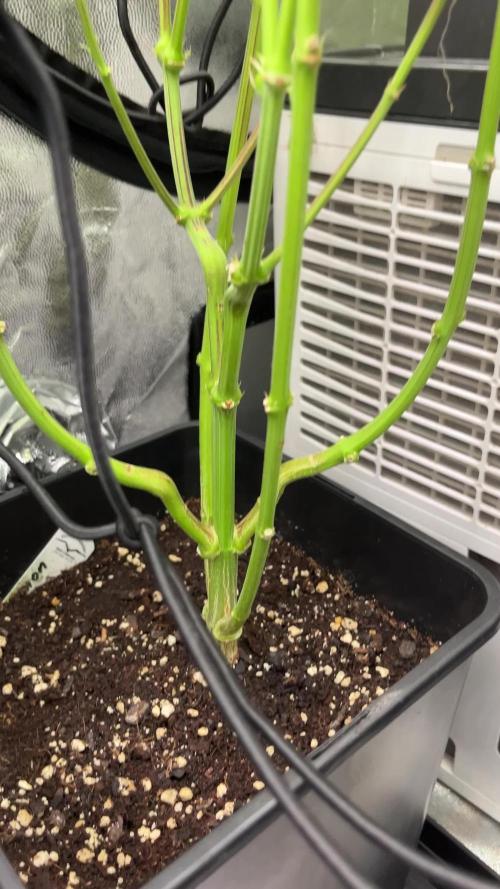
Buenooo semana final (eso espero) para ultimo engorde y conservacion de los terps. Bajamos la luz al minimo, y comenzamos con el flawless finish!! Vamos a intentar llegar al corte 0.0 o lo mas cercano!! Mas o menos me quedan 3 riegos con suerte! Clave regar y que drene un 30-40 %

Likes
8
Share


@Gonjuk
Follow
Ciao a tutti, confermo che sta mettendo un odore simile alla ciambella con note di arancia dolce calda, le cime sono molto dense specialmente quelle in alto, ec di 2.4 ph 6.3!

Likes
3
Share

@TerpNoobster
Follow
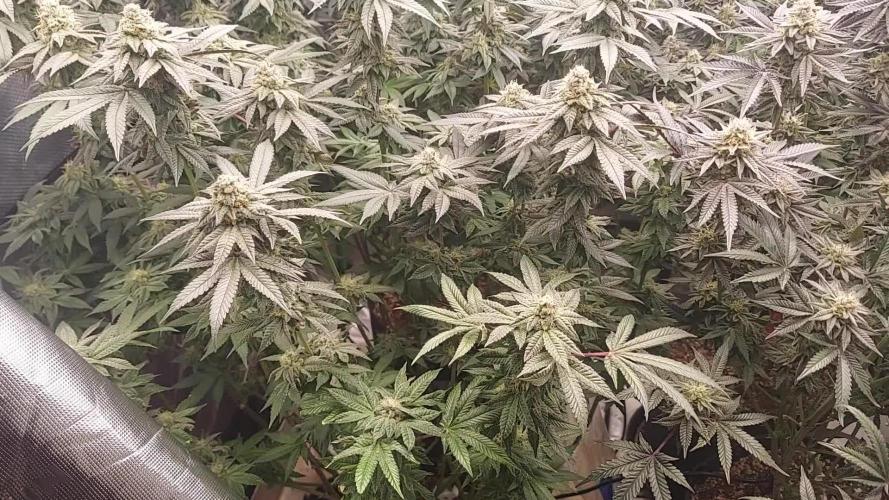
Week 6
Both the jedi juice and inked up cherries have two very different phenos. The inked up cherries 1 has very large buds that smell of candy. Cherries 2 has gotten so dark it's almost black at this point with big white tips. Jedi 1 is the frosiest with smell of minty citrus. Jedi 2 larger yeild than 1 but not as frosty and a fruity funky kind of smell. All very dense. Overall very happy with results so far and glad I cloned them.

Likes
8
Share

@all_about_420
Follow
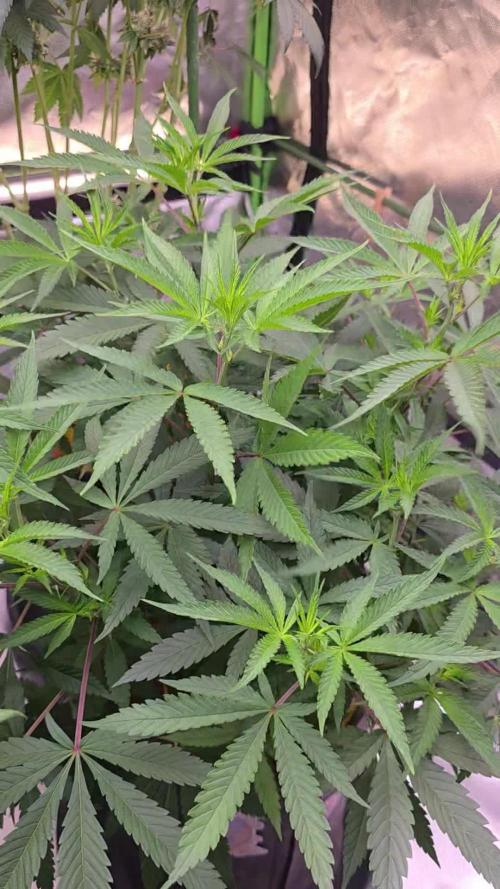
Die achte Woche markiert das offizielle Finale der Vegetationsphase für die Tropicanna Poison F1 Fast Version. Unsere süße Exotin aus dem Hause Sweet Seeds hat den 15-Liter-Topf meisterhaft ausgefüllt und präsentiert sich extrem buschig, homogen und mit maximaler Vitalität. Zum Ende der Woche folgte schließlich der entscheidende Move: Der Umzug ins Blütezelt unter den klassischen 12/12-Lichtzyklus. Mit dieser stabilen Grundstruktur und reichlich Power in den Nodien steht dem bevorstehenden Stretch und einer spektakulären Blütenbildung nichts mehr im Weg.

Likes
3
Share


Likes
23
Share


@Tmasm
Follow
Zamnesia, obrigado por fornecer a genéticas para testes.
Entrega segura, dentro do prazo e muito discreta, como você pode ver nas fotos.
Experiência para possível plantio em massa, dependendo dos resolvidos.
1 BISCOTTI (ZAMNESIA SEEDS) FEMINIZED
Já germinada
1 JEALOUSY (ZAMNESIA SEEDS)
Já germinada
1 SUNSET SHERBET AUTOMATIC (ZAMNESIA SEEDS) FEMINIZED
Será germinada no próximo mês, devido temperatura elevadas, temos dias chegar 40c⁰, não quero automática stressada, logo ao início.
O diário será atualizado toda semana, espero que gostem (eu também).

Likes
66
Share

@Arcadium
Follow
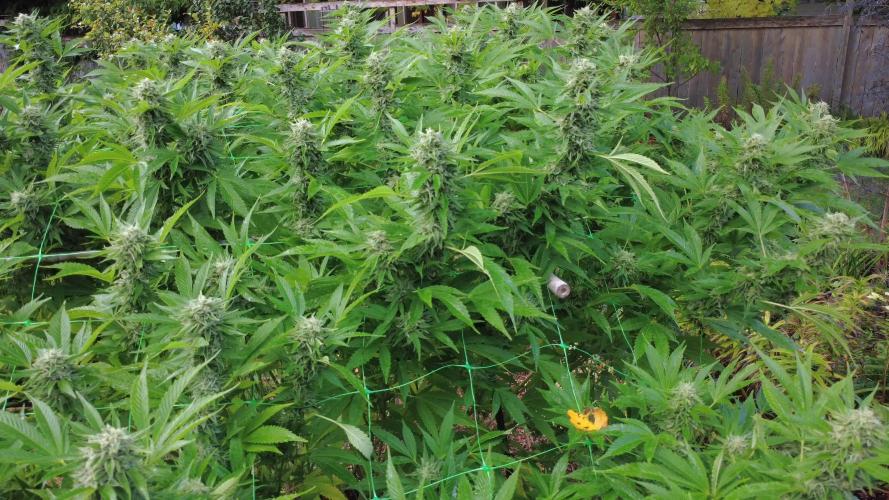
Temperature dropped this week, rain came, next week looks awful, so we're pulling her tomorrow! She's at a full 9 weeks now, 7-9 for this strain, trichomes are looking great. Will be sad to see her go, but I'll update harvest next week, will be pressing some Rosin, and hash runs late Oct that I will update as well.
530am, Snip tops, fan leaves, wash, one bucket baking soda & lemon juice, 2 rinse buckets, drip dry for a few then bring inside to hang dry. After 5 days, will paper bag sweat for a few days, then snip, super light trim and into grove bags. Will press for Rosin next weekend (assuming she's dry) so I'll update then to see how she looks!
Rest will be frozen for hash. She smells amazing, hardly lost any to rot but had some rain yesterday so I'll keep an eye on her while she's drying.
Super sad to see her go, I may leave some lower scraps for a few weeks and see how she does!
Likes
Comments
Share


@The_Lonely_Farmer
Follow
Start of week 2 commences 🌱💚
Few days late updating last week but not much change allthough all testers are on the hunt for light and standing tall 🌱
I have opted too start them with aptus startbooster and regulator and may continue too use the full aptus line but not yet still 100% I will decide on the start of proper vegetation on monday,
I may stick with shogun as I'm quite confident & keep my other diary which I currently have humboldts ice cream cake & blacktunaco toronjaz all on aptus range as my learning journey with aptus too begin 👌
Appolagies minimum images as I had not accessed them untill 2 days later...
Many photos and videos pending monday start of veg 😍 I will say they are looking eager stay tuned too see 😎👊💚
Likes
176
Share


@DevilsBud
Follow
Week 5 Flowering phase Cookies Gelato supported by @Marshydro
Unboxing tomorrow stay tuned !!!
special thanks to @Marshydro
From tomorrow 20/07/2021
I will be teleporting my plants into another atmosphere 🖖🚀☄️👾
I will be growing completely @Marshydro
Tent+lamp
Mars Hydro TS-1000
Mars Hydro GT 100x100x180cm(3.3'x3.3'x5.9')
Come that a look at website of marshydro:
www.marshydro.eu
https://www.marshydro_aliexpress.
Day 28 IT IS TIME!!!!
READY FOR LIFT OFF IN 10!!!!!
9
8
7
6
5
4
3
2
1
LIFT OFF HEADING FOR MARSHYDRO!!!!!
The launch of the marshydro tent was a great success! A simple and easy setup! From the moment you open the box you know you have a high quality product! 👌🏻👌🏻👌🏻. I literally had the tent up in 20 min! While setting up the marshydro tent i could already see the huge difference in the quality of the material. This mylar is awesome and when compared to the mylar in my old tent there is immediately a huge improvement in quality, brand and results! 💪🏻💪🏻👌🏻👌🏻.MarsHydro save me with the height problem i had the 20 cm Extra is blessing in the sky my plants love it
Day 29 Cookies Gelato
Hallo Growmies what a day what a day i loving the new and improved marshydro.eu set up . The peek hole is perfect no more opening the tent All the time 🤯 mind blown . It's definitely Lock All Light Inside and No light leaks or rips 💯🚀 the cookies gelato have some tall stalks but also a large amount of very low one's i am trying to give them some more light
I Gave them a full range of nutrients today 1,25 L. pH 6.2
And boy o boy they are looking good I am very excited for the weeks to come
These quality products are from marshydro and are available at:
www.marshydro.eu
Mars Hydro TS-1000 LED Lamp
Mars Hydro GT 100x100x180cm(3.3'x3.3'x5.9') Tent
Day 30 Cookies Gelato
Everything is going oké 💪🏻💪🏻 . Small Cookies Gelato buds getting good and frosty because i move the lamp a little . I checked the Runoff water pH and ppm. And the pH was fine around 6.3 the ppm was a little to high so i probably have to lower down next watering with nutrients . Other than that humidity and temperature are 👌🏻. The environment of the baby's are out of this world . Loving the Marshydro set up even i am running a TS-1000 in a 100X100X180 tent it works like a charm absolute little power house 💪🏻💪🏻. The GT100X100X180 is doing wonderful Love everything about it the zipper are top Notch the strong heavy-duty SBS zippers and double layer lining to create a light-proof seal.
Also made nice video today come have look and see what you think of it.
These quality products are from marshydro and are available at:
www.marshydro.eu
Mars Hydro TS-1000 LED Lamp
Mars Hydro GT 100x100x180cm(3.3'x3.3'x5.9') Tent
Day 31 Cookies Gelato
Starting of today with making the new nutrients bottle for next watering . Cookies Gelato looking better and better and starting to smell . Defoliation is not needed anymore. So where good on that . I own the marshydro TS-1000 lamp now for couple of months. And it's simply perfect the dimmer is great for all your stages of the grow . Also i love that the power bill not going to be sky high 🤣🤣 because of the very low Power Draw off : 150W ±10%👌🏻 .
Some good news today by Mars hydro they provide me with discount code so
Come visit www.marshydro.eu
for your best gear and use the PROMO CODE: DEVILSBUD
And you will get a nice discount.
Day 32 Cookies Gelato
Everything good in the hood. Did nothing today but looked at them and admire them in full glory how they are developing . Squeeze the buds a little and Damm there sticky as hell very Citrus, Earthy smell coming off the cookies gelato 🤤 Never went this far in growing stage. I did for my other diaries the transplant to there soil pots let th germinate for 48 hours and drop straight into soil . I ain't doing the wet towel anymore ones i see they open up drop them like there soft 🤣
Come look at my other diaries! I appreciate it a lot 🤘🏻
Come visit www.marshydro.eu
for your best gear and use the PROMO CODE: DEVILSBUD
And you will get a nice discount.
Day 33 Cookies Gelato
Gave the Cookies Gelato a 1L water per plant they are fine easy day today . The humidity i finally tuned out . Nice steady 55% and after watering will not go up dither then 65%. Def the chance in brand off tent work miracles . before i had mastergrow 👎🏻not air and light tight . Zipper keep getting stuck to the unstitched fabric not good . The marshydro tent Tho 💯 better in every way and i know now . The High-quality 1680D canvas being double stitched is killer
Come look at my other diaries! I appreciate it a lot 🤘🏻
Come visit www.marshydro.eu
for your best gear and use the PROMO CODE: DEVILSBUD
And you will get a nice discount.
DAY 34 END OF WEEK 5 OF FLOWERING!!!!!
What a great week for cookies Gelato and Critical and me! 😎 With a new complete marshydro setup straight up best thing ever. the Marshydro TS-1000 works how lamp needs to work. And has every handy things you can think off dimmer, Daisy chain,removeble driver to place outside the tent . What more do you want . TO SMOKE THOSE DELICIOUS BUDSSSSS 🤣🤣🤣🤣. But patience is a virtue they say . Hurry the F up 😎 . See you hopefully in next week's thanks for stopping by and you know Growmies . Don't reach for the stars but go for marshydro .
Come look at my other diaries! I appreciate it a lot 🤘🏻
Come visit www.marshydro.eu
for your best gear and use the PROMO CODE: DEVILSBUD
Mars Hydro tent handy info
Lock All Light Inside: MARS HYDRO Grow Tent Interior is made of diamond mylar. Non-toxic to the environment, no harm to plants. High-quality 1680D canvas being double stitched, (ALL OTHERS BRAND grow tent is 601D canvas) which is tear-proof for perfect light locking, No light leaks or rips at all.
Durability Grow Tent :Stable Metal corner adapters and poles are the trustful supporters of the tent. No rusting nor paint-falling. Quick easy tool-free installation. Carries strong heavy-duty SBS zippers, double layer lining to create a light-proof seal.
Easy Observation of your Plants: Special peek👀 window made by double layers of cloths. Observe the growing conditions of your plants without opening the tent and avoid disturbing plants. The peek window also serves to dissipate heat and ventilate air.
Removable Tray Keep Clean: The package includes a removable waterproof floor tray to hold soil and fallen leaves. The tray can be taken out easily to wash. Removable and water-proof cleaning easy.
Good Ventilation&Fast Assembly: Circular double-sleeved vent holes with adjustable nylon strap for air circulation by exhaust fan, ducting, carbon filter, or reflector. Better allows proper light, heat, and airflow. Quick tool-free installation. Reinforced by a sturdy metal frame to ensure security and stability, supports up to 140lb. Perfectly safeguard your plants to thrive even in winter.
Likes
47
Share


@FreddyGrows
Follow
Third week of visible flowering.
Growing out nice cant wait for the buds to grow fat and big.
While they grow i give them a bit more nutrient every feeding so now im @ EC 1.6
Im thinking of maybe going up to an EC1.8 if anyone has any tips for this??
Thanks for reading again and untill next time


Likes
16
Share


@osmrducks
Follow
Day 36: Girls looking pretty happy. Still some discoloration going on. Doesn't look to be spreading though.
Day 37: Ok, the girls obviously were not happy this morning. I watered with quite a good amount of runoff and measure the PPM at 3200!!!!!!!!!!!!!!!!!!!!! I'm surprised they are still alive! Had to make a quick run to get some water for a flush as I only have 5 gallons worth. Ran 2 gallons through each of them at a ph of 6.4 around 9:30 this morning. It's now 5pm and they have pulled through great. These OG Kush are extremely resilient.
Day 38: The girls look way better today after flushing yesterday. Two of the pots were almost completely dry already. Went ahead and fed at 500ppm with runoff.
Day 39: I think it's dialed in now. They are looking amazing and still stretching pretty good. Went ahead and pulled off a handful of leaves between the 5 of em.
Day 40: Did a little more defoliation and opened them up a bit. I am super worried about getting any type of mold or any issues in particular for this first round. One of the girls needs a touch more but ran out of time. Girls are looking super healthy! 💪
Day 41: They are looking super awesome. Got the runoff dialed in. 750 going in and roughly 800 coming out. May up it in a week or so.
Day 42: Nothing new to update. Girls still looking amazing. I think the stretch may be slowing just a tad.
Likes
14
Share


@Mr_nugs_lover_David
Follow
This lady has been Transplanted on day 39 since she was planted (may 10th) and I've prepared the 15L pot with the complete line of biotabs using 2 spoons of startrex for every 5L, sprinkled a couple of grams of mycotrex on the transplant hole before putting the plant and then I added 3 slow release tabs one biotab for every 5L of soil, so that's why in this case I added 3, after the Transplant was done I immediately watered the plant with 1ml/L of orgatrex and 1g/L of bactrex, I hope you guys enjoy my work this season!!
Likes
2
Share


@KeemBboomin
Follow
Just cruising along the second week I water when dry and may be weird but I love playing music for them when I’m gone off to work and as you see we do have one that’s about a week ahead that’s GMO Cookies