


Likes
Comments
Share


@TangerineDre4m
Follow
Day 108
Today the last plant was harvested. She was huge, it took me 2 hours to do the wet trim. After trimming, she comes down to 909g wet. Honestly, I would not be surprised if this plant hits close to 200g. Her smell is distinct from all her sisters, curious to experience how she will vape.


Likes
50
Share


@Hou_Stone
Follow
👋
Here I am with 5 Nori cake seedlings, I want to grow 3 plants of this variety, I will keep the prettiest seedlings and continue the adventure with them🙏🌲
After a short week of growth I place my seedlings in their final 7Liters pot with a mixture that I made. I use unfertilized soil as a base.
And I add organic nutrients from GreenHouseFeeding that I mix at the top of the pot (35Grams BioGrow 14Grams Biobloom)
Then I water each pot with 1L of water.
I use tap water. I lower the pH and sometimes add a little BioEnhancer😘
My Instagram 🌱❤️️ :
https://www.instagram.com/hou_stone420/
------------------------------------------
Equipment used :
Light FC3000 Mars hydro. power 25% at 30cm
Extractor 6 inch Mars Hydro. power 1/10. ON 24/24h
No other fan this week
Heating mat Romberg 95x95cm. ON half an hour every hour
👌
☄️🌠🌠🌠🌟
Have a nice day buddies, thanks for your visit 🤩👋

Likes
3
Share


@PoshGrow
Follow
Welcome to GhostGrow Chapter One by PoshGrow!
🌳 Week #12July 12th - July 19th
LAST WEEK!
-----
July 16th.
As I mentioned last week, theres 4 girls left in a tent: Alaskan #1, #2, #3 & #5.
Alaskan #1, #3 & #5 will be chopped down at the end of this week. Finally they are ready at flowering week #12!!
Alaskan #2 would be shame to cut her and throw it away, so I decided to let her finish with my next grow. I think she will be ready in 3 weeks max, so it wont interupt my next run.
Watering: every 2 days.
Alaskan #1, #3 & #5. From the middle of the week 11 watering only pH corrected water (6.2 - 6.3 pH) to fully flush them before harvest.
Alaskan #2 was flushed for 1 week, no nuts, just 6.2 pH water and started all over again. Fox Farm Trio with BB 15ml, GB 10ml, TB 10ml per gallon ratio. Going to water using Fox Farm official schedule till the last 2 weeks, then going flush like always.
Stay tuned for my next grow to find out how her life is going lol 😆
See you guys in a few days with the end of this grow and final harvest update!
Peace ✌️
P. S Song in the background Yelawolf - You and Me 👍

Likes
1
Share

@Skipi007_CZ
Follow
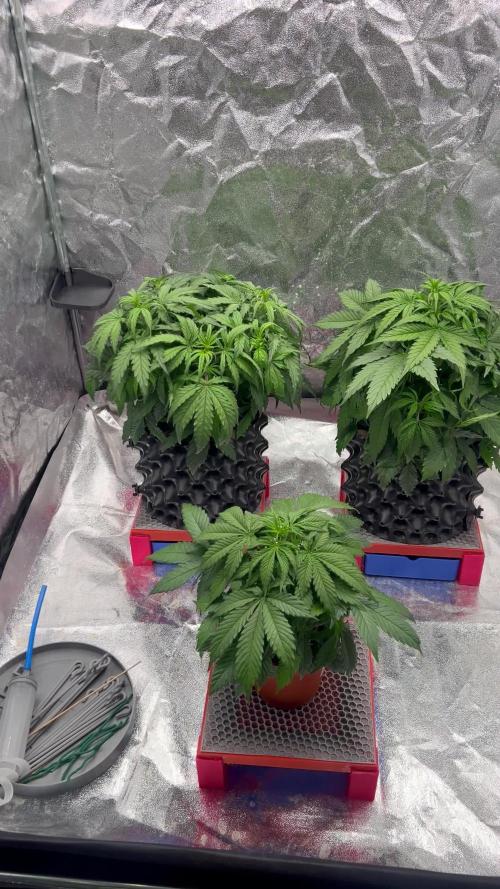
The girls are already starting to bloom, I think they have doubled in size, they look really nice and healthy, they have started to drink a lot, plant no. 1 - 0.9 l, plant no. 2 - 0.7 l, and no. 3 - 0.4 l, about 0.150 ml will flow out of 1 and 2, 3 - 50 ml. I hope they will grow nicely like this in the coming weeks.
Likes
4
Share


@Rele99
Follow
In the last two weeks I had some problems taking care of her, I was out most of the time and it kept raining. She's really doing her best and the flowers, even though they're small, are nearly ready. Still having a lot of troubles with mites, I hope I'm not gonna end up smoking them🤢🤣 Also, I have to keep using neem oil and I know it's going to effect the taste, but I really can't do anything else

Likes
12
Share


@EmeraldLakeCannabis
Follow
Good week in the tent, finally now seeing the flowers kicking in. Only took about 3 weeks under 12/12, lol. They've stretched quite a bit since the flip, and by the looks of things should yield more than I initially thought.
-10/6- Gave the girls a drink and a defo today, in the interest of airflow mainly. Don't want a repeat of last time. No matter how miniscule the amount of mold, any is a serious issue by my (and anyone resonable's) standards.
Likes
8
Share

@GrowX420
Follow
🌱🍒 Banana Cherry Cookies | Woche 7
Hey Growfreunde! 👋🌿
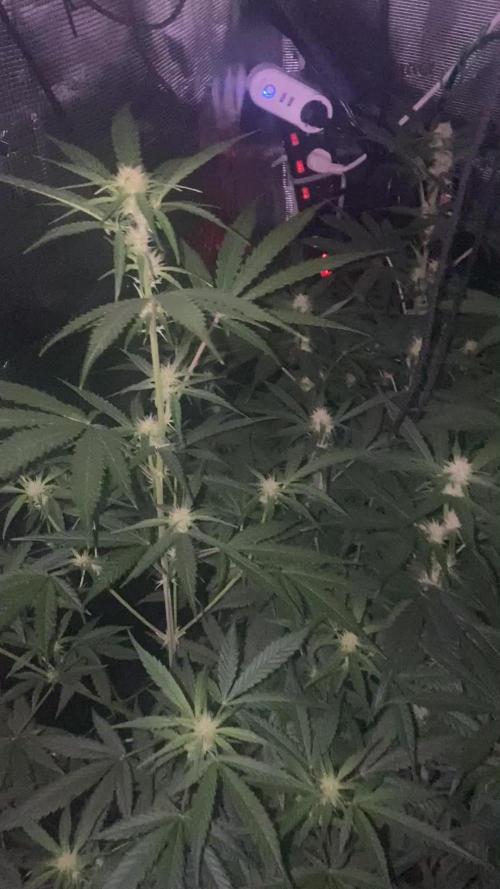
Woche 7 ist vorbei und die Banana Cherry Cookies haben diese Woche wieder ordentlich gezeigt, was in ihnen steckt! 🚀😍 Im SCROG-Netz konnten die Damen ihr Potenzial jetzt richtig entfalten und haben mittlerweile zu sechst das komplette 120 × 120 cm Zelt ausgefüllt. 😳🌳🌿 Das Blätterdach ist mittlerweile richtig dicht geworden!
🌸 Die ersten Blüten sind inzwischen deutlich zu sehen und langsam nimmt das Ganze richtig Fahrt auf. Die größte Lady ist aktuell schon etwas über 80 cm hoch. 📏🔥 Wenn man sich anschaut, wie klein sie vor ein paar Wochen noch waren, ist das schon eine heftige Entwicklung! 😅
✂️ Durch das mittlerweile sehr dichte Blätterdach werde ich diese Woche auch ein bisschen beschneiden, damit wieder etwas mehr Licht ins Innere kommt und die unteren Bereiche besser erreicht werden. 💡🍃
💡 Außerdem bekommt das Setup ab heute Unterstützung von einer zweiten Jackson Nemesis mit weiteren 200 Watt. Zum Start werde ich diese erstmal auf 60 % Leistung laufen lassen und schauen, wie die Ladys darauf reagieren. Zwei Lampen über dem inzwischen komplett gefüllten 120er Zelt jetzt wird’s hell! 😂☀️🌱
Beim Füttern gibt es ebenfalls ein kleines Upgrade. Die Banana Cherry Cookies bekommen weiterhin den S&R Organics 5in1 Dünger, mittlerweile mit 7 ml auf 1 Liter Gießwasser. Dazu gibt es von BioBizz Bloom und TopMax jeweils 2 ml auf 1 Liter Gießwasser. 💧🌸
🌡️ Zum Glück haben sich die Temperaturen inzwischen etwas beruhigt. Während der Lichtphase liegen wir aktuell bei angenehmen 22–24 °C. 🙏😎 Nach den heißen Wochen im Dachgeschoss bin ich darüber definitiv froh!
Ansonsten machen die Ladys einfach richtig Spaß. ?🏻🌿 Sie wachsen, blühen und füllen das Zelt komplett aus bisher läuft dieser Grow wirklich unglaublich entspannt. ❤️
Jetzt bin ich richtig gespannt auf die kommende Blütephase und darauf, was die Banana Cherry Cookies aus dem voll ausgefüllten Zelt noch rausholen werden. 🍒🌸🔥
Auf in die nächste Woche! 🚀?🏻

Likes
85
Share


@Tropicannibis_Todd
Follow
Start of day 14 ... Oct 23
Check out the full grow video on latest weekly update
Exceptional Growth thus far and each day .....
Decided to ponytail them today DAY 14 and 15 for 18hrs and will remove just before lights out....
Day 16 - 18 Leaf Tucking
Day 19 begun LST , hopfully they don't run away on me....
Watering only when needed and adjusting lights when needed ....
Rain Water Only !!!!!
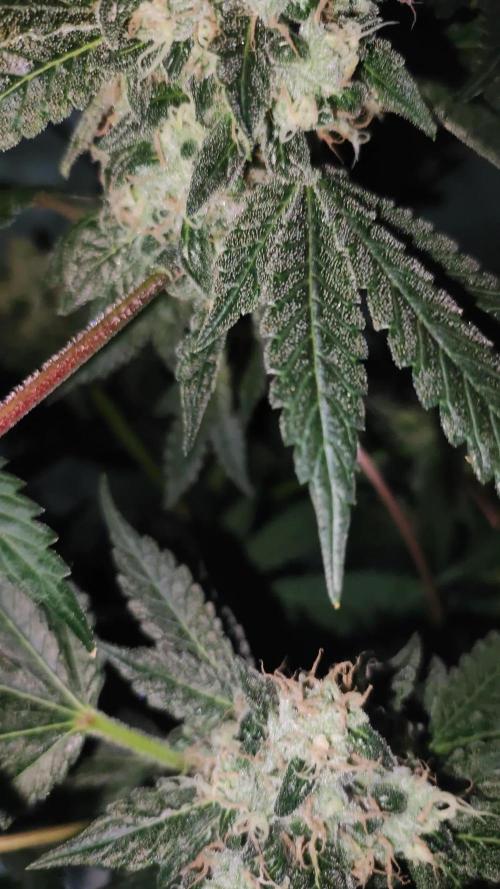
Can see the differences in Pheno types ....
Loving it .....



Likes
28
Share


@TrueNorth
Follow
-Strain: Purple Lemonade - Fast Buds
-Tent: 5x5 Gorilla Grow Tent
-Lights: Budget LED Grow Lights 2 x 250 Watt
LED Full Spec/Red Spec mixed boards
-Light Cycle: 18/6
-Soil: Fox Farm
-Air Circulation: AC Infinity Cloudline T6 Inline Duct Fan
WECLOME BACK GROWMIES! Week 12 here with our PURPLE LEMONADE by Fast Buds!
February, 09, 2020 (DAY 78) - YOO GROWMIES! Welcome to week 12 of our PURPLE LEMONADE! week 6 of flower to be exact! she is just thickening right out, i cant believe my eyes daily. she is just exploding even when i think it wont anymore. and to think there are still 2 weeks or so left..... she is still a thirsty and hungry one. she has about 5L with food every other day lol.
The smell is such a sweet citrus, i love when i touch it by accident and i get SLAPPED with that wonderful smell. The nugs have hues of purple nothing to crazy though!
February 12, 2020 (DAY 81) - WHAT UPPPPP!!!! here we are folks another update. think she is getting flushed starting this weekend. this will be the last feed then its onto that FLAWLESS FINISH by ADVANCED NUTRIENTS. hopefully im making the right choice......maybe another week wouldnt hurt....
Likes
4
Share


@fadedgreentaurus
Follow
This next week should be the bounce back out of the stunt I have really been waiting for. Went with a heavy decomposing top dress instead of the teas I been brewing. Might add more castings other then that I introduced slow burning phosphorus and potassium to start breaking down into July August so it will be available to the plants then.
Will add the seed list for new cover crop soon.
Seed mix:
California Bluebells
Plains Coreopsis
Cherry Belle Radish
Cosmos Blend
Royal Carpet Alyssum
Sweet Genovese Basil
Common Chives
Slow Bolting Cilantro
Bouquet Herb Dill
Summer Savory
Sweet Majoram
Blue Borage
Parsley
Broad Leaved Sage Herb
Italian Oregano
German Thyme
Rosemary
Siberian Wallflower
China Aster Mix
Purple Coneflower
Chinese Forget-Me-Not
Lanceleaf Coreopsis
Indian Blanket
Mixed Corn Poppy
Blue Flax
Sweet Mignonette
Lacy Phacelia
Clasping Coneflower
Black-Eyed Susan
Mexican Hat
New England Aster
Bergamot
Crimson Clover
White Clover
Medium Red Clover
Yellow Blossom Sweet Clover
Hairy Vetch
Common Vetch
Flax
Fenugreek
Forage Pea
Buckwheat
Cow Peas
Millet
Lentil
Chia
Marigold
Hyssop
Lavender
Catnip
Lemon Grass
I put such a diverse blend knowing sum will win out I also need a dense buffer to accommodate any buffer nutrient and allow me also to continuously increase diversity. Included a lot pest deterrent as well as beneficial insect attracting seeds to this mix.
Lots of lst preparing the final canopy.
Going so see how it grows out from here then decide how I am going about the trellis.
Aggressive veg getting in the last of my canopy LST before first layer of trellises.
June 12 first layer of trellis on 5 of 6 plants. Trellis for the 6th en route.
Final trellis up plan on re trellising in a month or so
Likes
21
Share


@OGTrauma
Follow
Big textwall incoming homies: Here Im doin some shit i knew from owning low to middle branded smd grow panels* how is that usually they come with both uv , ir, far red even newer quantum boards supplements itself with diverse chips extending their photosynthetic spectrum or making specific accesory bars / modules yet my purporse is rather focus on UV as this 15w bar (advertised as nominal 9 x 3w powered led) with UV-A 390-400nm spectrum – something that trigger some reaction to the plants with some other color son the flowering phase and trying to establish functional a ratio , as a bit of blue green and yellow have specific purposes instead of providing absurd quantities of red light , as there is some lateral cold bulbs in smaller but necessary ratios (as blue spectrum is still required on flowering , yet the original purpose was to complement mid to low branch development) in this shitty set up bonding with the upper bulbs and their colour temperature schema, every light has it's own schedule as how i suppose is a morning to night as something that cause plant resistance response (kinda noticed something i need to stimulate as i see a bit of fox-tailing but now with the uv-a i propose to build resistance and activate defense mechanisms like resin and of course, plant morphology according to its stage making bulkier , tankier , according to outdoor’s atmosphere i want to replicate as optimal weather as well – i hope this hardship make them more resilient and increase their health points as here i’s a HOT GIRL SUMMER- even indoors it rises my base temperature makes smell notorious, but as is not the usual weed smell make it and advantage in terms of discretion Killer Kush presents slight sweet tones not very prominent, the only herbal smell can be associated to pine undermining the refined coffee-like smell that is the dominant note (this selection of kush lack of lemon notes up to this point i can say it’s earthy with a bit of sour & sweetness) . Alas, as their late flowering phase and feeding schema should make chunky girls ,but the hot girl summer can become really a issue here, days and heat is something to be deal and prevent more light and food that they can chew , and this timing make me not over-do this niggas with excess of light, heat, disbalanced spectrum or extractions.
So automatizing it with some timers ( a very good hint to repurpose old shit in your house!) im doing a Schedule that turn off some lights through the course of the day switching the intensity and the spectrum itself , making a sweet morning to afternoon look alike , , making that timer looks really like a basement like a nice dream to my plants, not exposing them to very disfavourable conditions and yet controlling my electric bill peaking , by the same reason , ventilation is also measured as im relying just on ventilators to distribute and disperse heat and also doing the role of intraction / extractors, there are 9 usb fans in various levels of this weed maze <3 .
It's noticeable the quick evolution of these plants as there is no other factors to be aware except heat management as plants seem with not negative traces except some burnt leaf from previous weeks so i expect that they should be ready at the end of the month by my a personal mania of ripping shit all at once in order all to have that space at disposition for new projets , i will report stability eventually as they seemed quite rare enough when before putting to flower all, there was one already flowering AND THAT WAS FUCK THIS SHIT AND BECAUSE ITS NO CHEAP BULK TO EXPECT THIS SHIT!** ), and that shit become tears in the rain as that put me in some shit i can’t control or overcome, and just deal with in this strange lst bondage metal succubus nightmare that will be a nightmare to unmount too. Yet, i want the best conditions for her as all plants except her are ok so now the lateral bulbs also switched to give her more light (there is one on the left, right and on the back side, but i think better results with a neutral colour and using t5 led tubes with a water resistant case in each corner of the tent if i try to re do lateral lights ! )
*I still own the panels, in a next future, but not in this run i can use them as i think how i can supplement them and make them a team player as beyonding spectrum shaman shit i know now , and thankful to the chinese kids that made these fucking cheap as hell blessed bulbs,as they made me allow quickly adapt the spectrum on the main setup is 3000-4000k at the same ratio, with the addition of a cold light of 6500k on the idea of middle branching development too , and a small pint of unholy uv doing early 2000s cyberpunk shit with old trash janitor with compulsive hoarding stuff with some big gas leaks attitude niggas .
**I do second runs of plants in order reach a better result through practice - but is noticeable the lack of stability on these bastards as i was very happy with previous strains i can say this strain is a big no! , unlike their famous ones, like black Jack or sweet cheese , the former ones fast version are way more stable and they didn’t presented me autoflowering phenos in the batch … i don’t hate autos, but i hate to mix them with feminized on the same run, its like having a hermaphrodite indoors for me. 😫😫😫

Processing
Likes
12
Share


@LockDownGrow
Follow
So I had absolutely no ill effect on the plants at at all moving from the green buzz veg feed too the house & garden soil a&b feeds,
I did not even given them a water only inbetween the two,
I also went straight in with 50% the recommended dose stated on the house & Gardens bottles this switched happened the day before week 5 none showed any signed of defects or deficiency intact they exploded into life over night and then every day after that, I have been using the green buzz fast buds as a folar spry appied too the leaves of the early flower formation after lights out,
They seemed too love that too and I also kept the note roots going in,
I also started too apply C-RESULT at the fullbl dose stated on the bottle,
The plants live this stuff if you have not tried it do it,
I am not sponcered by c-result I was given this by my local grow store,
It brings all the nutrients straight too the roots it states,
All I know is this stuff triggers the plants too suck the pots dry in 24 hours,
So make sure you have your feed bucket fully in order before adding this stuff as a mistake here could cost you,
But get it right and in 24 hours these little autos doubled in size,
It states too used week one of flower only and smells like a sewer lol
I have today day one of week 6
Started too add house & garden
Bud XL at half strength too increase next week and also I added there top shooter at 1ml per liter of water as 7 as I plan too removed all chemicals exactly as of day 1 of week 7 leaving me week 9 clean, I am training all the shooting tips too my scrog netting the best I can due too very limited space in the grow space,
And am praying for some of the promised purple leaves on the fast buds Web site, I did not too these this time,
I has on lemon pie this round that is 2 weeks behind the rest due too non germination but I am wondering if a staggered planting each plant exactly one week behind each other would give me a little more canapé space and the treat of harvesting a plant every week,
Using the skyline 1000 only
I did not too any of these autos
2 x strawberry cheese cake
2 x lemon pie
4 x fyah
Sounds like a plan too me,
Thanks for reading
Likes
3
Share


@spankyxvi
Follow
Buds looks super dense and start to see resin, I’m so hype to see what she can produce.
Overall look great. Healthy plant.
Likes
14
Share


@JamieKnolliver
Follow
Hey Leute!
Das ist nun der Stand nach Woche 3.
Die Blütenstände entwickeln sich allmählich und allgemein macht sie mir einen guten Eindruck.
Einige Blätter werden langsam gelb-lila farben, was hoffentlich auf den Fortschritt der Blüte hindeutet und nicht auf einen Mangel.
Wenn ihr da mehr drüber wisst bzw. Sagen könnt, gebt mir doch gerne mal ein Kommentar.
Möchte nochmal erwähnen, dass ich kein Profi bin sondern dies mein 2. Grow ist.
Falls ihr Tipps für Verbesserungen habt oder Anregungen für Veränderung, gerne kommentieren!
Habe die Zufuhr von Stickstoff nun angehoben um auf den erhöhten Bedarf zu reagieren, da mir die Blätter etwas zu hell aussahen.
Likes
13
Share


@DieselKush
Follow
Nov.8 - Watered girls 250mL each, 0.25mL of each nutrient for each plant
Nov.9 - Moved these girls into Vivosun tent under Phlizon 1200w light from a Marz Hydro tent 5x5 with Marz Hydro ts 1000 light. We needed to move these girls to this tent and have our DWC in the bigger tent so the DWC plants don’t get too hot at the bottom
*once girls were transported to new tent the leaves turned to curl and lift upwards, the light is on veg and is 24” high
Nov.10 - Watered girls 250mL each, 0.25mL of each nutrient for each plant
Nov.10 - Decided we don’t like the blurple light and took one of our Mars Hydro lights from our big tent and switched it
Nov.11 - Watered each plant, 500mL, 1mL of each nutrient. Our girls drank soo fast so we are bumping it up a bit
Nov.12 - Our girl #1’s leaves are a little droopy and are looking a bit weird in some spots (darker green and almost wrinkled). Our girl #2 though is going great and we started some LST training on her today. Let her growww
Nov.14 - Started our girl #1 on LST her leaves are much happier now! Ohhh boy #2 is sprouting so nice she’s starting to fill out so well and she just blossomed once we started LST, she was facing upwards in less than 24h!!
Nov.15 - Our girls are thriving so I wanted to FIM #2 and my boyfriend wanted to Top girl #1
Let’s see how these girls groooww
Nov.15 - Watered each girl 250mL and 0.25 mL of each nutrient we are going to water them just enough to soak into the ground every day for them to soak up as much nutrients and drink as possible without over watering.
Likes
4
Share

@SWITCH420
Follow
Hi folks,
I'm coming here to start the process of ending this grow journal. I harvested about three months ago and the weed is definitely cured. Photos are about to come — I'm doing a real studio photo shoot for those buds, they deserve it!
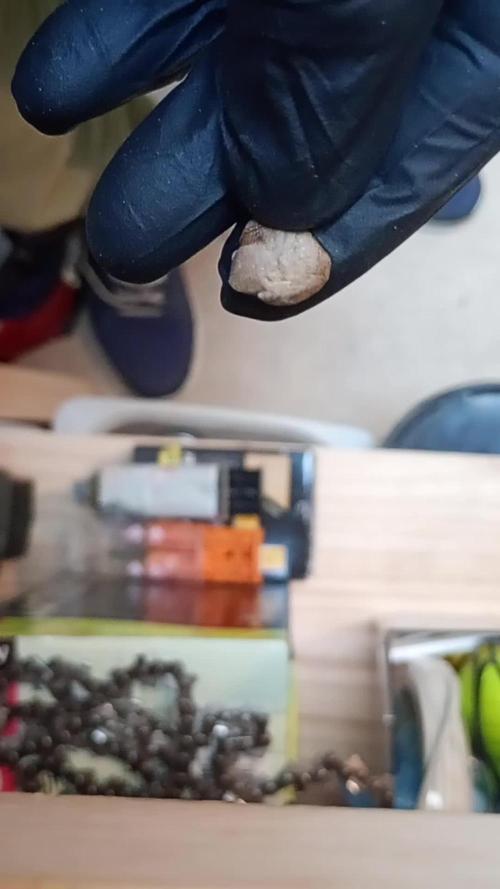
While waiting for the shots, I made some pretty damn dank hash temple balls using the iced water extraction method (solvent-free) with my little washing machine. It's a mix of the 8 strains I grew here — never ideal to mix different kinds of resin... but man, this is some serious dedicated work, so I'm making myself happy with that 14g shiny temple ball in the end 😉
Here are a few details about my process for you guys (and don't forget — you can do it with fresh material! Fresh frozen is always tastier. Also, the drying process is much more efficient and faster with a freeze dryer, but... you need the budget for that. I don't, so I go with the air drying method — check it out below):
1. Get your dry trim, then cure it properly for at least a month (I did 3 months). Smell it — mmh, sweet, dried to perfection. ✅
2. Freeze it, delicately wrapped in a freezer bag.
3. Let a large amount of tap water sit for at least 24h to remove chemicals like chlorine, then use it to make plenty of ice cubes — don't be shy, especially if you're not working in a cool environment.
4. Prep your washing machine: add trim between two layers of ice, fill up with clean water (as much as you can, large vortex is better than a smaller one), then make it seat for 30 min (45 min for thicker buds) the time that the dried green material gets wet again.
5. Prep your filtering tools: catch bag, different mesh bags, spoon, etc.
6. Wash as many times as you can before green contaminants appear, as these lower the quality of your hash — don't hesitate to go up to 8 to 12 washes if the resin still looks clean! Important: each wash has its own specific duration, and they get progressively longer as you advance through the process. Frenchy Cannoli (a true hash legend) provides a detailed timetable for this — from as little as 30 seconds to 1 minute for the first wash, all the way up to around 25 minutes by wash 8. Make sure to follow that schedule rather than using the same duration for every run or running it too long the first wash !! It could breaks to quickly your precious material before you collect all the trich's and the quality would be lower in the end.
7. Collect the wet resin in the mesh bags with a frozen metal spoon, make patties with the resin, and let them sit over some towels in order to drain as much water as possible (place a tissue made for hash collecting over the towel).
8. When the patties are a little dry to the touch, wrap them as they are in the tissue and place them in the freezer for 48h or more.
9. With an iron strainer, microplane your patties over the biggest flat surface you can get! It's important that your micro pieces of hash dry widely and don't get too compacted. Any failure in the air drying process will nucleate rot, ruining your hash in the end and making it a poor product — eventually something to throw away. Sad when you think about all the phases of the process to get to this point!
10. So, in order to air dry properly, you must — it's not optional — lower the RH of your dry room to 35% or slightly below, never above and let it dry as long as needed until the material feels like dry sand. For myself, I found 10 to 15 days is ideal. The room must be very lightly ventilated (not directly on your resin!) and in complete darkness — the goal is to preserve all those delicious terpenes! Ideally, temps around 60°F or 16°C
11. Now that it's dry, collect your resin with a large thin spatula! Make a little mound between two layers of PaperHash, boil some water, and fill up a wine bottle with it!
⚠️ From this point on, to avoid exposing your carefully dried resin to a more humid environment — which could ruin all your hard work — everything must happen in the same drying room. Keep working at 35% RH until your temple ball is tightly and airtight wrapped in PaperHash. (And don't forget to drink water — it's dry in there! 💧)
12. Start to slowly press your resin. Magical moment. Finally....
13. Press 3 times for 10 to 15 minutes in order to really decarb your hash — because that's what it's all about! Between each press, try as best you can to shape a patty... until the final press, when you'll be able to form that magical shiny temple ball (it only shines with gloves on, guys 😄)
14. You are now allowed to try it — for quality control purposes only, of course!
15. Because you want to age your hash for the sweetest 5-star smoking experience: wrap your temple ball in a large piece of PaperHash — if you can get that brand it's ideal, or another kind (check https://thepressclub.co) as long as it's organic!
16. Place the wrapped temple ball in a glass jar and store it in a dark, cool place.
17. Wait a minimum of 3 months before opening it.
18. Open, smell, touch — you'll be amazed. Roll it up with some weed or tobacco or both (I do both) / Or get a Hooka... you are smoking some true primo aged hash made by yourself! Taste the difference and realize all the path from choosing the seeds online until this first amazing puff ... 🙏
I want to credit my inspiration for making this kind of hash to the great Frenchy Cannoli, who has shared all his knowledge through amazingly rich tutorial content that you can find online with a bit of searching. 😉 Peace Frenchy 🕊️☮️




Likes
16
Share

@GelatoGandalf
Follow
This grow turned out to be quite a journey.
Originally, this run was meant to be a simple between-grow project, something to keep the season going outdoors, without too much effort. But plans changed, and the Orange Sherbet ended up in the tent, where it took a completely different direction than expected.
She grew big and strong early on, but the LST was tricky. she didn’t respond very well at first, and shaping her the way I wanted took a lot of time and patience. It was interesting to see how she stretched and filled out later, but overall, the structure stayed somewhat awkward to manage.
Throughout the grow I struggled with CalMag and potassium balance. I tried several adjustments, sometimes with high CalMag doses, but it never fully stabilized. It’s still unclear if that came from the strain itself or from the BioBizz line, but it made the mid-to-late phase more difficult than I had hoped.
The flowering time was also much longer than advertised. the breeder mentions around 9 weeks, but in reality this one took closer to 14–15 weeks total. What was supposed to be a quick side project turned into a long, demanding run.
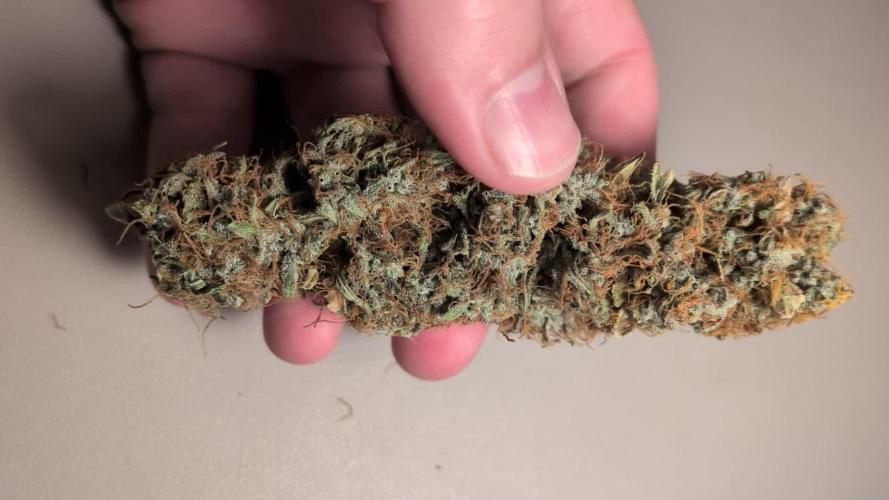
On the bright side, she delivered a very solid yield. a bit over 160 g of trimmed buds plus another 50 g of popcorn, well above 1 g/W. The aroma is lovely after 10 days of curing: creamy, with vanilla and a subtle orange note returning.
However, the buds are airy, not as dense as I hoped. The effect and flavor are great, but visually it’s more on the average side.
Even so, this grow was one of the most instructive I’ve done.
I learned a lot about deficiency management, humidity control, watering and how far genetics and environment interact.
Going forward, I’ll take a break from autos and focus on photoperiod strains again. I just prefer the control and predictability they offer.
All in all: not my prettiest grow, but a very valuable one.
About drying in dry ferm/dry age and regular drying: the material in the bags took a few days longer to dry which is said to be good (regular dry was 7 days, bags was 9 or 10). initially I think the buds from bags look better but now in curing I can't really tell a difference, not visually and not in the nose. Let's see how everything evolves over time but honestly I am not expecting it to differ a lot from regular drying.


