


Likes
Comments
Share


@CanJey_Vec
Follow
Moin Community! 🌿✨
Unsere Ladies von @ganjafarmer.seed sind jetzt bei Tag 24–29 – und sie drehen richtig auf!
Der Umzug ins größere Zelt hat ihnen mega gutgetan: mehr Platz, mehr Ruhe, mehr Energie für frischen Wachstum.
Im Living Soil von @white_ash_botanic , bereitgestellt von @growandstyle , entwickeln sie sich Tag für Tag stärker.
Und mit dem Vollspektrum der @hortispectra bekommen sie jetzt genau die Energie, die diese Phase braucht – sauber geführt, gleichmäßig verteilt und mit richtig schönem Wachstumsschub. ⚡🌱
Gemeinsam mit der @canna.community.germany begleiten wir jede Phase.
Leaf for Leaf. Schritt für Schritt.
Canna Community Germany – We Grow Together. 💚✨

Likes
107
Share


@MrJones
Follow
Mr-Jones Strawberry Pie Auto by FastBuds
🍓╰⊰🍓´🍓⊱╮🍓╰⊰🍓´🍓⊱╮🍓╰⊰🍓´🍓⊱╮🍓╰⊰🍓´🍓⊱╮🍓
🌞Environment -
💧 Feeding - Using "Super Coco" amended soil. compost teas, Dechlorinated H20 PH/6.5 Fish Fertilizer
🍃Training / LST
🕷️ IPM - Will be using Green Cleaner" 1 OZ per Gallon, and CannControl from Mammoth alternating between product each month for Integrated Pest Management.
💡"960 Watts of LED's 4x8x8 Custom Grow Closet"💡
🍓╰⊰🍓´🍓⊱╮🍓╰⊰🍓´🍓⊱╮🍓╰⊰🍓´🍓⊱╮🍓╰⊰🍓´🍓⊱╮🍓
Rambling - Hello everyone, work has been a bear the last few days, this girl is doing much better, and decided to LST her - we will see how it goes.
🍓╰⊰🍓´🍓⊱╮🍓╰⊰🍓´🍓⊱╮🍓╰⊰🍓´🍓⊱╮🍓╰⊰🍓´🍓⊱╮🍓
▶️Monday 12.14.20 / Watered w/ Dechlorinated H20 PH/6.5
▶️Tuesday 12.15.20 / This Strawberry Pie from FastBuds does not like LST she looks great, so I released a few of the branches today and will see what happens, I received 10 more seeds from Fastbuds, all Strawberry Pie - looking forward to getting a full grow going.
▶️Wednesday 12.16.20 / Watered w/ Dechlorinated H20 PH/6.5
▶️Thursday 12.17.20 / Did a bit of Defoliation today, adjusted the tie-downs, she is starting to do much better!
▶️Friday 12.11.18 / No watering today, this girl is starting to stretch up a bit!
▶️Saturday 12.19.20 / This morning did an IPM treatment with Green Cleaner before lights out, watered at lights on with Dechlorinated H20 PH/6.5 - this plant is showing signs of pre flower, oddly enough towards the end of week 5, this is great, the extra veg time is producing some great bud locations.
▶️Sunday 12.20.20 / Continue watering with just Dechlorinated H20 PH/6.52
🍓╰⊰🍓´🍓⊱╮🍓╰⊰🍓´🍓⊱╮🍓╰⊰🍓´🍓⊱╮🍓╰⊰🍓´🍓⊱╮🍓
SOIL MIX
COCO - 70/30% Tupur Royal Gold 30 GALLON
WORM CASTINGS 5 GALLON
LOBSTER COMPOST 5 GALLON
PERLITE 6 GALLON
INSECT FRASS 2 CUP
ORGANICALLY DONE GROW 5 CUPS
BUILD A SOIL COCO MINERAL MIX 6 CUPS

Likes
82
Share


@BigBadLion
Follow
Heeey all!
Sorry for the huge amount of photos but this week was crazy. So many things happened and my lack of knowledge clearly showed up. I ended stressing one of my plants for no reason! 😱
At the start of the week everything was normal until I noticed that one of Roko's buds looked weird. It seemed to be too dry and orange for my tastes and I didn't know what it was. Obviously I started to ask around and I got so many mixed messages haha. Some people said it was nothing and I should not worry about it and others said they were 100% sure it was botrytis or budrot... aaaaaaaand I got paranoid lol. 😵😨
At first I tried to keep calm and ignore it for one day but the next one the bud looked even worse and that's when I feared the worst. What if it's really budrot? In general the values I write in here are approximates or an average of the week.. and usually my tent never goes over 60% of RH (in the dark it stays between 50% to 60% when I water them and on some rare occasions it reaches 65%). This time, after I checked the thermometer it said "75% of RH" but I did not know if it was during their sleep time or maybe some time after the lights went on) so once again I feared the worst! What if the plants stayed all the night with that amount of RH? Was that enough time for them to develop budrot? What if it's still nothing? Yikes. 😭
I had to do something and I did, I wasn't going to risk everything! I started removing the worst looking leaf to see if there was anything mushy or ugly between it and the pistils but I didn't see anything (maybe I was safe and that was something else? Or maybe the budrot was even deeper and I could not see it?) After reading I realized that the best idea was to cut the bud in half and then slice it to "see" if there was anything inside... so I did it and absolutely nothing showed up 😖! Those were good news! Sadly tho the poor plant had to go thru some stress after cutting that bud in half (at least from what I saw the insides were tightly packed and the photos showed some really cool stuff)
The rest of the week was uneventful (compared to what I feared haha) and some leaves started to change even more in color (I love it). I think I'll start with the flush next week or the one after that one. There are some amber trichomes...!
Thanks all for checking my diary! Hopefully you'll all find the pictures interesting!
PD: None of the plants have seeds in them, even when one of the sliced buds seemed to be making them!

Likes
260
Share


@SlowpokeFuegobud
Follow
🐒 🍌 🌴🐒 🍌 🌴🐒 🍌 🌴🐒 🍌 🌴🐒 🍌 🌴🐒 🍌 🌴🐒 🍌 🌴
So here we are! (sniff) ❤️ That was a fun grow! 🐒 🐒
Maybe interesting to mention that my light was running on 75% the whole time. 💡
Fun fact: the Monkey that was standing directly under the lights produced 2/3 of the whole harvest while (logically) the monkey on the side only produced half the amount of her sister's! WOW! 😬
Thanks everybody who jumped on the monkey train with me UHUH UH!! 🙏 😘
This variety is great, just get a good carbon filter, growmies! 😜
Thanks, my growmies for visiting and reading and commenting, I love reading your comments! Mwah! 😘
Thank you, @Kannabia, for sponsoring this grow, aaaaand for the amazing gift pack! 😍 I hope to make you proud! 🧡
Special shouts out to my fantastic sponsor @GreenBuzzNutrients! Thank you for trusting me with your awesome products, I'm a longtime fan! 💚 🙏 Green + juicy growmie hugs to my Greenbuzzers!! 😘 Get a generous discount code for their products in my set up section ⬇️ !!
Grower Love everybody!!!11 💚 💚💚💚💚💚💚💚
Wishes do come true, they just take a lot of time sometimes.. ✨
__________________________________________________________________
https://www.kannabia.com/en/feminized-cannabis-seeds/monkey-grease
Monkey Grease
Its own personality
At Kannabia Seeds we have put all our effort into bringing out our own feminized Monkey Grease, a cross between Monkey Grease x White Widow, focusing above all on giving it its own personality in flavor and aroma (frankly unmistakable) and, of course, in Highly demanded characteristics, such as high resistance to diseases and pests, and adaptability to all types of growing conditions, making it close and easy to grow to the widest possible range of growers. The result is a really powerful and versatile indica-sativa marijuana seed, with a powerful relaxing effect, ideal for those moments when you want to disconnect from the madding crowd.
Cultivation of Monkey Grease
Which cultivation method would be most appropriate for this variety? Good question… and one that is easy to answer. Its versatility and adaptability make it a true all-rounder, with remarkably uniform results, whether you choose SOG, SCROG, hydroponics or guerrilla growing. Moreover, we invite you to experiment and play, varying the techniques from moment to moment, and to draw your own conclusions. We are convinced that in all cases, apart from minor variations, the results will always be optimal, giving remarkable yields and in a short time.
Attention should be paid to its high bud production, which can be fat, dense and heavy, although its sturdy branches are able to bear heavy loads without major problems. If you are a fan of extractions, our Monkey Grease is also optimal, given its high production of caramelised resin.
If it is already amazingly productive indoors, this variety excels on its own merits outdoors, where it can easily reach 200 cm in height, and can reach between 700 and 800 grams per plant.
It is therefore an easy and grateful plant, which demands little from its gardeners, making do with simple basic care, and with little or no propensity to develop diseases or mildew, or to attract pests (despite its striking aroma!).
Taste and effect of Monkey Grease
Our Monkey Grease stands out first and foremost because of its powerful, strong smell, which is hard to camouflage. A penetrating aroma that unfolds, in a balanced way, on the palate in the form of a wide range of spicy and sweet flavours, reminiscent of wild honey, nougat and cinnamon, and distant notes of milk chocolate. A delicious treat to be savoured calmly, without haste, as a preamble to its pleasant effect: extremely relaxing and narcotic, powerful, ideal for meditation and moments of introspection and meditation.
Don’t be in a hurry with Monkey Grease. It can be your perfect ally to treat those stress and anxiety problems, but for that you must let yourself go, surrender to its charms, especially if you are inexperienced.
________________________________________________________
Setup:
140x70x200 cm Spiderfarmer tent
2x Monkey 16W fans (not oscillating)
1x box fan 50W oscillating (on lowest level)
LED
Full Spectrum 320W AGLEX AGL-320W-MA
5,6 kg
foldable, dimmable
864 pieces Samsung LH301H
864umol/s
2,7umol/J
full spectrum white + RED 660nm + IR 740nm
wavelength range 380-780nm
covering 3x4ft
Green Buzz Nutrients https://greenbuzzliquids.com/
❗ Use code GD42025 for generous 25% discount (for orders of minimum 75€) 💚
Plagron Growmix
Can Lite Filter 125/ 400cm³/h
PrimaKlima exhaust EC 125-400/240 cm³/h
tab water pH 8 - EC 0,25 with Calmag to 0,5
Advanced Hydroponics pH minus Grow + Bloom to pH 6.2 💧
🐒 🍌 🌴🐒 🍌 🌴🐒 🍌 🌴🐒 🍌 🌴🐒 🍌 🌴🐒 🍌 🌴🐒 🍌 🌴

Likes
51
Share


@Waveform
Follow
Already week 7, and it’s starting with much better air humidity which makes it easier for me to stay in the recommended VPD range – currently 54% at 25 °C at canopy height. With 58, 67, 78 and 80 cm plants’ average height is about 71 cm.
Odour has increased, and sometimes, but only shortly, I get the feeling the coal before the blowers cannot eliminate all of it. While the smell was a bit strange sometimes one and a half week ago, it’s now absolutely yummy, sweet and promising. As is all the sticky stuff adhering to my folding rule when I measure their size.
I am a bit confused about the amount of yellowing leaves. That would indicate a nutrition deficit. On the other hand, last feeding (yesterday it was only calmagged water) brought some brown edges to their tips as I wrote. Which could indicate a slight over-nutrition. I am not *that* worried as leaves around the buds all look great (except for mentioned, but not youngest tips), and mature plants obviously tend to concentrate on bud production solely. But week 7 is quite early, or isn’t it? Any recommendations?
Maybe I should go with organic fertiliser next time to avoid being stuck between two options ;)
As they had run dry already, I gave each one another round of drink. Slightly less fertilised than last week. And I removed the lowest yellow branches and tiny buds that would not make it into the light in time. The Pineapples must have some mimosa genes crossed in. Each time I touch them they bow away their heads in deep dislike. The taller one looks like her head would be too heavy now … It is not, and usually they recover after an hour or so. The Sherbets are pretty unimpressed by all I do.
Meanwhile I’ve been working on the Raspberry Pi BoxControl that should help me stay in better VPD ranges in the future. I am not sure how to translate this all into a more stable solution than based on a breadboard, but the state so far (and how it is supposed to work):
Raspi runs headless with control software on autostart. Every minute temperature and humidity are received from a GY-21 I2C chip that should be hanging around plant tops. Data is saved in a database, VPD is calculated and signalled in form of a RGB LED color. Additionally, LCD display rotates through current stats. 3 relay modules can en- or disable misting, dehydration or an additional blower. Maybe I can add a CO2 sensor just for the fun of it (but I’d have to develop a device protocol myself), maybe even one or two soil moisture sensors. Theoretically you could also have a lighting control, but then, GPIO ports are all used. The display needs a lot of them, and while I can log onto the Raspi on my local network and view its desktop, I’d prefer to have a quick overview at place.
I am not really informed about current models. Are some GPIO extensions or Raspis with extended GPIOs on the market?
But so far, that’s all theory. I never had a PCB developed for my hobbyist projects, I am not the best with a solder station. Never had a Raspi run 24/7 for a really long time.
Did a bit more lollipop ping in the evening. Especially tallest Shepard had fun building some more very low buds and branches. I think it can investigate its powers better on different places.
Day 51: It’s getting hard to measure soil humidity with my low tech device. Soil must be full with roots and I don’t want to hurt them much. I can see them at the outlets of their pots too, sometimes a bit dry of course as these parts run dry earliest.
Experiments to include the CO2 sensor in my test setup failed. I can read and reset it, but setting measurement mode and reading values don’t work. Maybe because my I2C library cannot use ClockStretchLimit. Running out of GPIO ports anyway and seeing that the soil sensors are analogue devices, I’ll probably revive my Uno too and have discovered some clever Raspi heads that should make a more stable setup (and some cooling) possible while also adding a handful of PWM ports and an integrated display. I’d like to include a camera module too and it would be great to have some ports available. A final setup would obviously include a Raspi 4 or 5 to easily enable secure online access. But so far, all working nicely in test setup.
Day 54: Sometimes I wonder if they’re still growing at all, but then it’s good to have the daily pictures to compare bud width which now seems to be the main interest of the ladies, although differences are now clearer to tell between two day intervals. The taller ones look like they are one week ahead of the smaller plants, with even higher fan leaves turning pale now. Which at an estimated seed–harvest time of 8–11 weeks for both strains should be pretty common, I guess. Or am I wrong?
Summerly temperatures make the temperatures at canopy level sometimes reach 31 °C, but at least the simple ultrasonic diffusers arrived and I am getting closer to a better environment control. I can at least switch the diffuser inside the tent remotely from my phone, and a deep bowl of water with a lid so the "fountain" produced will not wet the tent floor and one of the fans placed at the bottom now to lift its mist upwards seems to do the trick. Humidity increases while temperature drops, getting the plants into a better VPD level, so all I have to do is wait for the evil A to deliver the necessary Raspi components to have this automated, maybe still while this grow runs.
At the end of this week, there was just a bit of height gain for the two smaller ladies who now approach their next 10 cm mark. Overall, I get the feeling it won’t be that long until harvest. Maybe with the taller ones a week earlier than the others. There’s really not that much bud growth anymore, rather refinements – like buds getting more nodes and color. I’ll investigate the trichomes every few days but would welcome your estimation.


Likes
2
Share

@nastyy
Follow
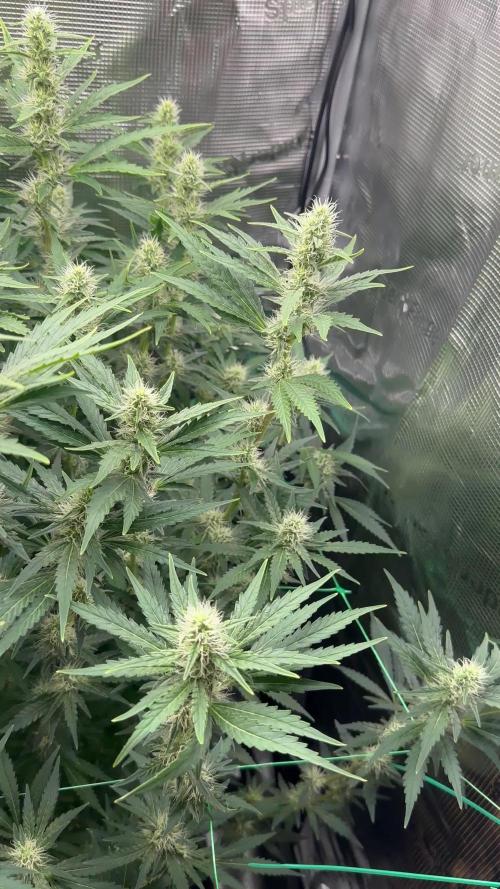
Last day of week 5 flower today. Like I said earlier, the cookies haze is a bit behind in flower. So counting that as last day of week 2
Just a little update for you guys


Likes
17
Share


@ThatsmyGrow
Follow
It's a really frosty variety, but so small... I don't know if I want to try the RF3 now.
Likes
4
Share


@Jonathanv1988
Follow
Haven't got the hand of the nutrient think it takes to long on my phone so I'll take a pic later when I flush out in 1 or 2 weeks hopefully I make the contest



Likes
4
Share


@AsNoriu
Follow
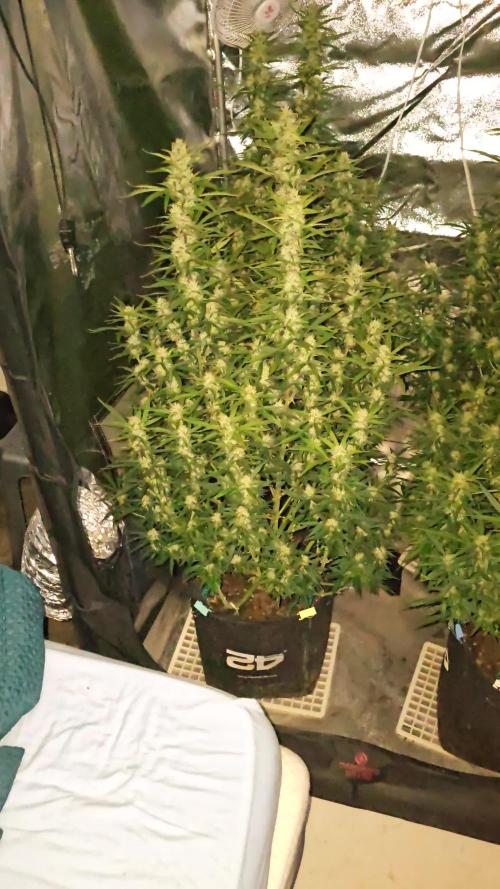
Day 82 since seed touched soil. Again troubles .... Came to check them and found tent dark. Normally theirs day was in the night, now one day we again had no electricity and everything moved 8 hours, so day is day now ....
Humidity spikes as hell. I dont want to make wounds, so no defoliation ... just too big of a risk to damage or bring infection in ....
Ground level 99% rh, canopy level - 85, lights level - 80 .... never grew in such hight, i did in 65-70 without problems, but this goes overboard ...
Drinking slowed down, will reduce volume by 20% next watering. One more feed left.
Keeping sticky pads as prevention and it helped to catch 50 or so bugs and maybe prevent infestation. Gnats mostly ...
This this girl is having intense light and high humidity issues, hope its not something in root zone, will dry her well before watering again. This girl is hardest to reach, so i didn't checked pots for few waterings, think i water too much, thats the result of it ...
Tonight i will install dehumidifier.
10 days till chop !!! Hope no bud rot !!!
Happy Growing !!!


Likes
36
Share


@MadeInGermany
Follow
Hey everyone .
This week she was left in her 1 L pot, and will not be in the 11 L pot until next week :-).
She was topped again and accepted it super 😃.
By the time she is repotted next week and given Green House Powder Feeding for the first time, she will have received a small portion of Canna Vega :-).
Otherwise it grows very quickly and vigorously, and they look beautiful 😍👌.
I wish you all a lot of fun with the new update, stay healthy and let it grow 🙏🏻👍
You can buy this Strain at :
https://sweetseeds.es/de/sweet-skunk-f1-fast-version/
Type:
Sweet Skunk F1 Fast Version
☝️🏼
Genetics:
Sweet Skunk Auto (SWS34)
X
Early Skunk
👍
Vega lamp:
2 x Todogrow Led
Quantum Board 100 W
💡
Bloom Lamp :
2 x Todogrow Led
Cxb 3590 COB 3500 K 205W
💡💡☝️🏼
Soil :
Canna Coco Professional +
☝️🏼
Fertilizer:
Green House Powder Feeding
☝️🏼🌱
Water:
Osmosis water mixed with normal water (24 hours stale that the chlorine evaporates) to 0.2 EC. Add Cal / Mag to 0.4 Ec Ph with Organic Ph - to 5.5 - 5.8 .

Likes
2
Share


@Cultivators_Dream
Follow
11/15/22 Day 28- at the beginning of week 3 had the soil ph raise but got it under control so start of week 4 she is really growing nice trying to keep branches trained out to keep airflow in middle probably gonna switch to flower after end of this week
Likes
6
Share


@Spearfish
Follow
Safe to say we're heading into flower.
I'm pretty close to full strength on the nutrients at this point.
Still defoliating and filling in the screen. Plant on the right is slightly behind as far as kicking into flower.
Some yellowing browning just starting a tips. I'll change out the water tomorrow (on day 49). Averaging water changes every 12 days.
Day 49: Did not change water today, will on day 52 or 53 instead. Decided it could just be the light being too close. Moved it up and did a little lst above the screen. All done removing branches and leaves. Great end to the first week of flower.

Likes
7
Share


@hooolian
Follow
18/02: The plants sugar leaves are starting to turn yellow being a good sign they are nearly done. Added more cable ties as again the colas are getting too heavy for the actual stalks. Should be a good harvest. Few more days on the nutes then to flush.

Likes
48
Share


@pifflestikkz
Follow
Day 85
23/09/24 Monday
De-chlorinated tap water pH 6 and calmag today.
Day 87
25/09/24 Wednesday
Feed today using de-chlorinated tap water pH 6 only.
Day 89
27/09/24 Friday
De-chlorinated tap water pH 6 with Plagron PK13-14 today.
Picture and video update 😎
Day 91
29/09/24 Sunday (End of week)
De-chlorinated tap water pH 6 only today. Will try get another nutrient week out of her before flush 👌💚

Likes
18
Share

@NewMan
Follow
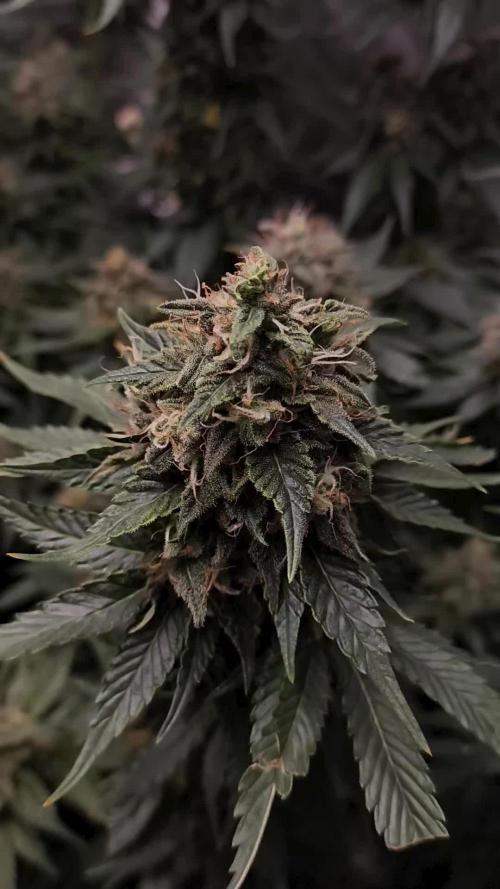
Zdar a sílu. Vypadá to že se blížíme ke zdárnému konci.Brocolice krásně voní a ještě víc lepí, palice zmohutněly a celkově to parádně zaplnilo stan, sundal jsem síťku, prostříhal a "TOP z pátého týdne" už šel pod kosu aby nepřekážel. Ta menší jde na řadu za dva dny a zbytek nechám ještě týden. Ph 6.2 , Ec 2 , zálivka pořad stejný dokola, 4.5l každý třetí den . Ať to roste a za týden 🖖
Likes
3
Share


@TyRun
Follow
Intermediate Results
Overview
This grow was intense! Setting up the grow consumed so much of my time and focus that I started slacking at work, and it took me a month to get back on track. But hey, what’s the point of a job if it gets in the way of growing? 😉 In the end, everything worked out, and I gained invaluable experience.
This was my first grow using coco coir. At first, I didn’t get it, but then it just clicked! Now I’m hooked: "I’m here to stay." Coco is more controlled than soil, flushes easily, and you can introduce beneficial microbes, which thrive in it. My main takeaway from this grow? If you buy coco, don’t forget CalMag!
Next time, I’ll definitely install HEPA filters at the intake. The amount of dust was insane, and the grow box pulls air like a vacuum cleaner. Watching the timelapse, you can see the box sucking in every bit of dust. I vacuumed the intake filters weekly. The plant was incredibly sticky, but that also meant it caught a lot of lint and fibers between trichomes, especially visible under a microscope. Smoking microplastics? No, thank you!
---
On CO2
CO2 only works if everything else is dialed in. If the plant experiences stress from deficiencies or overfeeding, you can forget about it. Since CO2 supplementation requires turning off the exhaust fan, it’s hard to manage temperature and humidity. The plant releases so much moisture that RH jumps to 80% within minutes. It’s doable, but definitely a challenge.
---
On Magnetic Fields
No clue what’s happening here yet, but it’s fascinating! I’ll test again with a control sample.
---
Nutrients
Dreams do come true—I’ve tested almost everything Advanced Nutrients offers. It wasn’t all smooth sailing; their feeding charts need adjustments for your conditions, and you usually need to feed less than recommended. Overall, I’d say the nutrients performed 100%, and I see no reason to switch. I’ll stick with them for future grows.
---
Strain
This strain is reliable, though not the most productive. It flowered exactly as advertised and delivered a frosty finish. It tolerated all my mistakes like a champ—especially mold. Despite an abandoned SCROG plan turning the plant into a bouquet, there wasn’t a single mold spot, even in the densely packed lower buds that got almost no light. Zero mold issues!
---
Aroma
As advertised: pine, wood, and citrus. At first, I thought it smelled like grapefruit, but now I’m leaning toward bergamot. Bergamot with a classic weed aroma—a recognizable twist on the usual scent. During the grow, the smell was strong, but the carbon filter handled it perfectly.
---
Flavor
It’s too early to say, but the flavor is definitely there! Embarrassingly, all my past harvests tasted the same—like nothing. Just smoke. This one has a distinct sour taste. I’m excited to see how it develops after curing.
---
Effect
Too early for a full review, but I love what I’ve tried so far. The high lasts about three hours, with euphoria and relaxation. It’s the perfect evening strain. I’ve smoked a lot over the years, but I’ve never experienced true euphoria—until now. Guess I’ve been stuck with garbage and ditch weed before. 😅 It’s not a strain for productivity or chores, but it’s perfect for chilling, watching something, or chatting. No anxiety, just great vibes. It feels like having a beer after a long day: you relax, and life feels good again.
---
Roots
The roots were healthy—maybe too healthy! While the AirPot (20L) prevented root circling, it didn’t eliminate it entirely. There were dead zones at the bottom where roots circled around the perimeter. A dense root mat formed at the bottom (so dense you couldn’t poke a finger through it), which likely contributed to salt buildup. Breaking through that mat required more water, and I suspect this caused EC to spike 1.5x the next day if there was no runoff. Next time, I’ll mix some pumice with the substrate at the bottom, about 3–4 cm deep.
---
Timelapse
I only got the timelapse running after the switch to flowering, so it’s not from the beginning. Still, it’s an incredibly useful tool for understanding growth rates. I’ll definitely use it for future grows. Comparing yesterday to today is one thing, but rewinding a week to see how things were is game-changing. I recommend it! You can even use an old phone with a timelapse app if your camera doesn’t support it by default.
---
What’s Next
I’ve grown fat buds before, but I’ve always neglected curing. This time, I’m doing it by the book with full control. Drying in the grow box with RH controlled at 50–60% (averaging 55%) for a slow, even dry. Temps are kept between 20–23°C, with frequent venting to keep it below 21°C for terpene preservation. After 7–10 days, when small stems snap with a characteristic sound, I’ll trim and jar them with humidity sensors. For the first two weeks, I’ll burp the jars twice daily, then reduce to once daily for the next two weeks. After that, I’ll monitor the RH sensors and adjust as needed. I’ll share the details after curing is complete.
After drying, I’ll weigh the buds, take photos, and share another post in a month or two after curing to report on the flavor and aroma.
For now, I’m taking a breather, fine-tuning my setup, and preparing for my next grow: Wizard Trees - Zangria S1.

Processing
Likes
27
Share


@CanadianFillmore
Follow
Week 7 begins for Mandarin dreams. Both ladies are looking good and healthy, bud sites continue to bulk up and frost up. The shirt smell from MD1 has gone away, it's current smell is a bit earthy.
Switched out big bud coco for overdrive as we approach the end of the grow.
Thanks for checking in, tune in next week! 👽🌳🔥